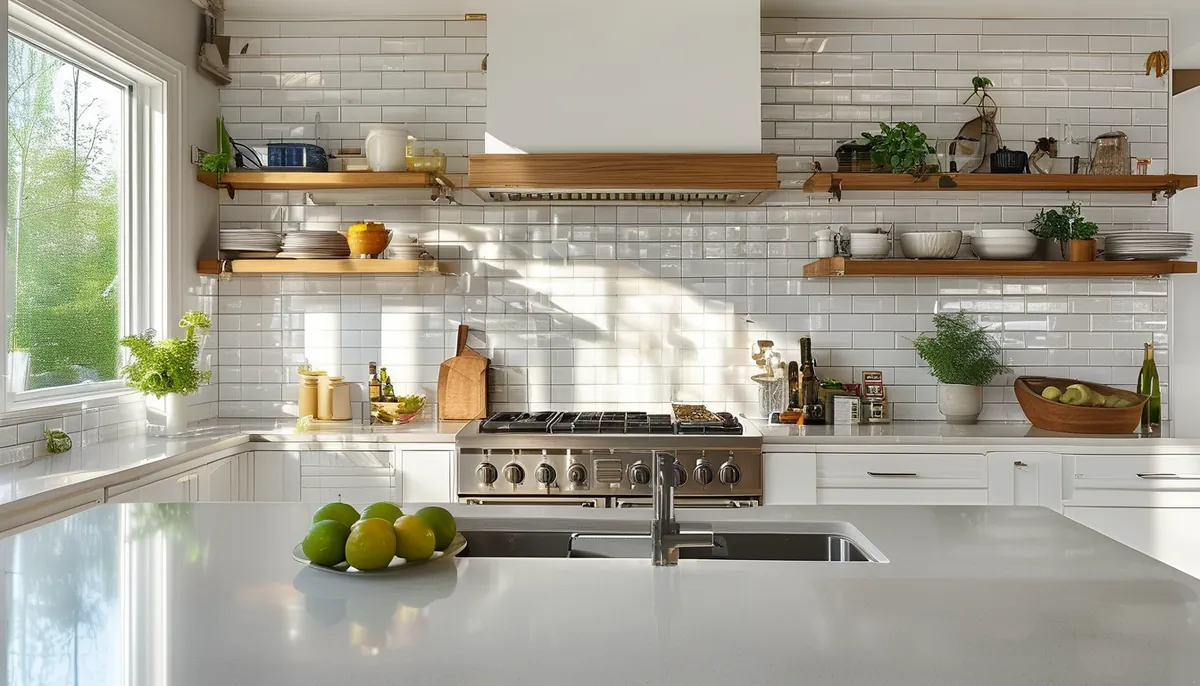
A kitchen does not have one wall condition, it has four. The strip behind a cooktop sees radiant heat and airborne grease. The run behind the sink takes standing water and detergent. The circulation zone by the refrigerator and the trash pull-out takes knocks and hand grime. The dining side takes almost nothing. Buying a single finish for all four is why kitchens look tired after two years while the cabinets are still fine.
Zone 1: the cooking wall
Everything within about 24 inches of a burner is a heat and grease zone. Gas burners throw combustion byproducts and vaporized oil that condense on any cool surface above them, and the film builds whether you see it or not. On a matte painted wall that film is permanent within months, because scrubbing matte paint burnishes it into shiny patches.
The requirement here is a non-porous surface you can wipe with a degreaser without changing its sheen. Ceramic or porcelain tile with a proper grout is the long-standing answer. Solid surface or a continuous slab backsplash removes the grout lines entirely, which is the real maintenance win. Stainless behind a range is functional and easy, though it shows every fingerprint and water spot.
Clearance above the cooking surface is not a decorating decision. Follow the range or cooktop manufacturer’s installation instructions for minimum clearance to combustible material, and check what your local code official requires, because those instructions govern. Combustible material includes wood paneling, most PVC and WPC panels, and vinyl wallpaper. Do not put any of those directly behind or above a burner because you like how they look.
Peel-and-stick vinyl in this zone is a short-term fix at best. Heat softens the adhesive, edges curl at the corner nearest the burner first, and grease works under the lifted edge. If you are renting and it is the only option you have, at minimum leave the area directly behind the burners in tile or metal and start the vinyl outside the heat zone.
Zone 2: the sink wall
Water here is constant but low-temperature, and the failure mode is different: it is capillary action at seams and at the joint with the countertop, not heat. Whatever surface you choose, the detail that decides its lifespan is the bottom 1/4 inch.
The gap between countertop and wall surface gets a bead of silicone, not grout and not caulk that shrinks. Silicone stays flexible while the countertop moves seasonally; a rigid filler cracks in the first winter and then wicks water into the drywall behind. Same at the vertical joint where the backsplash meets a cabinet end panel.
Above the backsplash on the sink wall, a scrubbable paint is usually enough. Ask for an acrylic latex in satin or semi-gloss. Eggshell and flat both fail the wipe test in this zone; the sheen difference between the wiped spot and the rest shows under undercabinet lighting more than any stain would.
If there is a window over the sink, the casing and sill take more water than the wall does. Prime any exposed end grain on wood trim before painting, or the sill swells and the paint splits along the joint within two seasons.
Zone 3: the traffic and appliance walls
This is the wall beside the refrigerator, the run behind bar stools, the corner where the trash pull-out swings. The load is mechanical: chair backs, bag corners, cleaning tool handles, shoes.
Rigid panels earn their place here. WPC and PVC wall panels handle impact better than drywall and paint, install over an existing painted surface without demolition, and wipe clean. A 3D or slatted panel treatment on the wall behind bar seating hides scuffs by breaking up the surface, which flat paint cannot do. Check the panel thickness against your outlet boxes: adding 3/8 inch or more of panel means the receptacle sits recessed, and it needs a box extender to be safe and to let a cover plate sit flat.
If you would rather paint, put a semi-gloss on the bottom 36 inches or run a wainscot. A painted wainscot with a rail at 32 to 36 inches takes chair-back abuse and can be repainted in an afternoon without touching the rest of the room.
Baseboard in a kitchen deserves a moment. Wood baseboard beside a dishwasher gets the leak nobody notices for a week. A PVC or composite baseboard on the dishwasher and sink runs does not swell, and unless you look closely it reads the same as the wood elsewhere.
Zone 4: the quiet wall
The dining side, the wall the table sits against, the run to the pantry door. Nothing here is under attack, so this is where the kitchen gets its personality without a maintenance penalty.
Wallpaper works on this wall in a way it does not on the other three. A vinyl-coated or solid vinyl paper takes a damp cloth; a paper-based or grasscloth product does not, and grasscloth in a kitchen absorbs cooking odor. Keep any paper at least 24 inches from the range and out of the direct path of the dishwasher vent, which pushes hot moist air out at the end of a cycle.
A darker color survives here better than a pale one. Kitchen walls collect fine grease across the whole room, not only near the stove, and the film reads as a dull haze on pale surfaces first.
This is also the right wall for open shelving if you want it. Anchor into studs, not drywall anchors, and figure at least 20 pounds per linear foot for stacked dishes. Two brackets on a 36-inch shelf is the minimum; three if it carries stoneware.
Prep decides how long any of it lasts
Every surface in a kitchen goes onto a wall that is already greasy, including walls that look clean. Wash with a degreasing cleaner, rinse with clean water, and let it dry fully. Adhesive, paint and tile mortar all fail on a film you cannot see.
Check for texture. Peel-and-stick vinyl and thin panels need a surface with no more than a light orange peel. Knockdown texture has to be skim-coated first, and a skim coat plus sanding plus primer is most of a day per wall.
Check flatness where a rigid panel or slab will go. Hold an 8-foot straightedge against the wall; a gap over about 1/8 inch means shimming or furring, because a rigid panel bridges the hollow and telegraphs it as a shadow line.
Prime bare drywall and any patched area before painting or papering. Wallpaper hung directly on unprimed drywall bonds to the paper facing, and removing it years later peels the drywall face off with it.
Order of work in a kitchen refresh
Paint the ceiling first, then the walls, then install the backsplash, then the trim. Doing the backsplash first means cutting in paint against tile, which is slow and never crisp.
If cabinets are staying, pull the doors and hardware anyway. Cutting in around a cabinet with the door hanging open gets you paint on the hinge and a wobbly line on the wall.
Kill the circuit and remove every cover plate before you start. Painting around plates leaves a visible ridge, and cutting wallpaper around a plate that stays on the wall never comes out straight.
Leave lighting for last and test it before you commit to a wall color. Undercabinet LEDs at 4000K make a warm cream look green, and the only way to know how a finish behaves is to see it under the fixtures you will actually live with.