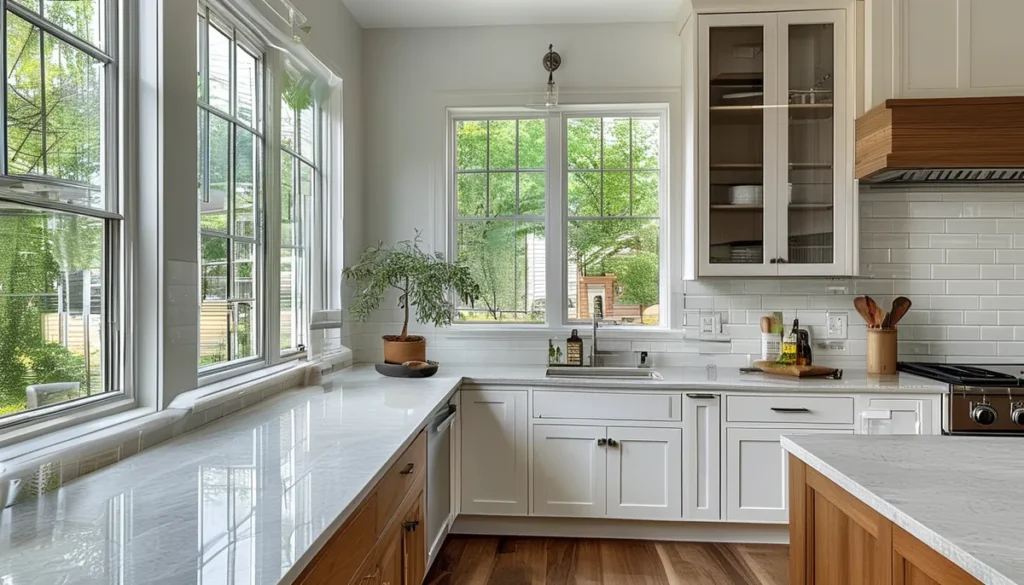
Choosing an adhesive backsplash is a smart move for a quick kitchen refresh. Unlike traditional tile, these options stick directly to your existing wall surface, cutting down on labor and mess. You’ll find them made from a variety of materials, each with its own look and durability. The most common are vinyl (PVC), gel, and metal composites. Vinyl tiles are budget-friendly and come in endless designs, mimicking everything from subway tile to natural stone. Gel tiles offer a more realistic 3D texture, often with a glossy, glass-like finish. Metal composites provide a modern, sleek aesthetic, though they can be more expensive.
Understanding adhesive backsplash materials
When you’re looking at adhesive backsplashes, the material is key to both appearance and longevity. Vinyl (PVC) is the workhorse of the peel-and-stick world. It’s flexible, water-resistant, and easy to clean, making it ideal for kitchen environments where splashes are common. You can find vinyl tiles that look remarkably like ceramic or stone, often with a slight texture to enhance realism. The thickness of vinyl tiles can vary, but generally, a thicker gauge will feel more substantial and durable. Look for options that are at least 0.08 inches (2mm) thick for a better quality feel.
Gel tiles, often marketed as ‘3D gel’ or ’tile stickers,’ use a polyurethane gel layer over a printed design. This creates a raised, glossy effect that mimics the look of real glass tiles. They are also water-resistant and easy to wipe down. However, the gel layer can be susceptible to scratching over time, and some cheaper versions might yellow under direct sunlight. Their thickness is usually less than vinyl, typically around 0.04 to 0.08 inches (1-2mm).
Metal composite backsplashes offer a sophisticated, contemporary look. These are often made with a metal layer (like aluminum or stainless steel) bonded to a plastic or vinyl core. They are durable, heat-resistant, and can withstand moisture well. The metallic finish can range from brushed nickel to brushed bronze or even colored options. Be aware that metal composites can be pricier than vinyl and might require a bit more care during installation to avoid bending or scratching the surface.
Installation: DIY-friendly but requires prep
Installing an adhesive backsplash is generally a straightforward DIY project, but proper surface preparation is crucial for a lasting bond. First, ensure the wall surface is clean, dry, and smooth. Any grease, dirt, or loose paint will prevent the adhesive from sticking properly. For best results, clean the wall with a degreaser and allow it to dry completely. If your wall has a glossy finish, you might want to lightly sand it to create a better surface for the adhesive to grip.
Measure your space carefully before you start cutting any tiles. Most peel-and-stick tiles are designed to be cut with a utility knife or strong scissors. Plan your layout, starting from a central point or a visible corner, to ensure a professional look. Many tiles have an interlocking or overlapping design, so pay attention to the manufacturer’s instructions for how to align them.
When applying the tiles, peel back only a small portion of the adhesive backing at first. Position the tile and then slowly peel away the rest of the backing as you press the tile firmly onto the wall. Work from the center outwards to avoid air bubbles. If you make a mistake, you can usually reposition the tile immediately, but don’t wait too long, as the adhesive can become very strong once pressed down.
Pay special attention to areas around outlets and light switches. You’ll need to carefully cut out openings in the tiles to fit around these fixtures. Use a sharp utility knife for precise cuts. For areas behind stovetops or sinks, ensure the material you choose is rated for heat resistance and is highly water-resistant.
Design considerations for your kitchen
The aesthetic of your adhesive backsplash can dramatically change the feel of your kitchen. Think about the overall style you’re aiming for. For a classic look, subway tiles in white or a muted color are always a safe bet. If you’re going for a more modern vibe, consider geometric patterns, metallic finishes, or even a faux marble effect. For a farmhouse or rustic kitchen, a faux brick or stone pattern can add warmth and character.
Consider the color palette of your kitchen cabinets, countertops, and walls. Your backsplash should complement these elements without clashing. A busy pattern might work well in a minimalist kitchen, while a simple, solid color could balance out busy countertops. The scale of the tile is also important. Small mosaics can add intricate detail, while larger format tiles can make a space feel bigger.
Don’t underestimate the impact of grout lines. Some adhesive tiles have a built-in grout effect, while others are designed to be installed with minimal or no visible grout. Tiles that mimic grout lines can offer a more realistic tile appearance. If you’re opting for a design that requires visible grout, ensure you choose a grout color that harmonizes with your tile choice.
Maintenance and cleaning tips
Keeping your adhesive backsplash looking its best is relatively simple, but it depends on the material. For most vinyl and gel tiles, a soft cloth dampened with water and mild soap is sufficient for regular cleaning. Wipe away spills and splatters as soon as they occur to prevent staining. Avoid using abrasive cleaners, scouring pads, or harsh chemicals, as these can damage the surface or the adhesive.
For metal composite backsplashes, follow the manufacturer’s specific cleaning recommendations. Generally, a mild detergent and a soft cloth will work. For stubborn marks, you might need a non-abrasive cleaner specifically designed for metal surfaces. Always test any cleaning product in an inconspicuous area first.
Over time, the adhesive may weaken, especially in areas exposed to high heat or moisture, such as behind the stove or near the sink. If you notice any lifting edges, you can try to re-adhere them with a small amount of strong, clear adhesive caulk, but this is often a temporary fix. For significant peeling, replacement of the affected tiles may be necessary.
Common pitfalls to avoid
One of the biggest mistakes people make is not preparing the wall surface properly. Applying adhesive backsplash over dirty, greasy, or uneven walls is a recipe for peeling and failure. Take the time to clean and smooth your walls thoroughly. Another common issue is rushing the installation. It’s tempting to slap tiles up quickly, but taking your time to align them correctly and press them down firmly will result in a much better, longer-lasting finish.
Cutting corners (literally) can also lead to problems. Inaccurate cuts around outlets, windows, or cabinet edges can leave gaps or look unprofessional. Use a sharp blade and measure twice, cut once. Finally, choosing a material that isn’t suitable for a high-moisture or high-heat area can lead to premature failure. Always check the product specifications to ensure it can handle the demands of your kitchen environment.
When to consider professional installation
While adhesive backsplashes are designed for DIY installation, there are times when hiring a professional might be a wise decision. If you have complex wall layouts, many obstructions like windows or cabinets, or if you’re aiming for a very intricate pattern, a professional installer can ensure a flawless finish. They have the tools and experience to handle tricky cuts and ensure perfect alignment, especially for larger areas or when working with more delicate materials.
If you’re unsure about the surface preparation required for your specific walls, or if you want the peace of mind that comes with a professionally done job, don’t hesitate to seek help. A skilled installer can save you time, potential frustration, and ensure your new backsplash looks as good as it possibly can for years to come.