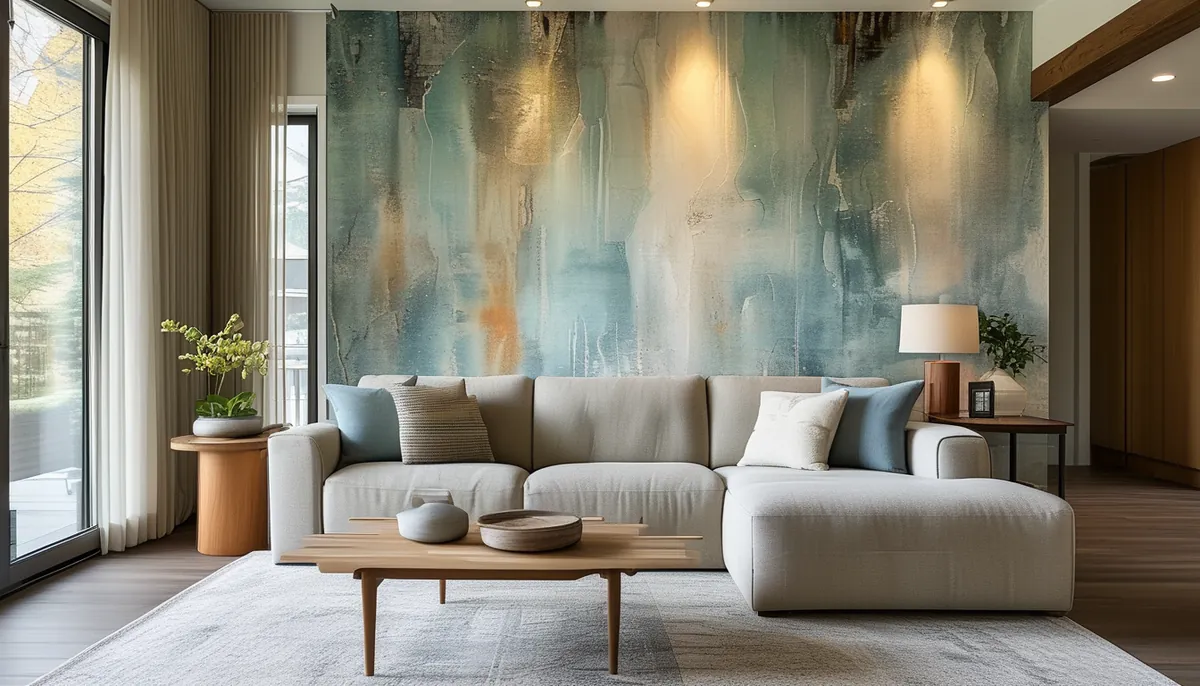
A living room mural goes wrong for one of three reasons: it landed on the wrong wall, the image was scaled to the wall instead of to the furniture in front of it, or the drywall underneath was never prepped. All three get decided before anything is ordered, and a custom-sized print is almost never returnable once it is cut.
Measure the wall the way a printer needs it
Walls are not rectangles. Measure the width three times, at the baseboard, at 48 inches, and within 2 inches of the ceiling. Measure the height at the left edge, the center, and the right edge. Take the largest width and the largest height you recorded, because the mural has to cover the worst case, not the average.
Then add bleed. Two extra inches on each side and two at the top and bottom is the working minimum, and four is safer on an older house where the ceiling line waves. That surplus is what you trim off against the baseboard and crown after the panels are up. A print ordered at the exact measured height leaves nothing to fight a settled ceiling with, and the gap always shows at the corner people look at first.
Standard US ceilings are 96 inches. Nine-foot walls run 108 inches and ten-foot walls 120 inches, but measure anyway, since a floor buildup from new plank flooring can eat an inch off the finished height. Do not subtract anything for outlets, switches, or a thermostat. You cut those openings after the panel is on the wall.
Obstructions change the order you buy in. If a fireplace breast, a built-in, or a doorway interrupts the wall, treat each flat section as its own measurement and say so when you order. Wrapping a mural around a chimney breast almost never reads well, because the image bends at two outside corners and the eye reads the break as a printing error.
Pick the wall the room already looks at
Stand in the main doorway. The wall directly in your line of sight is the one that carries a mural, and in most living rooms that is the wall behind the sofa or the wall the sofa faces. The wall the sofa faces usually wins, because a mural behind seating spends most of its life hidden behind heads and cushions.
The television wall is the hardest place to put one. A black rectangle in the middle of a landscape print cuts the image into two unrelated halves, and screen glare fights any mural with a satin or vinyl surface. If the TV has to stay on that wall, choose an image with a quiet center and detail concentrated toward the edges, or accept that the mural is a frame rather than a picture.
Windows on the mural wall are less of a problem than people expect, as long as the opening is centered or the image is non-directional. A single off-center window in a scenic mural forces the horizon line into an awkward relationship with the sill, and there is no fixing that after the fact.
Scale the image to the furniture line, not the wall
The bottom third of a living room wall is furniture. A sofa back sits 30 to 34 inches off the floor, a console around 30 inches, a low credenza 24 to 28. Anything printed below 36 inches is largely invisible in a furnished room, which means a mural centered on the wall is effectively centered too low.
Seated eye level runs 40 to 44 inches off the floor and standing eye level 60 to 65 inches. Put the focal element of the image, the mountain ridge, the biggest bloom, the vanishing point, somewhere between 42 and 72 inches. Ask the supplier whether the artwork can be shifted vertically within the panel before you approve a proof; most large-format files have enough margin to move the composition up four or five inches, and that shift is the difference between a mural that reads and one that hides behind a couch.
Scale of the motif matters as much as placement. A pattern with a 12-inch repeat on a 14-foot wall reads as texture from the doorway, not as a mural. On a wall that wide, motifs need to be 30 inches or larger to hold their shape at viewing distance.
Three material systems, three different jobs
Peel-and-stick vinyl is the renter’s answer and the fastest to hang alone, because you can lift and reposition a panel while the adhesive is still fresh. It is also the least forgiving of surface texture. Any orange peel or knockdown finish telegraphs through within a week as the film pulls tight, and a heavy texture will let the panel edges lift.
Prepasted paper is the least expensive to correct. It goes up wet, slides into position easily, and comes off with warm water and patience. It is also the most likely to shrink at the seams as it dries, so it wants a room held at a steady temperature rather than a January install with the front door propped open.
Non-woven paste-the-wall material is what most large murals ship as. The paste goes on the wall rather than the panel, so nothing has to book and rest, seams butt rather than overlap, and the whole panel strips off dry in one piece years later. It is heavier and less tolerant of sloppy plumb lines, which is why it is the one worth hiring out if the wall is over 10 feet.
Prep decides whether the seams hold
Fill every nail hole and anchor with lightweight compound, sand the patches flush with 120-grit, and run your palm over the whole wall. Anything you can feel, you will see through the print. If the wall carries a texture and you are using peel-and-stick, skim coat it smooth first; there is no adhesive that fixes a textured substrate.
Prime with a pigmented wallpaper primer, not with flat wall paint. Primer gives the adhesive a uniform, slightly sealed surface to grab, and it gives you a shot at removing the mural later without tearing the drywall face paper off with it. Latex paint needs two to four weeks to cure before anything sticky goes over it, and new drywall mud needs a full 30 days of drying before it is primed. Rushing that step is the single most common cause of edges curling in month two.
Pull outlet and switch plates, kill the circuit at the panel, and vacuum the wall and the floor line. Dust at the baseboard ends up on the adhesive face of the last panel every time.
Hanging order for a paneled mural
Murals arrive as numbered strips, usually 24 to 36 inches wide. Do not trust the corner to be plumb. Snap a vertical line half an inch narrower than your first panel, measured out from the corner, and hang panel one to that line so the extra half inch laps into the corner.
Work in the sequence the manufacturer numbered, and dry-fit the first two panels against each other on the floor to confirm the pattern registers before any adhesive touches the wall. Butt non-woven seams edge to edge under light pressure; overlapping them creates a ridge that catches raking light from a west window every afternoon.
Smooth from the center of each panel outward and downward with a plastic smoother, never a wet rag on a printed surface. Trim with a fresh blade and change it every two or three cuts, because a dull blade drags the print and tears the edge. Cut outlet openings last, with an X from corner to corner of the box, then fold the flaps in and trim to the box edge.
Trade and wholesale accounts change what you can order
Designers, contractors and stagers ordering murals for more than one room are buying a different product than a homeowner is, and it is worth asking about a trade account before the first project rather than after. What changes is mostly logistics: batch or dye-lot matching across rooms so two walls printed six weeks apart still match, larger sample sizes that show the actual motif scale instead of a swatch, consolidated lead times, and the ability to hold a design for a client presentation.
Ask three questions when you set one up. How long is a given print file kept on record, in case a panel is damaged on site and has to be reprinted to match? Are custom sizes quoted per panel or per square foot? And what is the stated lead time from proof approval, not from order date, since proof rounds are where schedules slip.
Schedule a callback before you approve a custom size
The measurements are the part nobody should do alone the first time. A ten-minute call with someone who sizes murals daily catches the errors that cost an entire print: the height taken at the short end of a sloping ceiling, the width measured to the corner bead instead of the corner, the forgotten one-inch floor buildup from flooring that has not been installed yet.
Have five things ready before you call. The three widths and three heights you recorded. The ceiling height and whether crown molding is going in later. A straight-on photo of the wall with the furniture in place, plus one from the doorway. The wall texture and how old the paint is. And the position of every outlet, switch, vent and stud-mounted bracket, measured from the left corner and from the floor. That list turns a guess into a spec, and it is the cheapest insurance on the whole project.