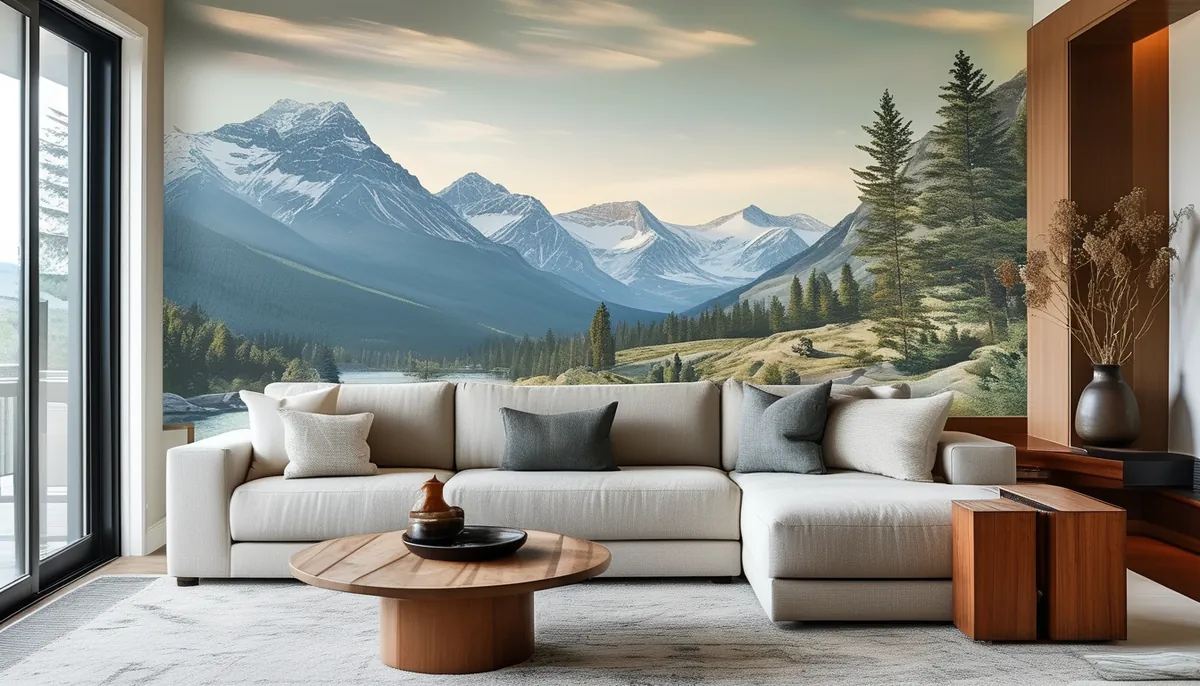
The two failure modes of a mountain mural are boring and predictable. Either the ridgeline lands behind the headboard and you paid for a wall of sky, or the artwork is a high-detail photograph installed in a hallway where nobody can stand more than four feet back. Both are decided before the order goes in.
Order to the wall plus bleed, never to the wall
Measure the wall at three heights and three widths, then use the largest number in each direction. Framed walls drift: half an inch of variance across a 10-ft run is normal, and it is always the mural that has to absorb it.
Add 3 to 4 in of bleed on every edge to the size you order. That surplus is what lets the installer plumb the first panel independently of an out-of-square corner and trim the excess at the ceiling and baseboard. A mural ordered at the exact wall dimension has zero adjustment, and the first crooked corner puts a wedge of bare drywall in the composition.
If the wall has a chair rail, wainscot, or a run of picture frame molding you intend to keep, measure from the top of that element, not the floor. Murals are printed as one continuous image and cannot be cropped after the fact without losing part of the scene.
Put the ridgeline where the eye is, not where the wall centers
Composition should be planned around the furniture, because the furniture is what the mural has to survive.
- Behind a bed: a headboard runs roughly 48 to 56 in tall on a standard frame, and pillows add another 12 in of visual mass. Anything in the bottom 5 ft of the image is gone. Choose a file where the peaks sit in the upper third.
- Behind a sofa: sofa backs land near 30 to 34 in. The bottom third disappears, which suits a layered ridgeline where the foreground hills are the least interesting element anyway.
- Behind a desk or console: 29 to 30 in of table plus a monitor. If the room doubles as a video call background, avoid high-contrast jagged peaks directly behind your head, which webcams handle badly.
- Stairwell or open landing: the only place a full-height composition survives intact, and the only place a tall vertical image reads correctly.
Standing eye level for most adults is 60 to 65 in. If the horizon line in the artwork sits close to that height, the room reads as if it opens outward. Push the horizon much higher and the wall feels like it is closing in.
Match the artwork style to the viewing distance
Viewing distance decides everything about which mountain image works. Measure from the wall to the spot where people actually stand or sit.
- Under 5 ft (hallways, narrow powder rooms, the wall at the foot of a bed in a small room): use flat illustration, line work, or a soft watercolor. Photographic detail collapses at close range into visible pixel structure and reads as busy rather than expansive.
- 6 to 12 ft: the sweet spot for layered, low-contrast misty ridgelines. This is the style that behaves most like a texture, holds up in small rooms, and does not compete with bedding or art.
- Over 12 ft (great rooms, stairwell landings, open-plan walls): photographic alpine scenes finally have room to work, and so do dramatic sunrise gradients.
Graphic geometric peaks — faceted triangles, two or three flat colors — are the durable choice for a nursery or kids room, because they read cleanly at any distance and do not date as fast as a specific photograph.
Get the color temperature right for the room’s light
Note which direction the window faces before choosing between a cool blue-gray range and a warm sunrise palette. North-facing rooms get flat, cool light all day and will push a blue-gray mural toward gray-green. South and west exposures make warm oranges and dusty pinks look correct in the afternoon and slightly garish at noon.
Check the light direction inside the artwork too. A mural lit from the left hung on a wall whose only window is on the right creates a mismatch most people feel without being able to name. Choose a file whose shadows fall the same way the room’s light falls.
Material and finish, in order of what actually matters
Finish first. A matte surface is correct for almost every mountain mural: it absorbs glare from ceiling cans and hides minor drywall imperfection. Satin or any sheen turns raking window light into a map of every taping seam and nail pop on the wall. A canvas or lightly textured print goes further and camouflages a wall that is smooth but not perfect.
Then the adhesive system. Peel-and-stick on a woven polyester substrate is repositionable during install, comes off in one piece, and is the renter-friendly option — but it demands a genuinely smooth, fully cured surface. Paste-the-wall non-woven murals are what most installers prefer for large formats: the paper does not expand while it soaks, panels butt cleanly, and long-term adhesion is better in a room that swings in humidity. Prepasted is the least common for murals and the least forgiving on registration.
Panels typically arrive 24 to 26 in wide and numbered left to right. Count them against your wall width before you start so you know at the outset whether the last panel is a full width or a 6-in sliver, which is a layout you fix by shifting the starting line, not by trimming at the end.
Wall prep decides whether the seams hold
Every mural wants a smooth wall. Orange peel and knockdown texture are the leading cause of peel-and-stick failure: the adhesive only contacts the high points, and edges start lifting within weeks. Skim coat and sand to a smooth finish, or switch to a paste system, which tolerates light texture better but does not love it either.
New drywall needs primer. Fresh latex paint needs to cure, not just dry — allow two to four weeks before applying any adhesive-backed material, longer in a cold or humid house. Wipe the wall with a mild degreaser, especially above a desk or near a kitchen, and let it dry fully. Remove outlet and switch plates and cut the breaker before anything wet or bladed comes near them.
Install sequence that keeps the image square
Start from a plumb line, never from a corner. Mark a vertical line one panel width minus 1/2 in from the starting corner, using a level rather than the corner itself as the reference. Hang panel one to that line and let the extra half inch wrap into the corner.
Work in the printed panel order. Smooth from the center outward with a plastic squeegee or smoothing brush in short overlapping strokes, driving air toward the nearest edge rather than chasing bubbles back and forth. On peel-and-stick, peel the backing 12 in at a time instead of all at once.
Butt the seams. Do not overlap unless the manufacturer specifically prints an overlap allowance, because a doubled edge casts a shadow line that runs the full height of the wall. At inside corners, wrap 1/2 in around, then start a new plumb line on the adjacent wall. Trim against a 6-in taping knife with a fresh blade, and change the blade every two or three cuts — a dull blade tears the face and drags the print.
Where a mountain mural is the wrong call
Skip the wall with the most openings. A composition broken by two windows and a door is no longer a landscape, it is three fragments. Pick the largest uninterrupted plane in the room even if it is not the first wall you see.
Full bathrooms are a gamble. Steam attacks edges and seams, and peel-and-stick lifts first at the top corners. If you go ahead, insist on a working exhaust fan, keep the material a minimum of 4 in outside any shower splash zone, and choose a paste-the-wall vinyl-coated print rather than a paper one.
Finally, resist tiling the mural across an entire room. Mountains are a horizon; horizons need a single direction to work in. One wall of ridgeline surrounded by three quiet walls is what makes the room feel deeper. Four walls of peaks just makes it smaller.