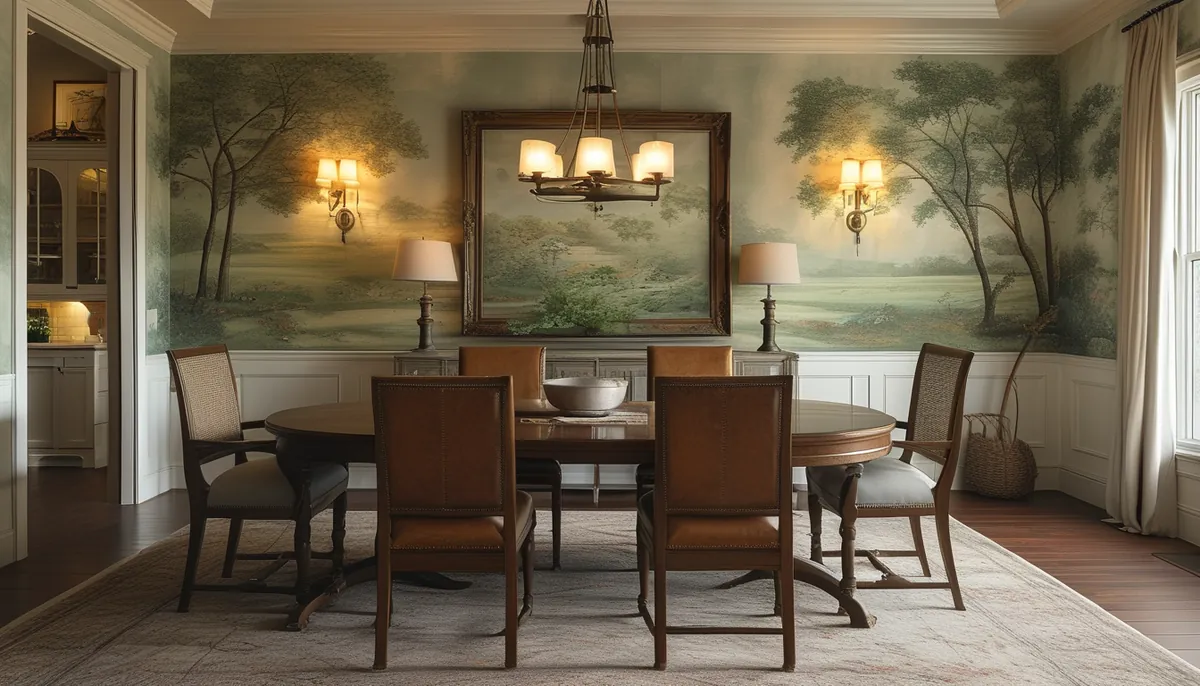
An antique wallpaper mural is one continuous image split across several panels, and that single fact drives every decision after it. There is no pattern repeat to hide a crooked cut, no second roll that matches if you come up short, and no forgiveness if the wall measurement is off by three inches. A mural is manufactured to your wall. It is not pulled off a shelf.
The look itself comes from three separate traditions that get lumped under one label, and they do not behave the same way on a wall. Scenic panoramas, meaning pastoral landscapes, harbor views and classical ruins, descend from early nineteenth-century block-printed French panels and read as a horizon that wraps a room. Chinoiserie murals, meaning flowering branches, birds and the occasional figure, descend from hand-painted Chinese export paper and run vertically, with the composition climbing toward the ceiling. Old-world maps and engraving reproductions are the third group: flat, graphic, closer to a framed print blown up to wall size. Swapping one type for another late in a project almost never works, because the focal heights and usable proportions are not interchangeable.
Measure the wall before you look at a single design
Measure the width in three places, at the floor, at roughly 4 feet, and at the ceiling. Measure the height at both ends and in the middle. In a house built before 1960 those numbers routinely disagree by 1 to 2 inches, and in a room with settled framing the disagreement can be worse. Order to the largest width and the largest height you recorded, then add 2 to 4 inches of overage on each dimension so you have something to trim into the corners and along the ceiling line.
Write down the obstructions too, because they change which design works. An outlet at 15 inches, a thermostat at 52 inches, a return-air grille, a door casing that eats the left 30 inches of the wall: each one removes part of the image. A scenic panorama with a single focal building can be ruined by a light switch landing in the middle of it. A dense botanical pattern absorbs the same switch without anyone noticing.
Panels typically arrive 24 to 27 inches wide and numbered left to right. Check that numbering against your room before you cut anything. Mural panels are printed in sequence, and reversing two of them is the one installation mistake that cannot be corrected with a smoothing brush.
Where the horizon lands matters more than the design
Furniture heights decide how much of a mural anyone ever sees. A sofa back sits around 30 to 34 inches. A console table runs about 30 inches. A king headboard stands 48 to 60 inches, and a bed with pillows blocks the bottom 4 feet of the wall entirely. If the interesting part of the image lives in the lower third, hanging it behind a bed throws away the reason you bought it.
Two practical rules follow. In a dining room or an entry, where nothing tall sits against the wall, the full composition reads and a low horizon works. Behind seating or a bed, choose a design whose subject sits above roughly 40 inches and treat everything below that as texture.
Scale is the other trap. An engraving that was originally printed at 12 inches across, then enlarged to a 9-foot drop, will show its halftone dots and soft edges from across the room. Before ordering, ask for a full-size printed crop of an actual detail area rather than a reduced swatch of the whole scene. A shrunk-down proof tells you the colorway and nothing about resolution.
Substrate, primer, and paste
Most murals ship on nonwoven stock hung with a paste-the-wall method, which is the easiest for a single installer because the panels stay dry, stay dimensionally stable, and slide into position. Traditional paper stock needs paste applied to the back and a booking period, and it expands as it soaks, so any panel you hang before the others have relaxed will not line up. Peel-and-stick murals exist and work best on a short wall with clean drywall, but the adhesive has less repositioning time than paste, and on a 9-foot drop that matters.
Prep is where murals get lost. New drywall needs a coat of primer made for wallpaper, or a quality acrylic primer, over the whole surface. Never hang directly on bare joint compound; it drinks paste and it tears when the paper is eventually removed. Existing paint in a satin or semi-gloss sheen needs a scuff sand with 120-grit paper followed by primer, otherwise the panels release at the seams within a season. Wall texture also has a limit. A light orange peel usually disappears under nonwoven stock. Knockdown or skip trowel does not, and it needs a skim coat sanded flat before you start.
Hang seams butted, never overlapped. Overlapping creates a visible ridge that runs floor to ceiling and catches light. Smooth from the center of each panel outward with a plastic smoother or a soft brush to push air toward the edges, then run a seam roller lightly. Pressing hard on a seam roller squeezes paste out and leaves a shiny line.
One placement warning: the wall that receives light from a window at a shallow angle is the worst place for a mural. That raking light exaggerates every seam and every ripple in the drywall. If that is the wall you want, budget for a skim coat.
Palette, light, and the rooms where murals fail
Sepia, umber and aged-parchment palettes absorb light. In a north-facing room in January, a dark scenic panorama can go muddy by mid-afternoon, and no lamp on a side table fixes a whole wall. If the room gets weak natural light, look for a colorway with a pale sky or an ivory ground, and check the mural under artificial light at night before committing, since warm bulbs push aged palettes further toward brown.
Trim color decides whether the mural reads as architecture or as a poster. Bright white baseboard and casing against a sepia panorama creates a hard frame that fights the image. Painting the trim in a warm off-white or a tone pulled from the mural itself settles it into the room.
Bathrooms are possible but conditional. A powder room with an exhaust fan is a good candidate and a classic use for a dramatic scenic paper. A full bath where a shower runs twice a day is a different problem, and it calls for a vinyl-coated surface, a fan that actually vents outside, and no panel edge within splash range of the tub.
Trade and wholesale accounts, samples, and lead times
Designers, builders and installers buying more than one project a year should ask about a trade or wholesale account rather than ordering retail. What those accounts are actually worth is not only the pricing tier. It is access to a sample library, order tracking across multiple client projects, a named contact who can confirm a print run, and a documented policy on what happens if a panel arrives damaged.
Before any mural order, confirm four things in writing: the exact finished dimensions being printed, the panel map showing how many panels and in what order, the colorway reference against a physical sample rather than a screen, and the reprint policy if a single panel is short or damaged in transit. Screens lie about color. A monitor showing a warm ivory ground can be sitting a full step off the printed paper.
Lead times deserve room in the schedule. Custom-sized murals print to order, and the printing is only part of it: proofing, cutting and packing add days, and freight for a long tube is slower than a boxed parcel. Order the mural before the painters finish, not after, and store it flat and dry until the walls are cured.
If you would rather talk it through than fill in a form, schedule a callback and have your numbers ready: the three width measurements, the three height measurements, ceiling height, a photo of the wall with obstructions visible, the current paint sheen, and the date the installer is booked. A five-minute call with those in hand settles sizing, substrate and lead time in one pass. A call without them just produces a second call.