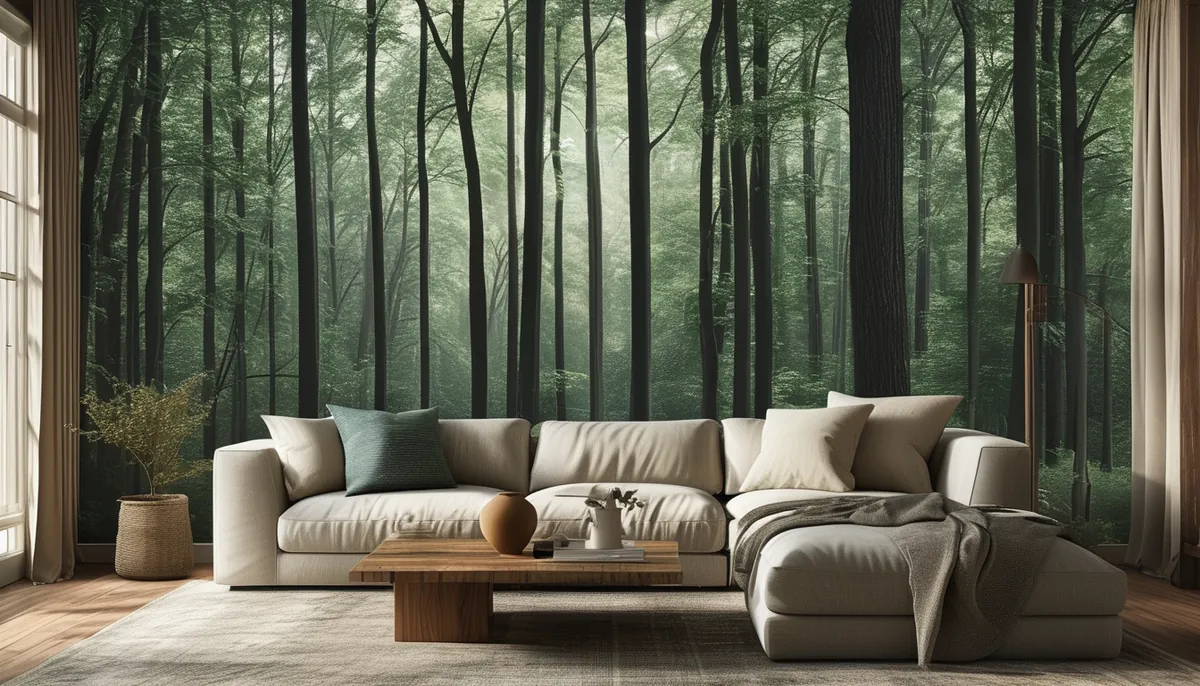
Most forest wallpaper is not wallpaper in the repeating sense. What sells under that name is usually a mural: one photograph or illustration split into vertical panels, printed to a fixed finished size, that only looks right on a wall matching the dimensions you ordered. That single fact drives everything else, from how you measure to how much material you can afford to waste at a corner.
Murals and repeats are two different purchases
A repeating forest pattern, meaning small pines, sketched birch trunks, or a stylized canopy, behaves like ordinary wallpaper. It ships in rolls, it has a horizontal repeat and a vertical drop, waste is predictable, and you can order another roll in six months if a corner gets damaged. Match the run or dye lot number and the patch is invisible.
A photographic mural has no repeat. Panel 3 fits between panel 2 and panel 4 and nowhere else. If you damage panel 3, you are reordering the whole set, because a single reprinted panel rarely matches the color of a print run made months earlier. Buy murals with 3 to 4 inches of overage on width and height, install with that surplus, and trim it off. Ordering the exact wall size is how people end up with a 1-inch strip of bare drywall in a corner.
The other practical difference is doors and windows. On a repeat you only buy the square footage you cover. On a mural you pay for the full rectangle even if a window eats 15 square feet of it, and you have to think about which part of the image the window is removing. A trunk cropped by a window casing looks intentional. A single deer cropped in half does not.
Measure the wall, not the room
Measure the width three times: at the baseboard, at 4 feet, and at the ceiling. Use the largest number. Do the same for height at both ends and the middle. Walls in houses built before 1980 are commonly out of square by 1/2 inch over 8 feet, and stud bays that bowed as the framing dried can add another 1/4 inch. The mural has to cover the worst case, not the average.
Add 3 inches to each dimension for trim allowance. If the ceiling visibly slopes, measure the drop across the wall and add that difference on top. Note the height of your baseboard and any chair rail, because a 5 1/4-inch baseboard swallows the bottom of the image, and if the forest floor with the interesting fern detail is in that bottom 5 inches, you paid for detail nobody sees.
Outlets and switches are not a reason to buy extra. Kill the breaker, unscrew the cover plates, hang the panel straight over the opening, then cut an X in the vinyl with a fresh blade and trim to the box. The plate covers a multitude of ragged edges.
Depth of field decides how big the room feels
Forest imagery falls into two camps and they do opposite things to a room. A misty scene with receding trunks and a soft background reads as depth. Put it on the wall you see from 10 or 12 feet away, opposite a sofa or at the end of a hallway, and the room gains a false horizon. A dense close-up canopy at full contrast, with black trunks and saturated green, does the reverse: it is a busy surface at arm’s length and it will make a 10 by 10 bedroom feel 9 by 9.
Viewing distance sets the pattern scale you can tolerate. Trunk spacing that reads as a forest at 12 feet turns into vertical stripes at 3 feet, which is exactly what happens in a narrow hallway where nobody ever stands back. In tight spaces choose an image with larger, fewer elements and more empty space between them.
Then check where the interest sits vertically. Eye level for a standing adult is about 5 feet. Furniture crops the bottom of the wall: a bed with a headboard hides roughly the lowest 30 to 48 inches, a sofa back about 30 inches, a console 32 inches. If the design’s best content lives below 36 inches, it is going behind furniture.
Green has an undertone and your room has a light direction
Forest wallpaper is a green purchase, and green splits hard between yellow-based and blue-based. North-facing rooms get cool, indirect light all day, and a blue-green forest in that light goes gray and flat by 3 p.m. Warmer greens with a yellow or olive base hold up. South and west rooms take warm light for hours, which pushes yellow-greens toward acid; cooler, grayer greens stay believable there.
Bulb color temperature matters as much as the window. A 2700K warm bulb pulls green toward brown and kills the blue in a misty scene. A 4000K bulb keeps the separation between foliage layers but makes warm greens look dusty. Whichever you have, order a sample, tape it to the actual wall, and look at it at 8 a.m., 4 p.m., and again with the lamps on. Three days of that tells you more than any showroom.
Material and finish by room
Peel-and-stick vinyl suits renters and anyone who expects to change their mind. It needs a smooth, clean, fully cured surface: satin or eggshell paint that has been on the wall at least three to four weeks. It fails on orange peel and knockdown texture because the adhesive only touches the high spots, and it fails on flat matte paint because on removal it takes the paint with it.
Prepasted or paste-the-wall nonwoven is the better long-term choice. Nonwoven does not expand when wet, so panels do not shrink back and open seams as they dry, and most of it strips off dry in full sheets years later.
Bathrooms are conditional. A powder room with no shower is fine. A full bath needs an exhaust fan sized to the room and actually used, and even then keep the mural off the wall that takes direct shower splash. Steam does not destroy vinyl, but repeated wetting at a seam edge lifts it.
On finish, matte hides drywall waves and prints with more visible depth. Satin bounces light across the surface and shows every seam and every high spot in your drywall compound. On a wall that gets raking light from a side window, matte is the safer call.
Hanging panels so the seams disappear
Lay the panels on the floor in order first and confirm the numbering matches the layout diagram. Printers do mislabel sets, and finding that out with panel 2 already on the wall is expensive.
Snap or draw a plumb line for the first panel, and place it at the visual center of the image rather than at a corner. Corners in real houses are not plumb; if you start there, the error accumulates across the wall and lands in the middle of the image where you see it. Starting at the middle splits the error into two halves that die in the corners.
Nonwoven panels butt edge to edge with no overlap; roll the seam lightly with a seam roller after 10 minutes, not immediately. Peel-and-stick usually overlaps 1/16 to 1/8 inch, and the overlap should face away from the room’s main entry so the shadow line does not catch your eye as you walk in. Smooth from the center outward with a felt-edged squeegee, working bubbles to the nearest edge.
Do not wrap a corner by more than about 1 inch. Cut, wrap the inch, and restart plumb on the adjacent wall. Trim along the ceiling and baseboard with a 6-inch taping knife as a guide and change the blade every two or three cuts; a dull blade tears vinyl instead of cutting it.
Where a forest wall goes wrong
Four walls of dense forest in a small room is the most common regret, and it usually shows up within a month. One wall, or one wall plus a painted ceiling picked from the darkest tone in the print, does more.
Hanging art over a mural is the second. A photographic forest is already the artwork; frames on top read as clutter. If the wall needs to hold picture frames, buy a quiet repeating pattern instead.
The third is fighting the architecture. Strong vertical trunks next to a tall window casing and a floor lamp produce three competing verticals within 4 feet. Either give the mural a wall with no interruptions, or choose an image whose main lines run horizontally, like a misty layered treeline.
Before you order anything, tape newspaper or kraft paper to the wall at the finished size, mark where the furniture tops land, and live with the rectangle for a couple of days. It costs nothing and it catches the crop problems that no photo on a product page will show you.