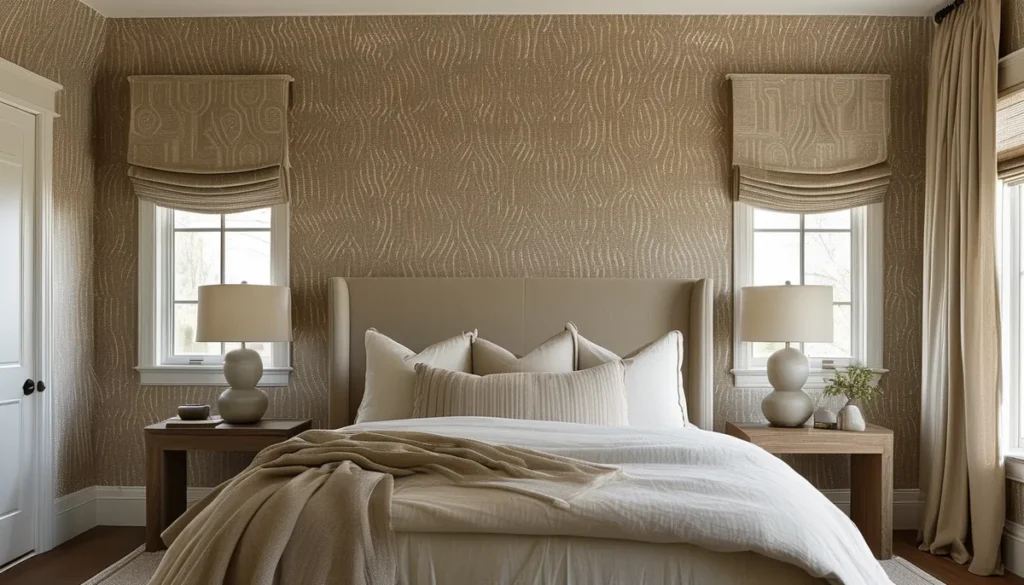
Getting the look of exposed brick is a design goal for many homeowners aiming for an industrial, rustic, or urban loft aesthetic. Real brick walls require significant structural work, are expensive to install, and can be messy. Red brick wallpaper provides a fast, affordable, and surprisingly realistic alternative. This guide covers everything you need to know to choose and install the right red brick wallpaper for your space.
Understanding the types of red brick wallpaper
Not all red brick wallpapers are created equal. The realism, durability, and application method vary significantly between types. Knowing these differences helps you select the best option for your project and budget.
Textured vs. flat brick wallpaper
The primary distinction lies in how closely the wallpaper mimics the tactile feel of real brick. Flat wallpaper has a smooth surface with a printed brick pattern. While some high-quality prints can look convincing from a distance, they lack the depth and dimension of real brick. Textured wallpaper, on the other hand, incorporates physical bumps, ridges, and grout lines to replicate the three-dimensional feel of masonry. This texture adds a significant layer of realism, making it the preferred choice for most applications where a true-to-life look is desired.
Materials and construction
The material used impacts durability, ease of cleaning, and installation. Common materials include:
- Vinyl-coated paper: This is a common and budget-friendly option. The paper base is coated with a layer of vinyl, offering some durability and washability. It’s a good choice for low-traffic areas like accent walls in bedrooms or living rooms.
- Solid vinyl: Thicker and more durable than vinyl-coated paper, solid vinyl wallpaper is also more scrubbable and water-resistant. It’s suitable for high-traffic areas, kitchens, and bathrooms. The texture is often more pronounced in solid vinyl options.
- Non-woven (or ‘paste-the-wall’): Made from a blend of paper and synthetic fibers, non-woven wallpapers are breathable, durable, and easy to remove. Many textured brick patterns are available in this material, and the ‘paste-the-wall’ application can simplify installation.
- Peel and stick: These wallpapers have a strong adhesive backing, allowing you to simply peel off the protective layer and stick them directly to the wall. They are excellent for renters or for DIYers who want a temporary or easily changeable solution. For more on this, check out our guide to red brick wallpaper peel and stick: what to know before buying.
Realistic print quality and color variations
The quality of the printed image is crucial for realism. Look for high-definition prints that capture the subtle variations in color, shading, and imperfections found in real brick. Some wallpapers feature multiple brick shades within a single panel to create a more natural, varied appearance, mimicking the way bricks age and weather differently.
Choosing the right shade of red
Red brick isn’t just one color. It ranges from deep, dark crimson to lighter, almost orange-red hues, with variations in mortar color adding to the complexity. Consider the existing color palette of your room:
- Deep red/burgundy: Offers a classic, historic feel. Pairs well with dark woods, leather, and metallic accents.
- Classic red/terracotta: A versatile choice that works with a wide range of styles, from modern farmhouse to industrial.
- Orange-red: Provides a warmer, more vibrant look. Can brighten up a space and complements lighter woods and neutral tones.
- Consider the mortar color: White or light gray mortar offers a stark contrast and a cleaner look, while darker or aged mortar can create a more subdued, rustic effect.
Where to use red brick wallpaper
The versatility of red brick wallpaper means it can enhance almost any space, but some areas benefit more than others. The key is to use it strategically to create the desired atmosphere.
Accent walls
The most common application is as an accent wall. This allows you to introduce the brick texture and color without overwhelming the space. It’s perfect for:
- Living rooms: Behind a sofa, a TV unit, or a fireplace to create a focal point.
- Bedrooms: Behind the headboard for a cozy, textured backdrop.
- Dining rooms: To add character and warmth to the space where you entertain.
Full room coverage
For a bolder statement or to fully embrace an industrial loft style, you can cover all four walls. This works best in larger rooms or spaces with high ceilings, where the pattern can breathe. It can also be effective in smaller spaces if the overall design is kept light and airy to prevent the room from feeling too dark or enclosed.
Kitchens and backsplashes
Certain types of vinyl or washable wallpapers can be used in kitchens. A red brick backsplash can add a unique, rustic charm. Ensure the wallpaper is specifically rated as washable or scrubbable, and consider applying a clear sealant over it for added protection against grease and moisture. For areas prone to heavy splattering, a more durable material like tile or a dedicated backsplash panel might be a better long-term solution.
Home offices and studies
A red brick wall can add a sophisticated and inspiring backdrop for a home office. It can evoke a sense of permanence and focus, making it an excellent choice for a productive workspace.
Commercial spaces
Restaurants, cafes, bars, and retail stores often use red brick wallpaper to create an inviting, trendy atmosphere. It’s a cost-effective way to achieve a popular design aesthetic.
Installation considerations for red brick wallpaper
Proper installation is key to achieving a realistic and long-lasting finish. While many wallpapers are now DIY-friendly, understanding the process will help you avoid common mistakes.
Surface preparation
This is the most critical step for any wallpaper installation. The wall must be:
- Clean: Free of dust, grease, and dirt. Wash the walls with a mild detergent and water, then rinse thoroughly.
- Smooth: Fill any holes or cracks with spackle or joint compound and sand them smooth once dry. Any imperfections on the wall will show through the wallpaper, especially with textured types.
- Dry: Ensure the wall is completely dry before applying the wallpaper.
- Primed: Applying a coat of wallpaper primer is highly recommended. Primer seals porous surfaces, improves adhesion, and makes future removal much easier. Use a primer specifically designed for wallpaper.
Measuring and cutting
Measure the height of your wall and add at least 4-6 inches to each strip to allow for trimming at the ceiling and baseboard. For patterned wallpapers like brick, you’ll need to match the pattern between strips. This means you might use more material than a simple calculation suggests. Lay out your strips before cutting to ensure the pattern flows correctly.
Application methods
The method depends on the type of wallpaper:
- Paste-the-wall: For non-woven wallpapers, you apply paste directly to the wall and then hang the strip. This is generally easier and less messy than traditional pasting.
- Paste-the-paper: For traditional paper-backed wallpapers, you apply paste to the back of the paper, book it (fold the pasted sides together for a few minutes to allow the paste to penetrate), and then hang.
- Peel and stick: Simply peel the backing and apply the wallpaper to the wall, smoothing out air bubbles as you go. For detailed instructions, refer to our guide on 3d brick wallpaper: installation, removal, and maintenance, which covers similar application principles.
Hanging the strips
Start in a corner or a prominent area. Hang the first strip perfectly plumb (vertical) using a spirit level. Subsequent strips should be hung edge-to-edge or with a slight overlap, depending on the manufacturer’s instructions. Smooth each strip from the center outwards using a wallpaper brush or smoother to remove air bubbles and ensure good adhesion.
Trimming and finishing
Once a strip is in place, use a sharp utility knife or a craft knife and a straight edge (like a metal ruler or a T-square) to trim the excess paper at the ceiling, baseboard, and around windows or doors. Overlap the edges slightly if instructed by the manufacturer for a seamless look.
Dealing with corners and obstacles
For internal corners, wrap the wallpaper slightly onto the adjoining wall (about 1/2 inch), then make a relief cut vertically from the ceiling down to the corner. Hang the next strip on the adjacent wall, overlapping the first strip slightly. For external corners, wrap the wallpaper around the corner by about 1 inch, then make a relief cut and wrap the next strip over it. For outlets and switches, turn off the power, remove the cover plates, and cut an ‘X’ in the wallpaper over the opening. Then, carefully trim away the excess paper to fit the opening.
Maintenance and care
Proper care will ensure your red brick wallpaper continues to look great for years.
Cleaning
For most vinyl and solid vinyl wallpapers, a damp cloth or sponge with mild soap is sufficient for cleaning. Avoid abrasive cleaners or excessive water, which can damage the print or the adhesive. For textured wallpapers, gently wipe the raised surfaces to avoid snagging.
Repairs
Minor nicks or tears can sometimes be repaired with a dab of wallpaper paste or a suitable adhesive, carefully applied with a small brush. For larger damage, it may be necessary to replace the affected strip. If you have leftover wallpaper, keep it for potential future repairs.
Longevity
The lifespan of your wallpaper depends on the quality of the material, the installation, and the environment. High-quality vinyl wallpapers in low-moisture, low-traffic areas can last 10-15 years or more. Peel-and-stick options may have a shorter lifespan due to the adhesive’s strength and potential for peeling over time, especially if removed and reapplied.
Common mistakes to avoid
Even with the best intentions, installation can go wrong. Be aware of these common pitfalls:
- Skipping surface preparation: This is the number one mistake. An uneven or dirty wall will lead to poor adhesion, bubbles, and peeling.
- Not using primer: Primer ensures better adhesion and makes removal easier down the line.
- Improper pattern matching: This results in visible seams and a disjointed look. Always allow extra material for matching.
- Over-stretching or tearing: Be gentle, especially with thinner wallpapers. Use a sharp blade for trimming.
- Using the wrong type of wallpaper in high-moisture areas: Standard paper wallpaper will not hold up in bathrooms or kitchens.
- Not reading manufacturer’s instructions: Different wallpapers have specific requirements for paste, hanging, and cleaning. Always follow the instructions provided.
Comparing red brick wallpaper to alternatives
While red brick wallpaper is a fantastic solution, it’s helpful to understand how it stacks up against other options for achieving a brick look.
Real brick veneer
Pros: Utmost authenticity, increases home value, extremely durable.
Cons: Very expensive, labor-intensive installation, adds significant weight to walls, requires structural considerations.
Faux brick panels
Pros: Highly realistic, durable, easier to install than real brick, can be waterproof.
Cons: More expensive than wallpaper, can be heavy, requires careful fitting to look seamless.
3D brick wallpaper
Pros: Offers significant texture and depth, very realistic.
Cons: Can be more expensive than standard wallpaper, installation requires careful pattern matching.
For a detailed look at one type of textured option, you can explore Peel and stick textured brick wallpaper: a realistic guide.
Paintable brick wallpaper
Pros: Allows for custom color matching, can be very convincing.
Cons: Requires painting after installation, can be more labor-intensive if you want a specific red hue. For those considering alternative colors, our black brick wallpaper guide for your home offers insights into other popular shades.
The DIY advantage of red brick wallpaper
The primary draw of red brick wallpaper is its accessibility for DIY enthusiasts. Unlike structural renovations, wallpapering is a project most homeowners can tackle over a weekend. The availability of peel-and-stick options further lowers the barrier to entry, making it possible to transform a space with minimal tools and experience. This democratizes design, allowing you to experiment with bold textures and styles without a significant financial commitment or the need to hire professional installers.
Styling your red brick space
Once installed, red brick wallpaper provides a fantastic canvas for various decor styles:
- Industrial Chic: Pair with metal furniture, exposed ductwork, Edison bulbs, and reclaimed wood.
- Rustic Farmhouse: Combine with shiplap, distressed wood furniture, woven textiles, and vintage accents.
- Modern Minimalist: Use the brick as a textured contrast to sleek, simple furniture, clean lines, and a neutral color palette.
- Bohemian: Mix with plants, colorful textiles, rattan furniture, and eclectic art pieces.
The key is to let the brick wall be a feature without creating too much clutter. Balance the texture with smoother surfaces and thoughtful furniture placement.
Where to buy red brick wallpaper
You can find red brick wallpaper at most home improvement stores, large online retailers like Amazon, Wayfair, and Overstock, as well as specialized online wallpaper shops. When purchasing, always buy enough rolls to complete your project, plus a little extra for pattern matching and potential future repairs. Check batch numbers to ensure consistency in color and pattern.