Removing old wallpaper can seem like a daunting task, but with the right knowledge, tools, and a methodical approach, it is a perfectly achievable home improvement project that can dramatically transform a space. This comprehensive guide from Starhouse provides precise, authoritative instructions on every facet of wallpaper removal, from identifying your wallpaper type to preparing your walls for their next finish, ensuring a smooth and successful renovation.
Key Takeaways
- Identifying your wallpaper type (e.g., peel-and-stick, traditional, non-woven) is the critical first step, as it dictates the most effective removal method.
- Thorough preparation, including protecting floors, furniture, and electrical outlets, is essential for safety and to minimize cleanup.
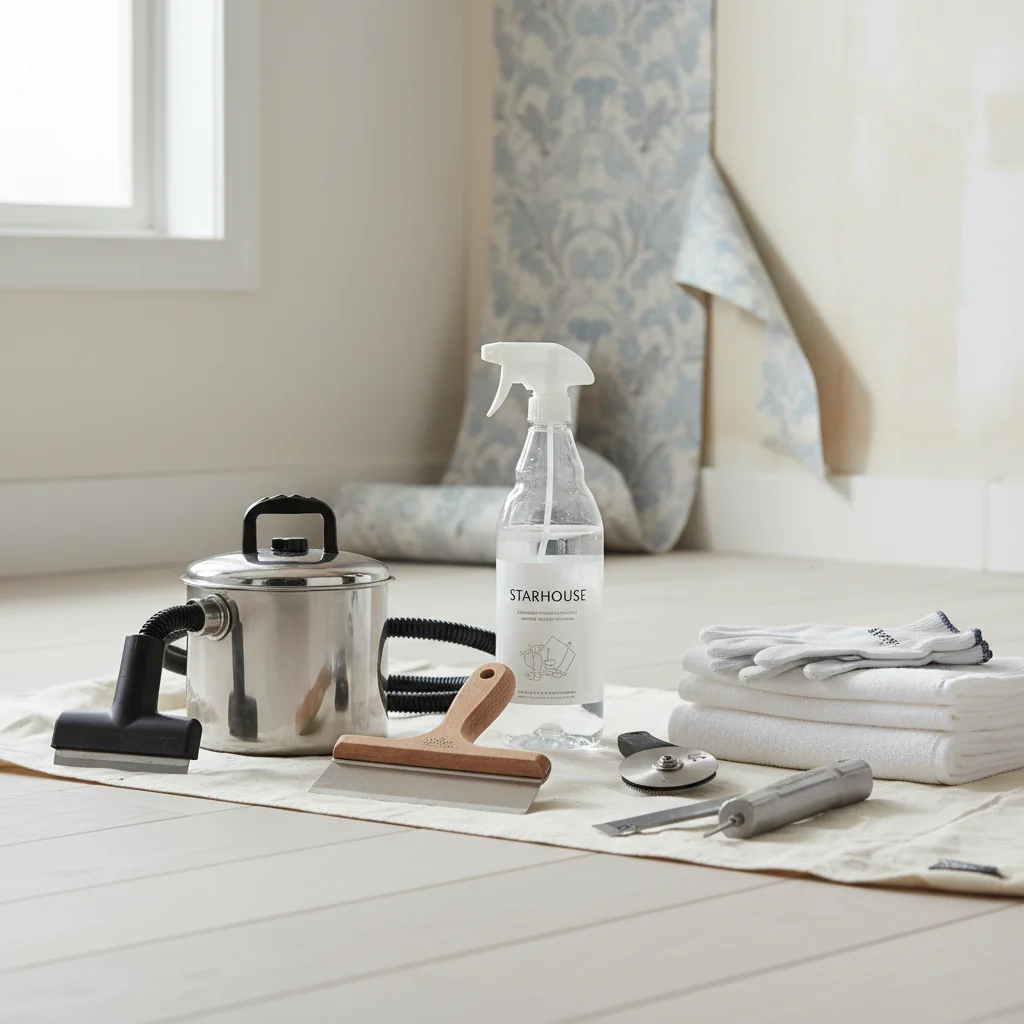
- Essential tools include scoring tools, spray bottles, wide scrapers, and protective gear; for stubborn paper, a wallpaper steamer is highly effective.
- Always test a small, inconspicuous area first to assess how the wallpaper and adhesive react to your chosen removal method and to prevent wall damage.
- Post-removal steps, such as cleaning adhesive residue and repairing wall imperfections, are crucial for achieving a smooth, paint-ready surface.
- Patience and precision are paramount; rushing the process or using improper techniques can lead to costly wall damage.
Understanding Your Wallpaper: Types and Composition
Identifying the specific type of wallpaper adorning your walls is the fundamental first step in any removal project, as its composition directly dictates the most effective and least damaging removal strategy. Each wallpaper type is constructed with different materials and adhered with distinct adhesives, requiring a tailored approach to ensure efficient and clean removal. A precise assessment at this stage prevents unnecessary damage to the underlying wall surface and streamlines the entire process.
Wallpaper has evolved significantly over the decades, moving from simple paper-based products to complex multi-layered vinyls and innovative non-wovens. Understanding these distinctions is not merely academic; it is a practical necessity for successful removal. The backing material, the surface layer, and the adhesive used all play critical roles in how easily the wallpaper will release from the wall.
Here are the primary types of wallpaper you are likely to encounter, along with their key characteristics and implications for removal:
-
Traditional Paper Wallpaper: This is one of the oldest forms, consisting of a printed paper layer directly adhered to the wall. Paper wallpaper is highly absorbent, making it responsive to wetting agents. However, it can also tear easily and is prone to leaving fibrous backing layers or adhesive residue behind.
Removal Implication: Requires thorough saturation with water or a wallpaper stripper solution to dissolve the paste. Patience is crucial to allow sufficient soak time for the adhesive to reactivate and soften.
-
Vinyl-Coated Paper Wallpaper: This type features a paper backing with a thin, clear vinyl layer on top, offering increased durability and washability compared to pure paper. The vinyl layer makes it less absorbent.
Removal Implication: The vinyl coating acts as a barrier to moisture. It often requires scoring the surface with a scoring tool (a device with small wheels that perforate the wallpaper) to allow water or stripper to penetrate to the paper backing and adhesive. Once scored and saturated, the paper backing can typically be scraped off.
-
Solid Sheet Vinyl Wallpaper: Composed entirely of vinyl, this wallpaper is exceptionally durable, washable, and resistant to moisture. It typically has a fabric or paper backing that is adhered to the wall.
Removal Implication: Solid sheet vinyl wallpaper is often “strippable.” The vinyl face layer can frequently be peeled away from the wall in full sheets, leaving only the paper or fabric backing. This backing can then be removed using warm water and a scraper or a wallpaper stripper solution.
-
Non-Woven Wallpaper: A modern innovation, non-woven wallpaper is made from a blend of natural and synthetic fibers. It is highly breathable, durable, and generally easier to hang and remove than traditional papers.
Removal Implication: Non-woven wallpaper is typically “peelable” or “strippable.” The entire sheet can often be peeled off the wall dry, leaving little to no residue. If a small amount of adhesive remains, it can usually be wiped clean with a damp cloth.
-
Peel-and-Stick (Removable) Wallpaper: Peel-and-stick wallpaper is a self-adhesive vinyl or fabric-based product designed for temporary or low-commitment applications, featuring an adhesive backing protected by a release liner. It is a highly popular choice for renters or those who frequently update their decor.
Removal Implication: This type is specifically engineered for easy removal. It can typically be peeled off the wall without water or tools, often without leaving residue or damaging the underlying paint. Gentle heat from a hairdryer can sometimes assist in softening the adhesive for smoother removal.
-
Fabric-Backed Vinyl Wallpaper: Common in commercial settings but also found in residential properties, this wallpaper consists of a heavy-duty vinyl face bonded to a fabric backing. It is extremely durable.
Removal Implication: Similar to solid sheet vinyl, the vinyl face is often strippable. Once the face is removed, the fabric backing can be dampened and scraped off. Due to its robust nature, it may require more aggressive soaking or steaming.
-
Mural Wallpaper: Murals can be printed on various substrates, including traditional paper, non-woven, or peel-and-stick materials. Their removal method will correspond to the specific material they are printed on.
Removal Implication: Determine the base material (e.g., non-woven, vinyl-coated paper) and follow the appropriate removal method for that substrate.
To identify your wallpaper type, examine a loose seam or a corner that has started to lift. If you can peel off a significant portion dry without tearing the surface, it is likely solid sheet vinyl, non-woven, or peel-and-stick. If it tears easily and reveals a paper backing, it is likely traditional paper or vinyl-coated paper. The feel and texture will also provide clues: vinyl has a plastic-like feel, while non-woven is softer and more fabric-like.
Assessing Your Walls: The Foundation Matters
Before embarking on any wallpaper removal, a thorough assessment of the underlying wall surface is absolutely essential to prevent damage, ensure a clean substrate for future finishes, and anticipate potential challenges. The condition of your walls—whether they are drywall, plaster, or previously painted—will significantly influence the removal technique and the amount of post-removal repair required. Ignoring this critical step can lead to costly repairs, such as delaminated drywall paper or crumbling plaster.
The type of wall material and its preparation prior to wallpaper installation are paramount. Modern homes predominantly feature drywall, composed of gypsum plaster pressed between sheets of thick paper. Older homes often have plaster walls, which are typically more robust but can be prone to cracking or becoming soft when exposed to excessive moisture.
Consider the following aspects during your wall assessment:
-
Wall Material (Drywall vs. Plaster):
- Drywall: Generally easier to damage with excessive moisture or aggressive scraping. The paper face of drywall can delaminate if it gets too wet, leading to soft spots and significant repair work. It is crucial to use just enough moisture to loosen the adhesive without saturating the drywall.
- Plaster: More durable against moisture but can be brittle. Aggressive scraping can chip plaster, and prolonged saturation can soften older, lime-based plaster. Plaster walls often have more imperfections (cracks, unevenness) that will become apparent once wallpaper is removed.
-
Primer and Wall Preparation: Ideally, walls should have been primed with a specific wallpaper primer or an oil-based primer before wallpaper application. A properly primed wall creates a barrier that prevents the adhesive from bonding directly to the wall surface, making removal considerably easier.
Indicator: If the wallpaper peels off relatively easily without tearing the wall surface, it’s a good sign the wall was properly primed. If the wallpaper is bonded aggressively and tears off chunks of the wall’s surface paper (on drywall) or plaster, priming was likely insufficient or omitted.
-
Existing Paint Layer: If the walls were painted before wallpapering, the type of paint matters. Oil-based paints provide a slick, non-porous surface that wallpaper adhesive struggles to bond with strongly, aiding removal. Latex paints, especially flat finishes, are more porous and allow the adhesive to bond more firmly, making removal more challenging.
Indicator: Observe how the wallpaper comes off. If it pulls away paint with it, the underlying paint was either a poor base or not fully cured before wallpapering.
-
Number of Wallpaper Layers: Multiple layers of wallpaper, often applied over decades, complicate removal significantly. Each layer may have a different composition and adhesive.
Indicator: Look at exposed edges or corners for evidence of multiple patterns or textures stacked on top of each other. Removing multiple layers requires more time, patience, and potentially a combination of techniques.
-
Pre-existing Wall Damage: Identify any cracks, holes, or unevenness in the wall before removal. These will need to be addressed after the wallpaper is off, but knowing their extent beforehand helps in planning.
Indicator: Visible imperfections through the wallpaper or felt by running a hand over the surface.
The Test Patch: Your Most Important Assessment Tool
Before committing to a full-scale removal method, always perform a test patch in an inconspicuous area, such as behind a door, inside a closet, or a small corner. This test allows you to:
- Determine if the wallpaper is strippable (peelable) or requires wetting.
- Gauge how well the adhesive responds to water, stripping solution, or steam.
- Assess the vulnerability of the underlying wall surface to moisture and scraping.
- Estimate the time and effort required for the entire project.
To conduct a test patch, start by trying to peel a corner dry. If it comes off easily, you might have non-woven or peel-and-stick. If not, score a small area, apply warm water or a stripper solution, let it soak for 10-15 minutes, and then gently scrape. Observe the results carefully.
Essential Tools and Materials for Wallpaper Removal
Equipping yourself with the correct tools and materials is a prerequisite for efficient and damage-free wallpaper removal, transforming a potentially frustrating task into a manageable project. Having all necessary items on hand before you begin ensures a seamless process, minimizes interruptions, and contributes significantly to the quality of the final result. The right equipment protects both your walls and your personal safety throughout the endeavor.
Successful wallpaper removal is less about brute force and more about precision, patience, and the strategic application of the right tools. Each item serves a specific purpose, contributing to the overall effectiveness and safety of the operation. We recommend investing in quality tools, as they will perform better and last longer.
Here is a comprehensive list of essential tools and materials:
Tools for Wallpaper Preparation and Removal:
- Scoring Tool (Wallpaper Perforator): A vital instrument for vinyl-coated or impermeable wallpapers. This tool features small, sharp wheels that create tiny perforations in the wallpaper surface, allowing water or stripper solution to penetrate the vinyl layer and reach the adhesive beneath. Avoid excessive pressure to prevent damage to the underlying wall.
- Spray Bottle or Garden Sprayer: Essential for applying water or wallpaper stripping solution evenly and thoroughly to the wallpaper surface. A garden sprayer (pump-style) is highly recommended for larger areas as it provides a continuous, fine mist with less hand fatigue.
- Wallpaper Stripper Solution: A chemical concentrate specifically formulated to break down wallpaper adhesive. It is mixed with warm water according to manufacturer instructions. While warm water alone can work, a stripper solution significantly accelerates the process, particularly for stubborn glues.
- Wide Putty Knife or Wallpaper Scraper (3-6 inches): Used for gently lifting and scraping off softened wallpaper. Choose a tool with a flexible blade and rounded corners to minimize the risk of gouging the wall surface. Stainless steel blades are preferred for durability and ease of cleaning.
- Seam Roller: While primarily used for wallpaper installation, a seam roller can sometimes be useful for pressing down any remaining small bits of wallpaper or adhesive before final cleaning.
- Wallpaper Steamer: For extremely stubborn wallpaper or multiple layers, a wallpaper steamer is an invaluable asset. It uses heated water vapor to penetrate and soften old, dried-out adhesive more effectively than liquid solutions. Ensure you follow all safety instructions for operating a steamer.
- Utility Knife or Razor Blade: Useful for carefully cutting away small, recalcitrant pieces of wallpaper or for scoring in tight corners where a wheeled scoring tool cannot reach.
- Bucket(s): For mixing stripper solution and for holding clean water for rinsing.
- Large Sponges and Clean Cloths: For wiping down walls after scraping, removing adhesive residue, and general cleanup.
Protective and Cleanup Materials:
- Drop Cloths or Plastic Sheeting: Absolutely critical for protecting floors, furniture, and any exposed surfaces from water, stripper solution, and wallpaper debris. Heavy-duty plastic sheeting is ideal for floors, taped securely to baseboards.
- Painter’s Tape (Blue or Green): For securing drop cloths, taping off trim, and sealing electrical outlets.
- Safety Glasses or Goggles: Essential to protect your eyes from splashes of stripper solution, falling debris, or steam.
- Rubber Gloves: To protect your hands from prolonged exposure to water and chemical solutions.
- Face Mask/Respirator: Recommended, especially when using chemical strippers or when dealing with older wallpaper that might contain mold or mildew, or if lead paint is suspected underneath.
- Trash Bags or Large Buckets: For collecting removed wallpaper and debris.
- Ladder or Step Stool: For safely reaching higher sections of the wall. Ensure it is stable and rated for your weight.
Post-Removal Wall Preparation Tools:
- Adhesive Remover: A specialized cleaner to dissolve any stubborn, residual adhesive left on the wall after the wallpaper is removed.
- Degreaser/Cleaner (e.g., TSP substitute): For a final, thorough cleaning of the walls to remove all traces of adhesive, dirt, and stripper residue, preparing the surface for priming and painting.
- Fine-Grit Sandpaper (120-180 grit) or Sanding Sponge: For smoothing out any minor imperfections, rough spots, or remaining adhesive residue on the wall.
- Spackle, Joint Compound, or Wall Repair Compound: For patching holes, cracks, and gouges in the wall surface.
- Primer (Oil-based or Acrylic/Latex Primer-Sealer): Crucial for sealing the wall surface, preventing stains from bleeding through new paint, and ensuring proper adhesion of new paint or wallpaper.
By gathering these materials before you start, you establish a controlled and efficient environment, minimizing potential setbacks and ensuring a smoother transition to your newly refreshed walls.
Step-by-Step Removal Methods: Tailored Approaches for Every Type
Successful wallpaper removal hinges on employing the correct technique for the specific type of wallpaper and adhesive, ensuring minimal damage to the underlying wall. Each method, from gentle peeling to intensive steaming, is designed to efficiently break the bond between the wallpaper and the wall without compromising the structural integrity of the surface. A systematic, step-by-step approach tailored to the wallpaper’s composition is paramount for achieving a clean, ready-to-finish wall.
Before commencing any method, ensure you have completed all necessary preparation steps outlined in the “Preparation is Key” section, including protecting your workspace and ensuring safety.
A. Peel-and-Stick Wallpaper Removal
Peel-and-stick wallpaper is designed for straightforward, residue-free removal, making it the least labor-intensive option. This method typically requires minimal tools and effort, providing a quick transition for your walls.
- Locate a Corner: Find a top corner or seam of the wallpaper.
- Gently Lift: Use your fingernail or a plastic scraper to gently lift an edge of the wallpaper away from the wall.
- Peel Slowly and Steadily: Once an edge is lifted, peel the wallpaper downward at a 45-degree angle, or as close to the wall as possible. Maintain slow, consistent pressure. Rapid pulling can cause tearing or leave adhesive residue.
- Apply Gentle Heat (Optional): If the wallpaper is resistant or leaves residue, use a hairdryer on a low-medium setting. Hold it 6-8 inches from the wall, warming a small section for 20-30 seconds. The heat softens the adhesive, making it more pliable for removal. Immediately peel the warmed section.
- Remove Residue: If any adhesive residue remains, gently rub it with a soft cloth dampened with warm, soapy water or a specialized adhesive remover.
B. Traditional (Paste-Applied) Wallpaper Removal
Traditional wallpapers, including paper-backed vinyls and older paper varieties, typically require moisture to reactivate and dissolve the adhesive. This process often involves scoring, saturating, and then scraping the material away. This Old House provides excellent guidance on these techniques, emphasizing the importance of proper saturation for effective removal.
Method 1: Dry Stripping (If Applicable)
Some traditional wallpapers, particularly newer vinyl-faced types, may be “strippable,” meaning the top layer can be removed dry, leaving a paper backing. Always attempt this first after identifying your wallpaper type.
- Test a Seam: Locate a loose seam or corner at the top of a strip.
- Pull Gently: Grasp the top edge firmly and pull downward slowly and steadily. Aim to peel the wallpaper off in full sheets or large sections.
- Address Remaining Backing: If only the vinyl face peels off, leaving a paper backing, proceed to the “Soaking and Scraping” method for the remaining backing. If the entire strip comes off clean, you are fortunate.
Method 2: Soaking and Scraping (Most Common Method)
This method is effective for most traditional wallpapers, especially those with paper backings or vinyl-coated surfaces that have been scored. It relies on water or a chemical stripper to dissolve the paste.
- Score the Wallpaper (If Vinyl-Coated or Impermeable): Use a wallpaper scoring tool to create small perforations across the entire surface of the wallpaper. Apply even, moderate pressure, ensuring the tool scores the paper without deeply gouging the wall beneath. For walls with multiple layers or painted wallpaper, more extensive scoring is necessary to allow the solution to penetrate.
- Prepare Stripping Solution: Mix your chosen wallpaper stripping concentrate with warm water according to the manufacturer’s specific instructions. A typical ratio might be 1 part concentrate to 10 parts warm water. Warm water is crucial as it helps activate the solution and soften the adhesive more effectively.
- Apply Solution: Using a spray bottle or garden sprayer, thoroughly saturate a 3×3 foot section of wallpaper with the solution. Ensure the entire area is evenly wet, but avoid over-saturating to prevent water damage to drywall.
- Allow to Soak: Let the solution penetrate and soften the adhesive for 15-20 minutes. The exact soak time will depend on the wallpaper type and adhesive strength; monitor a small area to determine optimal timing. The wallpaper should appear darkened and feel soft.
- Scrape Gently: Beginning at a top corner or seam of the soaked section, use a wide wallpaper scraper or putty knife (with rounded corners) to gently lift and scrape the softened wallpaper from the wall. Hold the scraper at a shallow angle to avoid gouging the wall. Work in small sections, always scraping away from yourself.
- Re-wet as Needed: If the wallpaper dries out or becomes difficult to scrape, re-apply the solution and allow it to soak again. Do not force dry wallpaper off, as this invariably leads to wall damage.
- Repeat: Continue this process, working in 3×3 foot sections, until all wallpaper is removed from the wall.
Method 3: Steaming (For Stubborn Wallpaper)
A wallpaper steamer is highly effective for extremely stubborn wallpaper, multiple layers, or very old, dried-out adhesives. The steam penetrates deeply, softening the adhesive more thoroughly than liquid solutions alone. For detailed guidance on using a steamer, consult resources like This Old House’s guide on how to strip wallpaper.
- Prepare Steamer: Fill the steamer reservoir with water as per the manufacturer’s instructions. Allow it to heat up fully until steam is consistently emitted.
- Score (If Vinyl-Coated): For vinyl-coated wallpapers, score the surface thoroughly before steaming to allow the steam to penetrate.
- Apply Steam: Hold the steamer plate flat against a small section of wallpaper for 20-30 seconds. You will observe the wallpaper changing color or becoming visibly damp and soft.
- Scrape Immediately: As soon as a section is softened, remove the steamer and immediately use a wallpaper scraper to lift and remove the wallpaper. The heat from the steam keeps the adhesive pliable for only a short time. Work quickly.
- Overlap Sections: Overlap your steamed sections slightly to ensure continuous softening and efficient removal.
- Refill Water: Monitor the water level in the steamer and refill as necessary. Never let the steamer run dry.
- Exercise Caution: Steam is very hot and can cause burns. Always wear protective gloves and safety glasses. Avoid directing steam at electrical outlets or light fixtures.
C. Non-Woven and Fabric-Backed Vinyl Wallpaper Removal
These modern wallpapers are often designed for easy removal, typically peeling off in full strips without much fuss.
- Dry Peel: Start by gently lifting a top corner or seam. Most non-woven and fabric-backed vinyl wallpapers are “strippable” and can be pulled off the wall in large, dry sheets. Pull slowly and consistently at a shallow angle.
- Address Residue: If any adhesive residue remains, wipe the wall with a damp sponge or a mild adhesive remover. These wallpapers generally leave very little residue.
D. Difficult Scenarios: Multiple Layers, Painted Wallpaper, Old Adhesives
Some wallpaper removal projects present unique challenges that require more intensive or specialized techniques.
- Multiple Layers: If you discover multiple layers, treat each layer as a separate removal project. Start by scoring and saturating the top layer. Once removed, assess the next layer and repeat the appropriate method. Steaming is often the most effective approach for multiple, deeply adhered layers.
-
Painted Wallpaper: Painting over wallpaper seals the surface, making it extremely difficult for water or stripper to penetrate.
- Aggressive Scoring: You must score painted wallpaper much more aggressively than unpainted wallpaper, ensuring thousands of perforations are made across the entire surface.
- Steaming: A wallpaper steamer is often the most successful method for painted wallpaper, as the heat and moisture can penetrate the paint and wallpaper layers more effectively.
- Chemical Strippers: Stronger chemical strippers designed for painted surfaces may be necessary. Always test in an inconspicuous area first.
-
Old, Dried-Out Adhesives: Adhesives that have been on walls for decades can become rock-hard and resistant to standard strippers.
- Extended Soak Times: Allow significantly longer soak times (30 minutes or more) for water or stripper solutions to penetrate.
- Steaming: Again, steaming is often the most effective solution for these extremely tenacious adhesives.
- Adhesive Removers: After the wallpaper itself is removed, you may need a dedicated adhesive remover product to dissolve the remaining stubborn glue.
Regardless of the method chosen, patience is your most valuable tool. Rushing the process significantly increases the risk of damaging your walls, leading to more extensive and time-consuming repairs.

Preparation is Key: Protecting Your Space and Yourself
Thorough preparation of your workspace and personal safety are non-negotiable steps before beginning any wallpaper removal project, directly impacting the efficiency of the task and the integrity of your home. Proper preparation minimizes cleanup, prevents damage to floors and furnishings, and crucially safeguards against potential hazards like electrical shock or chemical exposure. Neglecting this phase can lead to regrettable accidents or extensive additional work.
The adage “an ounce of prevention is worth a pound of cure” holds particularly true for wallpaper removal. The process can be messy, involving water, chemical solutions, and debris. A meticulously prepared environment not only protects your belongings but also creates a safer and more organized workflow.
Protecting Your Workspace:
- Clear the Room: Remove all furniture from the room if possible. For larger items that cannot be moved, consolidate them in the center of the room and cover them completely with plastic sheeting. This prevents water, stripper, and wallpaper debris from accumulating on or staining your possessions.
- Protect Floors: Lay down heavy-duty plastic sheeting or canvas drop cloths over the entire floor area. Secure the edges with painter’s tape to the baseboards, creating a watertight seal. This is crucial as water and stripping solutions can damage hardwood, laminate, or carpet. For extra protection, consider placing old towels or rags along the base of the walls underneath the plastic to absorb any runoff.
- Cover Trim and Baseboards: Use painter’s tape to protect any unpainted wood trim or baseboards you do not wish to expose to moisture or chemicals.
- Seal Electrical Outlets and Switches: This is a critical safety step. First, turn off the power to the room at the circuit breaker. Remove the cover plates from all electrical outlets and light switches on the walls you are working on. Then, use painter’s tape to securely cover and seal the openings, preventing any liquid from entering the electrical boxes. According to the Occupational Safety and Health Administration (OSHA), it is imperative to ensure that work areas are kept clear of hazards and that electrical safety precautions are strictly followed, which includes preventing water from contacting live circuits.
- Ventilate the Room: Open windows and doors to ensure good air circulation, especially if you are using chemical stripping solutions. This helps dissipate fumes and maintains a healthier working environment.
- Prepare Your Tools: Gather all necessary tools and materials in one accessible location. Fill your spray bottle or garden sprayer with water or the mixed stripping solution. Have your scrapers, sponges, and trash bags ready.
Ensuring Personal Safety:
- Wear Safety Glasses or Goggles: Essential for protecting your eyes from splashes of water, chemical stripper, or flying debris, particularly when scraping or using a steamer.
- Use Rubber Gloves: Protect your hands from prolonged exposure to water, wallpaper adhesive, and chemical stripping solutions, which can cause skin irritation or dryness.
- Wear Appropriate Clothing: Long sleeves and pants are recommended to protect your skin. Choose old clothes that you don’t mind getting wet or stained.
- Consider a Face Mask/Respirator: If using chemical strippers, working in a poorly ventilated area, or if you suspect mold/mildew or lead paint (common in homes built before 1978), a respirator with appropriate filters is highly recommended to protect your respiratory system.
- Maintain a Stable Work Platform: Use a sturdy ladder or step stool for reaching high areas. Ensure it is placed on a stable, level surface and that you maintain three points of contact when ascending or descending. Never overreach; reposition the ladder as needed.
- Be Mindful of Electrical Hazards: Reiterate the importance of turning off power to the room at the circuit breaker and sealing outlets. Water and electricity are a dangerous combination.
By meticulously addressing these preparatory steps, you establish a solid foundation for a safe, clean, and ultimately successful wallpaper removal project, allowing you to focus on the task at hand with confidence and precision.
Post-Removal Wall Preparation: Cleaning and Repair
After the wallpaper is successfully removed, the critical next phase involves meticulously cleaning the walls and repairing any imperfections to ensure a smooth, uniform surface ready for its next finish, whether paint or new wallpaper. This stage is non-negotiable; skipping it will result in an uneven, unsightly finish that highlights every flaw. Proper post-removal preparation is fundamental to achieving a professional-grade aesthetic and ensuring the longevity of your new wall treatment.
The appearance of your newly painted or wallpapered walls is directly proportional to the quality of the surface preparation. Residual adhesive, minor tears, or small holes left unattended will be amplified by new paint or wallpaper, compromising the entire aesthetic. This phase is about creating a pristine canvas.
Step-by-Step Post-Removal Preparation:
-
Remove All Adhesive Residue: This is perhaps the most crucial step. Even if the wallpaper came off cleanly, there is almost always a thin, often invisible, layer of adhesive residue remaining.
- Warm Water and Sponge: For light residue, a clean sponge dampened with warm water can often wipe it away. Rinse the sponge frequently.
- Adhesive Remover: For stubborn or extensive residue, use a specialized wallpaper adhesive remover. Apply it according to the manufacturer’s instructions, allow it to dwell, and then scrub the wall gently with a sponge or soft brush.
- Vinegar Solution: A mixture of equal parts white vinegar and hot water can also be effective for dissolving residue. Apply, let sit for a few minutes, then wipe clean.
Verification: To ensure all adhesive is gone, run your hand over the wall. It should feel completely smooth, not tacky or bumpy. A flashlight held at an angle can also reveal any shiny spots of dried adhesive.
- Thoroughly Clean the Walls: Once all adhesive is removed, wash the entire wall surface with a solution of TSP (trisodium phosphate) substitute or a good quality degreaser/wall cleaner mixed with warm water. This step removes any remaining stripper residue, dirt, grease, and ensures the wall is pristine for priming. Rinse the walls with clean water using a damp sponge, wiping from top to bottom, and allow them to dry completely.
-
Inspect for Damage: With the walls clean and dry, carefully inspect every square inch for any damage. Look for:
- Small holes from picture nails or anchors.
- Cracks, hairline or larger.
- Gouges or scrapes from the removal process.
- Tears in the drywall paper (if applicable).
- Uneven areas or bumps.
-
Repair Imperfections:
- Small Holes and Cracks: Use spackle or lightweight joint compound to fill small holes and hairline cracks. Apply with a putty knife, ensuring it’s slightly overfilled.
- Gouges and Larger Damage: For deeper gouges or larger areas of damage, use a more substantial wall repair compound or standard joint compound. Apply in thin layers, allowing each layer to dry completely before applying the next.
- Torn Drywall Paper: If the paper face of drywall has torn, feather the edges of the tear with fine-grit sandpaper. Then, apply a thin coat of oil-based primer or an acrylic primer-sealer over the torn area to seal it. This prevents future bubbling when new paint or water-based primer is applied. Once dry, apply a thin layer of joint compound to smooth the area.
- Sand Repairs Smooth: Once all repair compounds are completely dry (this can take several hours, or overnight for thicker applications), gently sand the repaired areas with fine-grit sandpaper (120-180 grit) or a sanding sponge. The goal is to make the repaired areas perfectly flush and smooth with the surrounding wall. Wipe off all sanding dust with a damp cloth.
-
Apply Primer: Priming is a crucial final step. Primer is a preparatory coating applied to a surface before painting, designed to improve paint adhesion, provide a uniform surface, and seal porous substrates.
- Type of Primer: We recommend using a high-quality, oil-based primer or a stain-blocking acrylic/latex primer-sealer. These primers are excellent at sealing any residual adhesive that might reactivate under new paint, preventing bleed-through or bubbling. They also create a uniform surface porosity, ensuring consistent paint absorption and a smooth finish.
- Application: Apply one to two coats of primer evenly across the entire wall surface, following the manufacturer’s instructions for drying times between coats. Ensure complete coverage.
After the primer has dried, your walls are now a pristine, uniform canvas, fully prepared for their next decorative treatment, whether it’s a fresh coat of paint, new wallpaper, or a curated wall mural from Starhouse.
Common Mistakes to Avoid During Wallpaper Removal
Avoiding common pitfalls during wallpaper removal is as crucial as knowing the correct techniques, as these errors can lead to extensive wall damage, prolong the project, and increase repair costs. Many amateur mistakes stem from impatience or inadequate preparation, resulting in a compromised wall surface that is unsuitable for subsequent finishes. Precision and foresight are paramount to a smooth process.
While wallpaper removal is a DIY-friendly project, certain missteps can quickly turn it into a frustrating and damaging ordeal. Recognizing and actively avoiding these common errors will save you significant time, effort, and money in the long run.
Key Mistakes to Sidestep:
-
Inadequate Wall Assessment:
Mistake: Failing to identify the wallpaper type or assess the underlying wall material (drywall vs. plaster, primed vs. unprimed). This leads to using the wrong removal method, causing damage.
Correction: Always perform a test patch and thoroughly inspect the wall construction before starting. This guides your choice of tools and technique.
-
Skipping Preparation Steps:
Mistake: Not covering floors, furniture, or sealing electrical outlets. This results in water damage, chemical stains, and significant safety hazards (electrical shock).
Correction: Dedicate ample time to thoroughly protect your workspace and follow all safety protocols, including turning off power to the room at the circuit breaker and taping over outlets.
-
Insufficient Soaking/Steaming Time:
Mistake: Rushing the process by not allowing enough time for water or stripper solution (or steam) to fully penetrate and dissolve the adhesive. This causes the wallpaper to tear and leaves substantial adhesive residue or paper backing.
Correction: Be patient. Allow the solution to soak for the recommended 15-20 minutes (or longer for stubborn adhesives). For steaming, hold the plate against the wall for the full recommended duration. Re-wet or re-steam as needed.
-
Aggressive Scraping:
Mistake: Using excessive force or a sharp-edged scraper, resulting in gouges, divots, or tears in the drywall paper or plaster. This creates extensive repair work.
Correction: Use a wide scraper with rounded corners and hold it at a shallow angle to the wall. Apply gentle, consistent pressure. The wallpaper should come off easily if properly softened. If it resists, re-wet or re-steam.
-
Over-Wetting Drywall:
Mistake: Saturating drywall excessively, causing the paper face to delaminate, bubble, or become soft and mushy. This requires significant and costly drywall repair or replacement.
Correction: Apply water or stripper in measured amounts, focusing on small sections. Avoid letting water run down the walls or pool at the base. Use a sprayer for even application and monitor closely.
-
Not Removing All Adhesive Residue:
Mistake: Leaving behind a tacky film or small bits of dried adhesive. When new paint or primer is applied, this residue can reactivate, causing bubbling, peeling, or a bumpy finish.
Correction: After wallpaper removal, meticulously clean the walls with warm water, an adhesive remover, or a TSP substitute. Run your hand over the entire wall surface to ensure it feels perfectly smooth. Use a strong light source to check for shiny spots of dried glue.
-
Skipping Priming:
Mistake: Painting directly over a wall that previously had wallpaper, especially if any adhesive residue remains or if the drywall paper was slightly disturbed. This can lead to paint bubbling, uneven sheen, or stains bleeding through.
Correction: Always apply a high-quality, oil-based or stain-blocking primer-sealer after cleaning and repairing the walls. This seals the surface, prevents issues, and provides a uniform base for paint.
-
Ignoring Safety Gear:
Mistake: Not wearing safety glasses, gloves, or a mask. This risks eye injury from splashes, skin irritation from chemicals, or respiratory issues from fumes or dust.
Correction: Always wear appropriate personal protective equipment (PPE) as outlined in the “Preparation is Key” section. Safety is paramount.
By being mindful of these common errors and proactively implementing the correct procedures, you can ensure a successful and less stressful wallpaper removal experience, leaving your walls in pristine condition for their next decorative chapter.
Troubleshooting Stubborn Areas and Adhesive Residue
Even with the most meticulous approach, encountering stubborn sections of wallpaper or persistent adhesive residue is a common challenge that requires specific, targeted strategies to resolve without damaging the underlying wall. These recalcitrant areas often indicate a particularly strong bond, multiple layers, or an impermeable surface that requires a more aggressive or patient intervention. Effective troubleshooting ensures a uniformly clean and smooth wall surface.
When a section of wallpaper refuses to yield or a sticky film stubbornly adheres to the wall, it’s not a sign of failure but a cue to adjust your technique. These situations often demand a combination of intensified methods and specialized products.
Strategies for Stubborn Wallpaper Sections:
-
Re-Score and Re-Saturate: For areas that refuse to peel or scrape, the primary issue is almost always insufficient penetration of moisture or stripper.
- Aggressive Scoring: Use your scoring tool to make additional perforations, especially in areas that seem resistant. Ensure the entire area is thoroughly perforated, but still avoid deep gouging.
- Extended Soak Time: Apply a generous amount of warm water or stripping solution to the stubborn area and allow it to soak for a longer duration—20 to 30 minutes, or even longer if necessary. Cover the area with plastic sheeting temporarily to prevent evaporation and keep the solution active.
-
Employ the Steamer: If soaking and scraping are proving ineffective, a wallpaper steamer is your next most powerful tool. The intense heat and moisture from steam can penetrate layers and adhesives that liquid solutions struggle with.
- Focused Application: Hold the steamer plate firmly against the stubborn section for 30-45 seconds, allowing the steam to work its magic.
- Immediate Scraping: As soon as you remove the steamer, immediately scrape the softened wallpaper. The adhesive will re-harden quickly as it cools.
- Repeat: You may need to repeat this process multiple times for particularly difficult patches.
- Consider Stronger Strippers: For extremely tenacious wallpaper or multiple layers, a more potent chemical wallpaper stripper may be necessary. Always read and follow the manufacturer’s instructions carefully, ensure excellent ventilation, and wear full personal protective equipment (gloves, safety glasses, respirator). Test in an inconspicuous area first.
- Patience and Small Sections: Avoid the temptation to pull or scrape aggressively. Work in very small sections (e.g., 6×6 inches) with focused application of your chosen method. This precision prevents widespread wall damage.
Strategies for Persistent Adhesive Residue:
Even after the wallpaper itself is removed, a sticky film or dried adhesive chunks can remain. This residue must be completely removed for a smooth, paint-ready surface.
- Warm Water and Sponge: For light, tacky residue, often the simplest solution is the most effective. Use a clean sponge dampened with warm water and firmly wipe the walls. Rinse the sponge frequently in a bucket of clean water. Change the water regularly to avoid spreading dissolved adhesive.
- Vinegar Solution: A mixture of equal parts white vinegar and hot water is an excellent natural adhesive remover. Spray it onto the residue, let it sit for 5-10 minutes, then scrub with a sponge or a soft-bristled brush. The acidity helps break down the glue.
-
Commercial Adhesive Removers: For very stubborn, dried-on adhesive, a specialized commercial wallpaper adhesive remover is highly effective. These products are formulated to dissolve various types of glues.
- Application: Apply the remover directly to the residue according to the product’s instructions.
- Dwell Time: Allow the product to penetrate for the recommended dwell time (usually 5-15 minutes).
- Scraping/Wiping: Use a plastic scraper or a stiff-bristled brush to gently agitate and remove the softened adhesive. Wipe clean with a damp sponge.
- TSP Substitute: After removing the bulk of the residue, a final wash with a TSP (trisodium phosphate) substitute or a strong degreaser will thoroughly clean the walls, removing any remaining film, grease, and stripper residue. Always rinse thoroughly with clean water afterward.
- Light Sanding: For very thin, stubborn films of adhesive that resist chemical removal, very light sanding with fine-grit sandpaper (180-220 grit) can be used. Be extremely cautious, especially on drywall, to avoid sanding through the paper face. This should be a last resort and performed with minimal pressure.
- The “Flashlight Test”: After cleaning, let the walls dry completely. Then, shine a flashlight across the wall surface at a shallow angle. Any remaining adhesive residue will often appear as shiny, uneven spots, indicating areas that require further cleaning.
Thoroughness in removing all adhesive residue is critical. Any remaining glue will compromise the adhesion of new paint or wallpaper, potentially leading to bubbling, peeling, or an uneven finish. Invest the time now to ensure a pristine surface for your next design vision.
When to Call a Professional: Recognizing Limitations
While many wallpaper removal projects are manageable for the diligent DIY enthusiast, recognizing when to enlist the expertise of a professional is a critical decision that can prevent irreversible damage, ensure safety, and ultimately save time and money. Certain complex scenarios or pre-existing conditions demand specialized knowledge, tools, and experience beyond the scope of a typical homeowner. Acknowledging these limitations ensures the integrity of your home’s structure and the quality of the final finish.
Knowing when to delegate is a hallmark of intelligent home management. Attempting to tackle an overly complex wallpaper removal job without the requisite skills can lead to significant structural damage, health hazards, or a result that falls short of professional standards, necessitating costly corrective work.
Key Indicators for Professional Intervention:
-
Suspected Lead Paint: If your home was built before 1978, there is a significant probability that lead-based paint was used on the walls underneath the wallpaper. Disturbing lead paint during removal can release hazardous lead dust, posing severe health risks, particularly to children and pregnant women.
- Professional Action: A professional wallpaper remover or lead abatement specialist has the training, equipment, and certifications to safely test for lead paint and remove wallpaper under strict containment protocols, minimizing exposure and ensuring proper disposal of contaminated materials.
-
Extensive Wall Damage or Unknown Substrate: If, during your initial assessment or test patch, you discover significant underlying wall damage (e.g., crumbling plaster, extensive drywall tears, water damage) or if the wall material is unfamiliar and reacts poorly to removal attempts.
- Professional Action: Professionals can accurately diagnose the underlying wall issues, repair them effectively, and adjust their removal technique to prevent further damage. They have experience with various historical wall types and their specific sensitivities.
-
Multiple, Heavily Adhered Layers: While a DIYer can tackle a few layers, an exceptionally thick build-up of many wallpaper layers, especially if painted over or adhered with extremely stubborn, decades-old adhesive, can be overwhelmingly labor-intensive and challenging to remove without damaging the wall.
- Professional Action: Professionals possess industrial-grade steamers, stronger chemical strippers, and specialized techniques to efficiently remove multiple layers without compromising the wall integrity, often completing the job in a fraction of the time.
-
Time Constraints or Physical Limitations: Wallpaper removal is a physically demanding and time-consuming process. If you have a tight deadline for renovation, lack the physical stamina, or simply don’t have the time to dedicate to a thorough job, professional help is invaluable.
- Professional Action: A professional crew can complete the job quickly and efficiently, allowing you to focus on other aspects of your renovation without personal strain or schedule delays.
-
Mold or Mildew Discovery: If you uncover significant mold or mildew growth beneath the wallpaper, particularly in large areas, it indicates a moisture issue that needs professional remediation.
- Professional Action: Mold remediation specialists can safely remove mold, address the underlying moisture problem, and ensure the wall is sanitized before any new finishes are applied, protecting your health and home.
-
High Ceilings or Difficult-to-Reach Areas: Removing wallpaper from very high ceilings, stairwells, or other inaccessible areas requires specialized scaffolding and safety equipment that most homeowners do not possess.
- Professional Action: Professionals have the necessary equipment and training to safely access and work on high and challenging surfaces, preventing falls and ensuring a consistent removal quality across the entire space.
In these situations, the initial investment in professional services often translates to significant savings by preventing costly repairs, mitigating health risks, and ensuring a superior, lasting finish. Starhouse advocates for informed decisions, and knowing when to call in an expert is a testament to both practicality and prudence in home design and maintenance.
Wallpaper Removal Methods Comparison
| Method | Primary Application | Pros | Cons | Ideal Wallpaper Types |
|---|---|---|---|---|
| Dry Stripping / Peel-Off | Wallpaper with strippable or peelable backing. |
|
|
Peel-and-stick, Non-woven, Solid Sheet Vinyl (face layer). |
| Soaking & Scraping (Water/Stripper) | Traditional paper, vinyl-coated paper (after scoring), paper backing. |
|
|
Traditional Paper, Vinyl-Coated Paper, Paper Backing. |
| Steaming | Stubborn wallpaper, multiple layers, old/hardened adhesive, painted wallpaper. |
|
|
Multiple Layers, Heavily Painted Wallpaper, Old Paper Wallpaper with tenacious adhesive. |
| Chemical Strippers (Specialized) | Extremely difficult adhesives, painted wallpaper, heavy-duty commercial wallpaper. |
|
|
Very Old Adhesives, Painted Wallpaper (when other methods fail), Commercial-grade wallpapers. |
Sources
- 1926.25 – Housekeeping. | Occupational Safety and Health Administration
- How to Strip Wallpaper – This Old House
Frequently Asked Questions
Can I paint directly over old wallpaper?
Painting directly over old wallpaper is generally not recommended, as it often leads to bubbling, peeling, or visible seams over time. The moisture from the paint can reactivate the wallpaper adhesive, causing it to lift, and any imperfections in the wallpaper will be magnified by a fresh coat of paint. For a durable and professional finish, complete removal is always the superior approach.
How do I remove wallpaper without damaging drywall?
To remove wallpaper without damaging drywall, it is crucial to avoid over-saturating the wall with water or stripper, use a scoring tool judiciously, and employ a wide, flexible scraper at a shallow angle. Always perform a test patch in an inconspicuous area to assess the wall’s reaction, and allow sufficient soak time for the adhesive to soften before gently scraping.
What is the best solution for removing wallpaper?
The best solution for removing wallpaper depends on the wallpaper type; warm water alone is effective for some, but a commercial wallpaper stripping concentrate mixed with warm water is highly recommended for most paste-applied wallpapers. For stubborn adhesives or multiple layers, a wallpaper steamer is often the most effective method, utilizing only water vapor.
How long does wallpaper removal typically take?
Wallpaper removal typically takes between 4 to 8 hours for a standard 10×12 foot room, though this can vary significantly based on the wallpaper type, the number of layers, the strength of the adhesive, and the condition of the underlying wall. Complex projects with multiple layers or tenacious adhesives can extend the duration to several days.
Do I need to prime walls after removing wallpaper?
Yes, it is imperative to prime walls after removing wallpaper, even if they appear perfectly clean. A high-quality oil-based or stain-blocking acrylic primer-sealer will seal any residual adhesive, prevent stains from bleeding through new paint, and create a uniform surface for optimal paint adhesion and a smooth finish.
Can I use a fabric softener solution to remove wallpaper?
Yes, a solution of fabric softener and warm water (typically 1 part fabric softener to 1 part water) can be an effective, low-cost alternative for dissolving wallpaper adhesive. The softening agents help break down the glue, making the wallpaper easier to scrape. Always test this solution in an inconspicuous area first to ensure it does not stain the wall or leave a difficult-to-remove residue.
What should I do if I find mold behind the wallpaper?
If you find mold behind the wallpaper, immediately stop removal, ensure proper ventilation, and wear a respirator and gloves. For small areas (less than 10 square feet), you can clean it with a solution of water and detergent, ensuring the area is completely dry afterward. For larger or persistent mold growth, it is crucial to consult a professional mold remediation specialist to address the underlying moisture issue and safely remove the contamination.
Conclusion: Your Walls, Reimagined
Removing wallpaper is more than just stripping a surface; it’s the foundational step in reimagining your living space, preparing a fresh canvas for new aesthetics and personal expression. This guide has provided a precise, authoritative roadmap through every stage of the process, from initial assessment and tool acquisition to meticulous removal techniques and critical post-removal preparation. By adhering to these detailed instructions, you gain the confidence and capability to transform your walls with precision and achieve a professional-grade finish.
At Starhouse, we believe that every element of your home should reflect your unique vision and style. The removal of old wallpaper marks the beginning of a transformative journey, opening up endless possibilities for design and decor. Whether you envision a minimalist painted wall, a bold new wallpaper, or a curated gallery, the quality of your preparation directly influences the impact of your final design.
As you embark on these exciting home transformations, consider what truly inspires you. What colors, textures, and moods do you want to invite into your sanctuary? Starhouse is dedicated to curating an exquisite collection of home furnishings, textiles, lighting, and wall décor that aligns with your aspirations for elegant, comfortable living. We are building a collection specifically designed to inspire and elevate every room in your home.
We are meticulously curating our catalog to bring you the finest in home and décor. We invite you to be a part of this exciting journey. Share your design dreams and tell us what you’re looking for to make your space truly yours. By doing so, you’ll gain early access to our exclusive collections and be among the first to experience the Starhouse difference. Visit Starhouse USA online to tell us what you’re looking for and unlock early access.