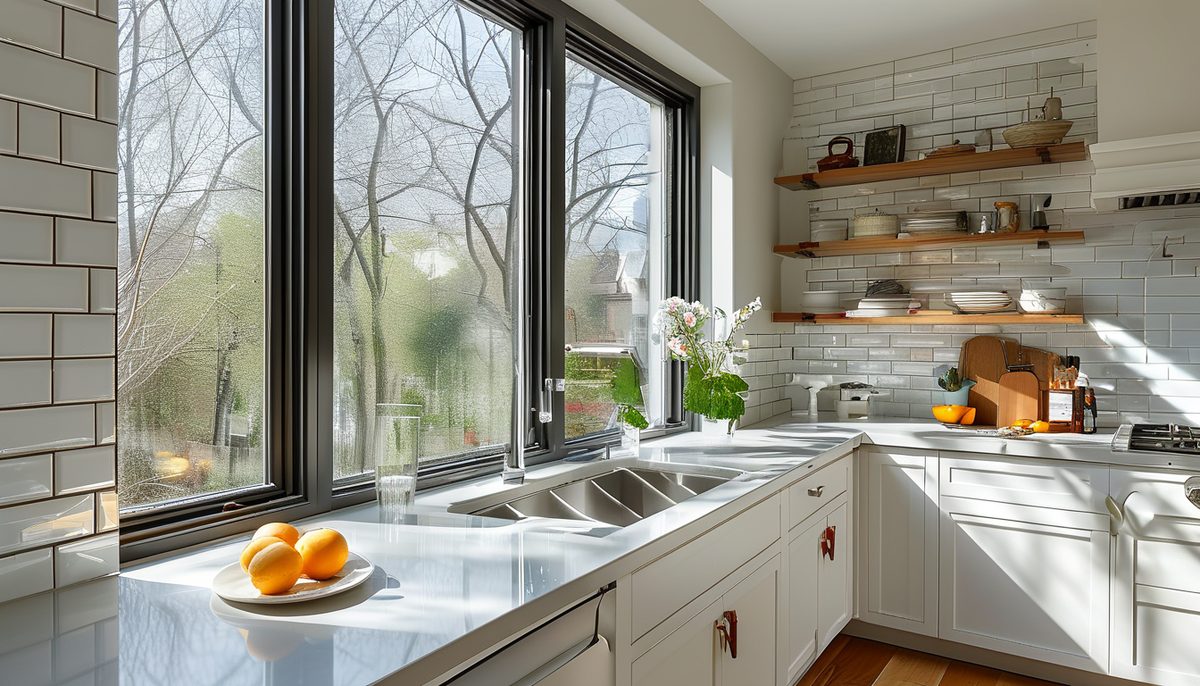
Decide the height before the material. The standard gap between a countertop and the underside of the wall cabinets is 18 inches, though 16 to 20 inches is all common depending on cabinet mounting height. That gap is your canvas, and there are only three real choices for how much of it you cover.
Height is the first decision
A 4-inch ledge, matched to the countertop material, is the cheapest option and the one that reads as builder-grade in almost every kitchen. It protects the wall where the counter meets it and nothing more. If a 4-inch ledge already exists and you want it gone, know that removing it usually damages the drywall behind, so plan on patching before any new tile goes up.
Full-height, floor of the counter to the bottom of the uppers, is the default for a reason: it gives the wall one continuous surface with no awkward stopping line, and it is easier to wipe. This is the version to price first.
Counter to ceiling, above and around the range or on a wall with open shelving, turns the backsplash into the room’s main surface. It costs more, and on a wall with a hood it looks intentional in a way that stopping at the shelf line does not. If you run tile to the ceiling behind a range, run it the full width of the range wall rather than a narrow column, or the panel reads as an afterthought.
Where a run of counter has no upper cabinets, such as a sink under a window or a stretch beside a fridge, pick a stopping height and hold it across the whole kitchen. Common resolutions: continue to the underside of the window casing, or set a horizontal line at the same height as the bottom of the adjacent upper cabinets and carry it around. Changing height mid-wall without a physical reason is what makes a kitchen look pieced together.
Materials, and what each one costs you in labor
Ceramic subway tile in 3 by 6, 4 by 12, or 2 by 8 remains the most forgiving option. It cuts cleanly with a wet saw, it is easy to source more of, and a matte glaze hides water spotting better than gloss. The 3 by 6 is the most recognizable and therefore the most anonymous; 2 by 8 and 4 by 12 give the same simplicity with a longer, less dated proportion.
Zellige and handmade-look tile has irregular edges and a variable glaze that catches light differently across the wall. It is the single most effective way to make a plain kitchen look considered. The trade-offs are real: the tiles vary in size, so layout takes longer, lippage between tiles is part of the look rather than a defect, and installers often charge more per square foot for it. Order 15 to 20 percent overage instead of the usual 10, because you will reject some pieces.
Porcelain or quartz slab run up the wall gives a seamless surface with no grout lines at all. On a wall behind a cooktop, that means nothing to scrub. It is the most expensive path, it requires exact templating, and it is unforgiving of any later change, because cutting a new outlet into an installed slab is a specialist job.
Glass tile and mirrored panels bounce light, which helps a galley kitchen with one window. Glass shows every adhesive inconsistency behind it, so the substrate has to be flat and the adhesive troweled evenly, and white thinset is used rather than gray.
Peel and stick vinyl tile is a genuine option, not just a compromise, provided it goes on a smooth, cured, satin or semi-gloss painted wall. It handles splashes and wipes clean. It does not belong directly behind a gas burner, where the heat and grease combination will loosen the adhesive over time. Leave a gap or use a heat-tolerant material in that zone.
PVC and WPC wall panels cover a full backsplash run in a few large pieces, which means almost no grout and a short install. Panels with a tile-look face and a groove pattern give texture without the labor of setting individual pieces, and they cut with a fine-tooth blade or a utility knife. Seal the edges and any penetrations with a mildew-resistant sealant, and treat them the same way as vinyl near an open flame.
Pressed metal and tin-look panels suit a period kitchen and reflect a lot of light. They dent, so keep them away from the zone where pots get set down.
Layout patterns and how to set them out
The pattern changes the wall more than the tile color does. Running bond, offset by half a tile, is the default and the most tolerant of an out-of-level counter, because the eye has no long continuous line to compare against. An offset of one third rather than one half looks less standard and is a free change at layout time.
Stack bond, with grid lines aligned both directions, is clean and modern and it exposes every error. Do not use it unless the wall is flat, the counter is level, and the tile is rectified with consistent edges. A third of an inch of drift across 8 feet is invisible in running bond and glaring in a stack.
Vertical stack, with subway tiles turned on end, adds apparent height in a kitchen with 8-foot ceilings and costs nothing extra. Herringbone at 45 or 90 degrees generates a lot of cuts and roughly 15 percent more waste, and it reads busy with a patterned countertop.
Before setting a single tile, dry lay the field on the counter and find the center. Balance the cuts so both ends of a run finish with a piece wider than half a tile. A sliver cut in an inside corner is the mark of an install that was started at the wrong end. Where the backsplash meets an outside corner or a window return, plan the cut to fall where the eye is least likely to land.
Grout color and joint width
Grout is a design decision, not a leftover. Matching the grout to the tile makes the wall read as one surface and quiets a busy pattern. Contrasting grout draws the grid and turns plain white subway tile into a graphic. Both work; picking without deciding does not.
Joint width follows the tile. Rectified tile with machine-cut edges takes a 1/16-inch joint. Standard pressed ceramic wants 1/8 inch, and handmade tile with irregular edges needs 1/8 to 3/16 inch just to absorb the size variation. Forcing a tight joint on an irregular tile guarantees a wandering grout line.
Use a stain-resistant grout formulation behind a range and around the sink. Standard cement grout in those two zones absorbs oil and turns a shade darker within a year, and no cleaner fully reverses it. Mid-tone grout, in warm gray or greige, hides normal kitchen life better than either bright white or black. White grout behind a cooktop is a maintenance decision more than an aesthetic one.
The joint where the tile meets the countertop is a movement joint and takes flexible sealant, not grout. Grout there cracks within a season as the counter and wall move at different rates.
Edges, terminations and the details that give it away
Every backsplash has to stop somewhere, and the exposed edge is where an install shows its quality. Options, roughly in order of cost:
- Bullnose or quarter-round trim tile in the same line. Simple and traditional, but confirm the trim exists in your tile before ordering, because plenty of lines have no matching bullnose.
- Metal edge profile set into the thinset with the tile, in brushed nickel, brass, black, or anodized aluminum. It gives a crisp modern edge and can pick up the cabinet hardware finish.
- Mitered edge on porcelain, where two tiles meet at 45 degrees for a hard corner with no trim. It is precise work and priced accordingly.
- Caulked raw edge. Acceptable on a glazed-edge tile whose exposed side is finished, and visibly unfinished on anything else.
Where the backsplash meets a window casing, stop the tile tight and caulk, rather than trying to die the tile into a bead of trim. Where it meets an outside corner into a doorway, either wrap the corner with a full tile or stop it at the corner with a profile. Stopping an inch short of a corner is the most common visible mistake in a self-installed backsplash.
The zone behind the range
This is the one area worth spending extra on, because it is the focal point and it takes the most abuse. A framed panel of patterned tile behind the range, set inside a border of the field tile, gives the kitchen a center without patterning the whole room. Size the panel to the range width plus the hood width, and keep its vertical centerline aligned with the range and the hood, not with the wall.
Practical notes for that zone: choose a material that tolerates heat and grease, keep the grout dark or stain-resistant, and confirm the clearance your range manufacturer requires between the cooktop and any combustible surface before installing a vinyl or composite panel there. Behind a gas range, a non-combustible material is the safer choice regardless of what the clearance table permits.
Outlets, switches and lighting
Outlets interrupt a backsplash more than anything else. Three ways to reduce the damage: mount them horizontally instead of vertically, so each one is a wide short break rather than a tall one; align them all at a consistent height above the counter; or move them under the upper cabinets so the tile field stays clean. Any change to outlet locations or orientation is electrical work with permit and inspection implications, so price it with an electrician before you plan the layout around it.
When outlets stay where they are, box extenders bring the receptacle flush with the new tile surface, and paintable or color-matched cover plates make them recede. A white plate on a dark tile field draws the eye to the one thing you did not want noticed.
Under-cabinet lighting changes how any backsplash looks, and it is unforgiving. A continuous linear fixture mounted toward the front edge of the cabinet washes the wall evenly. Puck lights mounted toward the back throw scallops of light and hard shadows that exaggerate every lippage between tiles. If your tile has texture or a handmade edge, mount the light forward.
Renter-friendly and low-commitment versions
If you cannot tile, you still have real options. Peel and stick vinyl tile over a clean, glossy or satin painted wall goes up in an afternoon and comes off with heat from a hair dryer. Removable wallcovering rated for kitchen use works on the sink wall behind a counter that stays reasonably dry, though not behind the range. Large-format wall panels can be installed on a cleat or with removable adhesive strips if you plan the seams around the cabinet runs.
Two rules for all of these: the wall must be clean of grease before anything sticks, which means degreaser and not just a wipe, and the paint underneath must be fully cured, which is 2 to 4 weeks after painting rather than 24 hours.
Color and contrast against what you already own
Work from the two largest surfaces already in the room, the cabinets and the countertop. With a busy granite or a heavily veined quartz, the backsplash should be plain: a solid, low-contrast field. With plain solid-surface counters, the backsplash is where pattern belongs.
With white or light cabinets, a mid-tone backsplash gives the kitchen a horizon and keeps it from reading as a white box. With dark or saturated cabinets, a light backsplash keeps the space from closing in, and a tonal one in the same family as the cabinets reads richer and more custom. With wood cabinets, match the undertone: warm oak and cool gray tile fight each other, and it is the tile that loses.
Sequence and the mistakes that cost the most
Order of operations: cabinets, then countertop templated and installed, then backsplash, then plumbing and appliance reconnection. Tiling before the counter is set is how you end up with a gap you cannot close and a support ledge the fabricator will not template against.
- Buying tile without checking whether the line includes trim pieces, then discovering it at the edge.
- Skipping the dry layout and ending a run with a half-inch sliver.
- Grouting the counter-to-tile joint instead of using flexible sealant.
- Using white grout behind a gas range and regretting it every time you cook.
- Installing peel and stick over textured or freshly painted walls.
- Ordering exactly the square footage with no overage, which leaves nothing for breakage or a future repair from the same dye lot.
- Choosing a strong pattern for the full run when the countertop is already the busiest thing in the room.
The backsplash is the smallest expensive surface in a kitchen, usually 25 to 45 square feet. That is small enough that a better material is affordable and large enough that the wrong one is visible from every part of the room.