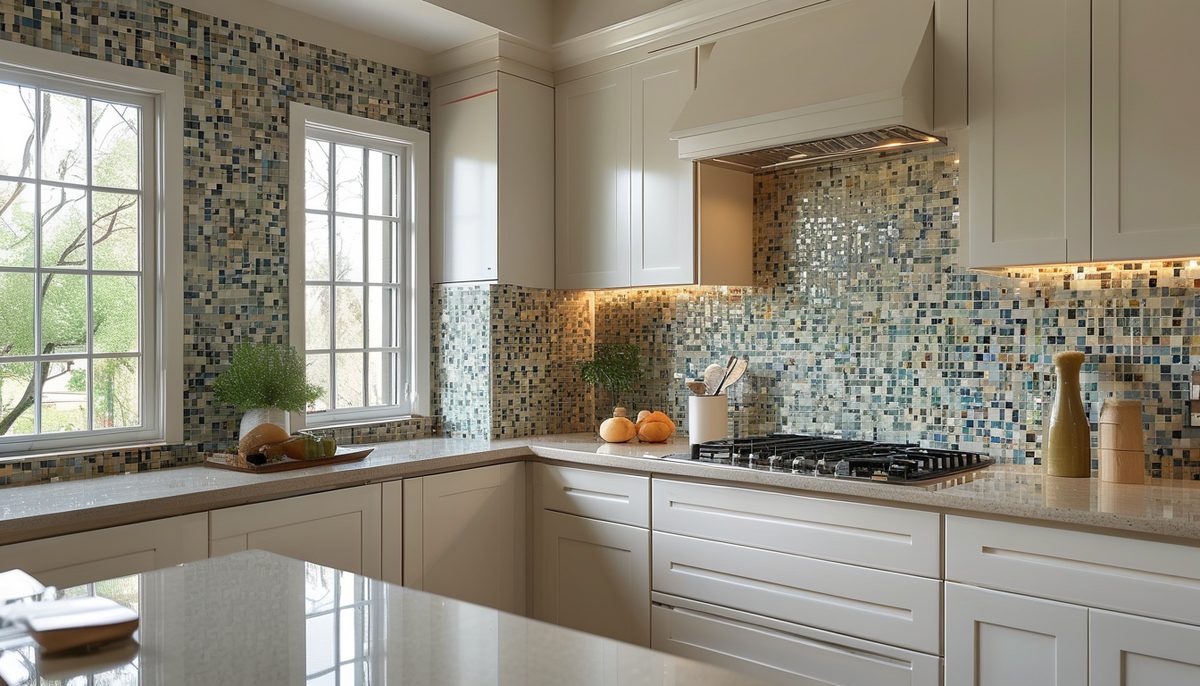
The tile you choose sets the color. The pattern sets the price, the waste factor and the difficulty, and most people pick it last. Reverse that order. A 3 by 6 ceramic in a straight running bond and the same tile in a herringbone are the same material and can be a two-to-one difference in labor, because one is a day of setting and the other is a day and a half of cutting.
Every pattern below is described by three things that matter to the outcome: how much the layout forgives an out-of-square wall, how many cut edges it generates, and what grout joint it needs.
Running bond, and why the offset matters
Running bond is the classic brick layout, each row shifted relative to the one below. It is the default for subway tile in 3 by 6, and it works for the same reason brickwork does: the staggered joints hide small variations in the wall and in the tile itself.
The offset is a real decision. A 50 percent offset, each tile centered on the joint below, is the traditional look. A 33 percent offset, each tile shifted by a third, reads slightly more contemporary and, more importantly, solves a physical problem. Tile is not perfectly flat; long pieces have a slight crown in the middle. Set at a 50 percent offset, the crown of one tile meets the end of the tile above and you get lippage, a ridge you can feel with a fingertip and see under a light. That is why most manufacturers of tile longer than about 15 inches specify a maximum one-third offset. With 4 by 12 and 2 by 8 formats the rule is worth following even when it is not printed on the box.
Running bond generates the fewest cuts of any pattern, roughly one cut per row, and the cuts land at the ends where a cabinet or a corner conceals them. Order about 10 percent extra.
The variations are cheap. Run 4 by 12 horizontally for a wide, low-slung look that makes a short backsplash band feel longer. Use a grout color one or two steps off the tile to make the pattern legible rather than a flat sheet of white.
Stack bond: the grid that shows every error
Stack bond lines the tiles up in a strict grid, joints continuous both directions. It reads as modern, calm and architectural, and it is the least forgiving layout there is.
Continuous joints act like a ruler laid against your wall. If the wall is out of plumb by 1/4 inch over 4 feet, the vertical grout lines will show it, and there is no stagger to disguise the drift. The same goes for tile that is not perfectly rectified: any variation in tile length accumulates along a row.
Use it with rectified porcelain or a good ceramic, on a wall you have checked with a level, and dry-lay a full row before committing. Stack bond with a large-format tile, say 12 by 24 turned so the grid is wide and low, is one of the cleanest backsplashes available. Stack bond in a small handmade tile with irregular edges is a fight you will lose.
Cuts are minimal and waste sits around 10 percent, but the setting time is longer because every tile has to be checked against two axes instead of one.
Vertical layouts
Turning a rectangular tile on end is the cheapest way to make a standard backsplash feel considered. Two versions exist. Vertical stack puts the tiles in columns with continuous joints; it emphasizes ceiling height and suits a full-height run behind a range. Vertical offset staggers the columns and reads softer.
Vertical layouts have a specific practical advantage in a standard 18-inch backsplash gap: a 3 by 6 tile set vertically gives you three rows of 6 inches, which lands at 18 inches with three uncut rows if your gap happens to cooperate. Measure before assuming, but where the arithmetic works you get a run with no horizontal cuts at all, which looks deliberate and saves labor.
The failure case is a short wall with tall tiles. A 4 by 16 tile set vertically in an 18-inch gap gives you one full tile and a 2-inch sliver, which is the worst-looking outcome in tile work. Either change the tile size or change the pattern.
Herringbone and chevron are not the same pattern
People use the words interchangeably and they are two different jobs.
Herringbone is rectangular tiles laid at right angles to each other in a zigzag, with the ends of one tile meeting the side of the next. The tiles are uncut in the field; the cuts happen only at the boundaries. It can be run at 45 degrees to the counter, the traditional orientation, or at 90 degrees, which produces a straighter, more graphic zigzag and generates fewer awkward edge cuts.
Chevron is different: the tiles are cut at an angle, usually 45 degrees, so the ends meet in a continuous point. Either you buy tile manufactured as chevron pieces, or your tile setter miters every single tile, which is why a chevron backsplash out of standard rectangles costs what it costs.
Herringbone in a 2 by 8 or 3 by 12 format has real presence and works best as a full-height feature behind the range rather than wrapped around the whole kitchen, where the pattern gets chopped up by upper cabinets and outlets. The boundary cuts are all angled, so plan the edges: a metal edge profile or a mitered return handles the exposed end far better than a row of raw angled cuts.
Waste on herringbone runs 15 percent and can reach 20 percent on a small wall with many boundaries. That is not padding; those angled offcuts genuinely cannot be reused.
Basketweave, pinwheel, and mosaic sheets
Small-format patterns almost always arrive on 12 by 12 mesh sheets, and the sheet is the thing you have to manage. The pattern within each sheet is perfect. The joint between two sheets is where it fails, because the mesh edge does not automatically continue the spacing.
A tile setter who works with mosaics knows to cut individual pieces off the edge of a sheet and hand-set them to keep the rhythm continuous, and to check the alignment of every sheet against a chalk line rather than trusting the previous sheet. If your bid is low and the installer is fast, this is the detail that gets skipped, and once the grout is in you can see the grid of 12-inch squares from across the room.
Basketweave, pinwheel with a contrasting dot, and penny round all suit a period kitchen, a butler’s pantry or a smaller wall. Their real cost is grout: a huge amount of joint length in a small area, which means more grouting labor and a surface with more to clean. In a kitchen behind a cooktop that gets used hard, that is a maintenance choice you make on purpose.
Picket, hexagon, arabesque, and handmade tile
Shaped tiles create the pattern themselves, so the layout question becomes where to stop rather than how to arrange.
Elongated hexagon and picket shapes have angled top and bottom edges, which means the run does not end in a straight line unless every piece at the boundary is cut. Under a cabinet where the top edge disappears, that is free. On a wall that ends in open air, the top row needs cutting or a trim piece, and cutting the points off a picket tile defeats the shape. Decide the termination before you buy.
Handmade and glazed terracotta tiles, the zellige family, are the exception to almost every rule above. They vary in size, they are not flat, they have wavy edges and pooled glaze, and that variation is the product. Set them tight with a joint around 1/16 to 1/8 inch, expect visible lippage, and do not use them in a stack bond that advertises how irregular they are. They also need a setter who is comfortable with them; a perfectionist tile setter and a handmade tile is an unhappy combination.
Grout decides how the pattern reads
Joint width comes from the tile, not from taste. Rectified porcelain with machine-cut edges can go to 1/16 inch. Standard ceramic with a slight size variation needs 1/8 inch to absorb it. Handmade tile takes whatever it takes. Squeezing a tile with size variation into a narrow joint makes the variation visible instead of hiding it.
Sanded grout is for joints of 1/8 inch and wider; unsanded is for narrower joints, where sand will not pack in. On polished marble or a soft glazed surface, sanded grout can scratch during application, so check the tile’s requirements first.
Cementitious grout is standard and needs sealing. Epoxy grout costs more in material and considerably more in labor, because it sets fast and cleans hard, but it does not stain and does not need sealing. Behind a range, in a household that cooks with oil daily, epoxy is the one upgrade that pays for itself in appearance five years out.
Color strategy is simpler than it looks. Grout matched to the tile makes the field read as one surface and the pattern nearly disappears; use it with a dramatic tile shape or a bold color. Grout in contrast draws the pattern in outline; use it with a plain tile where the geometry is the point. Mid-gray hides kitchen life better than either white or black, both of which show everything, in opposite ways.
Setting out: where the first tile goes
This is the step that separates a professional result from an amateur one, and it costs nothing.
Find the focal area first, usually the wall behind the range or the run behind the sink under a window. Center the pattern on that focal point, not on the corner of the room. If the range hood is centered on the range, the tile centerline should agree with it, and any partial tiles get pushed to the ends where cabinets meet the wall.
Check the counter for level before you set anything. Counters are usually close, but if yours drops 1/8 inch over 6 feet, tiles set off the counter will drift and the top row will show a wedge. Snap a level line for the first course and shim off the counter instead.
Plan the outlets. Countertop receptacles are spaced by code and they will land in your field. Where an outlet falls, the ideal is a symmetrical arrangement of cuts around it rather than one full tile and one 1/2-inch splinter. Moving a box horizontally by 2 inches during rough-in is easy, and it is impossible after the tile is up. If the tile is a strong pattern, look into a receptacle cover in a matching color and, where the wiring allows, orienting the boxes horizontally so they read as part of the grid.
Decide how the field terminates. Under upper cabinets it just stops. At an open end it needs a finished edge: a metal profile in the same plane as the tile, a bullnose piece if the line makes one, or a mitered tile edge, which is the best-looking and the most expensive. A raw cut edge left exposed is the single most common tell of a rushed job.
Order quantities and where each pattern belongs
Measure the actual area, wall by wall, and add for the pattern: 10 percent for running bond, stack bond and vertical stack; 15 percent for anything set at 45 degrees, including diagonal and herringbone; 20 percent for herringbone on a wall with many boundaries, and for handmade tile where you will reject some pieces. Buy it all in one order so the shade lot matches, and keep a full box after the job for future repairs.
Matching pattern to kitchen, briefly. A small kitchen with a lot of upper cabinets and a narrow band of exposed wall wants a quiet pattern: running bond, vertical stack, or a stack bond in a larger format. There is not enough continuous surface for a herringbone to read as anything but noise.
A kitchen with a full-height wall behind a range and open shelving instead of upper cabinets is where the strong patterns work, because there is unbroken area to see them across.
A kitchen with a busy countertop, meaning heavily veined stone, should take the plainest backsplash available. Two patterns competing in the same sightline cancel each other out, and the counter is the one you cannot change on a weekend.