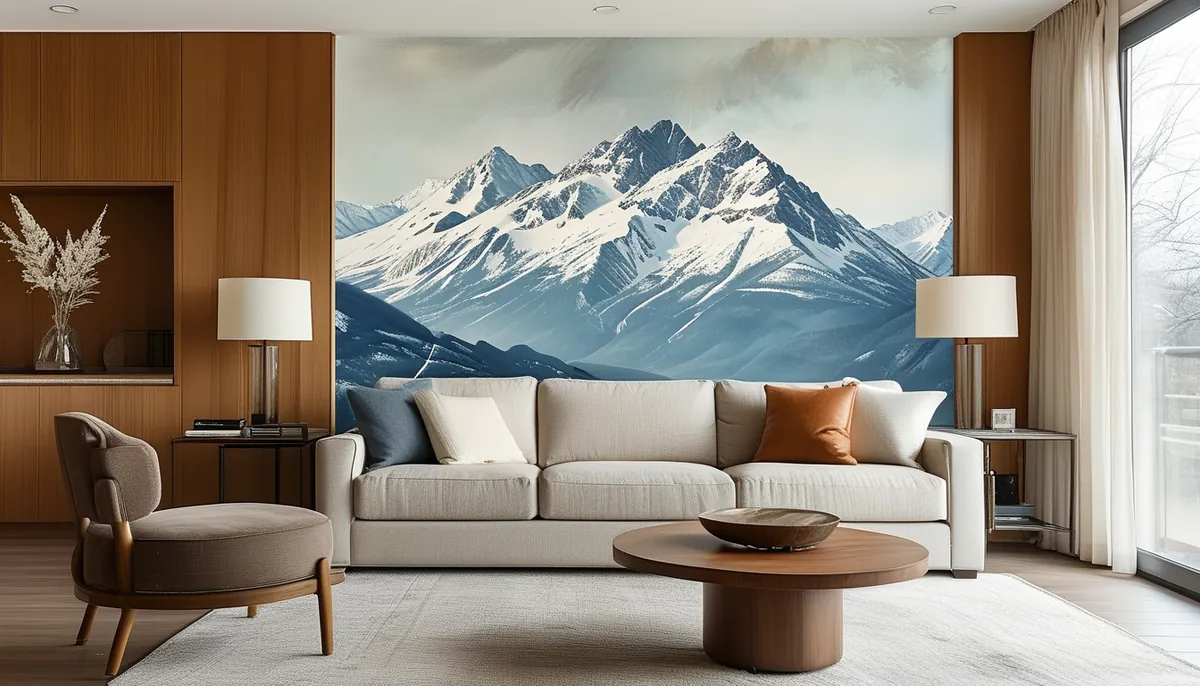
A mountain mural is sold by the wall, not by the roll. Before you look at a single image, measure the surface: width at the top, the middle, and the bottom, then height at the left, center, and right. Order to the largest reading in each direction and add 2 inches on every side. Walls in framed US houses are rarely square, and a mural cut to the smallest measurement leaves a wedge of bare drywall in one corner that no amount of furniture hides.
Measure the wall, then choose the image
Most murals arrive as vertical panels, usually 24 to 36 inches wide, hung in numbered sequence. The panel count follows the width you order, so a 12-foot wall might come as five or six strips. Two numbers decide whether the image survives the transfer: the printed size and the trim allowance. If a mural is printed to exactly 144 by 96 inches and your wall measures 144 and a half inches at the baseboard, you are short. Order the next size up and trim the excess.
Doors, windows, and closet openings do not reduce the size you buy. You still order the full rectangle and cut around the openings, because the image has to line up across them. Budget for that waste instead of trying to order a smaller sheet and piece it together.
Ceiling height drives the rest. A standard 8-foot wall gives you about 96 inches of finished height, but an image with a lot of sky reads better on 9- and 10-foot walls where the ridgeline can sit low. On an 8-foot wall, choose an image where the peaks occupy the upper third and the foreground stays simple.
Which mountain style holds up in a real room
Four treatments dominate, and they behave very differently once they are 10 feet wide.
- Photographic. Sharp, high contrast, literal. It reads as a window and it dates the fastest. It also punishes low-resolution files: at mural scale, a photo has to hold up from 3 feet away, not 15.
- Painterly and watercolor. Soft edges, muted palette, visible brush texture. Forgiving on scale and far easier to furnish against, because the eye stops trying to focus on detail.
- Line drawing and single color. Ridgelines rendered as contour lines on a flat ground. This is the one that works in a hallway or a small bedroom where a photographic scene would crowd the space.
- Topographic and layered paper-cut. Stepped bands of flat color. The most graphic option and the easiest to coordinate, since you can pull your trim or ceiling color straight out of one of the bands.
Fog and haze matter more than the peaks do. A mural with a pale, washed-out middle distance gives you somewhere to set a headboard or a sofa without the furniture fighting the image. A mural that is dark and detailed edge to edge leaves you nowhere to put anything.
Where the horizon line lands
This is the decision most people skip and then regret. Look at where the base of the mountains sits in the printed image and compare that height against your furniture.
Behind a bed, the top of a headboard usually lands 48 to 56 inches off the floor on a standard frame, and higher on a tall upholstered panel. If the mural puts its foreground detail below 50 inches, the headboard swallows it. Pick an image whose interesting content lives above 54 inches, or plan on a low platform bed with no headboard at all.
Behind a sofa, the back cushion sits around 30 to 34 inches, which is much less intrusive. A sectional against a mural wall is workable. A tall bookcase is not.
In a nursery or a kid’s room the logic inverts. Put the detail low, between 24 and 48 inches, where a child actually looks, and let the sky fill the top of the wall.
Peel and stick, prepasted, or paste-the-wall
Self-adhesive vinyl is the renter’s answer and the format most murals ship in. It repositions during install, comes off without a steamer, and tolerates a bathroom that has a working exhaust fan. It also telegraphs every bump in the wall, and it will not bond to flat or matte paint that has chalked. Peel and stick wants a smooth eggshell or satin surface that has cured at least three weeks after painting.
Non-woven paste-the-wall murals are the better long-term choice. You roll adhesive onto the drywall, hang the dry panel, and slide it into position. The material does not expand when wet, so panels butt cleanly instead of gapping as they dry, and years later it strips off in full sheets.
Prepasted sits in between: soak or spray-activate each panel, book it for the time printed on the instructions, then hang. Cheaper, messier, and less forgiving of a long open time on a hot day.
Prep and hanging, panel by panel
Skim any ridged drywall seams and sand them flat. Prime bare or patched drywall with a wallcovering primer, not just paint, because a mural pulled off unprimed drywall takes the paper facing with it.
Snap a plumb line for the first panel rather than trusting the corner. Start with the panel carrying the focal point instead of the left edge, so any drift you accumulate ends up in a corner rather than splitting a peak.
Overlap or butt the seams exactly as the instructions specify and hold to one method. Mixing them across a six-panel mural shifts the image by an inch by the time you reach the far side. Work each panel from the center outward with a plastic smoother rather than a rag, and keep a fresh blade and a wide taping knife for trimming at the ceiling and baseboard. Change the blade every two or three cuts, because a dull edge tears vinyl instead of slicing it.
Cut outlets last. Kill the breaker, pull the cover plates, hang straight over the box, then slice an X and trim back to the opening.
Coordinating the other three walls
Sample the mural, not the paint chip. Pull two colors out of the printed image: the palest value in the sky for the adjacent walls and a mid-tone from the ridgeline for trim or a closet door. Painting the other three walls a bright white next to a muted, hazy mural makes the mural look dirty by comparison.
Ceilings are the exception worth breaking. On a low room, carrying the sky color from the mural onto the ceiling makes the wall feel like it continues rather than stopping at a hard line.
What goes wrong
Panels hung out of order. They are numbered for a reason, and mountain imagery is unforgiving of a swap because ridgelines never repeat.
Centering by eye. Measure the wall center, mark it, center the image on that mark, and check what happens at both ends before you commit the first strip.
Ignoring a sloped ceiling. On a knee wall or under a stair, the mural has to be ordered oversized and cut on the rake. There is no fixing that after the fact.
Papering all four walls. One wall of mountains reads as a view. Four walls reads as a diorama, and it makes a 12-by-12 bedroom feel closed in rather than open.