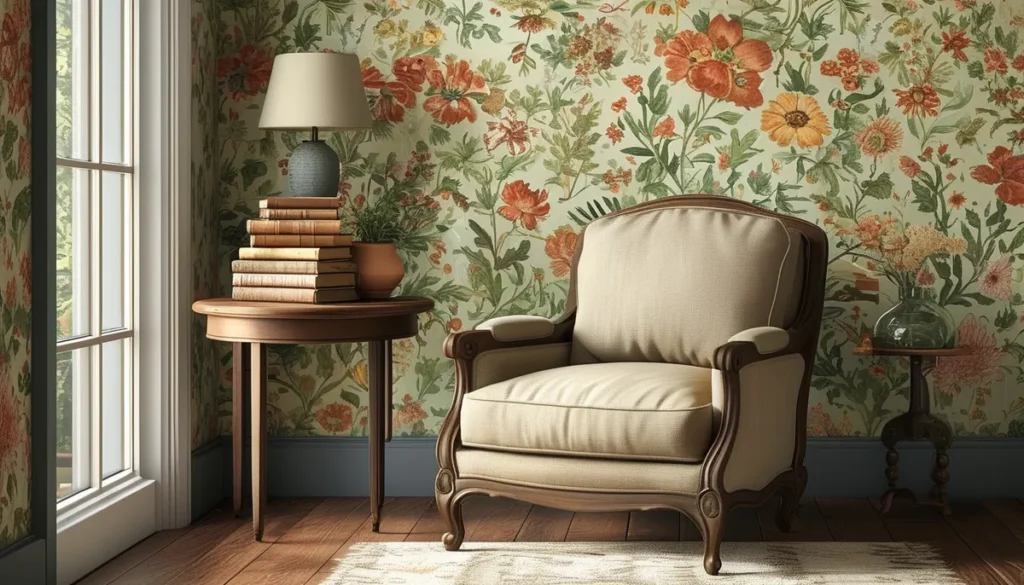
A botanical wall mural brings the outdoors in, creating a vibrant and calming atmosphere. Before you buy, understand the different types of materials available and how they affect the final look and installation process.
Choosing the right botanical wall mural material
The material of your botanical wall mural impacts its durability, texture, and ease of installation. Most murals are printed on a paper or vinyl substrate. Paper options offer a more traditional feel and are often more budget-friendly, but they can be less forgiving during installation and are more susceptible to moisture damage. Vinyl-backed options, on the other hand, are more durable, washable, and can hide minor imperfections in your wall surface. They are also generally easier to apply and remove, making them a popular choice for high-traffic areas or rental properties.
Non-woven paper murals
Non-woven paper is a popular choice for botanical wall murals. It’s made from a blend of natural and synthetic fibers, giving it strength and stability. Unlike traditional paper wallpapers, non-woven materials are breathable and resist shrinking or expanding with humidity changes. This makes them easier to work with, as they are less likely to tear during application. The matte finish of non-woven paper is excellent for showcasing detailed botanical prints without glare.
Vinyl-coated murals
For areas prone to moisture or frequent cleaning, such as kitchens or bathrooms, vinyl-coated botanical wall murals are an excellent option. The vinyl layer provides a protective barrier, making the mural water-resistant and easy to wipe clean. This durability comes at a slightly higher cost, but the longevity and ease of maintenance often justify the investment. Vinyl murals can have a slight sheen, which may be a consideration depending on your desired aesthetic.
Peel and stick murals
Peel and stick botanical wall murals offer the ultimate in DIY convenience. These murals are printed on a self-adhesive vinyl material that can be repositioned during installation. This is a significant advantage, especially for beginners, as it allows you to correct mistakes without damaging the mural or the wall. Peel and stick options are ideal for renters or anyone who likes to change their decor frequently. While generally durable, they might not be as long-lasting as traditional pasted wallpapers in very humid environments.
Design considerations for your botanical mural
The world of botanical wall murals is vast, offering designs from delicate floral patterns to lush jungle scenes. When selecting a design, consider the overall style of your room and the mood you wish to create.
Tropical and jungle themes
These murals feature bold, vibrant foliage like palm leaves, monstera, and exotic flowers. They are perfect for creating a statement piece in a living room, dining room, or bedroom. A well-chosen tropical mural can transport you to a faraway paradise, adding energy and a sense of escapism to your space. Ensure the scale of the print complements the size of your room; an overly large pattern can overwhelm a small space.
Floral and botanical illustrations
For a more classic or subtle approach, consider murals with intricate floral illustrations or delicate botanical drawings. These can range from vintage-inspired wildflower bouquets to realistic renderings of specific plant species. They work well in bedrooms, studies, or even as an accent wall in a living area, adding a touch of natural elegance without being overpowering. You can explore exquisite Chinoiserie mural wallpaper for a similar yet distinct artistic style.
Minimalist green leaf designs
If you prefer a more modern and understated look, minimalist green leaf designs offer a sophisticated way to incorporate nature. Think simple line drawings of leaves, subtle watercolor effects, or monochromatic prints. These designs add texture and a natural element without dominating the room, making them versatile for various decor styles.
Preparing your walls for a botanical mural
Proper wall preparation is crucial for a seamless and long-lasting installation of your botanical wall mural. Skipping these steps can lead to bubbles, peeling, or an uneven finish.
Clean and smooth the surface
Start by thoroughly cleaning your walls. Remove any dust, grease, or old wallpaper adhesive. Use a mild detergent and water solution, then rinse and allow the walls to dry completely. For optimal adhesion, especially with non-woven or vinyl murals, the wall surface should be smooth. Fill any holes or cracks with spackle and sand them smooth once dry. If you have textured walls, consider using a primer or a specialized smoothing compound to create a uniform surface.
Prime the walls
Priming your walls is a vital step, particularly if you are applying a pasted mural over a dark paint color or a previously wallpapered surface. A good quality primer will create a uniform surface, improve adhesion, and prevent the underlying color or pattern from showing through your new mural. It also makes future removal easier. For peel and stick murals, priming is often recommended to ensure the best grip, though some manufacturers advise against it. Always check the specific instructions for your chosen mural.
Installation steps for your botanical wall mural
The installation process will vary slightly depending on the type of mural you choose (pasted vs. peel and stick), but the general principles remain the same. Having a helper can make the process much smoother.
Measure and plan
Accurately measure the area where the mural will be installed. Most murals come in numbered panels. Lay them out on a clean floor in the correct order to visualize the final design and ensure you have all the pieces. Check for any printing errors or damage before starting.
Applying pasted murals
For murals requiring adhesive, mix the wallpaper paste according to the manufacturer’s instructions. Apply an even coat of paste to the back of the first panel, or directly to the wall if recommended. Carefully align the first panel with a level line, ensuring it is straight. Smooth out any air bubbles or wrinkles using a wallpaper brush or a smoothing tool, working from the center outwards. Apply the subsequent panels, butting the edges together precisely without overlapping, which can create unsightly seams.
Applying peel and stick murals
With peel and stick botanical wall murals, start by peeling a small section of the backing from the top of the first panel. Align the top edge with your starting point (usually a corner or a predetermined line) and carefully press it into place. Gradually peel off the backing as you smooth the mural onto the wall, using a smoothing tool to eliminate air bubbles. If you make a mistake, gently peel the panel back and reposition it. Continue with each subsequent panel, ensuring the edges align correctly.
Trimming excess material
Once the mural is fully applied, you may need to trim any excess material around the edges, particularly in corners or around outlets. Use a sharp utility knife or a precision craft knife for clean cuts. Be careful not to cut into the wall itself.
Maintaining your botanical wall mural
Proper maintenance will ensure your botanical wall mural remains beautiful for years to come. For most non-woven and vinyl murals, a gentle cleaning routine is sufficient. Use a soft, damp cloth to wipe away dust or light marks. Avoid abrasive cleaners or excessive moisture, which can damage the print or the adhesive. For peel and stick murals, follow the manufacturer’s specific cleaning recommendations, as some adhesives may be sensitive to certain cleaning agents.
A botanical wall mural is a fantastic way to introduce natural beauty and vibrant design into your home. By understanding your material options, choosing a design that complements your space, and following proper preparation and installation steps, you can achieve a stunning result. For more ideas on different types of murals, you can learn about wall murals and explore how different wall mural wallpapers can enhance your decor.