Updated: June 2026
A wall mural wallpaper transforms a room into an immersive experience, offering a singular, large-scale image or pattern that spans an entire wall, creating a dramatic focal point unlike traditional repetitive wallpaper patterns. This distinctive design element leverages high-resolution digital printing technology to reproduce intricate artwork, photographs, or abstract designs with exceptional clarity and vibrant color fidelity, allowing for unparalleled personalization and aesthetic impact in any space. At Starhouse, we understand that a wall mural is more than just a decorative covering; it is a curated statement, an expansive canvas reflecting your unique vision and enhancing the architectural narrative of your home.
Key Takeaways
- Wall mural wallpaper offers a single, large-format image or design, providing a unique and immersive focal point that distinguishes it from repetitive traditional wallpaper patterns.
- Available in various types, including peel-and-stick, pre-pasted, and traditional paste-the-wall, murals cater to diverse installation preferences and commitment levels.
- Material choices such as non-woven, vinyl, and fabric-backed vinyl, paired with finishes like matte, satin, or textured, dictate durability, washability, and overall aesthetic.
- Accurate wall measurement, including accounting for irregularities and adding bleed, is critical for successful mural selection and a seamless, professional installation.
- Current trends emphasize biophilic designs, abstract art, textural illusions, and personalized photography, reflecting a desire for unique and emotionally resonant spaces.
- Proper care, including gentle cleaning and humidity control, significantly extends the life and preserves the vibrant appearance of a wall mural.
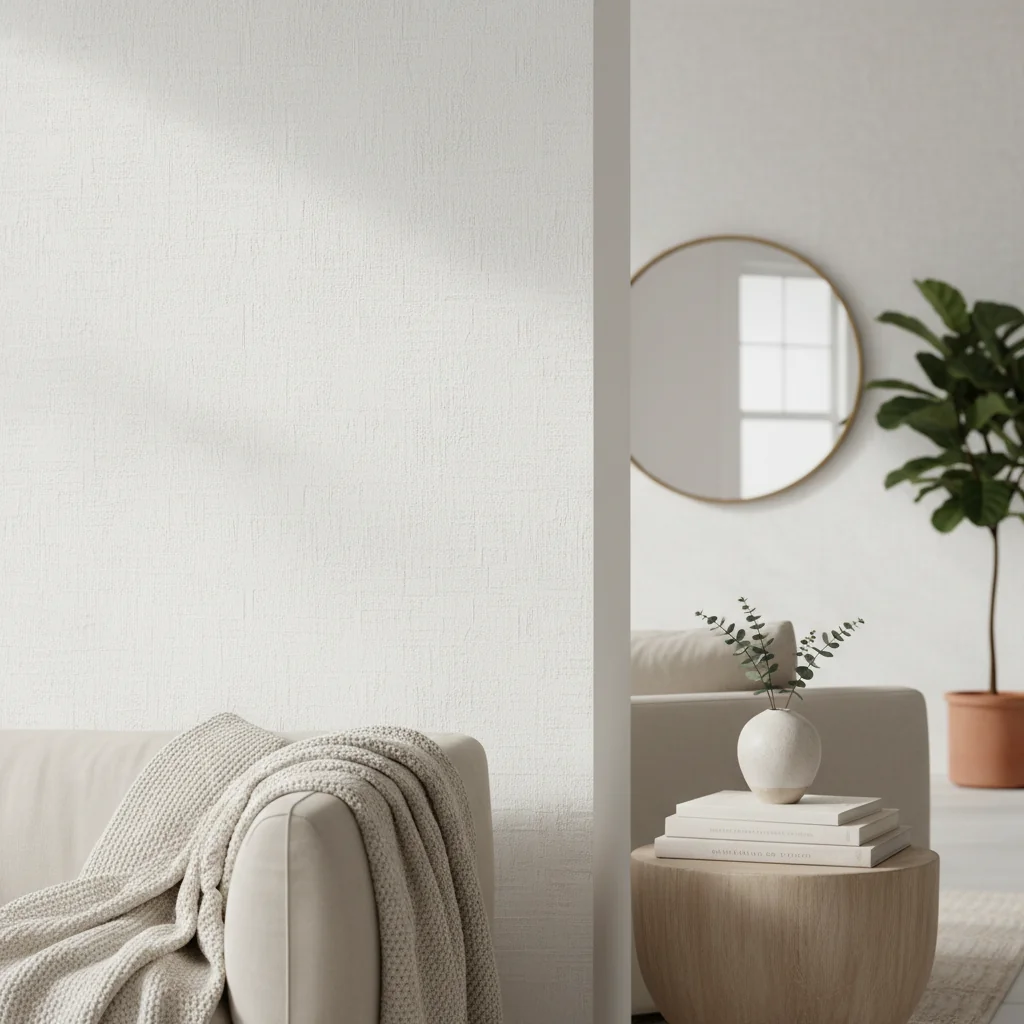
What is Wall Mural Wallpaper?
A wall mural wallpaper is a large-format, single-image wallcovering designed to create an expansive, continuous visual narrative across an entire wall, fundamentally differing from traditional wallpaper’s repeating patterns. This distinctive décor element acts as an oversized piece of art, transforming a room’s atmosphere by introducing landscapes, abstract designs, historical scenes, or custom imagery at an immersive scale. Its primary purpose is to establish a dominant focal point, infusing a space with character, depth, and a bespoke aesthetic that resonates deeply with the homeowner’s personal style and design aspirations.
The evolution of wall mural wallpaper traces back to ancient frescoes and tapestries, but its modern iteration is a direct beneficiary of advanced digital printing technologies. These innovations enable the reproduction of highly detailed, vibrant, and photorealistic images onto various substrates, expanding design possibilities exponentially. Unlike early printed murals that often came in small, sequential panels requiring meticulous alignment, today’s murals are frequently produced in larger, numbered panels that seamlessly connect, simplifying installation while maintaining the grand scale. This technological leap has made custom murals more accessible and versatile, moving them from niche applications to a mainstream design staple.
The distinction between a wall mural and traditional wallpaper is crucial. Traditional wallpaper features a repeating pattern designed to cover walls uniformly, offering texture or subtle visual interest without a singular narrative. A wall mural, conversely, presents a complete, non-repeating image or artwork that dominates the visual field. This fundamental difference allows murals to achieve an unparalleled level of artistic expression and thematic immersion, making them ideal for creating dramatic statements or transporting an inhabitant to an entirely different environment. The artistic intent behind a mural is to create an experience, not just a backdrop.
Wall murals are gaining significant popularity across the United States for several compelling reasons. Homeowners increasingly seek personalized and unique interior design solutions that reflect their individuality and passions. Murals provide an immediate and impactful way to achieve this, offering an almost limitless array of themes and styles—from serene natural landscapes that evoke tranquility to dynamic urban cityscapes that inspire energy. Furthermore, the advancements in materials, including peel-and-stick options, have demystified installation, making murals a viable and exciting DIY project for many, while professional installation ensures a flawless, high-end finish for complex designs or premium materials. Their ability to dramatically alter perception of space, add depth, and introduce a unique artistic element positions wall murals as a premier choice for contemporary home décor.
Exploring the Types of Wall Mural Wallpaper
Wall mural wallpaper is categorized primarily by its installation method and material composition, offering distinct advantages and considerations for various applications and user preferences. Understanding these types—peel-and-stick, traditional paste-the-wall, and pre-pasted—is essential for selecting the mural that best aligns with your design goals, installation expertise, and long-term commitment to the aesthetic. Each type delivers a unique balance of ease of application, durability, and repositionability, directly influencing the overall project experience and the mural’s longevity.
Peel-and-Stick Murals
Peel-and-stick murals, also known as self-adhesive or removable murals, feature an adhesive backing protected by a removable liner, allowing for a straightforward, waterless application process. This type is ideal for renters, those who frequently redecorate, or DIY enthusiasts seeking a low-commitment, temporary solution. The material is typically a durable vinyl or fabric blend, offering good resistance to tears and often featuring a matte or satin finish.
- Advantages: The primary benefit is ease of installation; simply peel off the backing and apply to a clean, smooth wall. They are highly repositionable during installation, allowing for adjustments to achieve perfect alignment. Peel-and-stick murals are also easily removable without damaging the underlying wall surface or leaving sticky residue, making them excellent for temporary décor or children’s rooms.
- Disadvantages: While repositionable, they generally offer less long-term adhesion compared to traditional pasted options, potentially lifting at edges in high-humidity environments or on poorly prepared surfaces. They may not be suitable for textured walls, as the adhesive requires a smooth surface for optimal grip. Reusability, though often advertised, is typically limited to careful reapplication on another smooth surface, as the adhesive can lose efficacy over time.
Traditional Paste-the-Wall Murals
Traditional paste-the-wall murals require the application of a separate wallpaper paste directly onto the wall before hanging each panel, providing a robust and enduring bond. These murals are typically made from non-woven materials, which are dimensionally stable, making them easier to handle and preventing stretching or shrinking during installation. This method is favored for achieving a professional, permanent finish.
- Definition: These murals consist of unpasted panels that necessitate the application of a specialized wallpaper adhesive directly onto the wall surface prior to hanging. The material is often a high-quality non-woven cellulose and polyester fiber blend.
- Advantages: Traditional paste-the-wall murals offer superior durability and a more permanent adhesion, making them an excellent choice for high-traffic areas or long-term design statements. The non-woven material is breathable, which helps prevent mold and mildew, and is often strippable for easier removal when it’s time for a change, leaving the wall intact. The robust nature of the material and adhesive ensures a smooth, professional-looking finish with minimal visible seams.
- Disadvantages: Installation is more complex and time-consuming than peel-and-stick, often requiring professional assistance for optimal results. The process involves mixing and applying paste, which can be messier. They are not easily repositionable once the paste sets, requiring precise alignment from the outset.
Pre-Pasted Murals
Pre-pasted murals feature a dry adhesive layer already applied to the back of each panel, which is activated by submerging the panel in water. This offers a convenient middle ground between peel-and-stick and traditional paste-the-wall options, simplifying the adhesive application step. The material is typically paper-based or a light non-woven.
- Definition: These murals come with a pre-applied adhesive backing that becomes tacky and ready for application once moistened with water.
- Advantages: Installation is less messy than traditional methods as there is no separate paste to mix or apply. The water-activated adhesive provides a strong bond, ensuring durability. They offer good adhesion and are generally more forgiving than traditional murals, allowing for some repositioning while wet.
- Disadvantages: The process of soaking panels can be cumbersome, especially for large mural pieces, and requires a water tray or trough. Once the adhesive is activated, the panels become heavy and can be delicate, requiring careful handling to avoid creasing or tearing. While easier than traditional, they are less forgiving and repositionable than peel-and-stick. Removal typically involves steaming or soaking, similar to traditional wallpaper.
Understanding these distinctions empowers you to make an informed decision, ensuring your chosen wall mural not only looks spectacular but also performs optimally for your lifestyle and space. Starhouse curates options across all these types, focusing on quality and design integrity.
Materials and Finishes: A Foundation of Quality
The material and finish of a wall mural wallpaper are paramount to its aesthetic appeal, durability, and suitability for specific environments, directly influencing its tactile quality, light reflection, and ease of maintenance. Starhouse rigorously selects substrates and finishes that not only enhance design but also meet stringent performance criteria, ensuring your investment delivers lasting beauty and functionality. The selection process considers factors such as breathability, washability, fire resistance, and environmental impact.
Substrates: The Core of Your Mural
The substrate refers to the base material onto which the mural design is printed. Each type offers distinct characteristics:
- Non-Woven
-
Definition: Non-woven wallpaper is a blend of natural and synthetic fibers, primarily cellulose and polyester, bonded together to create a breathable, tear-resistant, and dimensionally stable material. It is one of the most popular and versatile substrates for modern wall murals.
Durability: Highly durable and resistant to tearing during installation and over time. Its dimensional stability prevents shrinking or expanding, leading to seamless installations.
Breathability: Allows walls to breathe, which helps prevent moisture buildup, mold, and mildew, making it suitable for various climates and rooms.
Ease of Removal: Often designed for “strippable” removal, meaning it can be peeled off in full sheets without damaging the wall surface, leaving minimal residue.
Ideal Use: Excellent for all residential areas, including bedrooms, living rooms, and dining rooms, as well as light commercial spaces where durability and ease of removal are valued.
- Vinyl
-
Definition: Vinyl murals are typically composed of a vinyl surface layer laminated to a paper or fabric backing. The vinyl layer provides exceptional durability and a protective, often washable, surface.
Washability: Extremely washable and scrubbable, making it ideal for areas prone to spills or high traffic. It can withstand rigorous cleaning without compromising the design.
Durability: Highly resistant to abrasions, scratches, and moisture, offering a long lifespan even in demanding environments.
Ideal Use: Best suited for bathrooms, kitchens, children’s rooms, hallways, and commercial settings such as restaurants or medical offices due to its robust nature and ease of cleaning.
- Fabric-Backed Vinyl
-
Definition: This is a premium vinyl option where the vinyl surface is bonded to a textile fabric backing, providing enhanced strength and tear resistance compared to paper-backed vinyl.
Enhanced Durability: Offers superior structural integrity, making it highly resistant to punctures and tears. The fabric backing adds stability and helps conceal minor wall imperfections.
Professional Grade: Often preferred by professional installers for its ease of handling, robust nature, and ability to create a flawless, long-lasting finish.
Ideal Use: Primarily used in high-traffic commercial environments, hospitality settings, and luxury residential applications where maximum durability and a premium finish are non-negotiable.
- Paper
-
Definition: Traditional paper murals are printed directly onto a paper base. While less common for modern murals due to durability concerns, specialized paper types exist.
Traditional Appeal: Offers a classic, matte finish that can absorb colors richly. Some eco-friendly options use recycled paper or sustainable pulp.
Less Durable: Generally less resistant to moisture, tearing, and abrasion compared to non-woven or vinyl. Not recommended for high-traffic or humid areas.
Eco-Friendly Options: Certain paper murals are made from sustainably sourced materials, appealing to environmentally conscious consumers.
Ideal Use: Best for low-traffic areas like formal dining rooms, guest bedrooms, or spaces where a delicate, traditional aesthetic is desired and environmental considerations are paramount.
Finishes: Shaping Perception
The finish refers to the surface texture and sheen of the mural, which significantly impacts how light interacts with the design and the overall mood of the room.
- Matte
-
Characteristic: A non-reflective surface that absorbs light rather than reflecting it, resulting in a soft, subtle appearance without glare.
Aesthetic: Creates a sophisticated, understated, and artistic look, often mimicking the appearance of painted art or fresco. It minimizes imperfections on the wall surface.
Ideal Use: Perfect for bedrooms, living rooms, and any space where a refined, gallery-like ambiance is desired. It enhances the depth and richness of colors.
- Satin/Eggshell
-
Characteristic: Offers a subtle, low-to-medium sheen that reflects a small amount of light, providing a soft glow without being overly glossy.
Aesthetic: A versatile finish that balances elegance with practicality. It adds a touch of sophistication and makes colors appear more vibrant than matte.
Durability: Generally more durable and easier to clean than matte finishes, offering better resistance to scuffs and moisture.
Ideal Use: Suitable for a wide range of rooms, including family rooms, dining areas, and even bathrooms where a slight sheen and easier maintenance are beneficial.
- Gloss
-
Characteristic: A highly reflective, shiny surface that maximizes light reflection, creating a bold, vibrant, and sometimes dramatic effect.
Aesthetic: Delivers a striking, modern, and luxurious appearance. It can make colors pop and enhance the perceived depth of an image.
Considerations: High gloss can highlight wall imperfections due to its reflectivity and may be prone to glare in brightly lit rooms. It is typically the most durable and easiest to clean.
Ideal Use: Best for accent walls, contemporary spaces, or areas where a high-impact, statement-making finish is desired, such as commercial lobbies or avant-garde residential designs.
- Textured
-
Characteristic: Incorporates a tactile surface pattern, such as linen, canvas, stucco, or subtle geometric relief, adding physical dimension to the mural.
Aesthetic: Creates visual interest and depth beyond the printed image, mimicking the feel of natural materials or artistic mediums. It can soften an image or add rustic charm.
Benefits: Helps to conceal minor wall imperfections and adds a layer of sophistication. It can make a printed image feel more like a hand-painted artwork.
Ideal Use: Excellent for adding warmth and character to living rooms, studies, or any space where a unique sensory experience is desired. It can be particularly effective with abstract or natural designs.
Certifications and Safety Standards
Selecting materials that adhere to recognized safety and environmental standards is a priority for Starhouse. These certifications ensure that murals are not only beautiful but also safe for your home and the environment.
- GREENGUARD Gold Certification: This certification indicates that a product has low volatile organic compound (VOC) emissions, contributing to healthier indoor air quality. Murals with this certification are safe for use in sensitive environments like schools and healthcare facilities, as well as homes.
- Fire Ratings (Class A / ASTM E84): Fire safety is a critical consideration for interior finishes. Wall murals should meet specific fire resistance standards, typically Class A or ASTM E84 ratings, which classify materials based on their flame spread and smoke development characteristics. UL Solutions provides comprehensive guidance on fire safety standards for various building materials, including interior finishes, ensuring products contribute to a safer environment.
- FSC (Forest Stewardship Council) Certified: For paper-based murals or those with paper components, FSC certification guarantees that the wood pulp used comes from responsibly managed forests, promoting environmental sustainability.
By carefully considering both the substrate and the finish, along with crucial safety certifications, you can select a wall mural that not only fulfills your aesthetic desires but also performs optimally and responsibly within your living space. Starhouse is committed to curating options that meet these exacting standards.
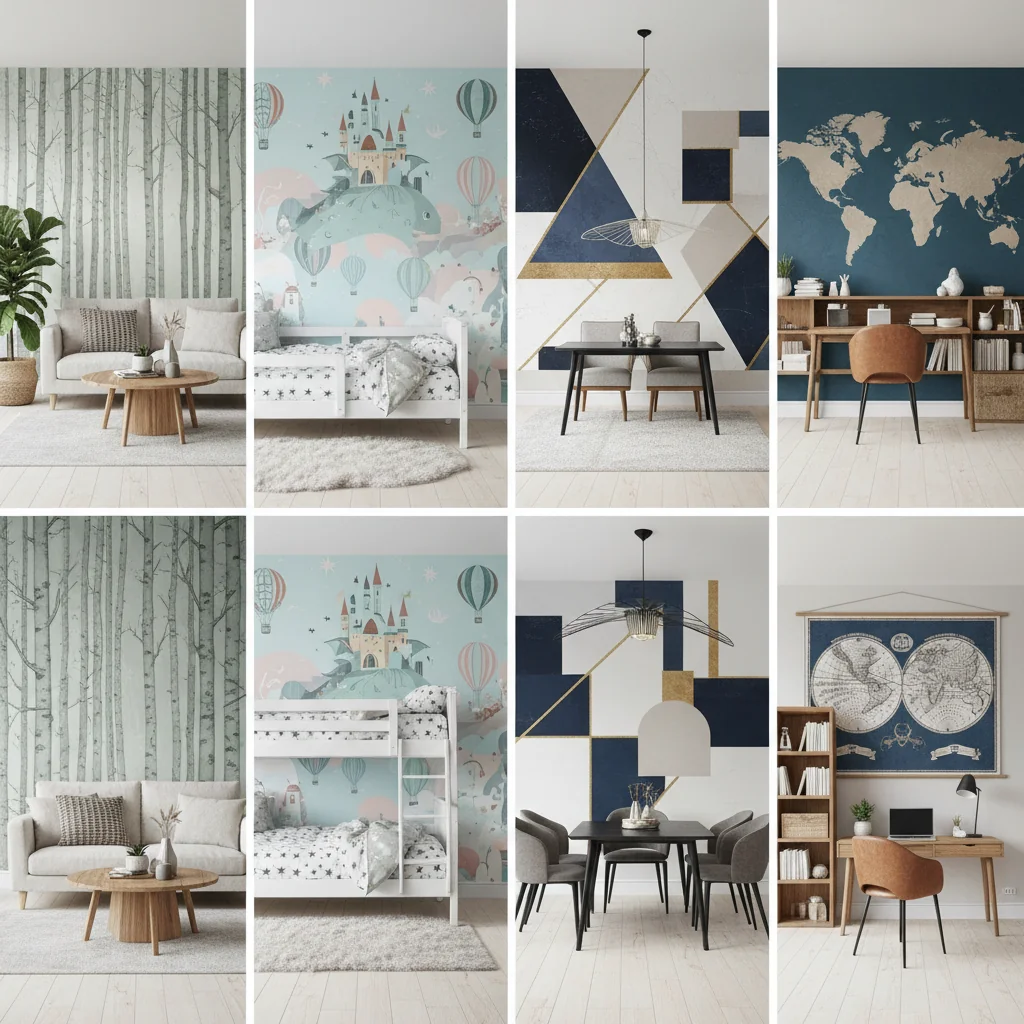
Popular Styles and Themes for Wall Murals
Wall murals offer an unparalleled opportunity to imbue a space with a distinct personality and narrative, drawing from an expansive palette of styles and themes that cater to every aesthetic preference. At Starhouse, we observe that the most impactful murals successfully harmonize with the room’s function and the homeowner’s desired ambiance, creating a cohesive and inspiring environment. The breadth of available designs ensures that whether you seek tranquility, stimulation, or a touch of whimsy, there is a mural theme perfectly suited for your vision.
Nature & Landscapes
Nature-themed murals are perennially popular, bringing the serenity and grandeur of the outdoors inside. They are designed to create a sense of calm, expansion, and connection to the natural world.
- Forests & Woodlands: Depicting dense woods, sun-dappled clearings, or mist-shrouded trees, these murals evoke a sense of peace and depth, ideal for bedrooms, studies, or living rooms seeking a grounding presence.
- Mountains & Peaks: Majestic mountain ranges, from snow-capped peaks to rugged desert formations, offer a dramatic and awe-inspiring backdrop, perfect for creating a powerful focal point in a modern or rustic setting.
- Seascapes & Beaches: Visions of tranquil oceans, crashing waves, or idyllic sandy shores introduce a calming, expansive feel, often chosen for bathrooms, sunrooms, or coastal-inspired living spaces.
- Botanicals & Florals: Large-scale floral patterns, intricate botanical illustrations, or lush garden scenes add vibrancy, elegance, and a touch of organic beauty. These can range from delicate watercolors to bold, illustrative designs.
- Celestial & Sky Scenes: Murals featuring starry nights, nebulae, cloud formations, or vibrant sunsets create an ethereal and dreamy atmosphere, often used in bedrooms or creative spaces.
Abstract & Geometric
For those who appreciate modern aesthetics and conceptual design, abstract and geometric murals offer dynamic visual interest without explicit representation.
- Modern Abstract: Characterized by fluid shapes, expressive brushstrokes, and non-representational forms, these murals create a sophisticated, artistic statement, often working well in contemporary living spaces or art studios.
- Geometric Patterns: Featuring clean lines, repeating shapes (circles, triangles, hexagons), and precise angles, geometric murals bring structure, order, and a sense of architectural style to a room, fitting perfectly into minimalist or industrial designs.
- Architectural Illusions: Designs that mimic structural elements, such as arches, columns, or receding perspectives, can create the illusion of greater space and architectural grandeur.
Artistic & Painterly
These murals celebrate the beauty of various artistic movements, transforming walls into expansive canvases.
- Impressionistic & Watercolor: Soft edges, blended colors, and a dreamlike quality define these styles, bringing a gentle and artistic flair, suitable for serene environments.
- Classical Art Reproductions: Replicas of famous masterpieces or classical frescoes add a touch of historical elegance and cultural sophistication to formal rooms or studies.
- Illustrative & Sketch Art: Hand-drawn aesthetics, line art, or detailed illustrations offer a unique, often whimsical, or narrative quality.
Urban & Architectural
Capturing the energy and structure of city life, these murals bring a metropolitan edge to interiors.
- Cityscapes: Iconic skylines, bustling streets, or serene city views, especially at dusk or dawn, create a dynamic and sophisticated backdrop, popular in urban apartments or offices.
- Industrial & Loft Themes: Murals mimicking exposed brick, raw concrete, or distressed metal textures lend an edgy, contemporary feel, ideal for industrial-chic interiors.
Children’s Themes
Designed to spark imagination and create playful environments, these murals are vibrant and engaging.
- Whimsical & Fairytale: Enchanted forests, fairytale castles, or magical creatures transform a child’s room into a world of adventure.
- Educational & Interactive: World maps, solar systems, or alphabet designs offer both decoration and learning opportunities.
- Playful Patterns: Bright colors, cute animals, or cartoon characters create a cheerful and stimulating space for young ones.
Vintage & Retro
Evoking nostalgia and historical charm, vintage murals bring a sense of history and unique character.
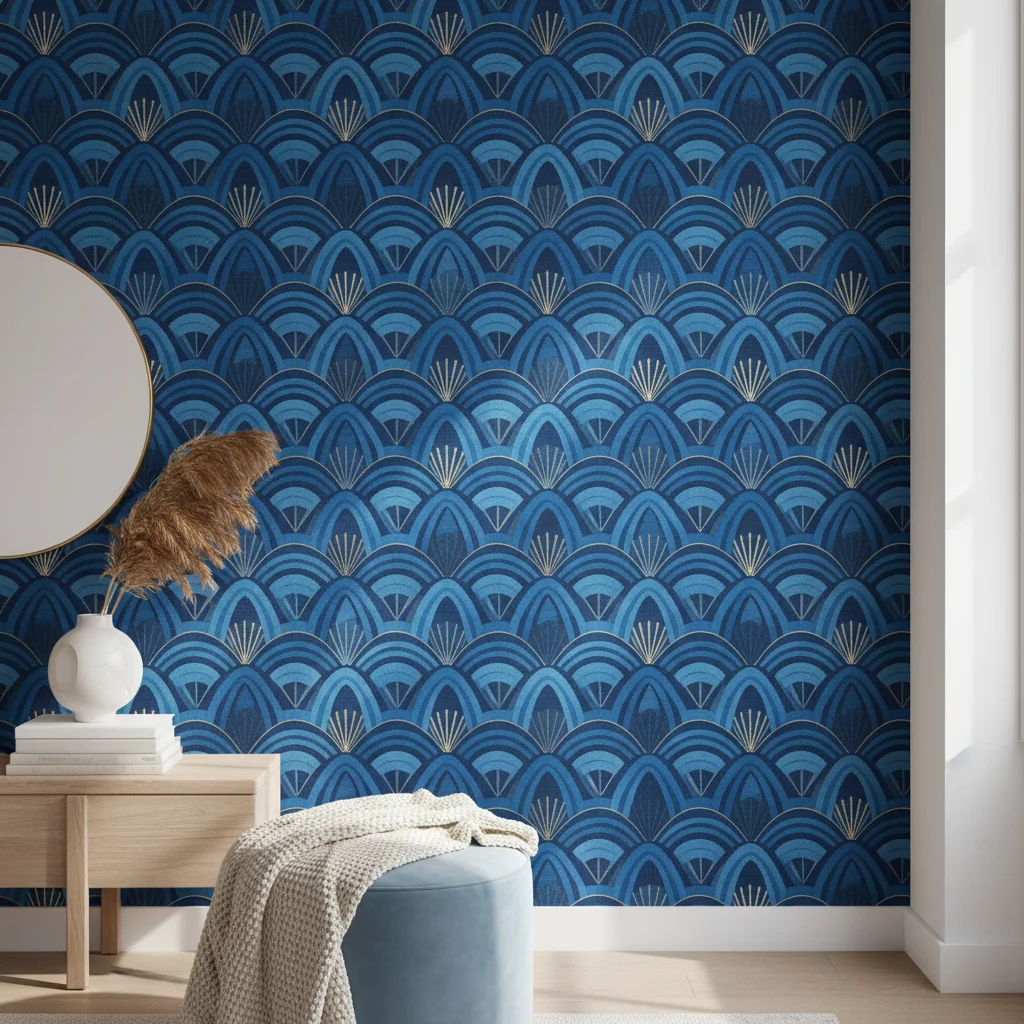
- Art Deco & Mid-Century Modern: Geometric patterns, bold colors, and streamlined designs from specific historical periods create a distinctive retro ambiance.
- Historical Maps & Cartography: Old world maps, celestial charts, or antique city plans add a sophisticated, worldly touch to studies or living rooms.
- Grayscale Photography: Vintage black and white photographs of historical events, figures, or city scenes offer a timeless and elegant aesthetic.
Textural Illusions
These murals cleverly mimic the appearance of real-world textures, adding depth and tactile interest without the physical material.
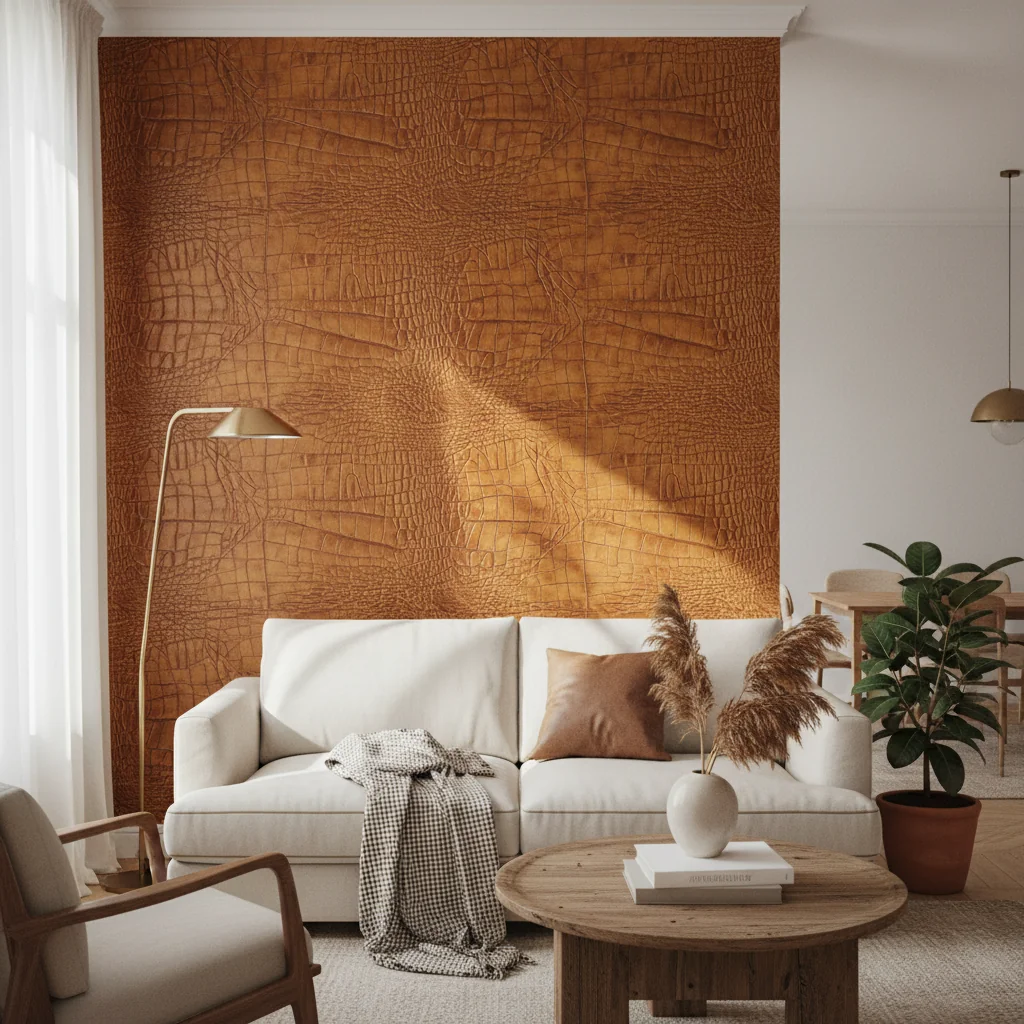
- Faux Brick & Stone: Realistic depictions of exposed brickwork or natural stone create an industrial, rustic, or cozy atmosphere.
- Wood Panels & Shiplap: Murals that replicate the look of reclaimed wood, elegant paneling, or shiplap add warmth and architectural detail.
- Concrete & Marble: Sophisticated concrete textures or luxurious marble veins provide a sleek, modern, and high-end feel.
Photorealistic
Leveraging high-resolution imagery, these murals create incredibly lifelike and immersive scenes.
- Panoramic Views: Expansive photographs of cityscapes, natural vistas, or dramatic architectural interiors immerse the viewer in the scene.
- Extreme Close-ups: Detailed macro photography of natural elements, textiles, or abstract forms creates a powerful visual impact.
When selecting a style and theme, consider the existing architecture, the furniture, and the desired emotional response for the room. A well-chosen mural becomes the heart of the space, dictating its mood and defining its character. Starhouse offers a curated collection that spans these diverse themes, ensuring you find the perfect artistic expression for your home.
How to Choose the Perfect Wall Mural for Your Space
Choosing the perfect wall mural wallpaper involves a thoughtful assessment of your room’s specific characteristics, your personal aesthetic preferences, and the practical demands of daily living. A successful selection integrates seamlessly with your existing décor, enhances the room’s functionality, and creates the desired emotional response, transforming a mere wall into a captivating design statement. Starhouse recommends a systematic approach to ensure your mural choice is both beautiful and perfectly suited to its environment.
Room Function & Desired Mood
The primary function of a room dictates the appropriate mural theme and color palette.
- Bedroom: Opt for calming, serene themes such as soft landscapes, abstract art with muted tones, or subtle botanical patterns to promote relaxation and rest. Avoid overly busy or vibrant designs that may disrupt tranquility.
- Living Room: This is often the prime location for a statement piece. Consider bold landscapes, striking abstract art, or architectural cityscapes that reflect your personality and serve as a conversation starter. The mural should complement rather than clash with your main seating area.
- Home Office/Study: Choose murals that inspire focus and creativity. This could be a sophisticated map, a tranquil forest scene, or an abstract design that encourages contemplation. Ensure the design is not too distracting.
- Children’s Room/Nursery: Embrace whimsical, colorful, and imaginative themes. Fairytale scenes, playful animals, or educational maps can stimulate imagination and create a joyful environment. Prioritize durable, washable materials.
- Bathroom/Kitchen: Durability and moisture resistance are paramount here. Select murals with vinyl or fabric-backed vinyl substrates. Themes can range from refreshing seascapes in bathrooms to vibrant food-related art in kitchens, or even textural illusions like faux marble.
- Dining Room: Elegant botanical prints, classic art reproductions, or sophisticated abstract designs can enhance the dining experience, fostering an atmosphere conducive to conversation and enjoyment.
Existing Décor & Color Palette
Your mural should integrate harmoniously with the current furnishings, textiles, and overall color scheme of your room.
- Complement or Contrast: Decide if the mural should subtly complement existing colors (e.g., pulling a secondary color from your sofa into the mural) or provide a dramatic contrast (e.g., a monochromatic mural in a colorful room, or vice versa).
- Style Cohesion: Ensure the mural’s style aligns with your home’s overarching aesthetic, whether it’s modern, traditional, bohemian, industrial, or minimalist. A contemporary abstract mural might clash in a heavily traditional room unless deliberately used as a contrasting focal point.
- Balance: If your room already features strong patterns or colors, a mural with a softer, more subdued design or a tonal palette may be more appropriate to maintain balance. Conversely, a minimalist room can easily accommodate a bold, vibrant mural.
Scale & Proportion
The size and visual weight of the mural must be proportionate to the wall and the room itself.
- Small Room Considerations: In smaller spaces, opt for murals that create an illusion of depth and expanse, such as receding landscapes or open vistas. Lighter colors and less busy patterns can prevent the room from feeling overwhelmed. Avoid large, dark, or densely patterned murals that can make a small room feel cramped.
- Large Wall Impact: Large, uninterrupted walls are ideal canvases for grand, detailed murals. Here, you can embrace bold designs, complex scenes, and rich color palettes. The mural should be large enough to fill the wall without looking dwarfed.
- Furniture Placement: Consider where furniture will be placed. Ensure critical elements of the mural design will not be obscured by large pieces of furniture.
Lighting Conditions
How natural and artificial light interacts with your mural will significantly impact its appearance.
- Natural Light: A room with abundant natural light can handle darker or richer mural colors, as the light will prevent them from feeling oppressive. In rooms with limited natural light, lighter murals can help brighten and open up the space.
- Artificial Light: Consider how your artificial lighting (overhead, lamps, accent lighting) will illuminate the mural. Matte finishes minimize glare, while satin or gloss finishes can reflect light, potentially highlighting textures or creating a dramatic sheen. Spotlighting can be used to emphasize specific details of the mural.
- Direction of Light: Murals placed on a wall opposite a window may appear brighter and more vibrant. Those on a wall perpendicular to a window might experience varying light throughout the day.
Personal Style & Preference
Ultimately, your mural should reflect your unique taste and bring you joy.
- Emotional Connection: Choose a design that you genuinely love and that evokes a positive emotional response. It will be a dominant feature in your home.
- Longevity of Appeal: While trends are interesting, select a mural that you believe you will appreciate for years to come. Consider its timelessness against fleeting fads.
Durability & Maintenance Needs
Practical considerations are crucial for the long-term enjoyment of your mural.
- High-Traffic Areas: For hallways, children’s rooms, or commercial spaces, prioritize vinyl or fabric-backed vinyl murals due to their superior durability, scrubbability, and resistance to wear and tear.
- Moisture Resistance: In bathrooms or kitchens, select murals specifically rated for high humidity and easy cleaning to prevent mold, mildew, and damage.
- Ease of Cleaning: Consider how easily the mural can be cleaned. Matte finishes are generally more delicate, while satin and gloss are more forgiving for wiping down.
Budget Considerations
Murals vary in price based on material, customization, and whether professional installation is required.
- Material Costs: Peel-and-stick murals are often more budget-friendly, while custom-designed, fabric-backed vinyl, or specialized textured murals will be at the higher end.
- Installation Costs: DIY installation saves money but requires time and precision. Professional installation, while an added cost (typically $3-$7 per square foot for standard wallpaper, murals can be higher due to complexity), ensures a flawless finish and is often a worthwhile investment for intricate designs or large-scale projects.
- Long-Term Value: Investing in a higher-quality, more durable mural might offer better long-term value, especially in high-use areas, reducing the need for premature replacement.
By meticulously evaluating these factors, you can confidently select a wall mural wallpaper that not only transforms your space aesthetically but also functions perfectly within your lifestyle. Starhouse is dedicated to providing options that cater to this comprehensive decision-making process.
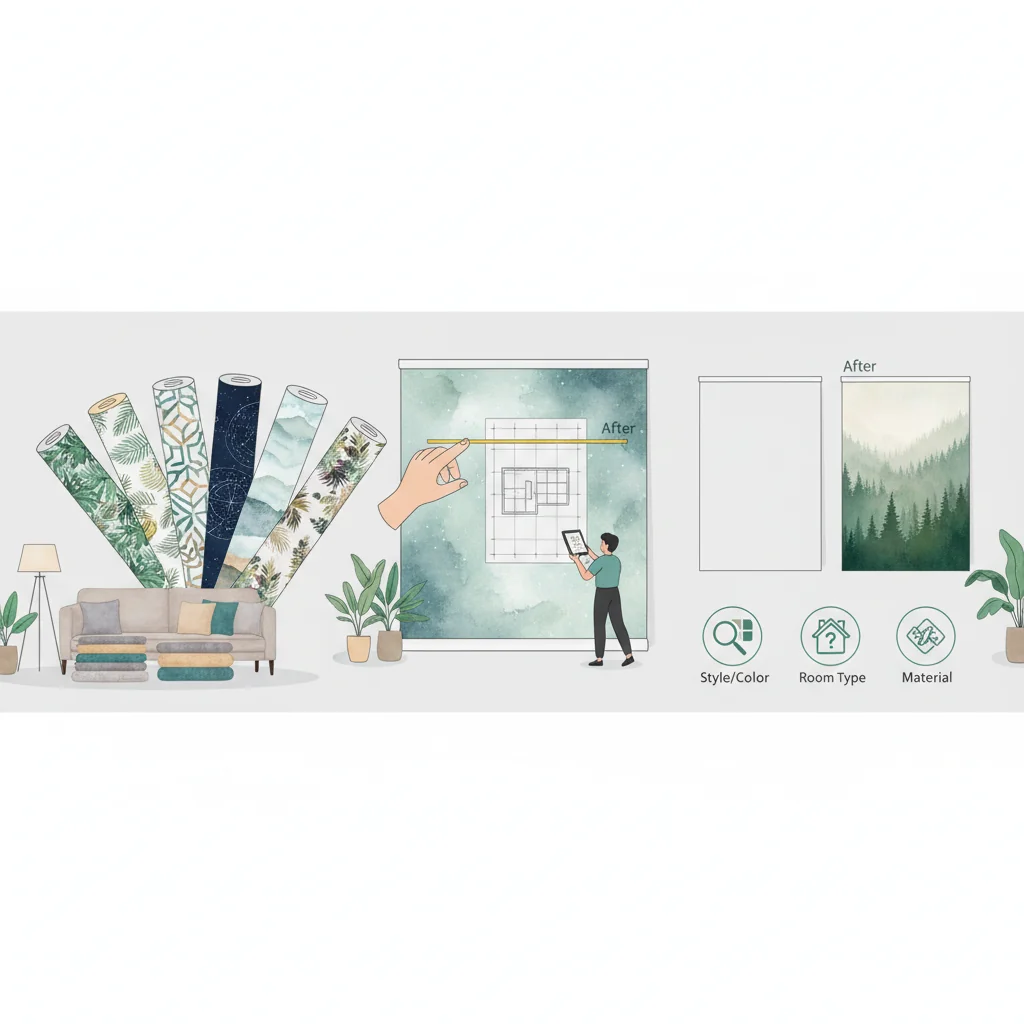
Precise Sizing and Measuring for Flawless Installation
Accurate sizing and meticulous measurement are the most critical prerequisites for a successful wall mural wallpaper installation, directly impacting the aesthetic outcome and preventing costly errors. Unlike traditional wallpaper with its forgiving repeat patterns, a wall mural is a singular piece of art where every inch counts for perfect alignment and visual continuity. Starhouse emphasizes that precise measurements ensure your mural fits seamlessly, appearing as an intentional design element rather than an ill-fitting decal.
Accurate Measurement is Paramount
Begin by measuring the height and width of your wall at multiple points. Walls are rarely perfectly square or plumb, so taking measurements from various locations (e.g., left, center, right for width; top, middle, bottom for height) provides an average and identifies any significant discrepancies.
- Height: Measure from the ceiling to the baseboard at least three different points across the wall. Record the tallest measurement.
- Width: Measure from one corner to the other at least three different points (top, middle, bottom). Record the widest measurement.
- Record Dimensions: Always record measurements in inches, clearly noting height first, then width (e.g., 96 inches H x 144 inches W).
Accounting for Irregularities
Walls are not always perfect rectangles. Windows, doors, outlets, and architectural features must be precisely mapped.
- Obstructions: If your mural will cover a wall with windows, doors, or built-in shelving, measure the entire wall first, then measure the dimensions of each obstruction. Note their exact location relative to the wall’s edges (distance from top, bottom, left, and right). While murals are typically ordered for the full wall and trimmed around obstructions, these measurements are crucial for visualizing how the design will interact with these elements and ensuring no critical design features are cut off.
- Sloping Ceilings or Uneven Walls: For walls with sloped ceilings or noticeably uneven surfaces, measure the maximum height and width. Consider if the mural design can accommodate such irregularities without distorting key visual elements. For severe unevenness, professional installation is strongly recommended.
Adding Overlap/Bleed: Why It’s Necessary
Always add extra material, known as “bleed” or “overlap,” to your measurements. This crucial step provides a margin for error during installation and ensures a seamless edge-to-edge finish.
- Standard Bleed: We recommend adding at least 2-4 inches to both the height and width of your wall’s maximum dimensions. For example, if your wall measures 96 inches H x 144 inches W, order a mural that is 100 inches H x 148 inches W. This extra material is trimmed away after installation.
- Purpose of Bleed:
- Wall Imperfections: Compensates for walls that are not perfectly straight or square, allowing for precise trimming along ceilings, baseboards, and corners.
- Installation Adjustments: Provides flexibility for minor adjustments during hanging, ensuring panels align perfectly without leaving gaps.
- Edge Trimming: Allows for a clean, straight cut with a utility knife and straightedge after the mural is fully adhered, creating a professional finish.
Calculating Panels
Wall murals are typically printed in vertical panels that are numbered for sequential installation. Understanding how your mural is divided helps in planning.
- Panel Width: Standard panel widths usually range from 24 to 48 inches, depending on the manufacturer and material. Wider panels mean fewer seams but can be more challenging to handle.
- Seam Overlap: Most murals are designed with a slight overlap (e.g., 0.5 to 1 inch) between panels to ensure a perfectly seamless look once trimmed or butt-joined. Some installations require a double-cut method where both overlapping panels are cut simultaneously for a perfect match.
- Visualization: Before ordering, visualize how the mural design will be distributed across these panels, especially if there are critical elements that might fall directly on a seam.
Professional Measuring: When to Consider It
While DIY measuring is feasible for standard walls, certain situations warrant professional measurement.
- Complex Walls: Walls with multiple windows, doors, built-ins, or intricate architectural details (e.g., crown molding, wainscoting) benefit from professional measurement to ensure precise cuts and minimal waste.
- Very Large Walls: For expansive walls, especially those with very high ceilings, a professional can accurately assess the scale and potential challenges.
- Irregular Shapes: Walls that are significantly out of square, have dramatic slopes, or non-standard angles require expert assessment to guarantee a proper fit.
- High-Value Murals: For custom-designed or premium-material murals, the investment in professional measurement protects your overall project and ensures a flawless outcome.
By adhering to these precise measuring guidelines and understanding the technical aspects of mural production, you lay the groundwork for a stunning and perfectly installed wall mural. Starhouse prioritizes accuracy in design and encourages meticulous preparation for every project.
Installation Techniques: DIY vs. Professional
The installation of wall mural wallpaper is a pivotal stage that determines the final aesthetic and longevity of your design statement, requiring careful preparation and execution regardless of whether you choose a DIY approach or professional assistance. While peel-and-stick murals are designed for accessibility, traditional paste-the-wall options demand more specialized skills, making the decision between self-installation and professional hiring a critical one based on your experience, the mural type, and the complexity of your wall. Starhouse advocates for thorough understanding of both methods to ensure a flawless and lasting result.
Surface Preparation: The Foundation of Success
Improper wall preparation is the most common cause of installation failure, leading to bubbles, peeling, or visible imperfections. This step is non-negotiable for all mural types.
- Cleaning: The wall must be impeccably clean, free of dust, dirt, grease, or any residue. Use a mild detergent solution, rinse thoroughly, and allow the wall to dry completely (at least 24 hours).
- Patching: Fill any holes, cracks, or dents with spackle or joint compound. Sand smooth once dry, ensuring the surface is perfectly flush with the rest of the wall.
- Priming: Apply a high-quality wallpaper primer (e.g., a “sizing” primer or a specific mural primer) to create a uniform, smooth, and slightly porous surface. This improves adhesion, prevents paste from absorbing too quickly, and allows for easier repositioning and future removal. For dark-colored walls, use a white primer to prevent the underlying color from showing through lighter mural sections. Allow primer to dry completely according to manufacturer instructions, typically 24-48 hours.
- Texture: Peel-and-stick murals require a perfectly smooth surface. Textured walls will prevent proper adhesion. Traditional and pre-pasted murals can tolerate very minor textures, but a smooth wall is always preferable for the best finish.
Tools Required for Installation
Having the right tools on hand streamlines the process and ensures precision.
- Measuring Tools: Tape measure, straightedge (at least 48 inches long), plumb bob or laser level.
- Cutting Tools: Sharp utility knife with plenty of fresh blades (change frequently), cutting mat (optional, for pre-trimming).
- Application Tools: Smoothing tool (plastic squeegee or wallpaper brush), roller (seam roller for traditional, soft roller for peel-and-stick), sponge and clean water (for paste cleanup).
- Other Essentials: Step ladder, bucket (for paste or water for pre-pasted), clean cloths, pencil, painter’s tape.
Step-by-Step for Peel-and-Stick Murals (DIY-Friendly)
This method is generally the most accessible for homeowners.
- Layout & Planning: Lay out all mural panels on a clean floor to confirm the design, order, and panel numbering. Lightly mark a plumb line on the wall for your first panel using a level or plumb bob; this is crucial for ensuring all subsequent panels are straight.
- Initial Placement: Starting from the top of your first panel, peel back a few inches of the backing paper. Align the mural edge precisely with your plumb line and the ceiling.
- Application & Smoothing: Slowly peel away more of the backing paper, working downwards. As you peel, use your smoothing tool to press the mural onto the wall, working from the center outwards to remove air bubbles. Overlap subsequent panels according to the manufacturer’s instructions (usually 0.5-1 inch).
- Trimming: Once a panel is fully adhered, use your sharp utility knife and straightedge to trim excess material along the ceiling, baseboards, and corners. Change blades frequently for crisp cuts.
- Repeat: Continue with subsequent panels, carefully aligning each one to create a seamless image.
Step-by-Step for Paste-the-Wall Murals (More Involved)
This method typically yields a more durable and professional finish but requires more skill.
- Layout & Plumb Line: As with peel-and-stick, lay out panels and mark a precise plumb line for the first panel.
- Prepare Paste: Mix your chosen wallpaper paste according to manufacturer instructions. Consistency is key.
- Apply Paste to Wall: Using a roller or brush, apply a generous, even layer of paste directly to the wall section where the first panel will hang, extending slightly beyond the panel’s width and height.
- Hang First Panel: Carefully bring the first mural panel to the pasted wall. Align its edge with your plumb line and the ceiling. Gently press it into the paste.
- Smooth & Remove Excess Paste: Use a smoothing tool or wallpaper brush to work from the center outwards, pressing out air bubbles and ensuring full contact with the paste. Immediately wipe away any excess paste that squeezes out of the seams with a clean, damp sponge.
- Seaming & Trimming: For subsequent panels, apply paste to the next section of the wall. Carefully butt-join the new panel against the previous one (or overlap slightly, as specified) and smooth it. Use a seam roller to gently press down the seams for a smooth, invisible finish. Trim excess material at the ceiling, baseboards, and corners using a utility knife and straightedge.
- Final Inspection: After all panels are installed, inspect for any bubbles (which may flatten as the paste dries) or missed seams.
When to Hire a Professional
While DIY installation is rewarding, certain circumstances strongly recommend professional wallpaper hangers.
- Complex Designs or Large Walls: Murals with intricate details, precise geometric patterns, or those covering very large or high walls benefit immensely from a professional’s experience in alignment and handling.
- Textured or Irregular Surfaces: Professionals possess techniques and specialized primers to handle challenging wall textures or significant wall irregularities that can derail a DIY attempt.
- Premium or Delicate Materials: If your mural is made from a high-cost or delicate material (e.g., silk, metallic, or highly textured fabrics), a professional ensures it is handled correctly to avoid damage.
- Time Constraints or Lack of Experience: If you lack the time, patience, or prior experience with wallpaper installation, a professional guarantees a quicker, cleaner, and more perfect finish.
- Ensuring Longevity: Professional installers understand the nuances of adhesive application, temperature, and humidity, ensuring optimal adhesion and a longer lifespan for your mural.
It is imperative to follow the specific instructions provided by your mural manufacturer, as techniques can vary slightly. Regardless of your chosen method, meticulous preparation and careful execution are the hallmarks of a beautifully installed wall mural. Starhouse provides detailed guidance and high-quality materials to empower your installation journey.
For those seeking to ensure the highest standards of safety and performance in their home environment, selecting materials that have undergone rigorous testing is paramount. While UL Solutions is widely recognized for its comprehensive testing and certification of exterior wall systems, their broader commitment to product safety extends to various building components. This underscores the general importance of material integrity and adherence to performance standards for all elements within a structure, including interior finishes like wall murals, which contribute to the overall quality and safety of a living space.
Current Trends in Wall Mural Design (Updated: June 2026)
The landscape of interior design is in constant evolution, and wall mural wallpaper stands at the forefront of this dynamic shift, reflecting contemporary desires for personalization, connection to nature, and bold artistic expression. As of June 2026, Starhouse identifies several dominant trends shaping wall mural aesthetics, emphasizing immersive experiences, sophisticated textures, and a return to organic forms, all while prioritizing individual homeowner narratives. These trends move beyond mere decoration, positioning murals as integral components of a well-considered and emotionally resonant interior.
Biophilic Design Integration
Biophilic design, the concept of connecting building occupants with nature, continues to be a cornerstone of modern interiors. Wall murals are pivotal in achieving this.
- Lush Greenery & Tropical Escapes: Murals featuring dense rainforests, oversized banana leaves, or vibrant jungle flora are highly sought after, bringing the calming and refreshing energy of nature indoors. These often incorporate deep greens, emeralds, and hints of gold.
- Panoramic Landscapes: Expansive scenes of serene forests, majestic mountain ranges, or tranquil seascapes create a sense of openness and escape, fostering mental well-being and reducing stress.
- Abstracted Natural Forms: Designs that interpret natural elements through abstract shapes, organic lines, and earthy color palettes offer a sophisticated nod to biophilia without being overtly literal.
Abstract Art & Maximalism
Moving away from minimalist restraint, there’s a strong lean towards expressive, large-scale abstract art and bold, maximalist statements.
- Bold Brushstrokes & Expressive Textures: Murals that mimic large-scale paintings with visible brushstrokes, impasto effects, or watercolor washes create a gallery-like feel. Colors can be vibrant and clashing or deeply saturated and harmonious.
- Geometric Maximalism: While traditional geometrics remain, the trend now leans towards more complex, layered, and colorful geometric compositions, often with an Art Deco or Bauhaus influence, creating energetic and visually stimulating spaces.
- Mural as Gallery Wall: Single, impactful abstract designs that span an entire wall, serving as the room’s primary artwork, often paired with minimal furniture to let the mural dominate.
Textural Illusions & Sensory Depth
The desire for tactile experiences and added dimension is driving the popularity of murals that mimic natural and industrial textures.
- Faux Concrete & Plaster: Murals replicating the raw, industrial chic of concrete, distressed plaster, or subtly textured stucco add an urban, sophisticated edge, often in muted gray, beige, and off-white tones.
- Marble & Terrazzo: Luxurious marble veins, from classic Carrara to dramatic Calacatta, and intricate terrazzo patterns continue to be popular for their high-end appeal and visual richness.
- Wood & Rattan Weaves: Designs mimicking natural wood grains, reclaimed timber, or intricate rattan and wicker weaves introduce warmth and organic texture, especially in Scandinavian or bohemian-inspired interiors.
Vintage & Archival Prints with a Modern Twist
A renewed appreciation for history and unique aesthetics sees vintage and archival prints reimagined for contemporary spaces.
- Botanical Illustrations: 18th and 19th-century botanical and zoological prints, often with a slightly aged or sepia-toned finish, offer a sophisticated, academic charm.
- Historical Maps & World Views: Detailed antique maps, celestial charts, or panoramic city views from bygone eras provide an intellectual and wanderlust-inducing backdrop.
- Art Deco & Mid-Century Revival: Stylized patterns, geometric motifs, and color palettes reminiscent of the 1920s-1970s are making a strong comeback, often updated with contemporary color schemes or metallic accents.
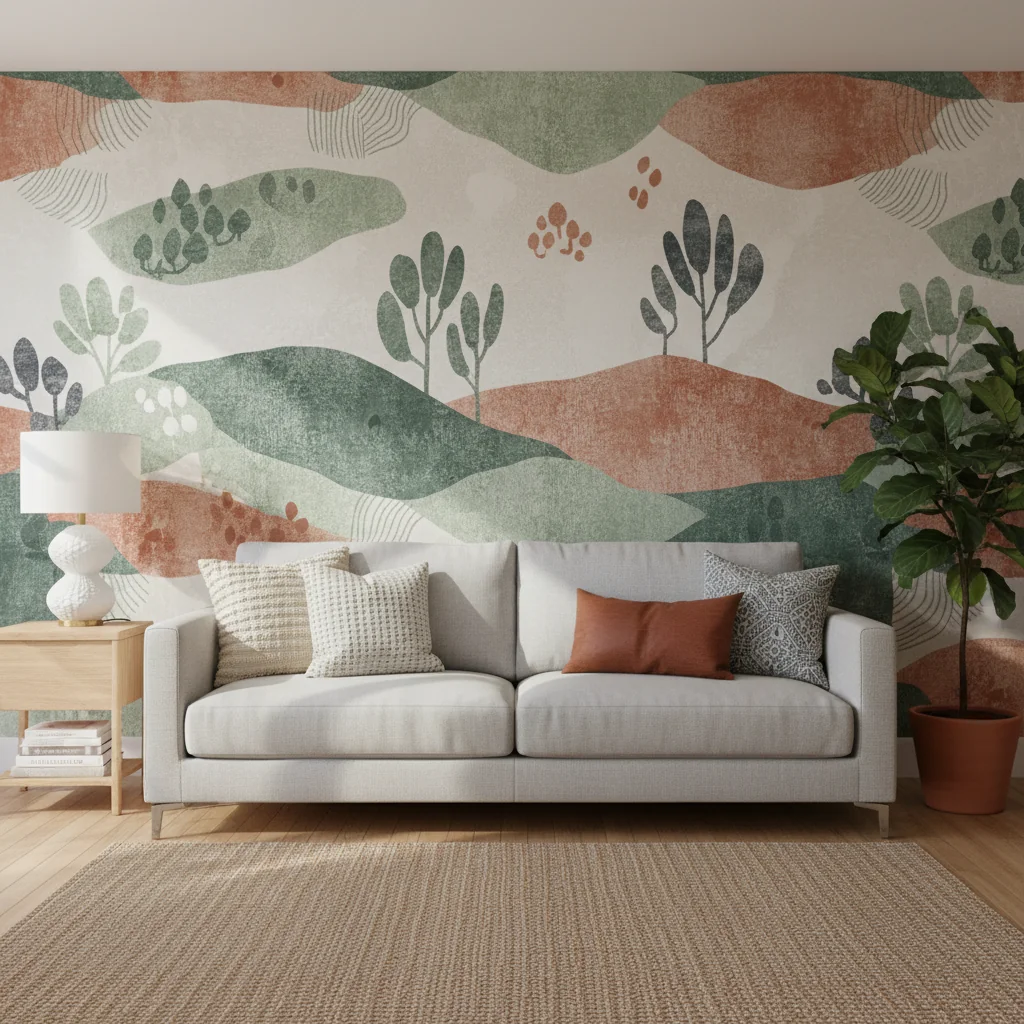
Soft Geometrics & Organic Shapes
A softer, more fluid approach to geometry and abstract forms is gaining traction, offering calming visual interest.
- Curvilinear Forms: Gentle arches, flowing lines, and soft, organic shapes create a sense of movement and tranquility, often inspired by natural elements like dunes or waves.
- Terrazzo-Inspired Patterns: Irregular, speckled patterns in muted, earthy tones offer a sophisticated yet playful aesthetic.
- Color-Block Abstractions: Large, soft-edged blocks of complementary or subtly contrasting colors create a minimalist yet impactful statement.
Personalization and Custom Photography
The ultimate expression of individuality, custom murals allow homeowners to transform personal memories or unique artistic visions into large-scale décor.
- Personal Travel Photography: High-resolution photographs from cherished trips or landscapes that hold personal significance are being adapted into bespoke murals.
- Family Portraits & Pet Art: Artistic renditions or stylized photographs of family members or pets are becoming unique focal points in personal spaces.
- Commissioned Art: Collaborating with artists to create a truly one-of-a-kind design tailored to specific dimensions and aesthetic desires.
Muted Tones & Earthy Palettes
While bold colors have their place, there’s a strong leaning towards calming, sophisticated palettes derived from nature.
- Greens & Blues: Deep forest greens, sage, muted teals, and dusty blues are prevalent, reinforcing the biophilic trend.
- Terracotta & Rust: Warm, earthy tones inspired by clay and desert landscapes add a grounding and cozy feel.
- Neutrals with Depth: Rich creams, warm grays, and soft taupes, often with subtle textures, create serene and elegant backdrops that allow furniture and accessories to shine.
These trends reflect a desire for homes that are not only beautiful but also deeply personal and conducive to well-being. Wall murals, with their capacity for immersive imagery and textural depth, are perfectly positioned to deliver on these contemporary design aspirations. Starhouse continuously updates its curated collection to reflect and anticipate these evolving design currents, ensuring you have access to the most compelling and current options for your home.
Styling and Pairing Your Wall Mural
Integrating a wall mural wallpaper into your interior design scheme requires careful consideration of how it interacts with other elements in the room, transforming it from a mere wall covering into the central anchor of your space. A thoughtfully styled mural dictates the room’s mood, enhances its architectural features, and creates a cohesive visual narrative that reflects your personal aesthetic. Starhouse emphasizes that successful pairing involves harmonizing the mural with furniture, lighting, textiles, and accessories to achieve a balanced and impactful design.
Furniture Placement: Complementing the Focal Point
The mural is a dominant visual element, so furniture placement must respect and enhance it, not obstruct it.
- Do Not Obscure Key Elements: Avoid placing tall or bulky furniture directly in front of critical design elements of the mural. If the mural depicts a landscape, ensure the horizon or main subject remains visible.
- Anchor the Space: Use the mural wall as the backdrop for your primary furniture grouping, such as a sofa in a living room or a headboard in a bedroom. This creates a strong focal point.
- Scale and Proportion: Choose furniture that is proportionate to the mural’s scale. In front of a grand, expansive mural, smaller, lighter pieces might feel lost, while a large, minimalist sofa can provide a grounding contrast.
- Negative Space: Allow for some negative space around the mural to let it breathe. Do not overcrowd the wall with too many pieces of furniture.
Color Palette Harmony: Drawing Inspiration
The mural’s color palette serves as a powerful guide for selecting complementary colors throughout the room.
- Extract Dominant Colors: Identify the primary and secondary colors within your mural. Use these as inspiration for throw pillows, rugs, curtains, and accent pieces.
- Introduce Contrast: While harmony is key, strategically introduce a contrasting color from the mural’s palette to add visual interest and prevent the room from feeling monotonous. For example, if your mural is primarily cool blues and greens, a small accent of warm terracotta or mustard yellow can provide a dynamic pop.
- Neutral Grounding: If your mural is very colorful or busy, balance it with neutral furniture and textiles (grays, whites, creams, natural wood tones) to avoid overwhelming the space.
Lighting: Highlighting and Enhancing
Thoughtful lighting can dramatically enhance the impact and mood of your wall mural.
- Accent Lighting: Install directional spotlights or picture lights above the mural to illuminate its details and textures, making it truly stand out.
- Ambient Lighting: Ensure overall room lighting is sufficient to appreciate the mural without creating harsh shadows or glare. Matte finishes are more forgiving with direct light, while glossy finishes can create dramatic reflections.
- Dimmer Switches: Use dimmer switches to adjust the intensity of light, allowing you to alter the mural’s mood from vibrant and bright to soft and atmospheric.
- Natural Light: Consider how natural light hits the mural throughout the day. A mural on a wall opposite a window will often appear brightest.
Artwork & Mirrors: Strategic Placement
While a mural is a piece of art itself, other wall décor can be integrated judiciously.
- Avoid Competing Art: Generally, avoid hanging other large or visually dominant artwork directly on the mural wall, as it can compete with the mural’s narrative.
- Minimalist Approach: If you must hang something, opt for minimalist frames, small, complementary pieces, or strategically placed mirrors.
- Mirrors for Depth: A well-placed mirror on an adjacent wall can reflect portions of the mural, amplifying its presence and making the room feel larger.
- Floating Shelves: Simple floating shelves with carefully curated objects can add dimension without overwhelming the mural.
Textiles & Accessories: Echoing the Theme
Textiles and accessories are crucial for weaving the mural’s theme throughout the room.
- Rugs: Choose a rug that complements the mural’s color palette and style. A rug with a subtle pattern can tie into a mural’s theme, or a solid rug can provide a grounding contrast.
- Throws & Pillows: Select throw blankets and decorative pillows in colors and textures that echo elements of the mural. For a biophilic mural, choose greens, browns, and natural textures.
- Curtains/Drapery: Opt for curtains in a solid color pulled from the mural, or a very subtle pattern that doesn’t compete. Sheer curtains can allow natural light to filter through, enhancing the mural’s visibility.
- Decorative Objects: Display accessories (vases, sculptures, books) that resonate with the mural’s theme. For example, natural elements like wood or stone for a nature mural, or metallic accents for an urban cityscape.
Plant Life: Enhancing Biophilic Themes
For nature-inspired murals, incorporating real plants adds another layer of biophilic design.
- Strategically Placed Plants: Position potted plants or hanging greenery in front of or near the mural to blur the lines between the depicted nature and real-life elements, enhancing the immersive experience.
- Complementary Foliage: Choose plants with foliage that complements the plants depicted in the mural, or simply select varieties that add texture and life.
Creating a Focal Point: The Mural as Anchor
The mural should serve as the room’s primary focal point, around which all other design decisions revolve.
- Visual Weight: Ensure the mural has sufficient visual weight to command attention. This means choosing a design that is impactful enough for the space.
- Balance: While a focal point, the room should still feel balanced. Avoid making the mural the *only* interesting element; instead, use it to inspire and inform the rest of your décor.
By carefully orchestrating these elements, your wall mural wallpaper will not only stand out but will also integrate seamlessly into a cohesive and captivating interior design, creating a space that is both beautiful and uniquely yours. Starhouse provides the canvas; your styling brings it to life.
Care and Maintenance for Lasting Beauty
Proper care and consistent maintenance are essential for preserving the vibrant appearance and extending the lifespan of your wall mural wallpaper, protecting your investment and ensuring its continued aesthetic appeal. Different mural materials necessitate specific cleaning protocols, and adhering to these guidelines prevents damage, fading, and premature wear, ensuring your mural remains a stunning focal point for years to come. Starhouse provides clear recommendations to help you maintain your mural’s pristine condition.
General Cleaning: Regular Dusting and Gentle Wiping
Regular, gentle cleaning is the first line of defense against dirt and dust buildup.
- Dusting: Periodically dust your mural using a soft, dry microfiber cloth, a feather duster, or the soft brush attachment of a vacuum cleaner on a low setting. This prevents dust from accumulating and dulling the image.
- Damp Cloth Wiping (Material Dependent): For murals made from washable materials (vinyl, fabric-backed vinyl, some non-wovens), a slightly damp, clean sponge or microfiber cloth can be used for light surface cleaning. Dampen the cloth with plain water, wring it out thoroughly so it’s barely moist, and gently wipe the mural in a downward motion. Avoid rubbing aggressively.
- Test in an Inconspicuous Area: Always test any cleaning method on a small, hidden area of the mural (e.g., behind a piece of furniture or near the baseboard) to ensure it does not cause discoloration or damage.
Spot Cleaning: Immediate Attention to Spills
Prompt action is crucial for spills and stains to prevent them from setting.
- Blot, Don’t Rub: For liquid spills, immediately blot the area with a clean, dry cloth or paper towel to absorb as much liquid as possible. Avoid rubbing, as this can spread the stain or damage the mural surface.
- Mild Soap Solution: For more stubborn stains on washable murals, prepare a very dilute solution of mild, non-abrasive soap (like dish soap) and water. Apply the solution to a clean, damp cloth, and gently dab the stained area. Rinse the cloth and wipe the area again with plain water to remove any soap residue, then gently pat dry.
- Avoid Harsh Abrasives: Never use abrasive cleaners, scouring pads, or brushes, as these will scratch, dull, or remove the mural’s finish and printed design.
Avoiding Harsh Chemicals
The use of strong cleaning agents can cause irreversible damage to your mural.
- No Bleach or Solvents: Absolutely avoid bleach, ammonia-based cleaners, abrasive powders, or any chemical solvents. These can strip the color, degrade the material, or cause permanent discoloration and damage to the ink.
- Gentle is Key: Stick to plain water or a very mild soap solution for washable murals. When in doubt, consult the mural manufacturer’s specific care instructions.
Humidity Control: Preventing Warping or Peeling
Maintaining stable humidity levels helps protect the mural’s adhesion and material integrity.
- Consistent Environment: Extreme fluctuations in temperature and humidity can cause murals to expand, contract, or peel at the seams and edges. Aim for consistent indoor temperatures and humidity levels.
- Ventilation: In high-humidity areas like bathrooms, ensure adequate ventilation (e.g., using an exhaust fan) to prevent moisture buildup, which can weaken adhesives and promote mold growth.
- Humidifiers/Dehumidifiers: In extremely dry or humid climates, consider using a humidifier or dehumidifier to maintain optimal indoor conditions, typically between 30% and 50% relative humidity.
UV Protection: Minimizing Fading
Prolonged exposure to direct sunlight can cause colors to fade over time, especially in vibrant murals.
- Window Treatments: Use curtains, blinds, or UV-filtering window films on windows that expose the mural to direct, intense sunlight for extended periods. This helps protect the colors from degradation.
- Mural Placement: When planning your installation, consider walls that receive less direct, harsh sunlight if color longevity is a primary concern.
Repairing Minor Damage: Addressing Small Issues Promptly
Minor damages can often be repaired if addressed quickly.
- Lifted Edges/Seams: For peel-and-stick murals, gently press the edge back down. For paste-the-wall murals, use a small amount of wallpaper seam adhesive applied with a brush or syringe underneath the lifted section, then press firmly. Wipe away excess adhesive.
- Small Tears: For small tears, a clear, non-yellowing wallpaper repair adhesive can be carefully applied to the underside of the tear, then pressed flat. For larger tears or missing pieces, you may need to patch with a leftover piece of the mural (if available) or consider professional repair.
By adhering to these comprehensive care and maintenance guidelines, your wall mural wallpaper will continue to be a source of beauty and inspiration in your home for many years, reflecting the quality and design integrity that Starhouse champions.
As Starhouse curates its evolving collection of exceptional home décor, we invite you to be a part of our journey. Your insights are invaluable as we select pieces that truly resonate with discerning homeowners. Tell us what you’re looking for in your dream space and gain early access to our upcoming collections, crafted to inspire and elevate every room.
Common Mistakes to Avoid When Choosing and Installing Wall Murals
Navigating the selection and installation of wall mural wallpaper can be complex, and a few common errors can significantly diminish the desired impact or lead to costly rectifications. Understanding and proactively avoiding these pitfalls ensures a seamless process and a stunning, long-lasting result that truly elevates your space. Starhouse highlights these frequent mistakes to empower homeowners with the knowledge needed for a successful mural project.
1. Incorrect Measurements
The most prevalent and impactful mistake is inaccurate wall measurement. Underestimating dimensions leads to ordering a mural that is too small, resulting in gaps or an awkward appearance. Conversely, overestimating without adequate bleed can lead to unnecessary waste or difficulty in handling oversized panels.
- Avoid: Measuring only once, rounding down measurements, or failing to measure at multiple points (top, middle, bottom for height; left, middle, right for width).
- Solution: Always measure the wall’s maximum height and width at several points. Add a minimum of 2-4 inches of bleed to both dimensions to allow for trimming and wall irregularities. Double-check all measurements before placing an order.
2. Ignoring Surface Preparation
A perfectly smooth, clean, and primed wall is non-negotiable for any wall mural. Neglecting this step compromises adhesion and allows imperfections to show through.
- Avoid: Applying murals over dirty, dusty, greasy, or textured walls; skipping patching holes and cracks; or neglecting to prime the wall, especially for dark-colored walls or porous surfaces.
- Solution: Thoroughly clean the wall, patch and sand all imperfections, and apply a high-quality wallpaper primer (sizing) 24-48 hours before installation. Ensure the wall is completely dry. For peel-and-stick murals, a perfectly smooth surface is paramount.
3. Mismatching Style to Room/Décor
Selecting a mural that clashes with the room’s existing aesthetic, color palette, or intended function can create visual dissonance and an uncomfortable atmosphere.
- Avoid: Choosing a mural solely based on its individual appeal without considering the room’s overall style (e.g., a vibrant abstract mural in a traditional, serene bedroom). Ignoring existing furniture, flooring, and textile colors.
- Solution: Define the room’s purpose and desired mood first. Choose a mural that complements existing colors or introduces a harmonious new palette. Ensure the mural’s style aligns with or thoughtfully contrasts your current décor for a cohesive look.
4. Overwhelming a Small Space
In smaller rooms, a mural that is too dark, too busy, or features excessively large-scale elements can make the space feel cramped and oppressive.
- Avoid: Selecting murals with dense patterns, dark colors, or very large, close-up images for compact rooms.
- Solution: For smaller spaces, opt for murals that create an illusion of depth (e.g., receding landscapes), feature lighter colors, or have more open, airy designs. Consider a mural for a single accent wall rather than multiple walls.
5. Neglecting Lighting
How a mural is lit profoundly affects its appearance. Poor lighting can make a stunning mural appear dull, cast unwanted shadows, or create glare.
- Avoid: Ignoring natural light sources, failing to consider how artificial lighting interacts with the mural, or placing a highly reflective mural directly opposite a strong light source without mitigation.
- Solution: Assess both natural and artificial light. Use accent lighting (e.g., picture lights, track lighting) to highlight the mural. For highly reflective finishes, consider dimmer switches or diffused lighting to control glare.
6. Rushing Installation
Impatience during installation leads to misalignments, air bubbles, creases, and tears, which are often difficult or impossible to rectify without starting over.
- Avoid: Attempting installation when rushed or tired; skipping the crucial step of drawing a plumb line for the first panel; or not carefully smoothing out air bubbles as you go.
- Solution: Allocate ample time for installation. Read all instructions carefully. Use a plumb line for perfect vertical alignment. Work slowly and methodically, smoothing each section thoroughly before moving to the next. If unsure, consider hiring a professional.
7. Forgetting Maintenance Requirements
Different mural materials have varying care needs. Neglecting proper maintenance can lead to premature wear, fading, or damage.
- Avoid: Using harsh chemical cleaners on non-washable murals, ignoring spills, or exposing the mural to excessive humidity or direct UV light without protection.
- Solution: Understand your mural’s material and its specific cleaning instructions. Regularly dust. Spot clean spills immediately with appropriate methods. Control humidity in high-moisture rooms and consider UV protection for murals in direct sunlight.
By being aware of these common pitfalls, you can approach your wall mural project with confidence, ensuring a beautiful, professional, and long-lasting result. Starhouse is committed to guiding you through every step, from selection to lasting enjoyment.
Sources
- UL Solutions: Fire Safety for Interior Finishes (PDF)
- UL Solutions: Exterior Wall System Testing and Certification
Frequently Asked Questions About Wall Mural Wallpaper
What is the difference between wallpaper and a wall mural?
The primary difference is the design format: traditional wallpaper features a repeating pattern across the entire wall, creating a uniform background, whereas a wall mural displays a single, large-scale image or non-repeating design that covers the entire wall as one continuous piece of art, serving as a distinct focal point.
Can wall murals be removed without damaging walls?
Yes, many modern wall murals, especially peel-and-stick (self-adhesive) and non-woven paste-the-wall types, are designed for clean removal without damaging properly prepared walls. Peel-and-stick murals are generally the easiest to remove, often coming off in full sheets, while non-woven murals are typically strippable. Traditional paper-backed murals, however, may require steaming or soaking for removal and can be more prone to leaving residue or minor wall damage.
Are wall murals durable?
Yes, wall murals are highly durable, particularly those made from vinyl or fabric-backed vinyl materials, which offer excellent resistance to tears, abrasions, and moisture. Non-woven murals also provide robust durability and dimensional stability. The lifespan of a mural is significantly influenced by its material, proper installation, and adherence to recommended care and maintenance guidelines.
How much does a wall mural cost?
The cost of a wall mural wallpaper typically ranges from $5 to $15 per square foot, though custom designs, premium materials like fabric-backed vinyl, and specialized finishes can push prices higher, sometimes exceeding $20 per square foot. Factors influencing cost include the mural’s material, print quality, customization options, and whether professional installation (an additional $3-$7+ per square foot) is required.
Can I install a wall mural myself?
Yes, many homeowners successfully install wall murals themselves, particularly peel-and-stick options which are designed for DIY application. However, traditional paste-the-wall murals require more precision and experience. For complex designs, very large walls, or premium materials, professional installation is recommended to ensure a flawless finish and prevent potential damage or alignment issues.
What kind of walls are suitable for murals?
Wall murals require clean, dry, smooth, and properly primed walls for optimal adhesion and a professional finish. Imperfections like holes, cracks, or significant textures (especially for peel-and-stick) must be addressed before installation. Walls painted with flat or eggshell finishes are generally ideal, while glossy paints may require light sanding and priming to ensure proper grip.
How do I clean a wall mural?
For general cleaning, gently dust the mural with a soft, dry microfiber cloth. For washable materials (like vinyl or some non-wovens), light dirt or spills can be carefully wiped with a barely damp cloth using plain water or a very mild, non-abrasive soap solution. Always test in an inconspicuous area first, avoid harsh chemicals or abrasive scrubbers, and blot spills immediately rather than rubbing.
Conclusion: Your Vision, Our Canvas
Wall mural wallpaper represents a dynamic and transformative design solution, offering an unparalleled opportunity to infuse your home with personality, depth, and an immersive aesthetic. From selecting the ideal material and finish to mastering precise measurements and thoughtful styling, each step in the mural journey is an opportunity to craft a space that authentically reflects your vision. The breadth of available themes and the advancements in installation technology ensure that whether you seek tranquil biophilic escapes, bold abstract statements, or sophisticated textural illusions, a perfect mural awaits to elevate your interior.
At Starhouse, we are dedicated to curating a collection that meets the highest standards of design, quality, and functionality, empowering you to create spaces that are not only beautiful but also deeply personal and inspiring. A well-chosen and expertly installed wall mural is more than just a decorative element; it is a captivating backdrop for life’s moments, a testament to thoughtful design, and a reflection of your unique style. We believe your home should be a canvas for your dreams, and our curated offerings are designed to help you paint that picture with confidence and elegance.
As Starhouse meticulously curates its upcoming collection of exquisite home décor, we are eager to hear directly from you. Your discerning taste and unique aspirations are invaluable as we shape an offering that truly resonates with the modern homeowner. We invite you to share your design desires and contribute to the evolution of our collection. Tell us what you’re looking for to transform your space, and secure early access to the curated selections designed to bring your vision to life.