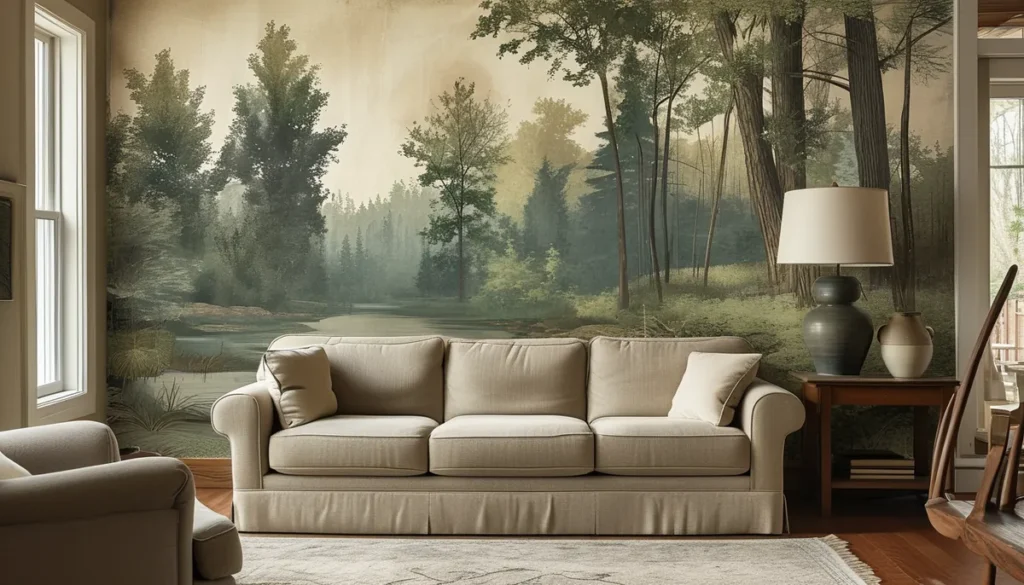
The first decision for a nursery wallpaper mural isn’t the theme, it’s the material. Your choice impacts durability, washability, and ease of installation – crucial factors when dealing with the inevitable spills and sticky fingers.
Choosing your nursery wallpaper mural material
When selecting a nursery mural wallpaper, consider these primary material types:
Vinyl wallpapers for nurseries
Vinyl is a popular choice for nurseries due to its durability and washability. It typically comes in two main forms:
- Solid vinyl: This is the most robust option, offering excellent resistance to moisture and stains. It’s ideal for high-traffic areas or if you anticipate frequent cleaning. The surface can usually be wiped down with a damp cloth and mild soap. Look for solid vinyl murals rated for kitchens and bathrooms, as these will withstand spills best.
- Vinyl-coated paper: This is a paper wallpaper with a thin vinyl coating. It offers some washability but is less durable than solid vinyl. It might be suitable for a mural that isn’t in a prime spot for accidents, but for a nursery, investing in solid vinyl is often worth it.
Thickness matters: Aim for a vinyl mural with a thickness of at least 6-8 mil (0.15-0.20 mm). Thicker vinyl provides better coverage over minor wall imperfections and is generally more forgiving during installation. Cheap, thin vinyl can tear easily and may show underlying wall texture.
Non-woven wallpapers for nurseries
Non-woven wallpaper is made from a blend of synthetic fibers and natural materials. It’s known for being breathable, making it a good choice for potentially humid environments, though this is less of a concern in a climate-controlled nursery. Key advantages include:
- Ease of installation: Non-woven papers often use a paste-the-wall application, which simplifies the process. You apply the paste directly to the wall, then hang the dry paper. This avoids the mess and difficulty of paste-the-back methods.
- Removability: Most non-woven murals can be dry-stripped from the wall when you’re ready for a change, leaving minimal residue.
- Durability: While not as inherently washable as solid vinyl, good quality non-woven can be gently wiped. Check manufacturer instructions for cleaning.
Breathability: Non-woven materials allow small amounts of moisture vapor to pass through, which can help prevent mold and mildew growth. This is a nice benefit, though less critical than washability for most nurseries.
Other materials to consider
While vinyl and non-woven dominate, you might encounter other options:
- Textured papers: Some murals come on textured grounds like grasscloth or linen. These add a rich tactile quality but are generally not washable and can be delicate, making them less practical for a nursery.
- Peel-and-stick vinyl: These are essentially large stickers. They are the easiest to install and remove but can be less durable and may not adhere well to textured walls. Their adhesive can sometimes damage paint on removal if the paint is low quality or not properly cured. Test in an inconspicuous area first.
Avoid: Standard paper wallpapers are generally not recommended for nurseries due to their lack of durability and washability.
Nursery wallpaper mural design considerations
The visual appeal of your nursery wallpaper mural is paramount. Consider these design elements:
Theme selection
This is where you bring personality to the space. Popular themes include:
- Nature-inspired: Forests, mountains, animals (woodland creatures, jungle animals, safari), floral patterns, hot air balloons. These create a calming or adventurous atmosphere.
- Celestial: Stars, moons, constellations, planets. These can be whimsical or sophisticated and often have a soothing effect.
- Abstract or geometric: Simple shapes, patterns, or watercolor effects can provide a modern and stimulating environment without being overwhelming.
- Storybook or whimsical: Characters from classic tales, charming illustrations, or playful motifs.
- Maps or globes: Educational and visually interesting, these can grow with the child.
Color palette: Opt for calming colors like pastels, muted tones, or soft neutrals. While vibrant colors can be stimulating, a nursery is primarily a place for rest and sleep, so balance is key. Consider how the mural colors will complement your chosen furniture and decor.
Scale and placement
The size of the mural and where you place it significantly impacts the room’s feel:
- Full wall coverage: An entire wall mural can create a dramatic focal point and immersive environment. Ensure the design isn’t too busy for the room size.
- Partial wall coverage: A smaller mural or a scene that doesn’t extend to the ceiling can be less overwhelming in a small room.
- Focal point: Place the mural where it will be most impactful, often opposite the crib or near the changing station.
Visual trickery: A well-chosen mural can make a small room feel larger. Landscape scenes with depth, or designs that draw the eye upward, can add perceived space.
Design trends
Current trends lean towards murals with a softer, more artistic feel:
- Hand-painted look: Designs that mimic watercolors, gouache, or brushstrokes add a unique, artisanal quality.
- Subtle textures: Even in printed murals, a sense of texture can add depth.
- Earthy tones: A shift towards natural colors and motifs.
- Minimalist designs: Simple, impactful graphics that aren’t overly stimulating.
Consider longevity: While it’s tempting to choose a very specific, trendy theme, consider if the mural will still be appropriate as the child grows. Many nature or celestial themes have a longer lifespan than character-specific designs.
Installation practicalities for nursery wallpaper murals
Proper installation is key to a beautiful and long-lasting nursery wallpaper mural. Read all manufacturer instructions carefully.
Preparation is crucial
A smooth, clean, and dry wall surface is non-negotiable.
- Clean the walls: Remove any old wallpaper, dust, grease, or mildew. A thorough cleaning with a mild detergent and water, followed by rinsing and drying, is essential.
- Repair imperfections: Fill any holes or cracks with spackle and sand smooth. Uneven surfaces will show through most mural materials, especially thinner ones.
- Prime the walls: Apply a high-quality wallpaper primer. This seals the wall, ensures good adhesion, and makes future removal easier. Use a primer specifically designed for wallpaper or a high-hiding, stain-blocking primer. Let it dry completely according to the manufacturer’s instructions (usually 24-48 hours).
- Check for squareness: Use a level to ensure your starting point is perfectly vertical. This is critical for a seamless look, especially with patterned murals.
Application methods
The method depends on the material:
- Paste-the-wall (non-woven): Apply a consistent layer of wallpaper adhesive to a manageable section of the wall (usually 2-3 strips wide). Unroll the mural panel and butt the edges firmly against the pasted wall. Use a wallpaper brush or smoothing tool to gently work out air bubbles, starting from the center and moving outwards.
- Paste-the-back (vinyl, paper): Apply adhesive evenly to the back of the wallpaper panel. For many vinyl papers, you’ll need to ‘book’ the paper (fold it paste-to-paste) for 5-10 minutes to allow the adhesive to activate. Then, hang the panel on the wall, aligning edges carefully.
- Peel-and-stick: Simply peel off the backing and apply the panel to the wall, smoothing as you go. Start from the top and work your way down, using a squeegee to press out air bubbles.
Cutting and trimming
- For paste-the-wall and paste-the-back: Use a sharp utility knife and a straight edge (like a metal ruler or level) to trim excess wallpaper at the ceiling, baseboard, and corners. Change your blade frequently for clean cuts.
- For peel-and-stick: Use a sharp utility knife and straight edge. Be careful not to cut into the wall surface.
Dealing with seams and bubbles
- Butt seams: For most murals, edges should butt up tightly against each other, not overlap. Overlapping can create visible lines and lead to peeling.
- Air bubbles: Small bubbles can sometimes be worked out with a smoothing tool. If a bubble persists, you can try gently pricking it with a pin and smoothing the air out. For larger or stubborn bubbles, you may need to carefully lift the panel and reapply, or in some cases, use a small amount of wallpaper adhesive injected with a syringe.
Drying and curing
Allow the wallpaper to dry completely as per manufacturer instructions. This can take 24-72 hours, depending on humidity and ventilation. Avoid opening windows or using fans vigorously during the initial drying period, as this can cause uneven drying and potential shrinkage or lifting.
Common mistakes to avoid with nursery wallpaper murals
Installing a nursery wallpaper mural can be a rewarding DIY project, but pitfalls exist.
- Skipping wall prep: This is the number one mistake. A poorly prepared wall guarantees a subpar result, no matter how beautiful the mural.
- Using the wrong adhesive: Always use the adhesive recommended by the mural manufacturer. Standard wallpaper paste may not be suitable for all vinyl or non-woven materials.
- Over-pasting: Applying too much paste can cause the paper to become oversaturated, leading to tearing and difficulty in handling.
- Under-pasting: Insufficient paste results in poor adhesion, bubbles, and peeling seams.
- Not checking for pattern repeat (if applicable): While most murals are designed as a single scene, some may have elements that need to align between panels. Always check the instructions.
- Rushing the process: Take your time. Measure twice, cut once. Carefully align each panel.
- Using dirty tools: Any dirt or debris on your smoothing tools, brushes, or knives can transfer to the wallpaper and be difficult to remove.
- Ignoring manufacturer instructions: Each mural is unique. What works for one might not work for another. Read and follow them meticulously.
- Expecting perfection on textured walls: Most murals require a smooth surface. If your walls are heavily textured, you might need to skim coat them first or opt for a peel-and-stick that can sometimes hide minor texture, though results vary.
- Not accounting for waste: Always order slightly more material than your wall measurements indicate to account for trimming and potential mistakes.
When to call a professional
While many nursery wallpaper murals are designed for DIY installation, certain situations warrant professional help:
- Complex designs: Murals with intricate patterns, metallic elements, or very large scale can be challenging to align perfectly.
- Difficult wall surfaces: Walls with significant imperfections, existing textured finishes, or unusual shapes may require expert preparation.
- High ceilings: Working at extreme heights increases the difficulty and risk of error.
- Time constraints: If you’re on a tight schedule, a professional installer can save you time and ensure a flawless finish.
- Lack of confidence: If you’re not comfortable with DIY projects or have had negative experiences with wallpapering before, hiring an expert is a wise investment.
A professional installer ensures proper surface preparation, accurate application, and clean finishing, preventing costly mistakes and giving you peace of mind.
Cost considerations for nursery wallpaper murals
The price of a nursery wallpaper mural varies significantly based on material, size, brand, and design complexity. Expect to pay anywhere from $200 for a smaller, simpler design on basic material to upwards of $1,000 or more for large-scale, high-quality murals from premium brands.
- Material: Solid vinyl and high-quality non-woven materials are generally more expensive than basic paper or thin vinyl-coated options.
- Size: The larger the mural, the higher the cost. Measure your wall accurately to get precise quotes.
- Brand and design: Designer brands or murals with intricate, custom-like artwork will command higher prices.
- Installation: Professional installation can add $300 to $800 or more, depending on the complexity and your location.
Factor in the cost of primer, adhesive (if not included), tools, and potential professional help when budgeting for your project.
Maintaining your nursery wallpaper mural
Once installed, proper care ensures your nursery wallpaper mural remains beautiful:
- Regular dusting: Use a soft, dry cloth or a feather duster to remove dust.
- Spot cleaning: For most vinyl and non-woven murals, gently dab small spots with a clean, damp cloth. Avoid harsh scrubbing or abrasive cleaners, which can damage the print or material. Always test cleaning methods in an inconspicuous area first.
- Avoid moisture buildup: Ensure good ventilation in the nursery to prevent excess humidity, which can affect the wallpaper over time.
- Protect from direct sunlight: Prolonged exposure to direct sunlight can cause colors to fade. Consider window treatments to mitigate this.
Always refer to the specific care instructions provided by the mural manufacturer for the best results.