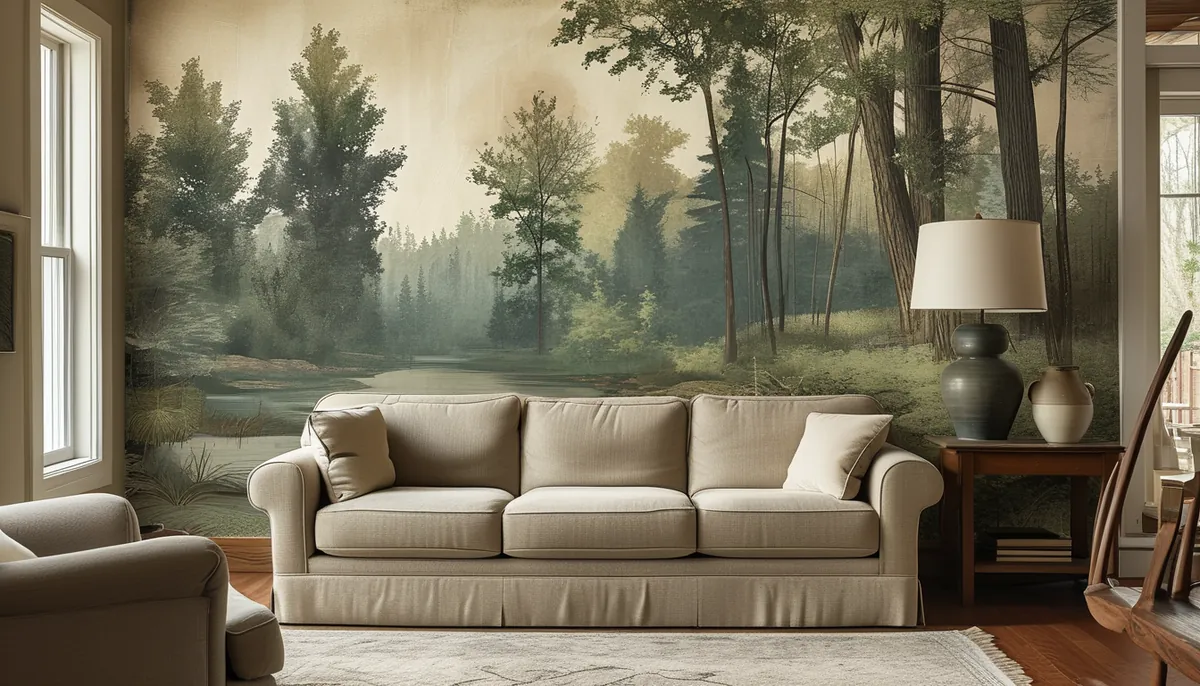
When you want to make a statement with your walls, vintage wallpaper murals offer a unique blend of history and artistry. Unlike standard wallpaper, murals are large-scale designs intended to be the focal point of a room, depicting scenes, patterns, or illustrations. Vintage styles specifically tap into eras like the 1920s through the 1970s, bringing a sense of nostalgia and timeless appeal.
Understanding the types of vintage wallpaper murals
The aesthetic you’re aiming for dictates the type of vintage mural you’ll select. Common themes include:
- Art Deco (1920s-1930s): Characterized by geometric shapes, bold lines, metallic accents, and symmetrical patterns. Think stylized florals, sunbursts, and opulent motifs.
- Mid-Century Modern (1940s-1960s): Features atomic shapes, abstract designs, natural motifs (like leaves and trees), and a more subdued color palette, often with pops of bright color.
- Retro (1970s): This era brings bold, often psychedelic patterns, floral explosions, and earthy tones. Think groovy vibes and a return to nature-inspired designs.
- Chinoiserie: While not strictly tied to a single decade, this style, popular in various vintage periods, features elaborate scenes of Chinese landscapes, pagodas, and birds, often with a hand-painted feel.
Material considerations for vintage murals
The material impacts durability, application, and the final look. Most vintage-style murals today are printed on modern, high-quality materials:
- Non-woven (or paste-the-wall): This is the most common and user-friendly option. The paper is durable, tear-resistant, and allows for repositioning during installation. You apply the paste directly to the wall.
- Vinyl-coated: Offers added durability and is often washable, making it suitable for high-traffic areas or rooms prone to moisture, like kitchens or bathrooms.
- Peel-and-stick: Excellent for renters or those who like to change their decor frequently. These murals are easy to apply and remove without damaging the underlying wall. Quality can vary, so ensure it’s from a reputable source for good adhesion.
Be aware that some very old, authentic vintage wallpapers might be made of different, less durable materials. For modern applications, stick to the types listed above.
What size and scale should your mural be?
The size of your mural needs to complement the room. A common mistake is choosing a mural that is too large or too small for the space, throwing off the room’s proportions. Measure the wall you intend to cover accurately. Many online providers allow you to input your dimensions for a custom fit. For smaller rooms or accent walls, a more detailed, smaller-scale vintage pattern might work best. In larger spaces, a grander, more expansive scene can be impactful. Use this guide to select the right wallpaper mural size.
Installation: DIY vs. Professional
Installing a vintage wallpaper mural can be a rewarding DIY project, but it requires patience and precision. Here’s a general breakdown:
- Prepare the wall: Ensure the wall is clean, dry, and smooth. Remove any old wallpaper, fill holes, and sand smooth. Priming the wall is often recommended, especially for non-woven types.
- Read instructions: Each mural type and brand will have specific instructions. Follow them closely.
- Dry layout: For some murals, it’s helpful to lay out the panels on the floor to see how the pattern flows and to number them if they aren’t already.
- Apply paste (if applicable): If using paste-the-wall, apply a consistent layer of wallpaper paste to the wall section by section, following the manufacturer’s recommendations.
- Hang panels: Carefully align the first panel with a plumb line or edge of the room. Smooth out any air bubbles with a wallpaper brush or smoother, working from the center outwards. Overlap panels slightly if instructed, or butt-join them for a seamless look.
- Trim excess: Once a panel is in place, carefully trim any excess paper at the ceiling, baseboard, and corners with a sharp utility knife.
- Repeat: Continue hanging panels, ensuring the pattern matches across seams.
If you’re not comfortable with precise measurements, cutting, or smoothing, hiring a professional installer is a wise investment. A poorly installed mural can detract from the beauty of even the most stunning design. Mistakes like misaligned seams, visible bubbles, or damage during cutting can be costly to fix.
Where to use vintage wallpaper murals
Vintage wallpaper murals aren’t limited to one type of room. Their versatility allows them to enhance various spaces:
- Living Rooms: Create a sophisticated focal point behind a sofa or on a main wall. A muted floral or a subtle scenic mural can add depth without overpowering the decor.
- Bedrooms: Offer a serene or dramatic backdrop. Consider a calming landscape or a romantic botanical print for a tranquil retreat. Decorate your bedroom with beautiful flowers on wallpaper for a charming atmosphere.
- Dining Rooms: A grand Chinoiserie or an Art Deco pattern can set an elegant tone for entertaining.
- Home Offices: Inspire creativity with a unique design. Abstract mid-century patterns or vintage maps can be particularly motivating.
- Powder Rooms/Bathrooms: A bold, eye-catching mural can transform a small space into a design statement. Ensure the material is suitable for a humid environment.
- Entryways: Make a memorable first impression with a striking mural that sets the tone for your home’s style.
Common pitfalls to avoid
To ensure your vintage wallpaper mural project is a success, be mindful of these common errors:
- Incorrect measurements: Double-check wall dimensions before ordering to avoid murals that are too large or too small.
- Ignoring wall prep: A bumpy, dirty, or unprimed wall will lead to adhesion issues and an unprofessional finish.
- Mismatched patterns: Take extra care to align pattern repeats, especially in busy designs. Patience is key here.
- Using the wrong adhesive or tools: Always use the adhesive recommended by the manufacturer and appropriate smoothing tools.
- Over-trimming: Be cautious when trimming excess paper; a sharp blade and a steady hand are crucial to avoid tearing.
- Forgetting about light: Consider how natural and artificial light will hit the mural. Some finishes might show imperfections or glare more than others.
By understanding the options and planning carefully, you can successfully incorporate vintage wallpaper murals into your home for a truly distinctive look. For more ideas on wall decor, explore ideas for home decor with wallpaper murals and inspiration from Rifle Paper Co. wallpaper.