Wall liner is a specialized foundational material applied to walls before wallpapering or painting, designed to create a perfectly smooth, uniform, and stable surface. This crucial underlayment effectively conceals minor wall imperfections, provides an optimal base for adhesion, and significantly extends the lifespan and aesthetic quality of the final wall finish, often composed of durable non-woven cellulose or fiberglass fibers for superior strength and stability.
Key takeaways
- Wall liner is an essential preparatory material that creates a smooth, stable, and uniform surface for wallpaper or paint.
- It effectively conceals minor wall imperfections, prevents bleed-through, and enhances the adhesion of subsequent wallcoverings.
- Key types include non-woven, fiberglass, and paper liners, each offering distinct benefits in terms of durability, breathability, and ease of removal.
- Proper selection depends on the wall’s condition, the type of top finish (wallpaper or paint), and specific environmental factors like moisture levels.
- Accurate measurement and meticulous surface preparation are critical for successful installation and to maximize the performance of the wall liner.
- Utilizing wall liner not only elevates the aesthetic of your finished walls but also provides a protective layer, simplifying future redecoration.
What is Wall Liner? The Foundation of Flawless Walls
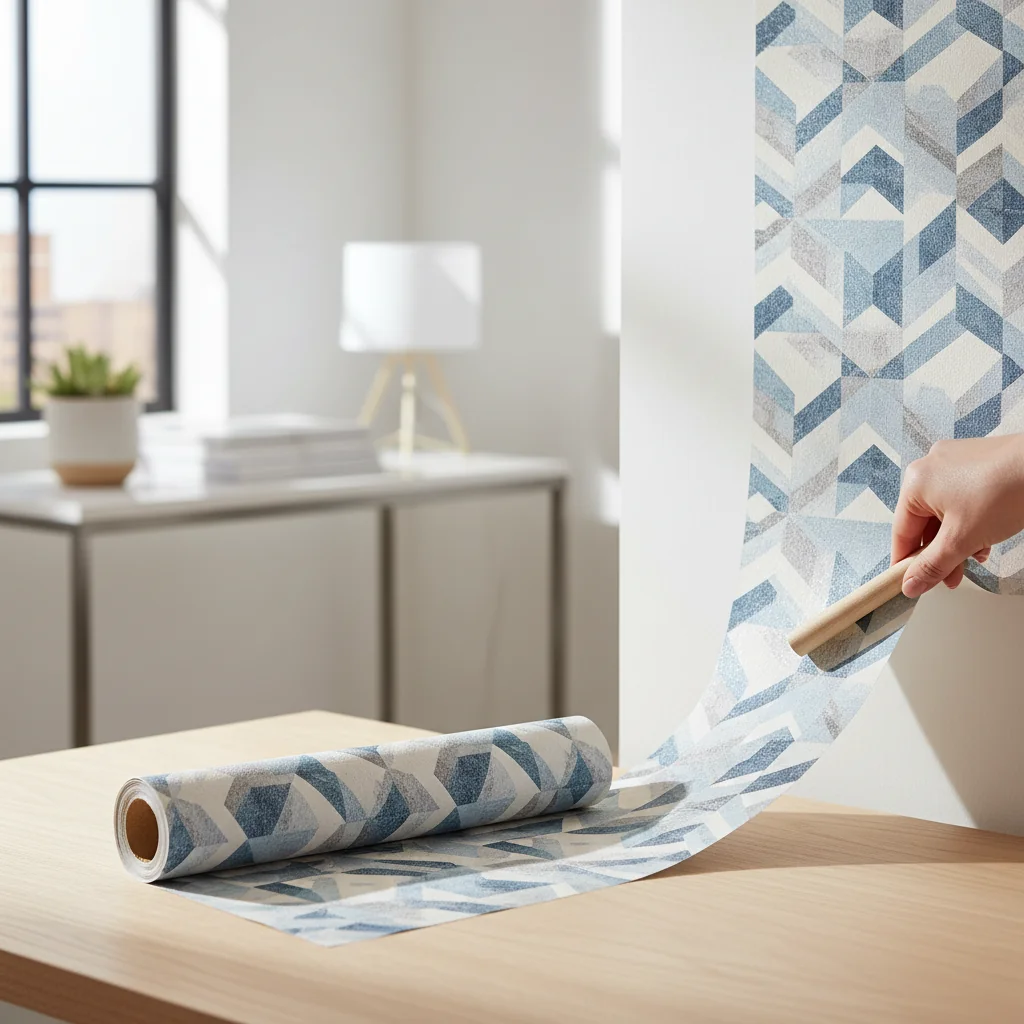
Wall liner is a specialized underlayment material applied to interior walls as a preparatory step before the application of wallpaper, paint, or other decorative finishes. Its primary function is to create a consistently smooth, uniform, and stable surface, effectively masking minor imperfections and providing an optimal substrate for subsequent layers. This foundational layer is indispensable for achieving a professional, long-lasting finish.
The strategic application of wall liner addresses several common challenges associated with wall finishing. It acts as a barrier, preventing adhesive bleed-through from wallpaper and ensuring an even absorption of paint, which results in a more uniform color and texture. Furthermore, it provides structural integrity to the wall surface, reducing the visibility of minor cracks, patching, or inconsistencies that would otherwise be apparent through a thin wallpaper or a fresh coat of paint. Starhouse recognizes the critical role of these foundational elements in achieving the refined and aspirational spaces our clients envision.
Wall liner is typically made from various materials, including non-woven cellulose fibers, fiberglass, or recycled paper, each engineered with specific properties to meet diverse project requirements. Its thickness and composition are designed to provide resilience and stability, acting as a protective skin for the wall. This protective layer not only improves the aesthetic outcome but also simplifies future redecoration by providing a solid, strippable base.
The decision to incorporate wall liner into a decorating project reflects a commitment to quality and longevity. Without it, even the most exquisite wallpaper or premium paint can fall short of its potential, revealing underlying wall flaws and potentially experiencing premature wear or adhesion issues. Wall liner establishes the benchmark for excellence, ensuring that the decorative finish performs optimally and retains its pristine appearance for years.
The Indispensable Role of Wall Liner in Interior Design
In the realm of sophisticated interior design, wall liner transcends a mere functional product; it is a strategic element that underpins the entire aesthetic and structural integrity of a wall finish. Designers and homeowners often overlook this critical preparatory step, yet its absence can compromise the visual impact and durability of even the most carefully selected wallcoverings or paint. Wall liner ensures that the canvas—the wall itself—is perfectly prepared to receive its artistic application.
For instance, when applying delicate or sheer wallpapers, wall liner becomes an absolute necessity. It homogenizes the wall’s color and texture, preventing any underlying variations, such as patched areas or old paint colors, from showing through the new wallcovering. This consistent base guarantees that the true colors and intricate patterns of the wallpaper are rendered faithfully and vibrantly, without distraction from imperfections.
Moreover, wall liner significantly improves the strippability of wallpaper. By providing a stable, non-porous layer between the wall and the wallpaper adhesive, it prevents the adhesive from bonding directly to the drywall or plaster. This makes future redecoration projects considerably easier and less damaging to the underlying wall surface, preserving the structural integrity and reducing labor and repair costs. This foresight in design is a hallmark of Starhouse’s approach to home curation.
The material composition of wall liner also contributes to its indispensable role. For example, some non-woven liners are breathable, allowing walls to “exhale,” which is crucial in preventing moisture buildup and mitigating mold and mildew growth in certain environments. This consideration extends beyond aesthetics to the very health and longevity of the living space, aligning with Starhouse’s commitment to holistic home solutions.
Ultimately, investing in quality wall liner is an investment in the overall success and longevity of a wall treatment. It elevates the final look, protects the underlying wall, and simplifies future maintenance, embodying the principle that true elegance begins with a flawless foundation. This understanding is paramount for any homeowner seeking to create a truly refined and enduring interior.
The Diverse World of Wall Liners: Types and Materials
Wall liners are available in various types, each distinguished by its material composition, weight, and intended application, offering specific benefits for different wall conditions and top finishes. Understanding these distinctions is crucial for selecting the optimal liner to achieve a flawless and durable wall treatment. The primary categories include non-woven, fiberglass, and paper-based liners, alongside specialized options like self-adhesive variants.
Non-Woven Wall Liner
Non-woven wall liner represents a significant advancement in wall preparation technology, composed of synthetic or natural fibers that are bonded together without weaving. This construction grants it exceptional dimensional stability, meaning it resists expansion and contraction when wet, which minimizes seam gaps and bubbling. Non-woven liners are renowned for their strength and durability, making them an excellent choice for walls with minor to moderate imperfections.
- Composition: Typically a blend of synthetic fibers (e.g., polyester, cellulose) and binders.
- Key Benefits:
- Dimensional Stability: Highly resistant to shrinking or stretching, ensuring tight seams.
- Breathability: Many non-woven types allow walls to breathe, which can help prevent moisture entrapment.
- Ease of Application: Often applied using a paste-the-wall method, which simplifies installation.
- Strippability: Designed for clean, easy removal in full sheets, making future redecoration effortless.
- Concealing Power: Effectively bridges minor cracks and smooths out textured surfaces.
- Ideal Use: Best for preparing walls for high-quality, delicate, or expensive wallpapers, especially those with intricate patterns or smooth finishes where imperfections would be highly visible. It is also suitable for covering light textures like orange peel or minor drywall repairs.
- Weight and Thickness: Available in various weights, typically measured in grams per square meter (gsm) or ounces per square yard (osy). Heavier grades offer greater concealing power. For instance, a 150-gsm non-woven liner provides substantial coverage for minor flaws, while lighter options might be around 100 gsm.
Fiberglass Wall Liner (Glass-Fiber Liner)
Fiberglass wall liner is an exceptionally strong and durable option, woven or non-woven from glass fibers, designed for maximum reinforcement and crack prevention. It is significantly more robust than other liner types and is often used in high-traffic commercial settings or on problem walls prone to cracking. This material provides a highly stable and impact-resistant surface.
- Composition: Made from woven or pressed glass fibers.
- Key Benefits:
- Superior Strength: Provides excellent tensile strength, reinforcing walls and preventing new cracks.
- Durability: Highly resistant to abrasion, impact, and wear.
- Fire Resistance: Inherently fire-resistant, offering an added layer of safety.
- Moisture and Mold Resistance: Impervious to water, making it suitable for damp environments when used with appropriate adhesives and topcoats.
- Textural Options: Can come in various subtle textures (e.g., fine weave, smooth) that can be painted over.
- Ideal Use: Recommended for walls with existing hairline cracks, unstable plaster, or in areas requiring extreme durability, such as hallways, commercial spaces, or older homes. It is an excellent base for painting, providing a durable, uniform texture.
- Installation: Requires specific heavy-duty adhesives and is often more challenging to install than non-woven or paper liners due to its rigidity and the need for careful handling to avoid skin irritation from glass fibers.
Paper-Based Wall Liner
Traditional paper-based wall liner, often referred to simply as lining paper, has been a staple in wall preparation for decades. It is typically made from recycled paper pulp and is designed to provide a smooth, absorbent surface for wallpaper. While more economical, it offers less dimensional stability than non-woven alternatives.
- Composition: Made from high-quality paper pulp, often recycled.
- Key Benefits:
- Cost-Effective: Generally the most budget-friendly option.
- Absorbent Surface: Provides an excellent key for wallpaper paste, ensuring good adhesion.
- Breathability: Allows walls to breathe, similar to some non-woven types.
- Concealing Power: Effective for very minor imperfections and evening out wall porosity.
- Limitations:
- Dimensional Instability: Prone to expansion when wet and contraction when drying, which can lead to visible seams if not expertly installed.
- Less Durable: Not as strong or tear-resistant as non-woven or fiberglass liners.
- Difficult Removal: Can be challenging to remove cleanly, often tearing or leaving residue.
- Ideal Use: Best for well-prepared, smooth walls that require only minor evening out, or as a cost-effective solution for temporary wallcoverings. Suitable for painting over, but non-woven might offer a more robust base.
- Weight and Thickness: Available in various “grades” or “weights,” such as 800, 1000, 1200, 1400, 1700, and 2000 grade, with higher numbers indicating thicker, more opaque paper. A 1200-grade liner is a common choice for general purposes.
Self-Adhesive Wall Liner
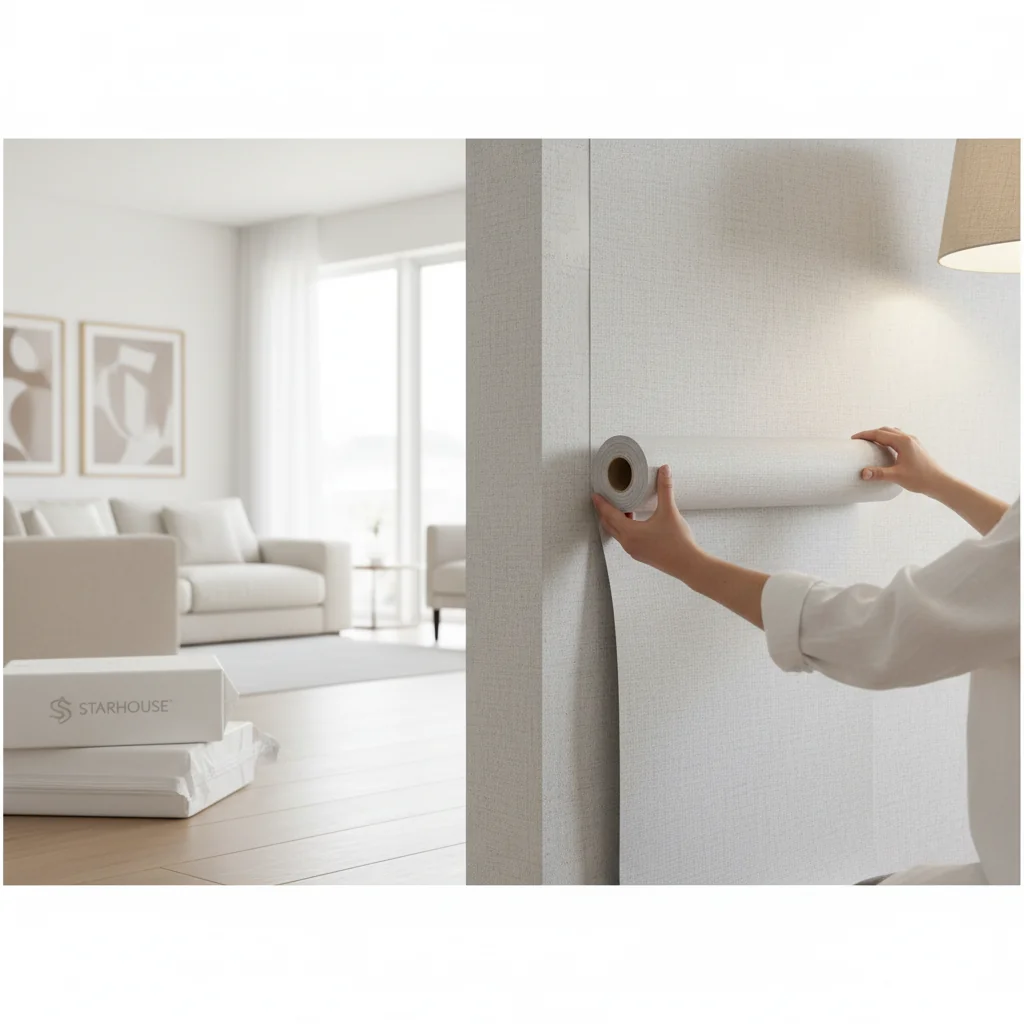
Self-adhesive wall liner offers a convenient, mess-free alternative, featuring a peel-and-stick backing. This type is typically a non-woven material with a pre-applied adhesive, protected by a release liner. It simplifies the installation process significantly, making it popular for DIY enthusiasts.
- Composition: Often a non-woven material with a pressure-sensitive adhesive backing.
- Key Benefits:
- Ease of Installation: No paste required, simply peel and stick.
- Cleanliness: Eliminates the need for messy adhesives.
- Repositionable: Many versions allow for temporary repositioning during installation.
- Removability: Typically designed for clean removal without damaging the wall.
- Limitations:
- Adhesion Strength: Adhesion quality can vary; cheaper versions may not stick well or may damage paint upon removal.
- Cost: Generally more expensive per roll than traditional pasted liners.
- Surface Preparation: Still requires a clean, smooth, and primed surface for optimal adhesion.
- Ideal Use: Excellent for temporary applications, rental properties, or for individuals seeking a straightforward, less labor-intensive installation process. It is particularly effective on smooth, well-primed walls.
Specialized Wall Liners
Beyond these core types, specialized wall liners address unique requirements:
- Thermal Liners: Incorporate insulating properties to help reduce heat loss, often made with foam or synthetic felt. These are thicker and can be effective in older homes with poor insulation.
- Sound-Absorbing Liners: Designed to dampen sound, these often feature a dense foam or felt layer. They are ideal for shared walls or home theaters, contributing to acoustic comfort.
- Damp-Proof Liners: Engineered with impermeable barriers to block moisture penetration, crucial for basements or walls with persistent dampness issues, though they do not address the source of the dampness.
Each type of wall liner serves a distinct purpose, and the selection process demands careful consideration of the wall’s current state, the desired final aesthetic, and the long-term performance expectations. Starhouse curates solutions that address both the foundational and aspirational aspects of home design, ensuring that every layer contributes to the overall excellence of your space.
Comparison of Wall Liner Types
| Feature | Non-Woven Liner | Fiberglass Liner | Paper-Based Liner | Self-Adhesive Liner |
|---|---|---|---|---|
| Composition | Synthetic/natural fibers (polyester, cellulose) | Woven/pressed glass fibers | Recycled paper pulp | Non-woven with pressure-sensitive adhesive |
| Dimensional Stability | Excellent (resists expansion/contraction) | Exceptional (highly stable) | Moderate (prone to expansion/contraction) | Good (inherits non-woven stability) |
| Concealing Power | Good (minor to moderate imperfections) | Excellent (bridges cracks, reinforces) | Fair (very minor imperfections, evens porosity) | Good (for minor imperfections) |
| Durability/Strength | High (tear-resistant, robust) | Superior (impact, abrasion, crack-resistant) | Moderate (less tear-resistant) | High (inherits non-woven durability) |
| Ease of Installation | Good (paste-the-wall method) | Challenging (rigid, requires specific tools/adhesives) | Moderate (requires soaking/booking) | Very Easy (peel-and-stick) |
| Ease of Removal | Excellent (strippable in full sheets) | Good (can be removed, but often requires scoring/wetting) | Poor (tends to tear, leaves residue) | Excellent (clean, dry removal) |
| Breathability | Good | Low (impervious) | Good | Moderate (depends on non-woven base) |
| Ideal Application | High-quality wallpapers, moderate wall flaws | Problem walls, high-traffic areas, crack prevention | Smooth walls, budget-conscious projects | DIY, temporary, rental properties, smooth walls |
| Approx. Price (per roll) | $25 – $70 | $40 – $100+ | $15 – $40 | $30 – $80 |
This comparative overview highlights that while paper-based liners offer a traditional and cost-effective approach, modern non-woven and fiberglass options provide superior performance, durability, and ease of use, aligning with contemporary demands for high-quality, long-lasting interior finishes. Self-adhesive variants prioritize convenience, making them appealing for specific project types.
Choosing the Right Wall Liner: A Strategic Decision
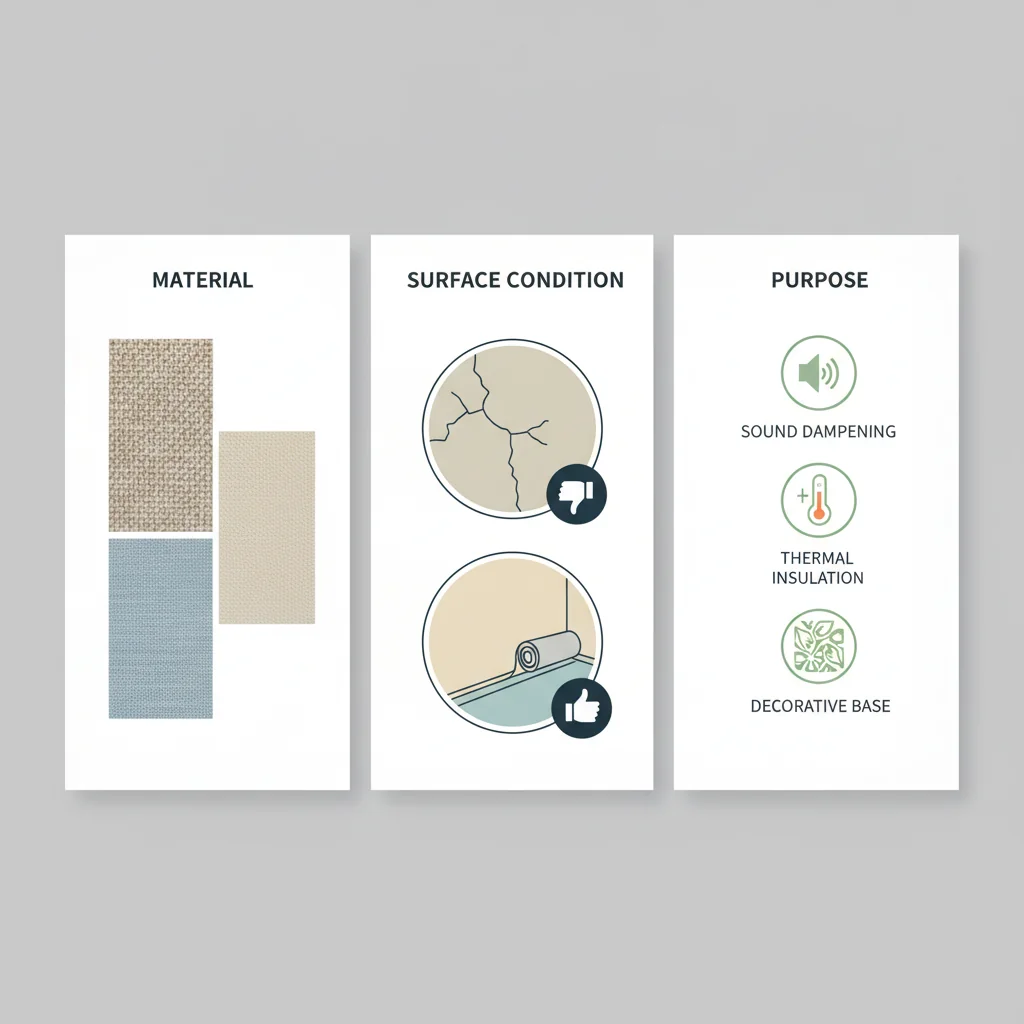
Selecting the appropriate wall liner is a strategic decision that profoundly impacts the success, durability, and aesthetic outcome of your wall finishing project. The correct choice depends on a careful assessment of several key factors, including the condition of your walls, the type of top finish you plan to apply, the specific environment of the room, and your project’s budget and skill level. A well-chosen liner ensures optimal performance and a professional result.
Assessing Wall Condition
The existing state of your walls is the primary determinant in choosing a wall liner. Different liners are engineered to address varying degrees of imperfections and structural needs.
- Perfectly Smooth Walls: If your walls are already in pristine condition, requiring only a uniform, absorbent surface for wallpaper, a lighter-grade non-woven or paper-based liner (e.g., 1000-grade paper) may suffice. Its role here is primarily to create an even base for adhesion and ensure strippability.
- Minor Imperfections (Hairline cracks, small dents, slight texture): For walls with minor flaws, a medium to heavy-grade non-woven liner (e.g., 150-200 gsm) is highly effective. Its inherent strength and bridging capabilities will smooth out these inconsistencies, creating a uniform surface without extensive patching.
- Significant Imperfections (Rough plaster, numerous cracks, uneven surfaces): Walls in poor condition, or those prone to cracking, demand a more robust solution. Fiberglass wall liner is the superior choice here, as its reinforcing properties prevent cracks from reappearing and provide exceptional structural stability. A heavy-duty non-woven liner can also be considered for significant, but not structural, texture issues.
- Existing Texture (e.g., Orange Peel, Knockdown): To completely obscure a pronounced wall texture, a heavy-grade non-woven liner or even multiple layers of a thinner non-woven liner might be necessary. Fiberglass liner can also be used, especially if the texture is very coarse and durability is paramount.
Considering the Top Finish
The type of wallcovering or paint you intend to apply over the liner significantly influences the best choice.
- Delicate or Sheer Wallpapers: For luxurious, thin, or light-colored wallpapers where any underlying color or texture would show through, a high-quality, smooth non-woven liner is essential. It provides a perfectly uniform, opaque base, ensuring the true beauty of the wallpaper is displayed.
- Textured or Heavy Wallpapers: While textured wallpapers can be more forgiving, a non-woven liner still provides superior adhesion and ensures the wallpaper hangs perfectly, preventing seams from showing and facilitating future removal. For very heavy vinyl or fabric-backed wallcoverings, a strong non-woven liner is critical to support the weight and prevent sagging.
- Paint: When painting over wall liner, a smooth non-woven or fiberglass liner is ideal. Non-woven liners provide a consistent, paintable surface that absorbs paint evenly, leading to a uniform finish. Fiberglass liners, while sometimes having a subtle texture, are excellent for creating an incredibly durable, crack-resistant painted surface, especially in high-traffic areas. Paper-based liners can also be painted over, but their dimensional instability can sometimes lead to minor surface irregularities after painting.
Room Environment and Specific Needs
The function and environmental conditions of the room also dictate liner selection.
- High-Moisture Areas (Bathrooms, Kitchens): In spaces prone to humidity, a breathable non-woven liner combined with a mold-inhibiting adhesive is often recommended. Fiberglass liner, being impervious to water, is also an excellent choice, particularly if coated with a suitable paint or wallcovering designed for wet areas.
- High-Traffic Areas (Hallways, Kids’ Rooms): Durability is key here. Fiberglass liner offers superior resistance to scuffs, impacts, and general wear and tear, making it ideal. A robust non-woven liner is also a strong contender, providing a resilient base for durable wallcoverings.
- Temperature Fluctuations: Walls exposed to significant temperature changes (e.g., exterior walls in older homes) benefit from dimensionally stable liners like non-woven or fiberglass, which resist movement and prevent cracks.
- Sound or Thermal Insulation: For specific needs like reducing noise or improving thermal efficiency, specialized thermal or sound-absorbing liners are the direct solution. These are typically thicker and integrate insulating materials.
Budget and Skill Level
Your project’s financial constraints and your experience with wall preparation are practical considerations.
- Budget: Paper-based liners are the most economical, suitable for minor projects or when budget is a primary concern. Non-woven liners offer a good balance of performance and cost. Fiberglass and specialized liners are at the higher end due to their advanced properties and durability.
- DIY vs. Professional Installation: Self-adhesive liners are the easiest for DIYers due to their peel-and-stick application. Non-woven liners, particularly those designed for paste-the-wall methods, are also relatively user-friendly. Paper-based liners require more traditional wallpapering skills (soaking, booking). Fiberglass liners are generally best left to experienced professionals due to their rigidity and specific adhesive requirements.
By systematically evaluating these factors, you can confidently select a wall liner that not only meets your aesthetic goals but also ensures the long-term integrity and performance of your chosen wall finish. Starhouse encourages a thoughtful, informed approach to every aspect of home design, recognizing that foundational choices pave the way for enduring beauty.
Beyond Function: How Wall Liner Influences Aesthetic Outcomes
Wall liner extends far beyond its functional role of concealing imperfections and promoting adhesion; it fundamentally influences the final aesthetic presentation of your walls, impacting everything from the perceived texture and color depth to the seamlessness of wallpaper installations. This foundational layer is a silent architect of visual excellence, ensuring that the decorative finish achieves its full potential in terms of clarity, vibrancy, and sophistication. Starhouse emphasizes that the subtle contributions of wall liner are pivotal in creating truly refined spaces.
Enhancing Color Depth and Uniformity
One of the most significant aesthetic contributions of wall liner is its ability to create a perfectly uniform base for color application, whether it’s paint or wallpaper. Walls, by nature, possess varying porosity, previous paint layers, or patched areas that can absorb paint or adhesive unevenly. This inconsistency results in blotchy color, visible brush strokes, or a dull, uneven appearance in the final finish.
- For Paint: Wall liner provides a consistent, non-porous surface that absorbs paint uniformly. This ensures that the chosen paint color appears true to its swatch, with rich, even saturation across the entire wall. It eliminates the need for multiple coats to achieve color consistency, saving time and paint. The result is a smooth, professional-grade painted finish that exudes depth and vibrancy.
- For Wallpaper: When applying wallpaper, especially lighter shades or those with subtle patterns, wall liner prevents any underlying wall color (e.g., dark paint, spackled areas) from showing through. It creates an opaque, neutral canvas, allowing the wallpaper’s true colors and intricate designs to stand out with maximum clarity and impact. This is particularly crucial for expensive or delicate wallcoverings where visual integrity is paramount.
Achieving Seamless Wallpaper Installations
The dimensional stability of high-quality wall liners, particularly non-woven types, is critical for achieving virtually invisible wallpaper seams. Wallpaper, when applied directly to an unprepared wall, can absorb moisture from the adhesive unevenly, leading to expansion and contraction. This movement causes seams to gap or overlap as the wallpaper dries, creating an amateurish and distracting finish.
By applying a dimensionally stable wall liner, you provide a consistent, non-absorbent substrate. The wallpaper adhesive bonds evenly to the liner, and the liner itself resists movement. This minimizes the risk of wallpaper shrinkage or expansion, ensuring that seams remain tightly butted together and virtually disappear, creating a cohesive, unbroken visual flow across the wall. This level of precision is a hallmark of sophisticated interior design.
Masking Imperfections for a Flawless Surface
Even minor wall imperfections—small cracks, nail holes, or slight textural variations from previous finishes—can become glaringly obvious once painted or wallpapered. Wall liner acts as a smoothing agent, effectively bridging these minor flaws to create a perfectly planar surface. This contributes to an overall sense of pristine elegance and meticulous attention to detail.
- Bridging Minor Cracks: The fibrous composition of non-woven and fiberglass liners has enough tensile strength to bridge hairline cracks, preventing them from telegraphing through the final wallcovering.
- Smoothing Textures: For walls with light textures (e.g., orange peel), a thicker wall liner can effectively flatten the surface, providing a smooth canvas for new finishes. This avoids the time-consuming and often messy process of skim coating.
- Uniform Absorption: Wall liner ensures that patched areas, which often have different porosity than the surrounding drywall, do not stand out through uneven paint absorption or wallpaper adhesion.
Creating a Foundation for Lasting Beauty
Beyond the immediate visual impact, wall liner contributes to the long-term aesthetic integrity of your walls. It protects the underlying drywall or plaster from the stresses of application and removal of wallcoverings, preventing surface damage that could degrade the wall’s appearance over time. This preservation of the wall’s substrate ensures that future redecoration projects start from a strong, smooth foundation, prolonging the life and beauty of your interiors.
In essence, wall liner is not just a hidden layer; it is an active participant in crafting the visual narrative of a room. It elevates the quality of the finish, refines the details, and ensures that every design choice, from the subtlest paint hue to the most intricate wallpaper pattern, is presented in its best light. Starhouse advocates for this foundational excellence as the cornerstone of truly distinguished living spaces.
Mastering the Measurements: Sizing and Installation Essentials
Accurate measurement and meticulous installation are paramount to achieving a professional and enduring finish with wall liner. Incorrect calculations lead to material waste or insufficient coverage, while improper installation can compromise the aesthetic and longevity of your subsequent wallcovering or paint. This section outlines the precise steps for sizing, preparing, and applying wall liner, ensuring a flawless foundation for your interior design project.
Step 1: Accurate Measurement of Your Space
Before purchasing any material, precise measurement of the walls is non-negotiable. This prevents costly over-ordering or frustrating shortages.
- Measure Wall Height: Measure the height of each wall from the baseboard to the ceiling. If the height varies, use the tallest measurement for calculation to ensure sufficient material for each strip. Add an extra 4-6 inches to this height for trimming at the top and bottom.
- Measure Wall Width: Measure the total width of all walls to be covered.
- Calculate Total Square Footage: Multiply the total height (including trim allowance) by the total width to get the approximate square footage. For complex rooms, measure each wall section individually (e.g., width of wall A x height of wall A, then sum all sections).
- Determine Roll Coverage: Wall liner rolls typically come in standard sizes. For example, a common roll might be 21 inches wide by 33 feet long (approximately 57.75 sq ft) or 36 inches wide by 24 feet long (approximately 72 sq ft). Always check the manufacturer’s stated coverage for the specific product you intend to use.
- Calculate Number of Rolls: Divide your total wall square footage by the square footage coverage per roll. Always round up to the nearest whole number. It is advisable to purchase one extra roll (a “buffer roll”) to account for errors, pattern matching (though less critical for plain liner), or future repairs.
- Account for Openings: While you don’t subtract the full area of windows and doors, you can make a slight adjustment. For every two standard doors or windows, you might deduct one strip of liner from your total calculated strips, as the off-cuts from these areas can often be used elsewhere.
Example Calculation:
- Room Dimensions: 10 ft high x 12 ft wide x 15 ft long (2 walls of 12 ft, 2 walls of 15 ft)
- Total Wall Width: (12 ft + 15 ft) x 2 = 54 ft
- Wall Height (with trim allowance): 10 ft + 0.5 ft (6 inches) = 10.5 ft
- Total Square Footage: 54 ft x 10.5 ft = 567 sq ft
- Assuming a roll covers 57.75 sq ft: 567 sq ft / 57.75 sq ft/roll ≈ 9.8 rolls
- Number of Rolls to Purchase: 10 rolls + 1 buffer roll = 11 rolls.
Step 2: Essential Tools and Materials
Having the right tools ensures a smooth and efficient installation process:
- Tape Measure: For precise wall and liner measurements.
- Utility Knife with Snap-Off Blades: For sharp, clean cuts.
- Straightedge or Level: To ensure straight plumb lines.
- Pencil: For marking plumb lines and cutting guides.
- Wallpaper Paste/Adhesive: Ensure it’s compatible with your chosen liner type (heavy-duty for non-woven/fiberglass, all-purpose for paper).
- Paste Brush or Roller: For even application of adhesive.
- Smoothing Brush or Plastic Smoother: To remove air bubbles and flatten the liner.
- Seam Roller: To press down seams firmly.
- Bucket and Sponge: For clean-up.
- Drop Cloths: To protect floors and furniture.
- Step Ladder: For reaching high areas.
- Protective Gloves: Especially for fiberglass liner, to prevent skin irritation.
Step 3: Meticulous Wall Preparation
Proper wall preparation is the most critical step, determining the adhesion and longevity of the liner. Neglecting this step guarantees poor results.
- Clean Walls: Wash walls thoroughly with a mild detergent (e.g., TSP substitute) and water to remove dirt, grease, and grime. Rinse well and allow to dry completely.
- Repair Imperfections: Fill all nail holes, cracks, and dents with spackle or drywall compound. Sand smooth once dry. For deeper imperfections, multiple layers may be required.
- Prime Walls: Apply a high-quality acrylic primer/sealer (e.g., an oil-based primer for stain blocking, or a water-based primer for general purpose) to all walls. Primer seals the surface, promotes adhesion, and prevents paste from soaking into the drywall. For new drywall, priming is absolutely essential. Allow primer to dry fully according to manufacturer instructions.
- Remove Fixtures: Remove switch plates, outlet covers, and any wall-mounted fixtures. Turn off power to outlets and switches at the breaker box for safety.
- Establish Plumb Lines: Using a level and pencil, draw a vertical plumb line from the ceiling down, approximately 18-20 inches from a corner or door frame. This ensures your first strip is perfectly straight, which is crucial for subsequent strips.
Before undertaking any wall finishing project, ensure the structural integrity and safety of the wall itself. While applying wall liner is distinct from structural construction, the fundamental principle of a sound substrate is paramount for safety and longevity, as highlighted by resources like those from OSHA on wall erection safety. A stable wall prevents future issues with your wall liner and decorative finishes.
Step 4: Installation Techniques (General Guide)
While specific instructions vary by liner type and manufacturer, these general steps apply:
- Cut Strips: Cut your first strip of wall liner to the measured wall height, adding the 4-6 inches for trimming. Repeat for subsequent strips, but if using a patterned liner (rare, but some textured liners have a slight repeat), ensure pattern alignment.
- Apply Adhesive (for paste-the-wall or paste-the-paper):
- Paste-the-Wall: Apply a generous, even layer of adhesive directly to the wall section where the first strip will go, slightly wider than the liner strip.
- Paste-the-Paper: Apply adhesive to the back of the cut liner strip. Fold the pasted ends towards the center (but not creasing) to “book” the paper, allowing the adhesive to soak in for the recommended time (usually 5-10 minutes). This activates the adhesive and allows the paper to expand before application, reducing shrinkage on the wall.
- Hang the First Strip: Align the top edge of the liner with the ceiling line (or slightly above for trimming) and the side edge precisely with your plumb line. Smooth the liner onto the wall using a smoothing brush or plastic smoother, working from the center outwards to remove all air bubbles.
- Trim Excess: Use a sharp utility knife and a straightedge (or the back of your smoothing tool) to trim the excess liner at the ceiling and baseboard. Change blades frequently for clean cuts.
- Hang Subsequent Strips: Apply the next strip, butting its edge tightly against the previous strip. Do not overlap. Smooth out bubbles. Use a seam roller to gently press down the seam, but avoid excessive pressure that could squeeze out adhesive.
- Work Around Obstacles:
- Windows/Doors: Hang the liner over the opening. Make diagonal cuts from the corners of the opening towards the center, then trim along the frame.
- Outlets/Switches: Turn off power. Hang the liner over the opening, make an X-cut over the box, and trim around the perimeter.
- Final Inspection: Once all strips are installed, carefully inspect for bubbles or loose seams. Address any issues promptly. Wipe off any excess adhesive with a damp sponge before it dries.
For public or commercial spaces, the choice of wall liner can indirectly contribute to maintaining accessible environments by ensuring a smooth, consistent wall surface that supports the application of durable, easy-to-clean wallcoverings, aligning with the spirit of ADA Accessibility Standards for building elements and spaces. A flawless, well-prepared wall contributes to the overall safety and usability of a space.
Step 5: Drying Time and Top Coat Application
Allow the wall liner to dry completely, typically 24-48 hours, before applying wallpaper or paint. This drying time is crucial for the adhesive to fully cure and for the liner to stabilize. Applying a top coat too soon can lead to bubbling, peeling, or uneven finishes. Follow the specific drying recommendations of your chosen adhesive and liner.
Mastering these measurements and installation techniques ensures that your wall liner provides an optimal foundation, allowing your chosen wall finish to perform at its best and contribute to the sophisticated aesthetic Starhouse champions. Precision in preparation yields unparalleled results in presentation.
Care and Longevity: Protecting Your Investment
While wall liner itself is typically covered by a decorative finish, its proper care and the contribution it makes to the longevity of your walls are critical aspects of a well-maintained home. The initial installation of a high-quality wall liner is an investment that protects your walls, extends the life of your chosen wallcovering, and simplifies future redecoration. Understanding how to maintain this foundational layer, even indirectly, ensures enduring beauty and structural integrity.
Preserving the Wall Liner’s Integrity
The primary way to care for your wall liner is through the careful application and maintenance of the wallcovering or paint that covers it. The liner acts as a protective shield for your drywall or plaster, but its own integrity is safeguarded by the finish applied over it.
- Proper Top Coat Application: Ensure that wallpaper or paint is applied correctly over the dry wall liner. This means using compatible adhesives, allowing adequate drying time, and avoiding excessive moisture during application. A well-adhered top coat prevents moisture from penetrating to the liner, which could compromise its adhesion or lead to bubbling.
- Avoiding Punctures and Tears: While the wall liner adds a layer of durability, it is not impervious to damage. Be mindful of sharp objects, furniture abrasions, or impacts that could puncture or tear the outer wallcovering. Damage to the top layer can expose and potentially compromise the wall liner beneath.
- Managing Moisture: In areas prone to high humidity, ensure good ventilation. While some non-woven liners are breathable, excessive, prolonged moisture can still affect the adhesive bond of both the liner and the top layer. Address any leaks or water ingress immediately to prevent damage to the wall structure and its coverings.
How Wall Liner Extends Wallcovering Lifespan
The strategic use of wall liner directly contributes to the extended lifespan and pristine appearance of your decorative wall finishes through several key mechanisms:
- Enhanced Adhesion: Wall liner provides a stable, uniform, and optimal surface for wallpaper adhesive to bond. This strong, consistent bond prevents wallpaper from peeling, lifting at the seams, or developing bubbles, all of which contribute to premature deterioration. The adhesive adheres to the liner, not directly to the wall, creating a more reliable connection.
- Protection from Wall Damage: When it comes time to redecorate, a properly installed wall liner allows for clean and easy removal of wallpaper. Instead of tearing off sections of drywall paper or plaster, the wallpaper (and often the liner itself, especially non-woven types) peels away cleanly. This preserves the underlying wall surface, preventing costly repairs and ensuring a smooth foundation for the next decorative treatment.
- Crack Prevention and Reinforcement: For walls prone to hairline cracks, particularly those in older homes or areas with structural movement, fiberglass wall liner provides significant reinforcement. It acts as a tensile layer, absorbing minor stresses and preventing cracks from reappearing through the wallcovering. This structural reinforcement significantly extends the aesthetic life of the wall finish.
- Moisture Barrier (Indirectly): While not a primary damp-proofing agent, wall liner can act as a subtle barrier. By creating a smooth, sealed surface, it can slow down the absorption of incidental moisture into the drywall, protecting the wall’s integrity and reducing the risk of mold growth behind the wallcovering, especially when used with appropriate primers and adhesives.
- Even Surface for Paint: For painted walls, the smooth, consistent surface provided by wall liner ensures even paint absorption and a uniform finish. This reduces the likelihood of paint cracking due to uneven drying or surface inconsistencies, contributing to a longer-lasting, flawless painted surface.
Repairing Damaged Wall Liner
Should the wall liner or the wallcovering over it become damaged, prompt repair is essential to maintain the wall’s aesthetic and protective qualities:
- Minor Tears/Bubbles in Top Layer: For small tears in wallpaper, a careful patch can be applied. For bubbles, a small incision and re-adhesion with a syringe of adhesive can be effective. If these issues are extensive, it might indicate an issue with the underlying liner or installation.
- Damage to Exposed Liner: If the decorative finish is removed or severely damaged, exposing the wall liner, minor damage to the liner itself can often be repaired. For small tears or holes, carefully cut out the damaged section and patch it with a new piece of the same wall liner, ensuring edges are feathered and smooth. Use a compatible adhesive.
- Extensive Damage: For large areas of damage or if the wall liner is peeling extensively, it may be necessary to remove the affected section of wallcovering and liner and reapply. This underscores the importance of proper initial installation to avoid such issues.
By understanding the protective role of wall liner and employing diligent maintenance practices for your wallcoverings, you safeguard your initial investment and ensure that your walls remain a stunning and durable feature of your home for years to come. Starhouse champions this proactive approach to home design, where foundational excellence leads to enduring beauty.
Common Pitfalls: Avoiding Wall Liner Mistakes
Even with the best intentions, several common mistakes can undermine the effectiveness of wall liner, leading to compromised aesthetic outcomes and reduced longevity of your wall finishes. Recognizing and actively avoiding these pitfalls is crucial for achieving a professional, durable, and sophisticated result. Starhouse emphasizes that meticulous attention to detail at every stage is non-negotiable for superior interior design.
1. Inadequate Wall Preparation
This is arguably the most frequent and impactful mistake. Failing to properly prepare the wall surface before applying wall liner negates many of the liner’s benefits.
- Problem: Applying liner to dirty, greasy, dusty, or uneven walls. Old adhesive residue, flaking paint, or un-sanded spackle patches.
- Consequence: Poor adhesion of the liner, leading to bubbles, peeling, or visible imperfections telegraphing through the liner and subsequent wallcovering. The liner cannot effectively smooth out significant textures or hide large flaws if the underlying surface is unstable or rough.
- Solution: Thoroughly clean, repair, and sand walls. Apply a high-quality primer/sealer, especially on new drywall, patched areas, or glossy surfaces. Ensure the wall is completely dry before application.
2. Choosing the Wrong Type of Wall Liner
Mismatched liner to wall condition or top finish leads to suboptimal performance and aesthetic disappointment.
- Problem: Using a thin paper-based liner on heavily textured or cracked walls, or using a non-breathable liner in a high-moisture environment.
- Consequence: The liner fails to conceal imperfections, cracks reappear, or moisture gets trapped, leading to mold or peeling. For instance, a light paper liner will not adequately smooth out an orange peel texture.
- Solution: Accurately assess wall condition, intended top finish, and room environment. Consult the comparison table and guidelines provided in the “Choosing the Right Wall Liner” section. Select a liner specifically designed for your project’s needs, such as fiberglass for problem walls or a heavy-grade non-woven for significant texture.
3. Incorrect Adhesive Application
The adhesive is the critical bond between the wall, the liner, and the final finish. Errors here lead to complete failure.
- Problem: Using the wrong type of adhesive (e.g., standard wallpaper paste for heavy-duty non-woven or fiberglass liner), applying too little or too much paste, or uneven application.
- Consequence: Liner bubbles, peels, or lifts at the seams. Too little paste results in poor adhesion; too much can cause slippage, squeeze-out, or prolonged drying times. Incompatible paste simply won’t hold the liner effectively.
- Solution: Always use an adhesive specifically recommended by the wall liner manufacturer for your chosen liner type. Apply paste evenly and generously according to instructions. For paste-the-paper liners, allow adequate “booking” time. For paste-the-wall, ensure even coverage.
4. Inaccurate Measurements and Cutting
Precision is key in all aspects of wall preparation and application.
- Problem: Cutting liner strips too short or too long, or cutting them unevenly. Not accounting for trim allowance.
- Consequence: Visible gaps at the ceiling or baseboard, wasted material, or uneven seams. Short strips are unusable; excessively long ones require more trimming, increasing labor and potential for error.
- Solution: Measure wall height accurately, adding 4-6 inches for trimming. Use a sharp utility knife and a straightedge for clean, precise cuts. Double-check measurements before cutting.
5. Improper Hanging Technique
The method of application directly affects the final finish.
- Problem: Not establishing a plumb line, overlapping seams, failing to remove air bubbles, or stretching the liner during application.
- Consequence: Crooked strips, visible seam lines, trapped air bubbles that create bumps, or distorted patterns (if applicable). Stretching non-woven or paper liners can lead to shrinkage and gapping as they dry.
- Solution: Always start with a plumb line. Butt seams tightly without overlapping. Use a smoothing tool to work out all air bubbles from the center outwards. Handle the liner carefully to avoid stretching, especially when wet.
6. Insufficient Drying Time
Patience is a virtue in wall finishing; rushing the process leads to irreversible issues.
- Problem: Applying wallpaper or paint over wall liner before it has fully dried and the adhesive has cured.
- Consequence: The moisture from the top coat can reactivate the liner adhesive, causing bubbling, blistering, or delamination of the liner. It can also lead to uneven absorption of paint or wallpaper paste, resulting in a patchy finish.
- Solution: Allow the wall liner to dry completely for at least 24-48 hours, or as specified by the manufacturer, before proceeding with any subsequent layers. Ensure adequate ventilation in the room to facilitate drying.
By diligently avoiding these common mistakes, you can ensure that your wall liner performs its intended function flawlessly, providing an exceptional foundation for the beautiful, lasting interiors that Starhouse helps you create. Precision and patience are the cornerstones of a truly distinguished finish.
Starhouse is curating a collection that speaks to these exacting standards. If you envision a space where every detail, from the foundational wall liner to the final decorative flourish, is perfectly considered, tell us what you’re looking for. Your input helps shape our offerings for early access.
The Future of Walls: Emerging Trends in Wall Liner Technology
The field of wall liner technology is continuously evolving, driven by innovations in material science, sustainability initiatives, and increasing demands for enhanced performance and convenience. Emerging trends focus on smart functionalities, eco-friendly compositions, and specialized properties that cater to modern living and design challenges. These advancements promise to make wall preparation even more efficient, effective, and environmentally conscious, aligning with Starhouse’s forward-thinking approach to home décor.
1. Sustainable and Eco-Friendly Formulations
A significant trend is the development of wall liners made from recycled, renewable, or biodegradable materials, minimizing environmental impact. Manufacturers are increasingly prioritizing product life cycles and reducing chemical footprints.
- Recycled Content: Liners incorporating post-consumer or post-industrial recycled fibers (e.g., recycled paper, recycled polyester) are becoming more prevalent.
- Natural Fibers: Exploration of natural fibers like bamboo, jute, or linen in non-woven blends offers biodegradable and renewable alternatives.
- Low VOC Adhesives: Paired with these liners are low-VOC (Volatile Organic Compound) or VOC-free adhesives, contributing to healthier indoor air quality. This is crucial for environments where occupant well-being is a priority.
- Cradle-to-Cradle Design: Some manufacturers are moving towards products that can be fully recycled or composted at the end of their life, supporting a circular economy.
2. Enhanced Smart Functionalities
The integration of “smart” properties into wall liners represents a cutting-edge frontier, moving beyond basic preparation to active enhancement of the living environment.
- Integrated Connectivity: Research is exploring wall liners that can subtly embed conductive materials or fiber optics, potentially enabling “smart walls” that can power low-voltage devices, integrate sensors, or even display subtle lighting effects without visible wiring. This could transform how we interact with our living spaces.
- Thermal Regulation: Advanced thermal liners are being developed with phase-change materials (PCMs) or enhanced insulating foams that actively absorb and release heat, contributing to more stable indoor temperatures and reducing energy consumption. These go beyond passive insulation to active climate moderation.
- Advanced Sound Absorption: Next-generation acoustic liners utilize complex material structures (e.g., micro-perforated membranes, multi-layered composites) to offer superior sound dampening, creating quieter and more peaceful interiors, especially valuable in urban environments or multi-family dwellings.
3. Advanced Composites and Hybrid Materials
Material science is leading to hybrid wall liners that combine the best properties of different materials, offering multi-functional benefits in a single product.
- Fiberglass-Non-Woven Hybrids: Combining the crack-bridging strength of fiberglass with the ease of application and strippability of non-woven materials, these hybrids offer superior durability and user-friendliness.
- Reinforced Paper Liners: Innovations in paper-based liners include incorporating synthetic microfibers or binders to enhance their dimensional stability and tear resistance, bridging the gap between traditional paper and modern non-woven options.
- Antimicrobial Properties: Liners infused with antimicrobial agents are gaining traction, particularly for healthcare settings or homes in humid climates, to actively inhibit the growth of mold, mildew, and bacteria.
4. Peel-and-Stick Evolution and Repositionability
While self-adhesive liners exist, the trend is towards improved adhesive technologies that offer stronger, yet more forgiving bonds, along with enhanced repositionability and guaranteed clean removal.
- Micro-Suction Technology: Some advanced peel-and-stick products are exploring micro-suction rather than traditional adhesives, allowing for easy repositioning multiple times without losing tack or damaging surfaces.
- Optimized Adhesion for Diverse Surfaces: Development of self-adhesive liners designed to perform optimally on a wider range of wall surfaces, from lightly textured to freshly painted, expanding their versatility.
5. Pre-Primed and Pre-Treated Liners
To further streamline the preparation process, manufacturers are introducing wall liners that come pre-primed or pre-treated, reducing steps for the installer.
- Pre-Primed for Paint: Liners that are factory-primed, ready to accept paint directly after installation and drying, eliminating the need for an additional priming step.
- Color-Neutralized: Liners with a perfectly neutral white or off-white base color, specifically designed to ensure true color rendition for any subsequent paint or wallpaper, without any underlying color casts.
These emerging trends indicate a future where wall liner is not merely a utilitarian underlayment but an integral, high-performance component of the smart, sustainable, and aesthetically refined home. Starhouse remains committed to curating products that embody these advancements, providing our customers with cutting-edge solutions for their most ambitious design visions.
Sources
Frequently Asked Questions
What is wall liner used for?
Wall liner is primarily used as a preparatory underlayment for walls, creating a smooth, uniform surface that conceals minor imperfections and provides an optimal, stable base for wallpaper or paint application.
Do I always need to use wall liner before wallpaper?
While not always strictly mandatory, using wall liner is highly recommended before applying wallpaper, especially for delicate, light-colored, or expensive wallpapers, to ensure a smooth finish, prevent underlying wall imperfections from showing through, and facilitate future removal.
Can I paint over wall liner?
Yes, you can absolutely paint over wall liner, and it is often recommended as it provides a perfectly smooth, uniform, and stable surface that accepts paint evenly, resulting in a professional, flawless painted finish.
What is the difference between non-woven and paper-based wall liner?
Non-woven wall liner is made from synthetic fibers, offering superior dimensional stability, strength, and ease of removal, while paper-based liner is made from recycled paper pulp, is more economical, but is prone to expansion/contraction and can be harder to remove cleanly.
How do I calculate how much wall liner I need?
To calculate the amount of wall liner needed, measure the total height of your walls (adding 4-6 inches for trim) by the total width of all walls to be covered, then divide this total square footage by the square footage coverage stated on the wall liner roll, always rounding up and adding an extra roll for contingency.
How long does wall liner need to dry before I can apply wallpaper or paint?
Wall liner typically needs to dry for a minimum of 24 to 48 hours, or according to the manufacturer’s specific instructions, to allow the adhesive to fully cure and the liner to stabilize before applying wallpaper or paint.
Can wall liner help with cracks in my walls?
Yes, certain types of wall liner, particularly heavy-grade non-woven and especially fiberglass liners, are highly effective at bridging and reinforcing hairline cracks, preventing them from reappearing through your final wall finish.
Conclusion: The Unseen Artistry of Wall Liner
The journey through the world of wall liner reveals it to be far more than a mere utilitarian product; it is a fundamental pillar of sophisticated interior design, an unseen artistry that underpins the beauty and longevity of our most cherished spaces. From its diverse types, each engineered for specific challenges, to its profound influence on aesthetic outcomes, wall liner is the silent guarantor of a flawless finish. It conceals, strengthens, smooths, and protects, ensuring that every decorative choice, from the most vibrant wallpaper to the subtlest paint hue, is presented with impeccable clarity and enduring grace.
At Starhouse, we understand that true elegance begins with a meticulous foundation. Our curated approach to home décor extends to every layer, recognizing that the quality of the wall liner directly elevates the final presentation and durability of your walls. By making informed choices in material selection, mastering precise installation techniques, and actively avoiding common pitfalls, homeowners and designers alike can transform ordinary walls into canvases of extraordinary beauty.
As we look to the future, innovations in sustainable materials, smart functionalities, and advanced composites promise to further enhance the role of wall liner, making our homes not only more beautiful but also more efficient and responsive to our needs. Embracing these advancements means investing in the long-term integrity and aesthetic excellence of your living environment.
We believe that every detail contributes to the story of your home. If you are envisioning a space where foundational excellence meets aspirational design, we invite you to share your vision with us. Starhouse is meticulously curating its collection of everything for the home, designed to meet the exacting standards of our discerning clientele. Your insights are invaluable in shaping our offerings and ensuring we provide exactly what you need to create your perfect sanctuary. Tell us what you’re looking for and get early access to our exclusive collection, where quality, style, and innovation converge to define the art of gracious living.