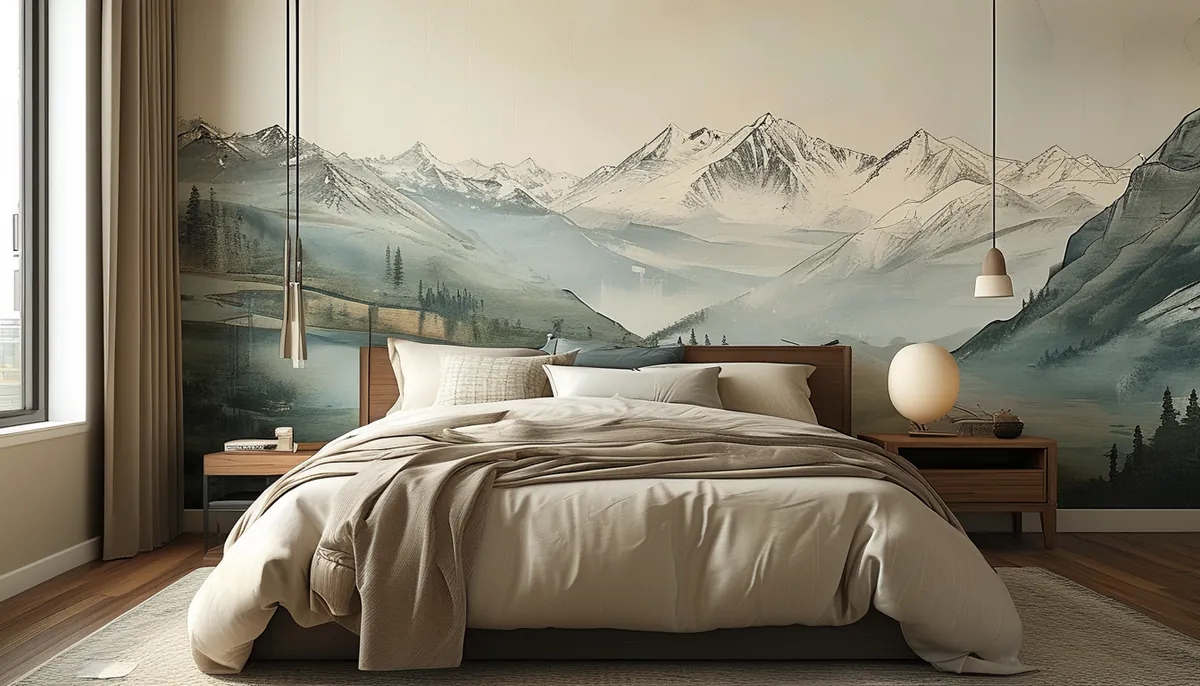
When choosing a bedroom mural, think about the focal point of the room. Do you want the mural to be a subtle backdrop or the main event? Consider the overall style you want to achieve. For a serene escape, a nature-inspired mural like a forest, mountains, or a tranquil beach scene can be incredibly effective. If you prefer something more contemporary, abstract designs, geometric patterns, or cityscapes offer a modern edge. Don’t forget the impact of color; bold hues can energize a space, while softer tones promote relaxation.
Choosing the right size and scale for your bedroom mural
The size of your mural is critical. A mural that’s too large for the wall can feel overwhelming, making the room seem smaller. Conversely, a mural that’s too small can look lost and insignificant. Measure your wall carefully. A common guideline is to ensure the mural doesn’t extend beyond the main furniture pieces, like your bed or dresser, unless it’s a full-room wrap-around design. For instance, if your bed is centered on the wall, the mural could align with the width of the headboard or extend slightly beyond it. A mural that covers the entire wall behind the bed can create a dramatic statement.
Consider the room’s dimensions and ceiling height. Tall ceilings can accommodate murals with more vertical detail, like cascading waterfalls or towering trees. In rooms with lower ceilings, a design that emphasizes horizontal lines can make the space feel wider and more expansive. Always check the scale of the design elements within the mural. If it’s a landscape, are the trees or buildings in proportion to your room? A mural with very small, detailed elements might be lost from a distance, while a design with massive elements could overpower the space.
Material considerations for bedroom murals
Bedroom murals come in various materials, each with its own pros and cons. The most common types are:
- Peel-and-stick vinyl murals: These are incredibly popular due to their ease of installation and removal. They are ideal for renters or for those who like to change their decor frequently. The adhesive is strong enough to hold but usually doesn’t damage paint when removed carefully. They are also washable and durable. Thickness can vary, with some being quite robust and others more delicate.
- Traditional wallpaper murals: These are applied with wallpaper paste, similar to standard wallpaper. They often offer a more premium finish, with options for textured surfaces that add depth. Installation is more involved, and removal can be more challenging, potentially requiring steaming.
- Fabric murals: Less common but offering a unique tactile quality, fabric murals can provide a soft, luxurious look. They are often custom-made and can be more expensive.
- Mural kits: Some murals come as a series of numbered panels that you piece together like a puzzle. This can simplify the application process, ensuring a cohesive design.
When selecting a material, think about the longevity you expect, the ease of installation you desire, and the overall aesthetic you’re aiming for. Vinyl murals are generally a safe bet for most DIYers.
Popular themes and styles for bedroom murals
The theme of your bedroom mural sets the tone for the entire room. Here are some ideas:
- Nature scenes: Lush forests, serene beaches, majestic mountains, tranquil lakes, or starry night skies are perennial favorites. These can create a calming and immersive atmosphere. For example, a forest mural can bring the outdoors in, making your bedroom feel like a private retreat. You can explore styles ranging from photorealistic to stylized, watercolor-like depictions. Consider linking to our post on wall mural design ideas for more inspiration on diverse themes.
- Abstract art: Bold geometric patterns, fluid watercolor washes, or textured abstract designs can add a contemporary and artistic flair. These are excellent for making a statement and can complement minimalist or modern decor.
- Cityscapes and maps: For the urban enthusiast, a mural of your favorite city skyline or an antique map can be a sophisticated choice. This can evoke a sense of wanderlust or personal connection.
- Floral and botanical prints: Large-scale floral designs or intricate botanical illustrations can bring life and color to a bedroom. These can range from delicate, vintage-inspired patterns to bold, modern interpretations. If you love the elegance of specific color palettes, you might find our discussion on blue and white wallpaper ideas and coral wallpaper designs relevant for incorporating these themes.
- Illustrations and graphics: Whimsical illustrations, graphic novel-inspired art, or even custom-designed graphics can inject personality and fun into a bedroom, especially for a child’s or teen’s room.
- Textured or scenic designs: Murals that mimic textures like brick, wood, or concrete can add an industrial or rustic feel. Scenic murals, beyond just nature, could include historical scenes or fantasy landscapes.
- Geometric patterns: These can range from simple repeating shapes to complex tessellations, offering a modern and structured look. They can be used to create a sense of order or to add visual interest.
When selecting a theme, consider your personal style and the mood you want to create. Is it a space for relaxation, or do you want it to feel energizing and inspiring?
Preparing your walls for mural installation
Proper wall preparation is arguably the most crucial step for a successful mural installation. Skipping this can lead to bubbles, peeling, or an uneven finish.
- Clean the walls: Remove all dust, dirt, grease, and cobwebs. Use a mild detergent and water solution, then rinse thoroughly. Ensure the walls are completely dry before proceeding.
- Repair imperfections: Fill any holes, cracks, or dents with spackle or joint compound. Sand smooth once dry. Any bumps or divots will be visible through the mural, especially with thinner materials.
- Sand lightly: If your walls are glossy, lightly sand them to create a surface that the adhesive can grip better. Wipe away any sanding dust with a damp cloth.
- Prime the walls: For most vinyl and traditional wallpaper murals, priming is recommended. A good quality primer will ensure even adhesion and make future removal easier. Use a water-based primer and let it dry completely according to the manufacturer’s instructions.
- Consider the existing wall color: If you have very dark or vibrant existing paint, and your mural is light-colored and somewhat translucent, the old color might show through. In such cases, a fresh coat of primer or a base coat of paint that matches the dominant color of your mural can be beneficial.
The smoother and cleaner your walls are, the better your mural will adhere and the more professional the final result will look.
Step-by-step guide to installing a peel-and-stick bedroom mural
Peel-and-stick murals are the most accessible option for DIYers. Here’s how to install one:
- Read the manufacturer’s instructions: Every mural is slightly different. Always follow the specific guidelines provided.
- Gather your tools: You’ll need a squeegee or a plastic smoother, a utility knife or scissors, a measuring tape, a level, and possibly a step ladder.
- Plan your starting point: Most murals are designed to be applied from one edge or corner. Decide where you want to start. Using a level, draw a faint vertical pencil line to ensure your first strip is perfectly straight.
- Peel and stick gradually: Peel a small section of the backing paper from the top edge. Align the mural with your starting line or edge. Once positioned, gently smooth the exposed adhesive section onto the wall with your squeegee, working from the center outwards to push out air bubbles.
- Continue peeling and smoothing: Slowly peel off more backing paper as you continue to smooth the mural onto the wall. Work methodically, ensuring no air is trapped. If you encounter a bubble, you can often lift the section slightly and re-smooth, or prick small bubbles with a fine needle and press flat.
- Trim excess: Once the mural is fully applied, use a sharp utility knife to carefully trim any excess material at the edges, ceiling, or baseboard.
- Overlap (if applicable): Some murals have slight overlaps between panels. Ensure these are aligned smoothly.
Take your time. Rushing the process is the most common mistake. Ensure each section is firmly adhered and free of bubbles before moving to the next.
Installing a traditional wallpaper mural
For traditional wallpaper murals, the process is similar but involves adhesive:
- Prepare the mural: Some murals come pre-pasted, requiring soaking in water. Others require you to apply paste to the back of the paper or directly to the wall. Follow instructions carefully.
- Book the wallpaper (if required): If you apply paste to the paper, fold it onto itself (paste-to-paste) and let it rest for the time specified by the manufacturer. This allows the paste to activate and the paper to expand evenly.
- Apply to the wall: If pasting the wall, apply a consistent layer of paste to the area where the first strip will go. If pasting the paper, ensure the entire back is covered.
- Hang the first strip: Align the top edge of the mural strip with the ceiling and use a level to ensure it’s perfectly vertical. Gently press it onto the wall, smoothing from the center outwards with a wallpaper brush or smoother to remove air bubbles.
- Continue with subsequent strips: Hang the next strip, butting the edge against the previous one or overlapping slightly if the design calls for it. Ensure patterns align perfectly.
- Trim excess: Use a sharp blade to trim excess paper at the ceiling, baseboard, and around windows or doors.
- Clean up: Wipe away any excess paste immediately with a damp sponge or cloth.
Traditional murals often provide a more durable and finished look, but require more effort and precision.
Maintaining your bedroom mural
Proper care will ensure your mural remains vibrant and in good condition for years to come.
- Dusting: Gently dust the mural regularly with a soft, dry cloth or a feather duster. Avoid abrasive materials.
- Cleaning: For most vinyl and washable wallpaper murals, you can use a damp cloth with a mild soap solution. Wipe gently, starting from the top and working down. Avoid excessive moisture, as this can damage the adhesive or the print. Always test a small, inconspicuous area first to ensure colorfastness.
- Avoid direct sunlight: Prolonged exposure to direct sunlight can cause colors to fade over time. Position your mural away from direct sunbeams if possible, or use window treatments to filter the light.
- Be cautious with decor: When hanging pictures or shelves over a mural, use appropriate hardware and avoid putting too much weight on any single point. For peel-and-stick murals, be especially careful if you plan to remove them; vigorous pulling can damage the paint underneath.
Regular, gentle maintenance is key to preserving the beauty of your mural.
Common mistakes to avoid with bedroom murals
Even with the best intentions, some common pitfalls can lead to disappointing results:
- Improper wall preparation: As mentioned, this is critical. Painting over a dirty or uneven wall is a recipe for disaster.
- Rushing the installation: Taking your time, especially with peel-and-stick applications, is essential for a smooth, bubble-free finish.
- Not checking scale and proportion: A mural’s design elements must be in harmony with the room’s size and your furniture.
- Using the wrong adhesive or technique: Always follow the manufacturer’s instructions for paste or adhesive application.
- Ignoring moisture: Avoid installing murals in areas with high humidity or moisture unless the material is specifically designed for it. Bathrooms or kitchens might require special considerations.
- Fading from sunlight: Not considering the impact of direct sun can lead to premature wear and discoloration.
- Damaging during removal: For renters or those who change decor often, improper removal of peel-and-stick murals can damage walls.
By being aware of these common mistakes, you can significantly improve your chances of a successful and satisfying mural installation.
Choosing a mural for different bedroom styles
Your bedroom mural should complement your existing decor. Here’s how to choose one for various styles:
Modern and minimalist bedrooms
Opt for murals with clean lines, geometric patterns, or abstract designs in a limited color palette. Think black and white cityscapes, subtle textured patterns, or bold, graphic shapes. The goal is to add visual interest without overwhelming the space.
Bohemian bedrooms
Embrace patterns and natural elements. Lush botanical prints, artistic interpretations of forests, or even tapestries-like murals with intricate mandala designs work well. Layering textures and colors is key to this style.
Traditional and classic bedrooms
Consider scenic landscapes, vintage maps, or murals with damask or floral patterns. A mural that mimics a classic painting or fresco can add an air of sophistication. Ensure the colors and style align with your existing furniture and color scheme.
Coastal or beach-themed bedrooms
Seascapes, beach scenes, or murals with subtle wave patterns are obvious choices. Light blues, sandy beiges, and whites dominate. A mural of a serene ocean view can enhance the tranquil atmosphere.
Industrial or urban bedrooms
Murals that mimic exposed brick, concrete, or distressed metal can enhance an industrial look. City skylines or large-scale typographic designs also fit this aesthetic.
Beyond the bedroom: where else can murals go?
While bedrooms are a popular choice for murals, their versatility extends to other areas:
- Living rooms: A statement mural can become the focal point of a living area, adding personality and style.
- Hallways: A well-chosen mural can make a long hallway more engaging and visually interesting.
- Home offices: Inspiring landscapes or abstract designs can boost creativity and productivity.
- Children’s rooms: Whimsical, educational, or character-themed murals are perfect for a child’s space.
- Dining rooms: A sophisticated mural can elevate the ambiance for dining and entertaining.
The impact of a mural isn’t limited to just one room; it can enhance the entire home’s aesthetic. For more general design ideas, check out our post on creating a lovestockletany background for unique home decor inspiration.
The cost of bedroom murals
The price of bedroom murals can vary significantly based on size, material, complexity of design, and whether it’s a standard product or custom-made.
- Peel-and-stick vinyl murals: These can range from $20-$50 per panel or section, with a full wall mural potentially costing anywhere from $100 to $500 or more, depending on the dimensions.
- Traditional wallpaper murals: These might start around $50-$100 per panel or roll and can go up to $300-$800+ for a large, high-quality design.
- Custom murals: Commissioning a unique design or having a professional create a mural from your own image can cost anywhere from $500 to $2,000+, excluding installation.
Installation costs can add another $200-$800, depending on the complexity and the installer’s rates.
The role of lighting with bedroom murals
Lighting plays a crucial role in how your mural is perceived. Strategic lighting can highlight its features and enhance its impact.
- Ambient lighting: General room lighting should be warm and inviting, complementing the mural’s colors.
- Task lighting: If you have reading lights near the bed, ensure they don’t cast harsh shadows on the mural.
- Accent lighting: Consider directional spotlights or LED strip lighting along the ceiling or baseboard to subtly highlight the mural’s texture or key elements, especially in the evening.
The right lighting can make your mural truly come alive.