Wallcoverings are sophisticated and versatile design elements that transform interior spaces, offering aesthetic depth, textural richness, and functional benefits far beyond what paint alone can achieve. From adding a subtle layer of visual interest to making a bold, dramatic statement, these engineered surfaces for walls provide unparalleled opportunities for personalization and elevated design within any home or commercial setting. Starhouse understands the profound impact wallcoverings have on a room’s atmosphere and curates exceptional selections that define luxury and style.
Key Takeaways
- Wallcoverings offer superior durability, textural variety, and pattern complexity compared to paint, enhancing both aesthetics and functionality.
- Selecting the appropriate wallcovering involves considering material type, room function, light conditions, pattern scale, and maintenance requirements.
- Accurate measurement and calculation, accounting for pattern repeat and waste, are critical for a seamless installation and to avoid material shortages.
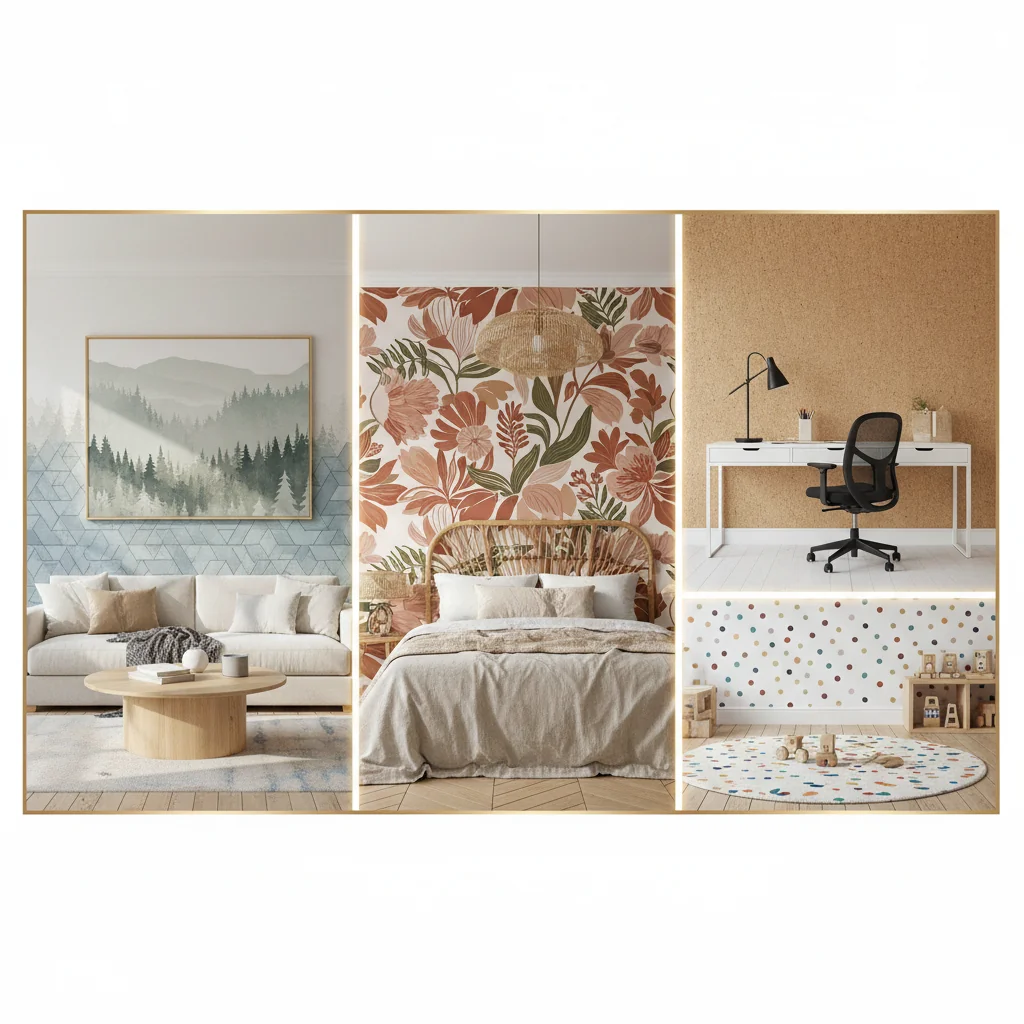
- Modern wallcovering trends embrace biophilic designs, textured neutrals, maximalism, and artisanal prints, reflecting a desire for unique, personalized spaces.
- Proper surface preparation, appropriate adhesives, and adherence to care instructions are essential for the longevity and aesthetic integrity of your wallcoverings.
- Starhouse emphasizes the importance of certified and low-VOC materials to ensure a healthy indoor environment, aligning with best practices for home décor.
What Are Wallcoverings?
Wallcoverings are decorative and protective materials applied to interior walls, typically sold in rolls or panels, designed to enhance a room’s aesthetic and provide a durable surface. Unlike paint, which offers a uniform color, wallcoverings introduce intricate patterns, rich textures, and a diverse array of materials that profoundly impact a space’s visual and tactile experience. They serve as a powerful design tool, capable of transforming the ambiance of any room from understated elegance to dramatic flair.
The primary function of wallcoverings extends beyond mere decoration; they offer practical benefits such as concealing wall imperfections, providing insulation against sound and temperature fluctuations, and offering superior durability and washability in high-traffic areas. Modern wallcoverings are engineered with advanced materials and printing techniques, allowing for an extraordinary range of designs, from classic damasks and intricate botanicals to contemporary geometrics and natural fiber textures. Starhouse carefully selects wallcoverings that exemplify both exceptional beauty and lasting performance, ensuring they meet the high standards of discerning homeowners and designers.
What is the difference between wallpaper and wallcovering?
The terms “wallpaper” and “wallcovering” are often used interchangeably, but “wallcovering” is the broader, more inclusive term, encompassing a wider range of materials, textures, and applications than traditional paper-based wallpaper. While wallpaper typically refers to decorative paper printed with patterns, wallcoverings can include vinyl, fabric, natural fibers like grasscloth, cork, wood veneer, and even metallic or acoustic materials. Wallcoverings are frequently chosen for their enhanced durability, textural depth, and specialized functional properties, making them suitable for both residential and commercial environments.
The Evolution of Wallcoverings: A Brief History
The history of wallcoverings is a rich tapestry, tracing its origins from ancient decorative practices to the sophisticated, technologically advanced products available today, reflecting centuries of artistic and industrial innovation. Early forms of wall decoration emerged in ancient China, where rice paper was used to adorn walls as early as 200 BC, and later in Europe, where tapestries, frescoes, and stamped leather panels served as status symbols and insulators. The advent of papermaking in the West, combined with woodblock printing techniques, laid the groundwork for the modern wallpaper industry.
By the 16th century, printed paper wall decorations began to gain traction in England and France, initially mimicking more expensive textiles and tapestries. The Industrial Revolution in the 18th and 19th centuries revolutionized production, introducing continuous roll manufacturing and mechanized printing, making wallcoverings more accessible to the middle class. Victorian-era homes often featured elaborate, multi-patterned designs, symbolizing prosperity and taste.
The 20th century brought further advancements, including the introduction of washable vinyl wallcoverings in the 1950s, which significantly improved durability and ease of maintenance. This innovation broadened their application to kitchens, bathrooms, and commercial spaces. The late 20th and early 21st centuries have seen a resurgence in popularity, driven by digital printing technologies, eco-friendly materials, and a renewed appreciation for texture and bespoke design. Today, wallcoverings are celebrated for their ability to infuse personality, depth, and luxury into any interior, continuing their legacy as a cornerstone of interior design.
Types and Materials of Wallcoverings
Wallcoverings are categorized by their construction and material composition, with each type offering distinct aesthetic qualities, functional benefits, and installation requirements, making careful selection paramount for achieving desired results. Understanding these variations is crucial for designers and homeowners seeking to optimize durability, maintenance, and visual impact within specific environments. Starhouse curates a diverse range of wallcovering types, ensuring options for every design sensibility and practical need.
Vinyl Wallcoverings
Vinyl wallcoverings are among the most popular choices due to their exceptional durability, washability, and versatility in design. They consist of a decorative surface layer of vinyl laminated to a backing material, which can be paper or fabric.
- Paper-Backed Vinyl: This type features a printed vinyl surface over a paper backing. It is generally more economical and offers good durability, making it suitable for moderate-traffic areas like bedrooms and living rooms. It provides excellent resistance to moisture and is easy to clean with a damp cloth.
- Solid Sheet Vinyl: Composed of a solid sheet of vinyl, this is the most durable and washable vinyl option. It is highly resistant to moisture, stains, and scuffs, making it ideal for high-traffic residential areas such as hallways, kitchens, and bathrooms, as well as commercial applications. Its robust nature makes it resilient against daily wear and tear.
- Fabric-Backed Vinyl (Type II Commercial Wallcovering): Designed for heavy-duty use, this features a woven fabric backing (typically polyester or cotton) laminated with a solid vinyl layer. Type II wallcoverings are extremely durable, impact-resistant, and often fire-rated, making them the standard for commercial spaces like hotels, hospitals, and offices. They are also an excellent choice for demanding residential areas requiring maximum longevity.
Non-Woven Wallcoverings
Non-woven wallcoverings represent a significant advancement in wallcovering technology, characterized by their ease of installation and removal, breathability, and eco-friendly properties. These are made from a blend of natural and synthetic fibers, often cellulose and polyester, compressed into a stable sheet.
- Key Benefits: Non-woven materials are “paste-the-wall” products, meaning adhesive is applied directly to the wall rather than the back of the paper, simplifying installation. They are also “strippable,” allowing for clean, damage-free removal when it’s time for a change. Their breathable nature helps prevent mold and mildew growth in humid environments.
- Applications: Ideal for almost any room in a residential setting, including living rooms, bedrooms, and dining areas, where ease of future redecoration is a consideration.
Non-woven wallcoverings are a blend of natural and synthetic fibers, offering superior breathability, ease of installation (paste-the-wall), and clean strippable removal.
Natural Fiber Wallcoverings
Natural fiber wallcoverings bring an organic, tactile dimension to interiors, celebrating the beauty of raw materials and handcrafted textures. These options are often hand-woven or assembled, resulting in unique variations and a luxurious, bespoke feel.
- Grasscloth: Made from natural fibers such as jute, sisal, hemp, or seagrass woven onto a paper backing. Grasscloth is prized for its subtle variations in color and texture, which create a warm, inviting atmosphere. It is delicate and typically not washable, making it best suited for low-traffic areas like dining rooms, studies, or bedrooms.
- Silk and Linen: These luxurious textiles are laminated onto a paper backing, offering a soft, elegant sheen and sophisticated texture. Silk wallcoverings are often used in formal living spaces or master bedrooms to evoke a sense of opulence. They require careful handling and professional installation.
- Cork and Wood Veneer: Thin slices of cork or real wood are adhered to a backing, providing a distinct natural aesthetic. Cork offers acoustic benefits and a soft, earthy feel, while wood veneers provide the warmth and grain patterns of timber. Both are durable but generally not washable and require specialized care.
Specialty Wallcoverings
Specialty wallcoverings push the boundaries of design, incorporating unique materials and advanced techniques to create truly distinctive surfaces.
- Mylar: Features a reflective, metallic-like surface that creates a high-gloss, glamorous effect. Mylar wallcoverings are often used to brighten a room or add a touch of retro chic. They are typically washable but can highlight wall imperfections due to their reflectivity.
- Flock: Created by applying tiny fibers (flock) onto a pattern printed with adhesive, resulting in a raised, velvety texture. Flock wallcoverings offer a luxurious, tactile experience and are often found in traditional or opulent designs. They are delicate and require careful cleaning.
- Metallics: Incorporate metallic inks or foils to create shimmering, reflective surfaces. These can range from subtle pearlescent finishes to bold, highly reflective gold, silver, or copper tones. Metallics add glamour and can bounce light around a room, making it feel brighter.
- Digital Murals and Custom Prints: With advancements in digital printing, it’s possible to create custom wallcoverings from high-resolution images, patterns, or artwork. These large-format designs can cover an entire wall, acting as a dramatic focal point or transporting a room to another landscape. They are often printed on non-woven or vinyl substrates for durability.
- Acoustic Wallcoverings: Engineered with sound-absorbing materials, these are designed to reduce noise reverberation in a room. They are particularly useful in home theaters, offices, or open-plan living spaces where noise control is a priority.
Comparison Table: Wallcovering Types
| Type | Primary Material | Durability Rating | Water Resistance | Ideal Use Cases | Approx. Price/Sq Ft (USD) |
|---|---|---|---|---|---|
| Paper-Backed Vinyl | Vinyl surface, paper backing | Moderate | Good (wipeable) | Bedrooms, living rooms, dining rooms (residential) | $2.00 – $6.00 |
| Solid Sheet Vinyl | Solid vinyl | High | Excellent (washable) | Kitchens, bathrooms, hallways, kids’ rooms (residential & light commercial) | $4.00 – $10.00 |
| Fabric-Backed Vinyl (Type II) | Vinyl surface, woven fabric backing | Very High | Excellent (scrubbable) | Commercial spaces, high-traffic residential areas | $8.00 – $25.00+ |
| Non-Woven | Cellulose/Polyester blend | Moderate to High | Good (breathable, some washable) | Living rooms, bedrooms, easily changeable decor | $3.00 – $12.00 |
| Grasscloth | Natural fibers (jute, sisal, hemp) | Delicate | Poor (not washable) | Low-traffic areas, formal rooms, accent walls | $8.00 – $30.00+ |
| Silk/Linen | Natural fabric (silk, linen) | Delicate | Poor (not washable) | Formal living, master bedrooms, luxurious accents | $15.00 – $50.00+ |
| Cork/Wood Veneer | Thin cork/wood slices | Moderate | Poor (not washable) | Studies, accent walls, unique textural statements | $10.00 – $40.00+ |
| Mylar | Polyester film | Moderate | Good (wipeable) | Glamorous spaces, accent walls, light-enhancing areas | $5.00 – $15.00 |
| Flock | Velvet-like fibers | Delicate | Poor (spot clean only) | Formal rooms, luxurious accents, low-traffic areas | $10.00 – $35.00+ |
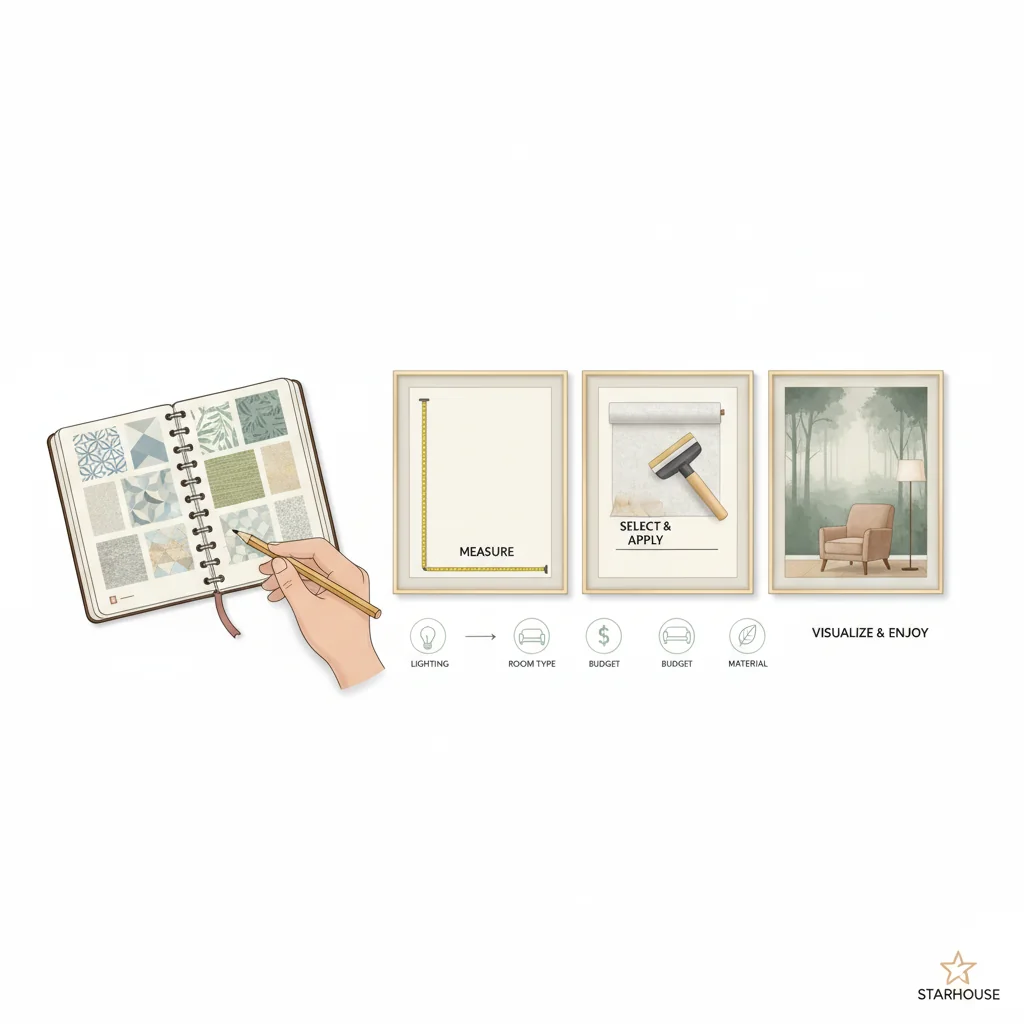
Choosing the Right Wallcovering for Your Space
Selecting the ideal wallcovering involves a thoughtful evaluation of several key factors, including the room’s function, existing décor, desired mood, and practical considerations like durability and maintenance. A strategic approach ensures the chosen wallcovering not only enhances aesthetic appeal but also performs optimally within its environment. Starhouse emphasizes a holistic design perspective, guiding clients to choices that resonate with their lifestyle and design aspirations.
Consider the Room’s Function and Traffic Level
The intended use of a room significantly dictates the most suitable wallcovering material. For high-traffic areas like hallways, children’s rooms, or active family rooms, prioritize durability and washability. Solid sheet vinyl or fabric-backed vinyl (Type II) wallcoverings are excellent choices due to their robust construction and resistance to scuffs and moisture. In contrast, low-traffic areas such as formal dining rooms, guest bedrooms, or studies allow for more delicate and luxurious options like grasscloth, silk, or flock, where aesthetic impact outweighs the need for extreme durability. Kitchens and bathrooms, which experience high humidity and potential splashes, demand moisture-resistant and easily cleanable materials, typically solid vinyl or specialized moisture-resistant non-wovens.
Evaluate Existing Décor and Architectural Style
The wallcovering should complement the existing furniture, textiles, and overall architectural style of your home. A contemporary space with clean lines might benefit from geometric patterns, abstract designs, or textured neutrals. A traditional home could embrace classic damasks, toile, or botanical prints. For a bohemian or eclectic interior, natural fibers, global-inspired patterns, or vibrant digital murals can create a cohesive yet unique look. Consider the color palette of your existing furnishings; the wallcovering should either harmonize with it or provide a well-considered contrast that elevates the scheme.
Determine Desired Mood and Ambiance
Wallcoverings are powerful tools for setting a room’s mood. Light colors and subtle patterns can make a room feel larger, brighter, and more open, fostering a serene or airy atmosphere. Darker hues or bold, large-scale patterns create a sense of intimacy, drama, or sophistication, ideal for accent walls, powder rooms, or studies. Textured wallcoverings, such as grasscloth or cork, add warmth and a tactile dimension, promoting a cozy and inviting feel. Metallic or reflective wallcoverings can introduce glamour and a contemporary edge, making a space feel more luxurious and dynamic.
Assess Lighting Conditions
Natural and artificial light interact dramatically with wallcoverings. In rooms with abundant natural light, you have more flexibility. However, in dimly lit spaces, consider wallcoverings with lighter colors, reflective surfaces (like Mylar or metallics), or subtle sheens to help bounce light around and brighten the room. Conversely, a very bright room can sometimes benefit from a wallcovering with a matte finish or deeper tones to prevent glare and create a more grounded feel. Always view samples of your preferred wallcovering in the actual room at different times of day to understand how light will affect its appearance.
Consider Pattern Scale and Repeat
The scale of a pattern should be proportionate to the size of the room and the wall it covers. Large patterns can overwhelm a small room but can make a grand statement in a spacious area. Small, intricate patterns can add detail without being overpowering in smaller rooms. Pattern repeat, the vertical distance before a pattern repeats itself, is a critical factor for installation and material calculation. A larger pattern repeat means more waste during installation to ensure patterns align seamlessly across strips. For an immersive experience, consider a large-scale mural or a non-repeating scenic design.
Maintenance and Longevity
Different wallcovering materials have varying maintenance requirements. Some are highly washable and scrubbable, perfect for families with children or pets. Others, particularly natural fibers or delicate fabrics, require gentle spot cleaning or professional care. Understand the cleaning codes (e.g., “washable,” “scrubbable,” “dry strippable”) before making a decision. Investing in a higher-quality, more durable wallcovering for high-traffic or moisture-prone areas will ensure greater longevity and ease of care, protecting your investment.
We invite you to explore the possibilities and tell us what you’re looking for to curate your perfect space. Share your vision and get early access to Starhouse’s evolving collection of exquisite wallcoverings and home décor by visiting Starhouse USA Online.
Sizing and Measuring for Wallcoverings
Accurate sizing and meticulous measuring are fundamental steps in any wallcovering project, ensuring you purchase the correct amount of material, minimize waste, and achieve a professional, seamless installation. Underestimating your needs can lead to costly delays and difficulty finding matching dye lots, while overestimating results in unnecessary expense. Starhouse advocates for precise preparation to guarantee a flawless finish for your design vision.
Gather Your Tools
Before you begin, ensure you have the following essential tools:
- Steel measuring tape (at least 25 feet long)
- Pencil
- Pad of paper or calculator
- Step stool or ladder
- Plumb bob or 4-foot level
Step-by-Step Measuring Process
1. Measure Wall Height and Perimeter
Begin by measuring the height of each wall from the top of the baseboard to the ceiling. If your ceiling height varies, take measurements at several points and use the tallest measurement for your calculations. Next, measure the total perimeter of the room by summing the width of all walls.
For example, if a room has four walls:
- Wall 1: 10 ft wide
- Wall 2: 12 ft wide
- Wall 3: 10 ft wide
- Wall 4: 12 ft wide
- Total Perimeter: 10 + 12 + 10 + 12 = 44 feet.
Assume a consistent wall height of 8 feet.
2. Calculate Total Square Footage
Multiply the total perimeter by the wall height to find the total square footage of the walls to be covered.
Example: 44 feet (perimeter) × 8 feet (height) = 352 square feet.
3. Account for Doors and Windows
While you will cut around doors and windows during installation, it is generally recommended to include their square footage in your initial calculation. This approach ensures you have enough material for pattern matching and potential errors, especially with large pattern repeats. For very large openings (e.g., a wall of floor-to-ceiling windows), you may deduct half of their area. For standard doors (approx. 21 sq ft) and windows (approx. 15 sq ft), it is safer to include them.
4. Understand Roll Dimensions
Wallcoverings are typically sold in single, double, or triple rolls. In the U.S., a standard single roll of wallpaper is usually 20.5 inches wide by 16.5 feet long, covering approximately 28 square feet. However, many designer wallcoverings come in wider widths (e.g., 27 inches, 36 inches, or 54 inches) and varying lengths, so always check the specific product’s coverage area.
A single roll of wallcovering in the U.S. typically measures 20.5 inches wide by 16.5 feet long, providing approximately 28 square feet of coverage.
5. Factor in Pattern Repeat and Waste
This is the most critical adjustment for accurate ordering. Pattern repeat is the vertical distance at which the pattern duplicates itself on the roll.
- No Pattern Repeat (Random Match): Minimal waste. Add 10-15% for trimming and errors.
- Small Pattern Repeat (Under 6 inches): Add 15-20% for matching and waste.
- Medium Pattern Repeat (6-18 inches): Add 20-25% for matching and waste.
- Large Pattern Repeat (Over 18 inches): Add 25-35% or more, especially for repeats over 24 inches, as significant waste occurs to align patterns across strips.
For example, if your wallcovering has a 24-inch (2-foot) pattern repeat, you might need an extra 2 feet of material for each strip cut to ensure proper alignment.
6. Calculate the Number of Rolls Needed
First, determine the usable square footage per roll after accounting for pattern repeat.
Example: If a double roll covers 56 sq ft, and you have a large pattern repeat requiring 25% extra material:
- Effective coverage per double roll = 56 sq ft / 1.25 (for 25% waste) = 44.8 sq ft.
Then, divide your total wall square footage by the effective coverage per roll:
- Total Wall Sq Ft / Effective Coverage per Roll = Number of Rolls.
- Example: 352 sq ft / 44.8 sq ft/roll = 7.85 rolls.
Always round up to the nearest whole roll. In this example, you would need 8 double rolls. It is always wise to purchase an extra roll, especially for designer or custom wallcoverings, to account for future repairs or unexpected issues. Ensure all rolls are from the same dye lot to prevent color variations.
7. Special Considerations for Accent Walls
If you are only covering an accent wall, measure only that specific wall’s dimensions. However, still factor in pattern repeat and an extra buffer. For a single accent wall, it’s often more challenging to perfectly utilize every piece, so a generous waste allowance is prudent.
By following these detailed measuring and calculation steps, you ensure a smoother, more efficient wallcovering installation, resulting in a beautifully finished space.
Installation Considerations and Best Practices
Proper installation is as crucial as the selection of the wallcovering itself, directly impacting its aesthetic outcome, durability, and longevity. Meticulous preparation, appropriate techniques, and adherence to manufacturer guidelines are paramount for a flawless finish. Starhouse emphasizes that even the most exquisite wallcovering will underperform if not installed correctly.
Surface Preparation: The Foundation of Success
The wall surface must be clean, dry, smooth, and structurally sound before any wallcovering application. Any imperfections, dust, or grease will show through the finished product or compromise adhesion.
- Clean Walls Thoroughly: Wash walls with a mild detergent solution, rinse thoroughly, and allow them to dry completely. Remove any old adhesive residue.
- Repair Imperfections: Fill holes, cracks, and dents with spackling compound, sand smooth, and wipe away dust. Ensure all surfaces are level and even.
- Prime Walls: Apply a high-quality, oil-based or acrylic-based wallcovering primer (often called a “sizing” primer). This creates a consistent, uniform surface for adhesion, seals porous walls, prevents moisture absorption, and aids in future removal. For new drywall, priming is non-negotiable. For darker existing paint or highly contrasting colors, a tinted primer can help prevent bleed-through.
- Ensure Proper Conditions: The room temperature should be between 65-75°F (18-24°C) with moderate humidity (around 50-60%) for optimal adhesive curing and material acclimatization.
Adhesive Selection: The Right Bond
The type of adhesive used must be compatible with the specific wallcovering material.
- Clear Adhesives: Often used for lighter-weight wallcoverings, especially those with delicate surfaces that could be stained by clay-based pastes.
- Clay-Based Adhesives: Stronger and more forgiving, suitable for heavier vinyls and non-wovens.
- Pre-Pasted Wallcoverings: These have adhesive already applied to the back, activated by water. While convenient, the quality of pre-pasted adhesive can vary.
- Specialty Adhesives: Natural fiber wallcoverings or metallic foils may require specific, often heavier-duty, clear adhesives to prevent staining or ensure a strong bond. Always consult the wallcovering manufacturer’s recommendations for the correct adhesive.
When selecting adhesives and primers, prioritize products with low Volatile Organic Compounds (VOCs) to maintain healthy indoor air quality. According to the U.S. Environmental Protection Agency (EPA), controlling pollutant sources, including those from building materials, is a critical strategy for improving indoor air quality.
Installation Techniques: Precision and Patience
While DIY installation is possible for simpler wallcoverings like peel-and-stick or non-wovens, complex patterns, delicate materials, or large-scale murals often benefit from professional expertise.
- Plumb Line: Always start by drawing a vertical plumb line on the wall, typically 20-22 inches from a corner (or the width of your roll minus half an inch) to ensure the first strip is perfectly straight. This sets the foundation for all subsequent strips.
- Cutting Strips: Cut strips to wall height, adding 4-6 inches extra for trimming at the top and bottom. For patterned wallcoverings, align the pattern across strips before cutting, ensuring enough material for the repeat.
- Applying Adhesive: For unpasted wallcoverings, apply adhesive evenly to the back of the strip (booking method for traditional papers) or directly to the wall (paste-the-wall for non-wovens).
- Hanging: Position the first strip along your plumb line, smoothing it from the center outwards with a brush or smoothing tool to remove air bubbles. Overlap subsequent strips slightly (for butt-joint seams, ensure edges meet precisely without overlapping, depending on wallcovering type).
- Trimming: Use a sharp utility knife and a straight edge to trim excess material at the ceiling, baseboards, and around openings for a clean finish. Change blades frequently to prevent tearing.
- Seams: For butt-joint wallcoverings, ensure seams are tightly butted together. For overlaps, a double-cut technique may be used for a seamless appearance. Use a seam roller to gently press seams flat, avoiding excessive pressure that could squeeze out adhesive.
Professional Installation: When to Call an Expert
For intricate patterns, delicate materials (like grasscloth or silk), large-scale murals, or rooms with challenging architectural features (e.g., vaulted ceilings, numerous windows, complex corners), hiring a professional installer is highly recommended. Professionals possess the specialized tools, experience, and techniques to ensure a flawless, long-lasting result, saving you time, frustration, and potential material waste. They can also advise on specific surface preparations and adhesives tailored to your chosen wallcovering.
While UL Solutions primarily focuses on exterior wall system testing, the broader principle of seeking materials tested and certified by reputable organizations is paramount. This ensures products meet rigorous safety and performance standards, contributing to a healthier and safer interior environment. Always look for wallcoverings and adhesives that comply with relevant industry standards for flame spread and VOC emissions.
Styling and Pairing Wallcoverings with Your Decor
Styling wallcoverings involves more than just applying them to a wall; it’s about integrating them seamlessly into your existing décor to create a cohesive, harmonious, and visually engaging space. Thoughtful pairing with furniture, lighting, textiles, and accessories is key to maximizing their transformative power. Starhouse believes that a well-chosen and expertly styled wallcovering can elevate a room from merely decorated to truly designed.
Defining the Role: Accent Wall vs. Full Room
Decide whether the wallcovering will serve as a dramatic focal point on a single accent wall or envelop the entire room for an immersive experience.
- Accent Wall: Ideal for bold patterns, vibrant colors, or highly textured materials that might overwhelm when used throughout a room. Place an accent wall behind a key furniture piece like a bed, sofa, or dining table to draw attention and define a zone. Ensure the accent wall’s design complements the paint color or subtle texture on the other walls.
- Full Room: Best suited for more subtle patterns, textures, or tone-on-tone designs that create a continuous, enveloping feel. This approach can make a room feel larger, more cohesive, or more intimate, depending on the chosen design. It works particularly well with biophilic prints, textured neutrals, or sophisticated geometric patterns.
Harmonizing with Furniture and Finishes
The wallcovering should either complement or provide a thoughtful contrast to your furniture and hard finishes (flooring, cabinetry).
- Color Palette: Choose a wallcovering that shares colors with your furniture or offers a complementary hue. For example, a wallcovering with hints of blue would pair beautifully with warm wood furniture, while a neutral textured wallcovering allows colorful furniture to pop.
- Style Alignment: Ensure the wallcovering’s style aligns with your furniture. A sleek, modern sofa pairs well with abstract or minimalist wallcoverings, while antique pieces might be enhanced by classic florals or damasks.
- Texture Play: If your furniture is smooth and sleek, introduce a textured wallcovering (like grasscloth or a subtle fabric weave) to add depth. Conversely, if your furniture has rich textures (e.g., velvet, distressed wood), a smoother, more graphic wallcovering can provide balance.
Integrating with Lighting
Lighting profoundly impacts how a wallcovering appears.
- Natural Light: Observe how natural light hits the wall at different times of day. Reflective wallcoverings (metallics, Mylar) will shimmer and change throughout the day, while matte textures will absorb light, creating a softer effect.
- Artificial Lighting: Consider the type and placement of artificial lights. Uplighting can highlight textures, while downlighting can create dramatic shadows. A wallcovering with a subtle sheen can enhance the glow from sconces or lamps. Ensure light sources don’t create unwanted glare on highly reflective surfaces.
Pairing with Textiles and Accessories
Textiles (curtains, rugs, throw pillows) and accessories (artwork, decorative objects) are crucial for tying the entire room together.
- Pattern Mixing: If your wallcovering has a prominent pattern, choose solid or subtly textured textiles. If you wish to mix patterns, ensure they vary in scale and motif (e.g., a large floral wallcovering with a small geometric pillow). A general rule is to use three patterns: one large, one medium, and one small, ensuring they share at least one common color.
- Color Repetition: Echo colors from the wallcovering in your throw pillows, artwork, or decorative vases to create a cohesive look.
- Artwork Placement: For a busy wallcovering, select artwork with simple frames and ample white space or choose pieces that complement the wallcovering’s dominant colors without competing. For subtle wallcoverings, bold artwork can serve as a secondary focal point.
Creating Flow Between Rooms
When using wallcoverings in multiple adjacent rooms, consider how they interact. You might use a bold pattern in one room and a coordinating solid texture or a simpler version of the same pattern in an adjoining space to create visual continuity without monotony. Maintaining a consistent color palette across different wallcovering designs helps achieve a harmonious flow throughout your home.
Care and Maintenance for Wallcoverings
Proper care and regular maintenance are essential for preserving the beauty and extending the lifespan of your wallcoverings, protecting your investment and ensuring your walls remain a stunning feature of your home. The specific cleaning methods depend entirely on the wallcovering material, making it imperative to understand its unique properties. Starhouse provides guidance to help you maintain the pristine condition of your curated selections.
Understanding Cleaning Codes
Most wallcoverings come with a cleaning code or symbol, usually found on the back of the roll or in the product specifications. Familiarize yourself with these codes before attempting any cleaning:
- Washable: Can be cleaned with a sponge, mild soap, and warm water. Gentle wiping is recommended. Common for most vinyl and some non-woven types.
- Scrubbable: Can withstand more vigorous cleaning with a brush and stronger detergent solutions. Typically applies to highly durable solid vinyl or fabric-backed vinyl (Type II).
- Dry Strippable: Refers to ease of removal, not cleaning.
- Peelable: Refers to ease of removal, not cleaning.
- Spongeable: Can be lightly wiped with a damp sponge, but not thoroughly washed.
- Non-Washable/Delicate: Requires dry cleaning or very careful spot cleaning with specialized products. This applies to natural fibers (grasscloth, silk), flock, and some very delicate paper-based wallcoverings. Avoid water.
General Cleaning Guidelines
- Dust Regularly: Use a soft, dry cloth, a feather duster, or a vacuum cleaner with a brush attachment to gently remove dust and cobwebs. This prevents dirt buildup and makes deeper cleaning less frequent.
- Spot Clean Immediately: Address spills or marks as soon as they occur. For washable wallcoverings, use a clean, white cloth dampened with a mild soap solution. Blot, do not rub, to avoid damaging the surface or spreading the stain. Rinse with a clean, damp cloth and pat dry.
- Test in an Inconspicuous Area: Before applying any cleaning solution to a visible area, always test it on a hidden spot (e.g., behind furniture or inside a closet) to ensure it doesn’t cause discoloration or damage.
- Avoid Harsh Chemicals: Never use abrasive cleaners, strong solvents, or harsh chemicals like bleach, as these can strip colors, damage finishes, or degrade the material.
- Work from Bottom Up (for general cleaning): When cleaning an entire wall, start from the bottom and work your way up to prevent dirty water from streaking down already cleaned sections. For spot cleaning, clean from the outside of the stain inwards to prevent spreading.
Specific Care for Different Materials
- Vinyl Wallcoverings (Paper-Backed, Solid Sheet, Fabric-Backed): These are typically the easiest to maintain. Washable or scrubbable, they can be cleaned with a mild detergent and water. For stubborn stains, a non-abrasive household cleaner might be used, but always test first.
- Non-Woven Wallcoverings: Many non-wovens are washable. Follow the general guidelines, using mild soap and water. Their breathable nature also means they dry relatively quickly.
- Natural Fiber Wallcoverings (Grasscloth, Silk, Cork): These are generally delicate and not washable.
- Grasscloth: Vacuum gently with a brush attachment. For minor spills, blot immediately with a clean, dry cloth. Do NOT use water, as it can stain or cause fibers to swell. Professional cleaning is recommended for significant issues.
- Silk/Linen: Dust regularly. For spills, blot immediately. Professional dry cleaning is usually the only safe option for deep cleaning.
- Cork/Wood Veneer: Dust gently. Avoid moisture. For light marks, a very slightly damp cloth might be used, but extreme caution is advised.
- Mylar and Metallics: These are often washable or spongeable. Use a soft cloth with mild soap and water. Be gentle, as excessive rubbing can scratch the reflective surface.
- Flock Wallcoverings: These are delicate and require dry cleaning or very gentle vacuuming with a soft brush attachment. Avoid any moisture, as it can damage the flock fibers.
Addressing Common Issues
- Loose Seams: If seams begin to lift, re-apply a small amount of seam adhesive with a small brush and press firmly with a seam roller. Wipe away excess adhesive immediately.
- Bubbles/Blisters: For small bubbles, use a utility knife to make a small slit, gently release the air, apply a small amount of adhesive under the flap, and press down. For larger bubbles, professional repair might be needed.
- Fading: Wallcoverings can fade over time, especially in direct sunlight. Consider UV-protective window films or blinds in sun-drenched rooms to extend their vibrancy.
By adhering to these care instructions, your wallcoverings will continue to provide beauty and character to your home for many years.
Current Trends in Wallcoverings
The world of wallcoverings is dynamic, constantly evolving to reflect contemporary design sensibilities, technological advancements, and a renewed focus on personalization and well-being. Current trends emphasize a blend of natural elements, sophisticated textures, and expressive patterns that transform interiors into unique, inspiring sanctuaries. Starhouse identifies these leading trends to ensure its curated collection remains at the forefront of modern home décor.
1. Biophilic Designs
A strong movement towards biophilia, connecting humans with nature, is evident in wallcovering trends. This includes:
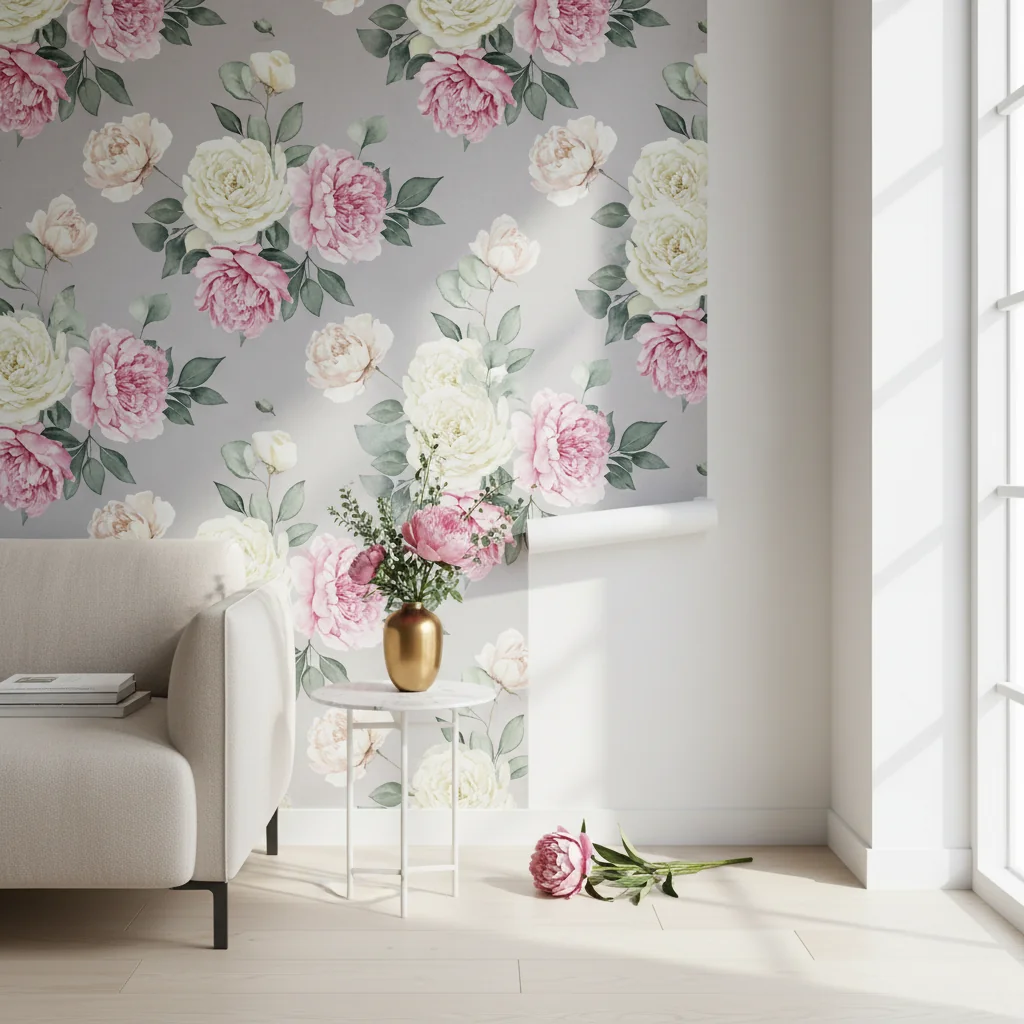
- Botanical and Floral Prints: Moving beyond traditional chintz, modern botanicals feature lush, oversized leaves, abstract floral patterns, and delicate, hand-drawn flora in softer palettes or dramatic, dark backgrounds.
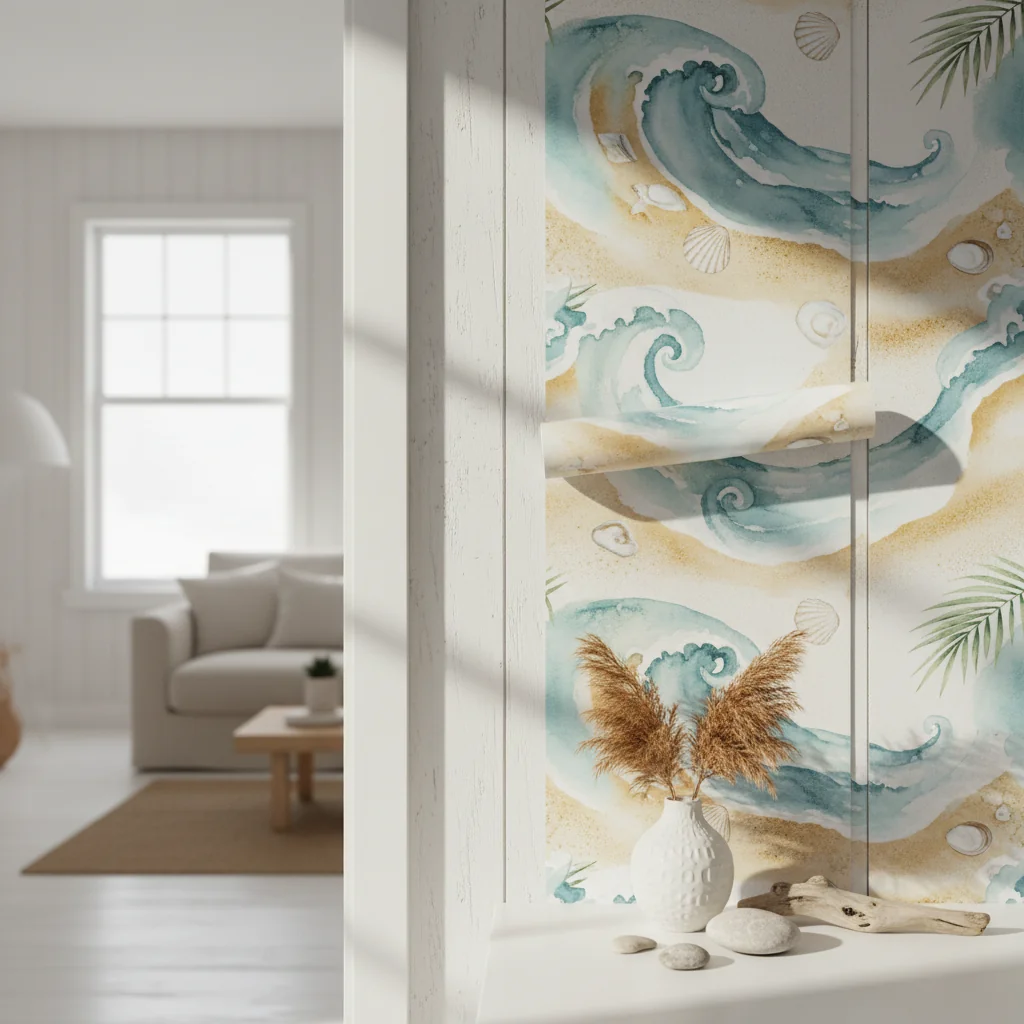
- Scenic Murals: Large-scale murals depicting forests, mountain ranges, tranquil lakes, or tropical landscapes create an immersive, transportive experience, bringing the outdoors in.
- Natural Textures: Wallcoverings mimicking wood grain, stone, concrete, or raw plaster offer an organic, earthy feel without the weight or cost of actual materials.
2. Textured Neutrals and Tactile Surfaces
There’s a growing appreciation for depth and sensory experience, leading to a rise in textured neutrals.
- Grasscloth and Woven Textures: Always a classic, grasscloth continues its reign, offering subtle variations and warmth. Other woven textiles, linen-looks, and subtle fabric textures add quiet luxury and a tactile dimension to walls.
- Embossed and Raised Patterns: Wallcoverings with subtle embossing or flocking create shadows and highlights, adding visual interest and sophistication without relying on bold colors.
- Plaster and Concrete Effects: Mimicking the raw beauty of industrial materials, these wallcoverings offer a minimalist yet textural backdrop, perfect for contemporary and industrial-chic interiors.
3. Maximalism and Bold Expression
Countering the minimalist movement, maximalism embraces rich colors, intricate patterns, and a “more is more” philosophy.
- Chinoiserie and Grandmillennial Styles: Traditional, often ornate, patterns are being reinterpreted with fresh color palettes, bringing a sense of heritage and playful elegance.
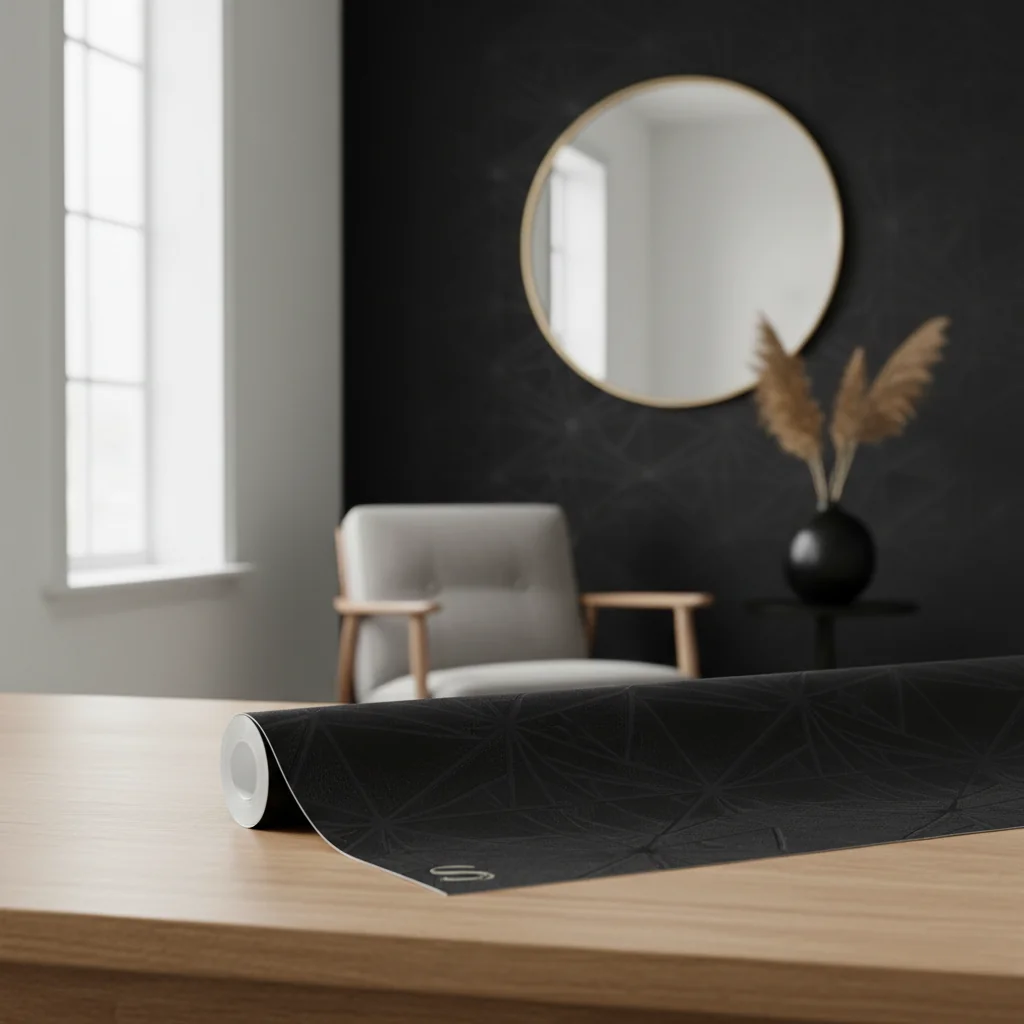
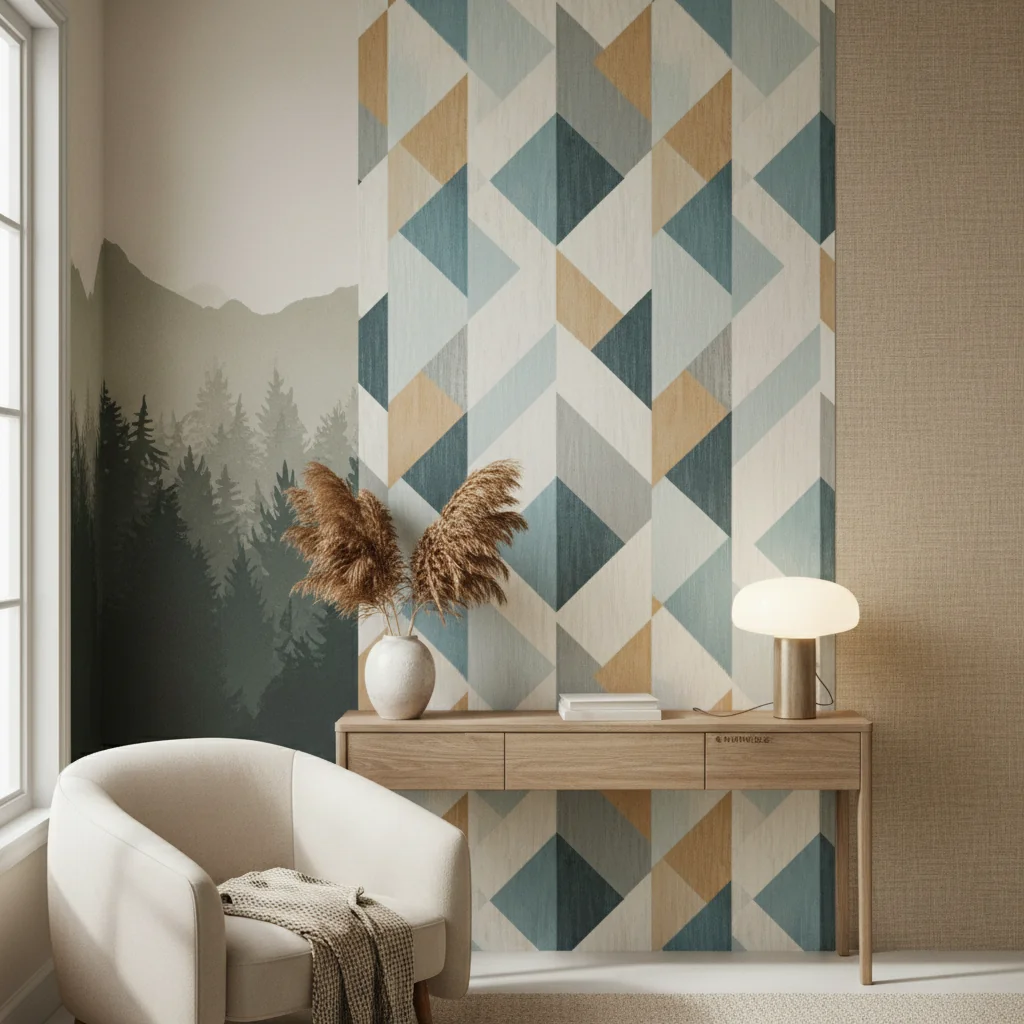
- Dramatic Geometrics: Bold, large-scale geometric patterns in vibrant colors or striking monochrome combinations make a powerful statement, adding energy and a contemporary edge.
- Abstract Artistry: Wallcoverings resembling abstract paintings, watercolor washes, or expressive brushstrokes turn walls into art installations, offering unique and personalized backdrops.
4. Artisanal and Handcrafted Looks
A desire for authenticity and unique pieces fuels the trend for wallcoverings that appear hand-painted or handcrafted.
- Imperfect Finishes: Designs with subtle irregularities, visible brushstrokes, or a slightly worn look evoke a sense of history and artisanal craftsmanship.
- Block Prints and Toile Reimagined: Traditional printing techniques are inspiring new patterns with a handmade feel, often in unexpected color combinations.
- Metallic Accents: While not new, metallics are being used more subtly, often as accents within a pattern or as a delicate sheen on a textured surface, adding a touch of understated glamour.
5. Sustainable and Eco-Friendly Options
As environmental consciousness grows, demand for sustainable wallcoverings is on the rise.
- Non-Woven Materials: Made from natural and synthetic fibers, these are often breathable, PVC-free, and easy to remove, reducing waste.
- Recycled Content: Wallcoverings made from recycled paper, post-consumer waste, or other sustainable materials are becoming more prevalent.
- Low-VOC and Water-Based Inks: Manufacturers are increasingly using non-toxic, water-based inks and low-VOC materials to ensure healthier indoor air quality.
These trends reflect a collective desire for homes that are not only beautiful but also deeply personal, comfortable, and reflective of a conscious lifestyle. Starhouse is committed to curating collections that embody these contemporary values.
Common Mistakes to Avoid When Selecting and Installing Wallcoverings
While wallcoverings offer immense potential for transforming a space, certain missteps in selection and installation can lead to disappointing results or unnecessary complications. Being aware of these common errors ensures a smoother process and a more satisfying outcome. Starhouse helps clients navigate these potential pitfalls with expert advice and curated product selections.
1. Neglecting Proper Wall Preparation
This is arguably the most critical and frequently overlooked step. Failing to clean, repair, and prime walls adequately before installation is a recipe for disaster.
- The Mistake: Applying wallcovering over dirty, uneven, or unprimed walls.
- The Consequence: Dust and grime prevent proper adhesion, leading to peeling. Bumps and holes will show through, especially with thinner or lighter-colored wallcoverings. Unprimed walls, particularly new drywall, can absorb adhesive unevenly, causing bubbling, poor adhesion, or making future removal extremely difficult and damaging.
- The Solution: Always thoroughly clean walls, fill all imperfections, sand smooth, and apply a high-quality wallcovering primer (sizing). This creates a consistent, sealed surface for optimal adhesion and easier removal.
2. Incorrect Measurement and Under-ordering
Underestimating the amount of wallcovering needed is a common and costly error, particularly with patterned designs.
- The Mistake: Not accounting for pattern repeat, windows, doors, or corners, or failing to add extra for waste and future repairs.
- The Consequence: Running out of material mid-project, potentially leading to delays and the difficulty of finding matching dye lots. Different dye lots can have subtle but noticeable color variations.
- The Solution: Follow precise measuring guidelines, always factor in pattern repeat, and order an extra roll (or 10-15% extra material) as a buffer. Ensure all rolls are from the same dye lot.
3. Choosing the Wrong Material for the Environment
Selecting a wallcovering based solely on aesthetics without considering its functional properties for a specific room.
- The Mistake: Using delicate, non-washable grasscloth in a high-traffic hallway or a bathroom, or a non-breathable vinyl in a very humid environment.
- The Consequence: Rapid deterioration, staining, difficulty cleaning, or potential mold growth.
- The Solution: Match the wallcovering’s durability and maintenance characteristics (e.g., washable, scrubbable, moisture-resistant) to the room’s function and traffic level. Vinyls are ideal for kitchens and baths, while natural fibers are best for low-traffic, dry areas.
4. Ignoring Pattern Repeat and Misaligning Designs
Failing to align patterns correctly across strips can ruin the aesthetic integrity of a patterned wallcovering.
- The Mistake: Cutting strips without considering the pattern repeat, resulting in disjointed designs.
- The Consequence: A visually jarring and unprofessional appearance where patterns don’t flow seamlessly from one strip to the next.
- The Solution: Always lay out and dry-match multiple strips on the floor before cutting, ensuring the pattern aligns perfectly. Account for the pattern repeat in your material calculations.
5. Using the Wrong Adhesive
The adhesive is the bond between the wallcovering and the wall; using an incompatible type can lead to adhesion failure.
- The Mistake: Using a standard wallpaper paste for heavy vinyl or natural fibers, or using a highly pigmented paste on a delicate, translucent wallcovering.
- The Consequence: Poor adhesion, bubbling, peeling, or staining of the wallcovering.
- The Solution: Always use the adhesive specifically recommended by the wallcovering manufacturer. For delicate materials, opt for clear, non-staining pastes.
6. Rushing the Installation Process (Especially for DIY)
Impatience during installation often leads to errors that are difficult and time-consuming to correct.
- The Mistake: Not taking time to properly plumb the first strip, rushing smoothing, or trimming with a dull blade.
- The Consequence: Crooked strips, air bubbles, visible seams, or torn edges.
- The Solution: Take your time. Use a plumb line for the first strip. Smooth thoroughly to remove air bubbles. Change utility knife blades frequently for clean cuts. If unsure, consider hiring a professional installer.
By being mindful of these common mistakes, you can approach your wallcovering project with confidence, ensuring a beautiful and lasting result.
Frequently Asked Questions About Wallcoverings
Can wallcoverings be used in bathrooms and kitchens?
Yes, wallcoverings can be effectively used in bathrooms and kitchens, provided you select the appropriate type designed to withstand moisture and high humidity. Solid sheet vinyl or fabric-backed vinyl wallcoverings are ideal for these environments because they are highly durable, washable, and resistant to moisture and mildew. Non-woven wallcoverings can also be a good choice if they are specifically labeled as washable and breathable, as their construction helps prevent mold growth.
How long do wallcoverings typically last?
The lifespan of a wallcovering varies significantly depending on its material, installation quality, and the environment it’s in, but high-quality wallcoverings can last anywhere from 10 to 15 years, or even longer. Durable vinyl wallcoverings in a low-traffic area with proper care can exceed 20 years, while delicate natural fibers in a sun-drenched, high-traffic area might show wear sooner. Proper surface preparation and professional installation are critical factors in maximizing longevity.
Are wallcoverings difficult to remove?
The ease of wallcovering removal depends largely on its type and how the wall was prepared prior to installation. Modern non-woven wallcoverings are designed to be “strippable,” meaning they can be peeled off the wall in full sheets without damaging the underlying surface. Older paper-backed wallpapers or those applied without proper priming can be more challenging to remove, often requiring steaming, scoring, and chemical removers. A properly primed wall significantly aids in future removal, regardless of the wallcovering type.
Can I install wallcoverings myself, or should I hire a professional?
DIY installation is feasible for certain types of wallcoverings, particularly peel-and-stick or paste-the-wall non-wovens, which are more forgiving for beginners. However, for complex patterns, delicate materials like grasscloth or silk, large-scale murals, or rooms with intricate architectural details, hiring a professional installer is highly recommended. Professionals possess the specialized tools, experience, and techniques to ensure a flawless, long-lasting result, preventing costly mistakes and maximizing the aesthetic impact of your investment.
Are wallcoverings environmentally friendly?
Many modern wallcoverings are designed with environmental considerations in mind. Look for options made from sustainably sourced materials (e.g., FSC-certified paper), recycled content, or natural fibers. Non-woven wallcoverings are often breathable, PVC-free, and printed with water-based, low-VOC inks. Manufacturers are increasingly offering products that meet strict environmental certifications, contributing to healthier indoor air quality. Always check product specifications for details on eco-friendly attributes.
How do I choose a wallcovering that will make my small room look bigger?
To make a small room appear larger, opt for wallcoverings with light colors, subtle textures, or small, delicate patterns. Light hues reflect more light, creating an open and airy feel. Vertical stripes can draw the eye upward, making ceilings appear taller, while horizontal stripes can visually widen a space. Wallcoverings with a slight sheen or metallic accents can also help bounce light around, enhancing the perception of space. Avoid large, busy patterns or dark colors, which tend to make a room feel more enclosed.
Sources
Conclusion: Elevate Your Home with Starhouse Wallcoverings
Wallcoverings are far more than just decorative accents; they are foundational elements of interior design, offering unparalleled depth, texture, and personality to any space. From the timeless elegance of natural fibers to the bold statements of contemporary digital murals, the right wallcovering can dramatically transform a room, reflecting individual style and enhancing daily living. By understanding the diverse types, materials, and installation nuances, homeowners and designers can confidently select options that not only captivate aesthetically but also deliver on durability and functionality.
At Starhouse, we believe that your home should be a true reflection of your unique vision and aspirations. Our commitment is to curate a collection of wallcoverings that embody exceptional quality, sophisticated design, and lasting value, helping you create spaces that inspire and delight. We meticulously select each piece, ensuring it meets our high standards for craftsmanship and style, providing you with the finest choices for your design projects.
As Starhouse curates its premier collection of wallcoverings and home décor, we invite you to be part of our journey. Share your design desires, tell us what you’re looking for, and receive early access to our exclusive offerings. Visit Starhouse USA Online to connect with us and begin shaping the home of your dreams.