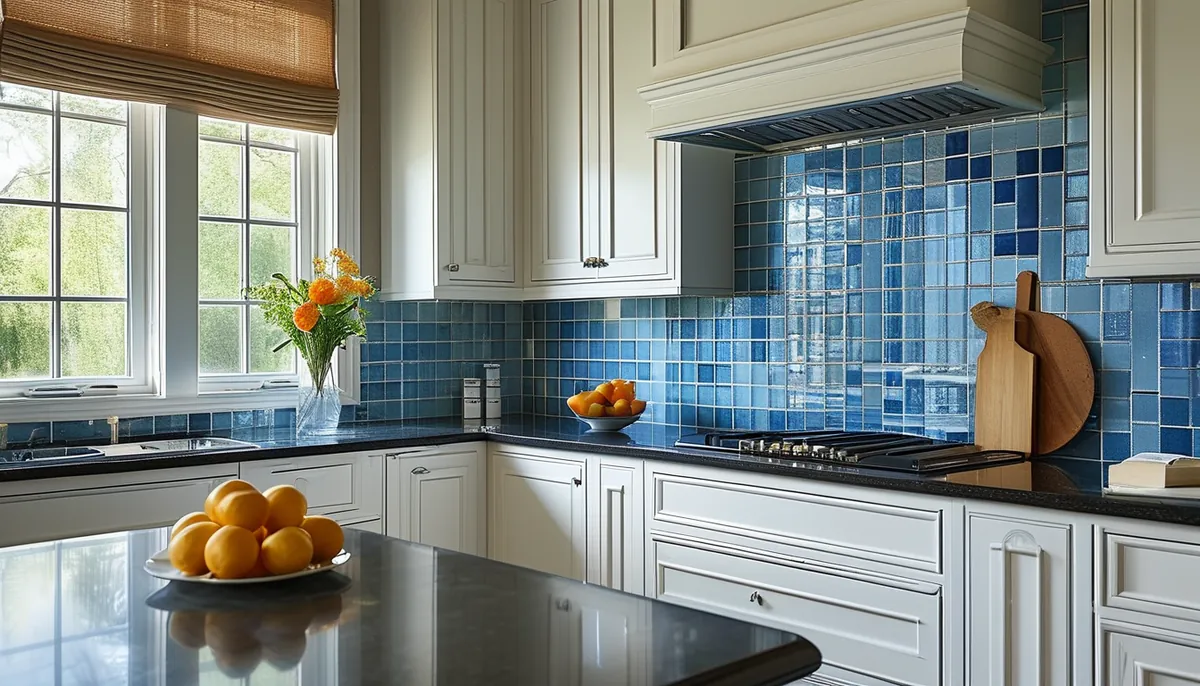
Blue is the color most likely to look correct in a product photo and wrong on your wall. Product shots are lit at around 5000K, cool and neutral. Most kitchens run 2700K to 3000K bulbs, which push a cool blue toward gray and a warm blue toward green. Order one sheet, tape it up, and look at it at 8 a.m., at dinner, and under the light you actually cook by. Then order the rest.
Which blue you are actually buying
The word covers four families that behave nothing alike on a wall.
- Navy and indigo. Very low light reflectance, so they eat light rather than bounce it. Excellent on a backsplash under cabinet lighting, risky as full wall coverage in a windowless powder room. Navy makes white counters read crisper and warm brass read warmer.
- Cobalt and true blue. Saturated and loud, which is the point. They fight patterned countertops and busy floors, so they need a plain field elsewhere in the room.
- Sky, powder and pale slate. These read almost as neutrals and are the safest choice for a small bathroom, but they turn chalky under cool white bulbs. Check them at 2700K.
- Teal and green-blue. The one that clashes with the others. A green-leaning blue next to a violet-leaning blue looks like a mistake, not a palette, so pick a side and stay there across tile, towels and paint.
One practical test: hold the sample against your countertop edge and your cabinet door at the same time, in that room. Blue that fights a countertop’s undertone will fight it every day for a decade.
The material under the color matters more than the finish
Four very different products sell as blue peel and stick tile, and they are priced and rated differently.
- Printed vinyl sheets. Flat, thin, usually 12 by 12 inches with a printed grout line. Cheapest and easiest to cut with a utility knife. The blue is ink under a clear wear layer, so it looks flat under raking light and can fade in a sunny window.
- Gel or resin tiles. A soft, raised polymer face over an adhesive backing. The dimensional surface catches light and reads much closer to real glass or ceramic from a few feet away. Heavier and harder to cut cleanly; a sharp blade and a steel straightedge, in several passes, beats one deep cut.
- Composite and stone-look tiles. Real aggregate or glass chips bonded to a backing sheet. The most convincing and the least forgiving, since they need a very flat wall and often a wet saw or nippers for cuts.
- Metal-faced tiles. Thin aluminum over a substrate, sometimes offered in anodized blue. Durable, but fingerprints and dents show, and cut edges are sharp enough to need filing.
Whatever the face, the backing is a pressure-sensitive adhesive. It does not cure like thinset. It grabs harder over the first 24 to 72 hours and it never stops caring about what is behind it.
Where it works, and where it will let you down
Good spots: a kitchen backsplash between counter and upper cabinets, the standard run being 18 inches tall; a laundry room wall behind a sink; a powder room accent wall; the face of an island or a bar back; the riser of a stair, if you accept that shoes will scuff it.
Bad spots, and each for a specific reason. Inside a shower or tub surround, because constant liquid water will find the seams and the adhesive is not a waterproofing system. Directly behind a gas cooktop with no separation, because sustained heat softens pressure-sensitive adhesive and vinyl faces can warp. Check the manufacturer’s maximum service temperature and honor any required clearance from the burners. On textured or heavily orange-peel drywall, because the tile only touches the high points and peels from the corners. And on floors, unless the product is specifically floor rated, which most decorative blue tile is not.
Prep, which is where most failures start
The wall must be clean, dry, smooth and non-porous, in that order of importance. In a kitchen that means degreasing first. Cooking oil film is invisible and it defeats adhesive completely, so wash with a degreasing cleaner, rinse with clear water, then wipe once with isopropyl alcohol and let it flash off.
Flat matters as much as clean. Fill and sand any texture, and prime raw drywall or fresh joint compound with a coat of paint so the adhesive bonds to a sealed film rather than to porous paper. Bare or freshly painted surfaces need time: give new paint at least two to three weeks to cure fully, or the tile will pull the paint off in sheets when it comes down. Wall temperature should be comfortable, roughly 60 to 85 degrees Fahrenheit, and the room should not be humid while you work.
Layout and cutting
Measure the area, divide by the coverage per sheet, and add 10 percent for cuts. A typical 30-inch wide range wall at 18 inches tall is 3.75 square feet, so a box that covers 10 square feet handles it with margin.
Find the visual center of the run, usually the sink or the range, and work outward so the cut pieces land at the ends where cabinets and trim hide them. Snap a level line for the first course rather than trusting the countertop, since counters are rarely dead level over 8 feet. Peel the backing halfway, tack the top edge, check the line, then press down and forward to avoid trapping air. Press every square inch with a hand roller or a wallpaper smoother, and go back over the outer 1/2 inch of every sheet, since edges lift first.
For outlets, turn off the breaker, remove the cover plate, cut the tile to overlap the box slightly, and use outlet spacers if the added thickness leaves the receptacle recessed. Finish the top and bottom edges with a bead of clear or color-matched silicone against the counter and the cabinet, which both seals the joint and stops a curious fingernail from finding the corner.
Getting it off again
The renter question deserves a straight answer: removal is usually clean, but not always. Warm each sheet with a hair dryer on low for 20 to 30 seconds, work a plastic putty knife under one corner, and pull slowly at a shallow angle back over itself rather than straight out from the wall. Pulling at 90 degrees is what tears drywall facing.
Adhesive residue comes off with a citrus-based remover or isopropyl alcohol and patience. Expect to repaint the area afterward regardless, and expect trouble anywhere the wall was unprimed, unpainted, or covered in flat builder-grade paint less than a month old when you tiled. If the deposit matters more than the look, test one sheet in a closet first and remove it after a week.