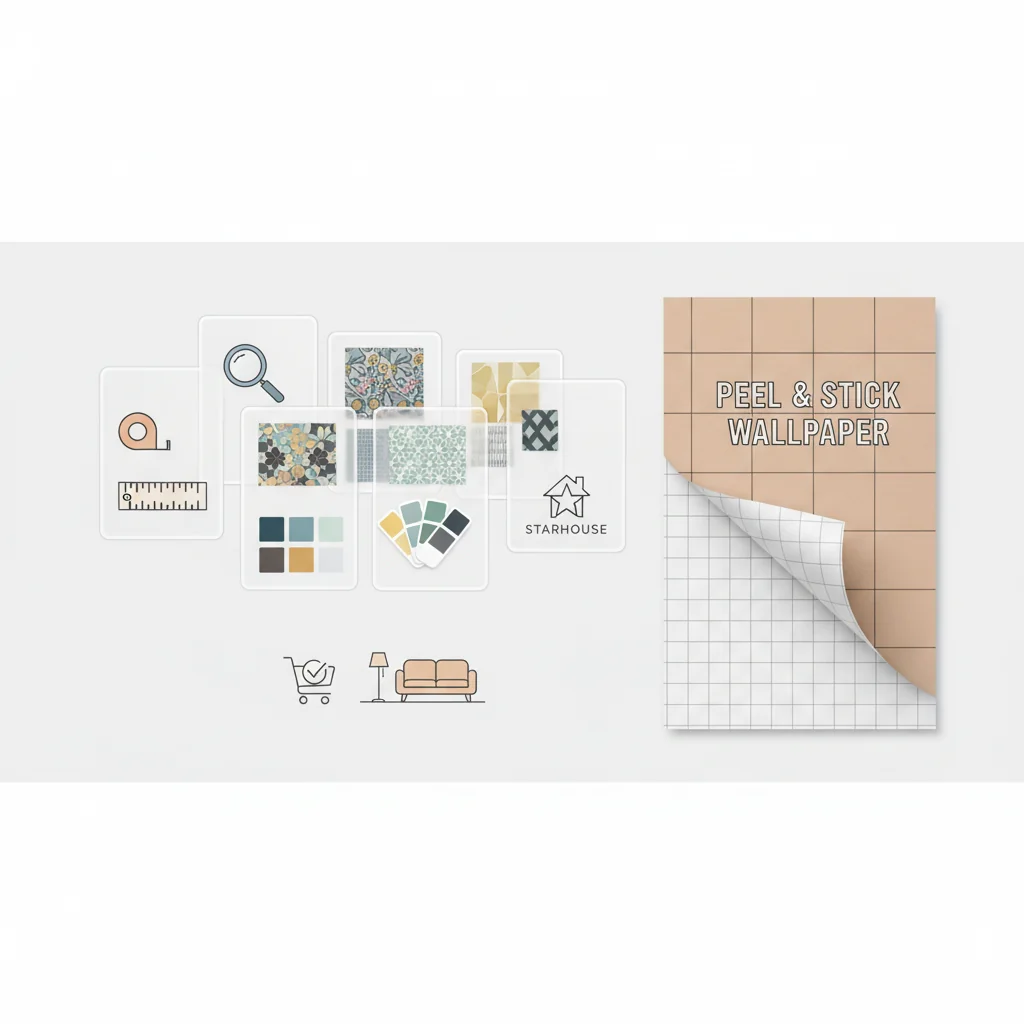
Peel & stick wallpaper has revolutionized interior design, offering a versatile, accessible, and high-impact solution for transforming spaces without the commitment or complexity of traditional wallcoverings. This innovative product features a self-adhesive backing, allowing for easy application by simply peeling off a liner and pressing the material onto a clean, smooth surface, and just as straightforward removal without damaging walls. It represents a significant advancement in home décor, empowering both seasoned designers and DIY enthusiasts to achieve sophisticated, personalized aesthetics with unprecedented ease and flexibility.
Key Takeaways
- Peel & stick wallpaper is a self-adhesive wall covering designed for effortless application and damage-free removal, making it ideal for both homeowners and renters.
- It offers unparalleled design versatility across materials like vinyl and fabric, and finishes from matte to metallic, catering to every aesthetic preference.
- Precise measurement, meticulous surface preparation, and systematic application are critical for a professional, lasting finish and avoiding common installation errors.
- This modern wallcovering is highly durable, easy to clean, and suitable for various environments, including moisture-prone areas when specified for such use.
- Strategic styling, from accent walls to full room transformations, allows peel & stick wallpaper to seamlessly integrate with existing décor, elevating a space’s character.
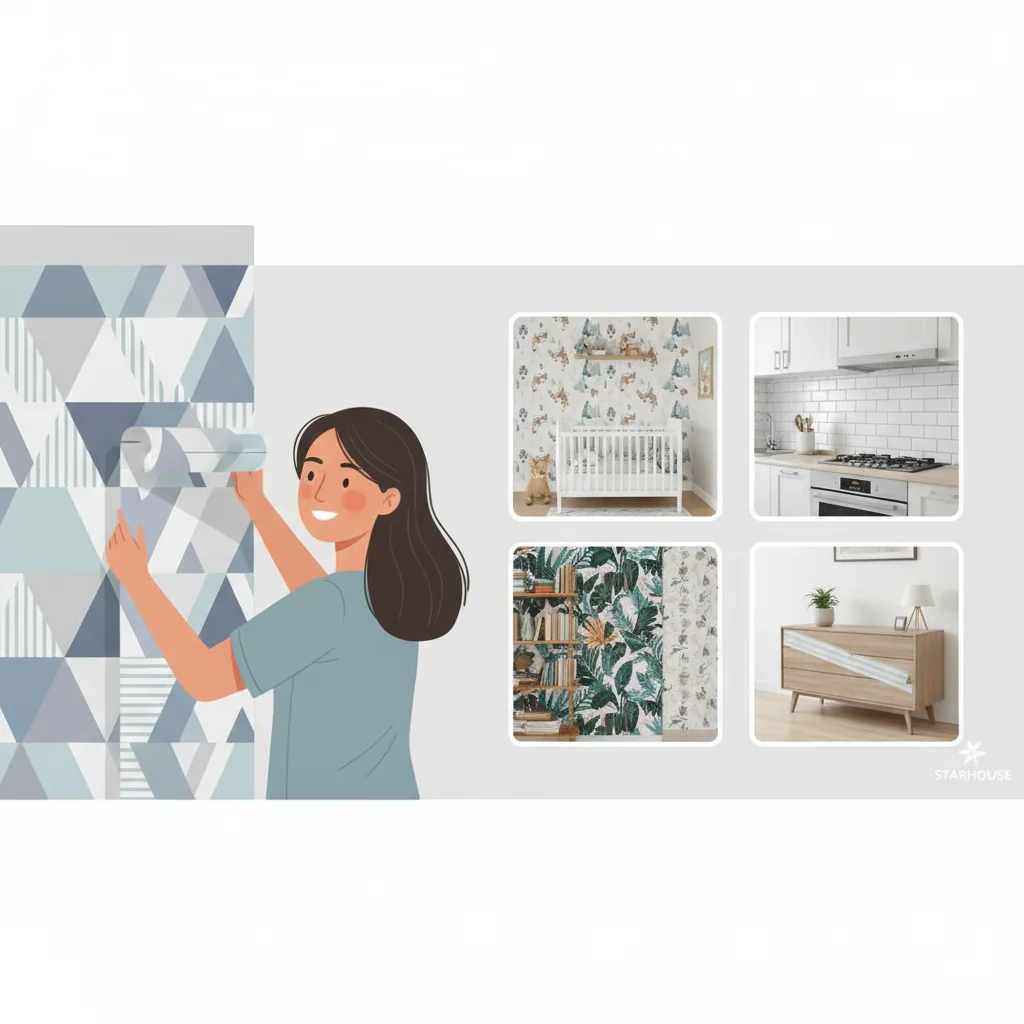
- Starhouse curates a diverse collection of peel & stick wallpaper, designed to meet discerning aesthetic standards and provide transformative design solutions for every home.
What is Peel & Stick Wallpaper?
Peel & stick wallpaper is a self-adhesive wall covering designed for easy application and removal without the need for traditional wallpaper paste or water activation. This modern innovation features a pre-applied adhesive backing protected by a removable liner, transforming the installation process into a straightforward peel-and-press method. Unlike conventional wallpapers that demand specialized tools and often professional installation, peel & stick options empower individuals to refresh their interiors with minimal effort and maximum flexibility.
At its core, peel & stick wallpaper represents a significant evolution in wall décor, addressing common pain points associated with older methods. The adhesive is engineered to be strong enough for reliable adherence to various smooth, clean surfaces, yet gentle enough to permit repositioning during installation and removal without causing damage to the underlying paint or drywall. This characteristic makes it an exceptionally versatile choice for homeowners seeking temporary design updates, renters aiming to personalize their spaces without violating lease agreements, or anyone desiring a low-commitment yet high-impact aesthetic transformation.
The innovation extends beyond mere application. Modern peel & stick wallpapers are crafted from a diverse array of materials, including durable vinyl, soft textiles, and even metallic foils, offering a rich tapestry of textures, finishes, and patterns. This breadth ensures that whether a space calls for a subtle textural accent, a bold graphic statement, or a serene botanical motif, there is a peel & stick solution to meet the design objective. The technology behind the adhesive has advanced considerably, ensuring better adhesion, easier removal, and greater longevity, solidifying its position as a go-to solution in contemporary interior design.
Moreover, the product’s rise in popularity is directly linked to its user-friendly nature. The absence of messy pastes, lengthy drying times, and complex trimming requirements significantly reduces the barrier to entry for DIY décor projects. Homeowners can confidently undertake transformations that might otherwise seem daunting, from accent walls in living rooms to full-room makeovers in bedrooms, or even adding decorative flair to furniture and stair risers. This accessibility, combined with sophisticated design offerings, positions peel & stick wallpaper as a cornerstone of accessible luxury in home styling.
In essence, peel & stick wallpaper is a pre-pasted, self-adhesive wallcovering that adheres to surfaces by removing a protective backing, offering a clean, simple, and damage-free method for interior decoration. Its development has democratized sophisticated design, providing a practical and stylish means to infuse personality and elegance into any living environment.
Why Choose Peel & Stick Wallpaper? The Unrivaled Benefits
Homeowners and renters increasingly choose peel & stick wallpaper for its unparalleled ease of installation, damage-free removal, and vast design versatility, offering a transformative yet flexible design solution. This modern wallcovering addresses many of the historical challenges associated with traditional wallpaper, making sophisticated design accessible to a broader audience. Its advantages extend beyond mere aesthetics, encompassing practical considerations that cater to contemporary living needs.
The primary appeal of peel & stick wallpaper lies in its **effortless installation**. Unlike conventional wallpapers that require extensive preparation, messy adhesive application, and precise alignment with wet strips, peel & stick varieties simplify the process to just three steps: peel, stick, and smooth. This eliminates the need for professional installers, specialized tools like paste tables or water trays, and significantly reduces the time and effort involved in a room makeover. A typical accent wall can often be completed in just a few hours, empowering individuals to take on ambitious design projects themselves.
Another significant benefit is its **damage-free removability**. This feature is particularly crucial for renters or homeowners who enjoy frequent design updates. The adhesive is formulated to bond securely to surfaces without becoming permanently fused, allowing for clean removal without leaving sticky residue or peeling paint. This preservation of underlying wall surfaces means that security deposits are protected, and future design changes are simplified, offering true design freedom without long-term commitment. This renter-friendly attribute has significantly expanded the market for wallpaper, allowing individuals in temporary living situations to personalize their spaces.
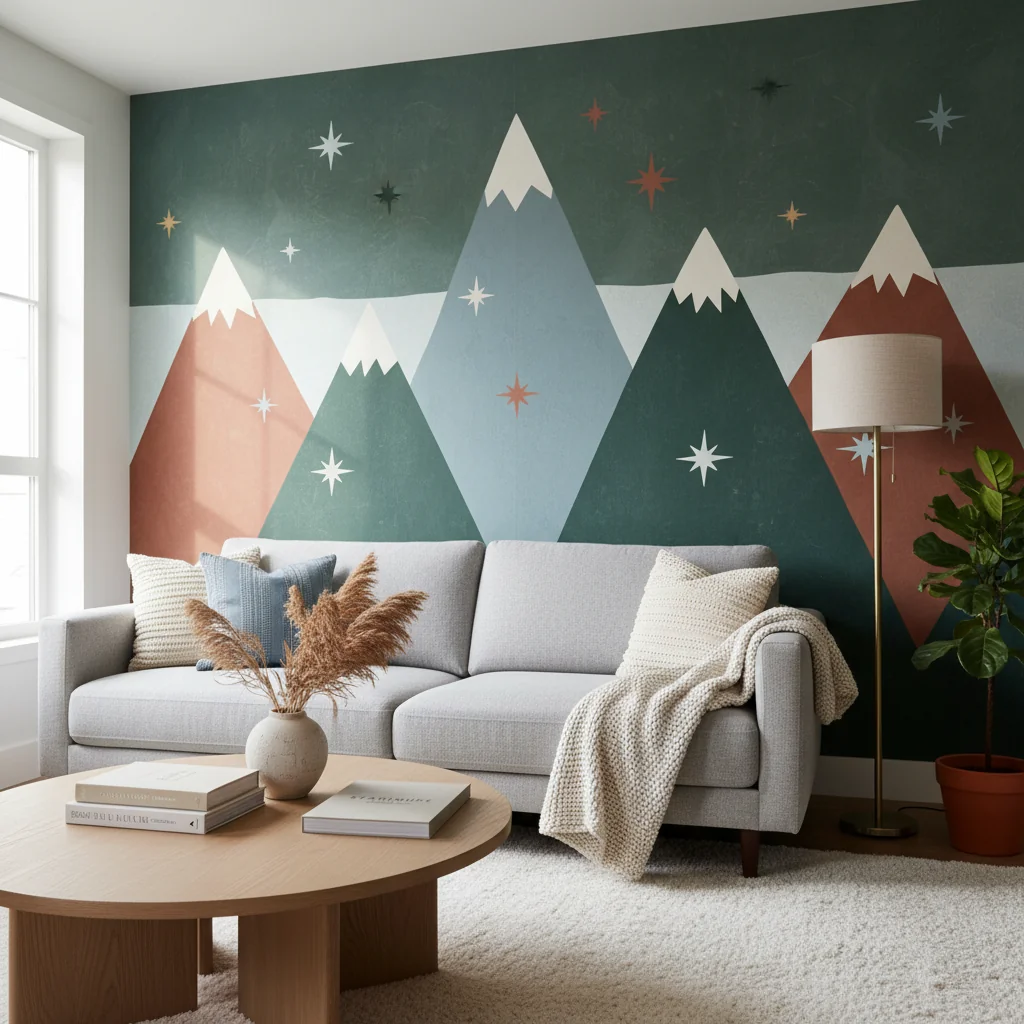
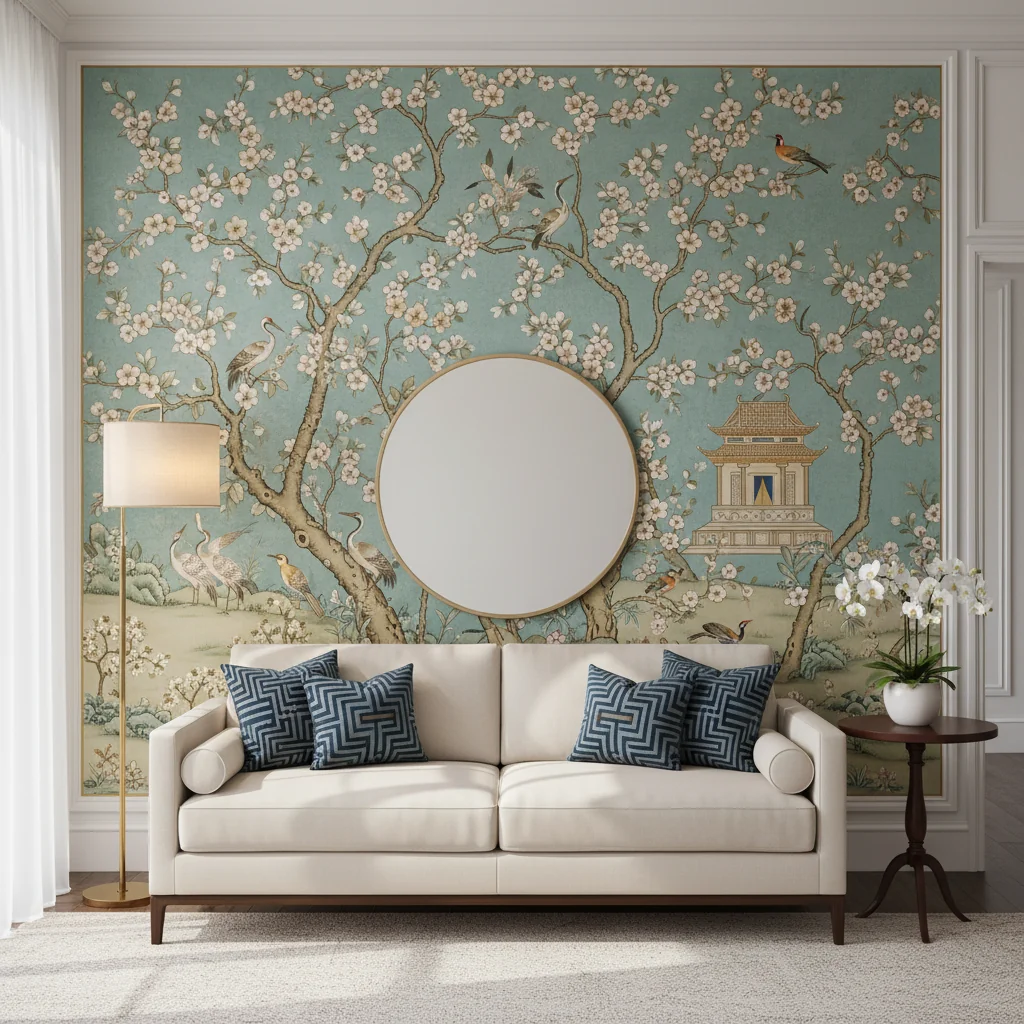
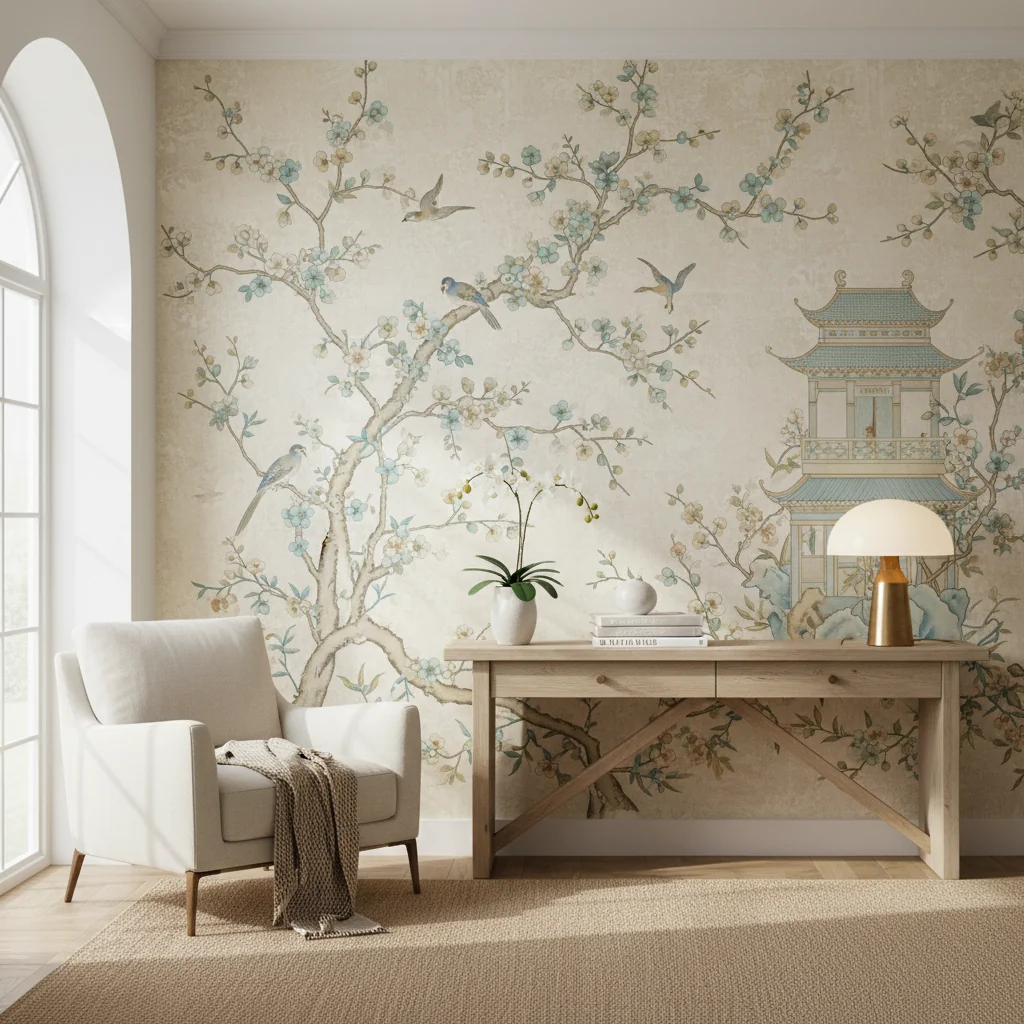
Peel & stick wallpaper offers **unmatched design versatility**. Available in an extensive array of patterns, colors, textures, and finishes, it can mimic everything from classic damasks and modern geometrics to natural wood grains, exposed brick, and intricate murals. This breadth of choice ensures that any design vision, from minimalist to maximalist, can be realized. Whether seeking to create a dramatic focal point, add subtle texture, or imbue a room with vibrant color, there is a peel & stick option to perfectly complement the desired aesthetic. The ability to easily sample and switch designs further enhances this versatility, encouraging experimentation.
From a financial perspective, it often presents a **cost-effective solution** for home renovation. While initial per-roll costs might seem comparable to some traditional wallpapers, the savings on professional installation, specialized tools, and the avoidance of potential wall repair costs upon removal often make peel & stick a more economical choice overall. Its DIY nature directly translates into savings on labor, which can be a substantial portion of any home improvement budget.
Furthermore, many peel & stick wallpapers are designed with **durability and ease of maintenance** in mind. Constructed from robust materials like vinyl, they are often water-resistant and washable, making them suitable for high-traffic areas, bathrooms, and kitchens where splashes and spills are common. This resilience ensures that the investment in a refreshed aesthetic holds up to the demands of daily life, maintaining its visual appeal with minimal effort over time. A simple wipe-down with a damp cloth is typically sufficient for cleaning.
Finally, the **immediate transformative power** of peel & stick wallpaper is a compelling advantage. A bare wall can be transformed into a statement piece in a single afternoon, providing instant gratification and a dramatic change in ambiance. This rapid transformation capability is invaluable for staging homes, preparing for special events, or simply satisfying the urge for a fresh look without embarking on a lengthy or disruptive renovation project. The sheer speed and simplicity with which a room’s character can be redefined are powerful motivators for its widespread adoption.
In summary, the decision to choose peel & stick wallpaper is driven by a compelling combination of convenience, flexibility, aesthetic breadth, and practical benefits that align perfectly with modern lifestyle demands. It empowers individuals to confidently express their style, knowing that their design choices are both impactful and easily reversible.
Types of Peel & Stick Wallpaper: Materials and Finishes
Peel & stick wallpaper is available in various materials and finishes, each offering distinct aesthetic and functional properties, from durable vinyl to tactile fabric-based options, allowing for precise selection based on application and desired visual impact. Understanding these distinctions is crucial for choosing a product that not only looks exceptional but also performs optimally in its intended environment. The advancements in manufacturing have introduced a rich array of choices, moving beyond basic printed paper.
The most prevalent material for peel & stick wallpaper is **vinyl**. Vinyl peel & stick wallpaper is a synthetic wallcovering known for its durability, water resistance, and ease of cleaning, making it suitable for high-traffic areas and humid environments. It typically features a PVC (polyvinyl chloride) face with a self-adhesive backing. Vinyl options are highly resistant to moisture, stains, and general wear and tear, which makes them an excellent choice for kitchens, bathrooms, laundry rooms, and children’s play areas. They are often wipeable with a damp cloth, ensuring longevity and maintaining a fresh appearance. Vinyl wallpapers can accurately mimic textures like wood grain, stone, or tile, providing a cost-effective alternative to genuine materials. Their robust nature ensures that they can withstand the rigors of daily life without fading or peeling prematurely.
Another popular material is **fabric-based** or **textile peel & stick wallpaper**. Fabric-based peel & stick wallpaper utilizes a woven textile or non-woven fiber as its primary substrate, offering a soft, tactile finish and enhanced breathability compared to vinyl options. These wallpapers often have a more matte finish and a softer hand-feel, lending a sophisticated, luxurious, or cozy ambiance to a room. They are generally more breathable than vinyl, which can be beneficial in certain environments, though they may not be as water-resistant or as easily scrubbable as their vinyl counterparts. Fabric options are superb for living rooms, bedrooms, and dining areas where comfort and an elevated tactile experience are prioritized. They can also offer acoustic benefits, subtly dampening sound within a space.
Beyond these primary materials, specialized types exist:
- Textured Peel & Stick Wallpaper: These options feature embossed patterns or raised surfaces that add tactile depth to walls. They can mimic plaster, stucco, grasscloth, or even intricate carved designs, providing a three-dimensional element that enhances visual interest.
- Metallic Peel & Stick Wallpaper: Incorporating metallic inks or foils, these wallpapers introduce a subtle sheen or high-gloss reflection to a room. They can create a sense of glamour, expand the perception of space by reflecting light, and add a contemporary edge. Gold, silver, copper, and iridescent finishes are common.
- Mylar/Foil Peel & Stick Wallpaper: Similar to metallic, but often with a more pronounced reflective quality, mylar wallpapers can create dramatic, high-impact statements. They are less common but offer unique visual effects.
The choice of **finish** also significantly impacts the final aesthetic:
- Matte: A non-reflective finish that absorbs light, providing a sophisticated, understated look. Matte finishes can help to conceal minor wall imperfections and offer a softer, more natural appearance, particularly with fabric-based designs.
- Satin/Eggshell: Possessing a slight sheen, this finish reflects a modest amount of light, adding a subtle glow without being overtly shiny. It offers a good balance between durability and aesthetic appeal, often being easier to clean than matte finishes.
- Gloss: A highly reflective, shiny finish that bounces light aggressively, creating a vibrant and often dramatic effect. Gloss finishes can make a room feel larger and brighter, but they tend to highlight wall imperfections more readily.
- Textured: This isn’t strictly a finish but a tactile surface quality that can be combined with any of the above. It adds depth and character, often replicating natural materials.
Here’s a comparison of common peel & stick wallpaper materials:
| Material Type | Key Characteristics | Durability & Care | Ideal Use Cases | Typical Finish |
|---|---|---|---|---|
| Vinyl | Durable, water-resistant, often textured, wide range of patterns. | High durability; easily wipeable and washable; resistant to humidity and stains. | Kitchens, bathrooms, laundry rooms, high-traffic areas, children’s rooms, rental properties. | Matte, satin, semi-gloss, textured (faux brick, wood, stone). |
| Fabric/Textile | Soft, tactile feel, often breathable, sophisticated aesthetic, less prone to glare. | Moderate durability; generally not as water-resistant as vinyl; spot clean or gentle wipe. | Bedrooms, living rooms, dining rooms, nurseries, offices, areas where a softer look is desired. | Matte, subtle sheen, linen-like texture. |
| Textured (Embossed) | Adds three-dimensional depth, can mimic natural materials like plaster or grasscloth. | Durability varies by base material (often vinyl or non-woven); generally robust. | Feature walls, spaces needing architectural interest, concealing minor wall imperfections. | Matte, subtle sheen, highly tactile. |
| Metallic/Foil | Reflective surface, creates dramatic effect, enhances light, adds glamour. | Moderate to high durability depending on base; can show fingerprints; gentle wipe only. | Accent walls, powder rooms, contemporary spaces, formal dining areas. | High gloss, reflective, iridescent. |
When selecting your peel & stick wallpaper, consider the functional demands of the space alongside your aesthetic preferences. A bathroom requires a different material resilience than a formal dining room, and the desired light interaction will dictate the appropriate finish. Starhouse carefully curates its collection to ensure a robust selection across all these categories, offering both beauty and performance.
How to Choose the Right Peel & Stick Wallpaper for Your Space
Selecting the ideal peel & stick wallpaper involves a strategic assessment of your room’s function, natural light, existing furnishings, and the desired aesthetic impact to ensure a harmonious and effective design. A thoughtful approach prevents costly mistakes and guarantees that the chosen pattern and material enhance, rather than detract from, the overall interior scheme. This selection process is a balance of practical considerations and personal aesthetic preferences.
1. Assess the Room’s Function and Environment:
The purpose of the room dictates practical requirements. For high-moisture areas like bathrooms or kitchens, opt for durable, water-resistant vinyl peel & stick wallpaper that can withstand humidity and be easily wiped clean. In low-traffic areas like bedrooms or formal living rooms, fabric-based or more delicate textured options might be appropriate for a softer, more luxurious feel. Consider children’s rooms or play areas, where extreme durability and scrubbability are paramount to manage inevitable spills and marks.
2. Evaluate Existing Décor and Color Palette:
Your new wallpaper should integrate seamlessly with your current furniture, textiles, and paint colors. Identify the dominant colors and undertones in your room. Will the wallpaper be a focal point, or will it serve as a subtle backdrop? If your furniture is bold, a more subdued pattern or texture might be best. Conversely, a neutral room can be energized by a vibrant, eye-catching design. Consider color harmony: analogous colors create a calm flow, while complementary colors provide dynamic contrast.
3. Consider the Room’s Size and Natural Light:
The scale of the pattern and the wallpaper’s finish significantly impact how a room feels. In smaller rooms, large, busy patterns can feel overwhelming, making the space appear even smaller. Conversely, a large-scale, open pattern can add drama and a sense of grandeur to a vast room. Light-colored wallpapers with reflective finishes (like satin or gloss) can make a room feel brighter and more expansive by bouncing light. Darker, matte wallpapers tend to absorb light, creating a cozier, more intimate atmosphere, which can be desirable in a large space or a bedroom.
4. Determine Your Desired Aesthetic and Mood:
What feeling do you want to evoke? A serene bedroom might benefit from soft botanicals or subtle textures in calming hues. A vibrant dining room could feature a bold geometric or a striking mural. A sophisticated home office might call for a faux grasscloth or a refined pinstripe. Sketch out your vision or create a mood board to visualize how different patterns and styles contribute to the overall ambiance. This step is crucial for aligning the wallpaper with your personal style and the room’s intended use.
5. Order Samples:
This is perhaps the most critical step. Colors and textures can appear drastically different on a screen than in person, and lighting conditions in your home will alter their appearance. Order several samples of your top choices and adhere them to your wall for a few days. Observe them at different times of day (morning, afternoon, evening) and under various lighting conditions (natural light, artificial light). This allows you to assess the true color, texture, and scale within your specific environment, ensuring confidence in your final decision.
6. Consider Pattern Repeat:
For patterns that repeat, understand the repeat size. A larger repeat means more waste during installation, as you’ll need to align each strip perfectly. This impacts the number of rolls you need to purchase. Smaller, non-repeating, or random patterns are generally more forgiving and result in less material waste. Plan accordingly in your budget and quantity calculations.
By systematically addressing these factors, you can confidently select a peel & stick wallpaper that not only meets your aesthetic aspirations but also performs optimally within the practical realities of your home. Starhouse offers detailed product descriptions and encourages the use of samples to ensure your choice is perfectly matched to your vision.
Precise Measurement and Calculation: Ensuring a Flawless Installation
Accurate measurement is paramount for a seamless peel & stick wallpaper installation, preventing shortages or excessive waste and ensuring pattern alignment across strips. Underestimating or overestimating material needs can lead to frustration and additional costs, making this preparatory step as crucial as the application itself. A meticulous approach here lays the foundation for a professional-looking finish.
Tools You Will Need:
- Metal tape measure (at least 25 feet)
- Pencil
- Notebook or calculator
- Step stool or ladder (for tall walls)
Step-by-Step Measurement Guide:
- Measure Wall Height: Measure the height of the wall from the baseboard to the ceiling at several points. Walls are rarely perfectly uniform. Use the tallest measurement for your calculations to ensure all strips are long enough. For a standard room, this might be 96 inches (8 feet) to 120 inches (10 feet).
- Measure Wall Width: Measure the total width of the wall(s) you intend to cover. If wallpapering multiple walls, measure each wall individually. Include doors, windows, and other architectural features in your initial width measurement; you will cut around these later.
- Calculate Required Strip Length: Add 4-6 inches to your tallest wall height measurement for trimming allowance at the top and bottom of each strip. For example, if your wall is 96 inches tall, each strip should be 100-102 inches long.
- Determine Number of Strips Needed: Divide the total width of the wall(s) by the width of one roll of peel & stick wallpaper. Standard roll widths are typically 20.5 inches, 24 inches, or 27 inches. Always round up to the nearest whole number to ensure you have enough strips to cover the entire width.
- Example: If your wall is 144 inches wide and your wallpaper roll is 20.5 inches wide, you need 144 / 20.5 = 7.02 strips. Round up to 8 strips.
- Account for Pattern Repeat: This is a critical step for patterned wallpaper. The pattern repeat is the vertical distance before the pattern repeats itself. This information is usually found in the product specifications. For each strip after the first, you will need to add the pattern repeat length to your calculated strip length (from step 3) to ensure proper alignment.
- Example: If your strip length is 100 inches and the pattern repeat is 24 inches, you effectively need 100 + 24 = 124 inches per patterned strip (except for the very first one, which you align to the ceiling). For simplicity and to avoid complex calculations, it’s often safer to add one full pattern repeat to the length of *each* strip you calculate.
- Calculate Total Roll Quantity:
- Multiply the number of strips needed (from step 4) by the adjusted strip length (from step 3, plus pattern repeat if applicable). This gives you the total linear inches of wallpaper required.
- Divide this total linear inches by the usable linear inches per roll (a standard double roll might have 20.5 inches width x 33 feet length = 20.5 inches x 396 inches = 8118 sq inches, or 33 feet = 396 inches of length).
- Round up to the nearest whole number. Always purchase an extra roll (or at least 10-15% extra) for mistakes, future repairs, or pattern matching. It is far better to have a little extra than to run short, especially since dye lots can vary between batches.
Illustrative Calculation Example:
- Wall Dimensions: 12 feet (144 inches) wide x 8 feet (96 inches) tall.
- Wallpaper Roll: 20.5 inches wide, 18 feet (216 inches) long.
- Pattern Repeat: 20 inches.
- Tallest Wall Height: 96 inches.
- Strip Length (with trim allowance): 96 inches + 6 inches = 102 inches.
- Number of Strips: 144 inches / 20.5 inches = 7.02, round up to 8 strips.
- Length per Patterned Strip (accounting for repeat): 102 inches + 20 inches (for subsequent strips) = 122 inches. To simplify, we’ll assume an average of 122 inches per strip to account for cutting and aligning.
- Total Linear Inches Required: 8 strips * 122 inches/strip = 976 inches.
- Usable Length per Roll: 216 inches.
- Rolls Needed: 976 inches / 216 inches/roll = 4.51. Round up to 5 rolls.
- Final Recommendation: Purchase 5 rolls, plus one extra for contingency, totaling 6 rolls.
- Account for Openings (Doors/Windows): While you measure these areas as part of your total wall, do not subtract their square footage from your total rolls needed. It’s often impossible to use the cut-out pieces elsewhere due to pattern alignment. Treat the wall as a solid surface for initial calculation and simply cut around openings during installation.
By following these precise measurement and calculation steps, you can confidently order the correct quantity of peel & stick wallpaper, minimizing waste and ensuring a smooth, successful installation. Starhouse provides detailed product specifications, including roll dimensions and pattern repeat, to facilitate these critical calculations.
Step-by-Step Installation Guide: From Prep to Perfection
Successful peel & stick wallpaper installation hinges on meticulous surface preparation and a systematic application process, ensuring a smooth, bubble-free, and lasting finish. Rushing or neglecting crucial steps can lead to frustrating issues such as peeling edges, visible seams, or trapped air bubbles. Adhering to a precise methodology guarantees a professional-looking result.
Tools and Materials You Will Need:
- Peel & stick wallpaper rolls
- Tape measure
- Pencil
- Level or plumb bob
- Utility knife with fresh blades
- Smoothing tool (plastic squeegee or felt-edged applicator)
- Damp cloth or sponge
- Clean, dry lint-free cloth
- Step ladder or stool
- Optional: Primer (for difficult surfaces), painter’s tape
Step 1: Prepare the Wall Surface (Crucial for Adhesion)
The wall must be clean, dry, smooth, and free of dust, grease, or debris. Any imperfections will show through the wallpaper and compromise adhesion.
- Clean: Wash the wall with a mild detergent solution (e.g., dish soap and water) or a sugar soap solution. Rinse thoroughly with clean water to remove all soap residue.
- Dry: Allow the wall to dry completely, typically 24-48 hours, especially in humid environments. Moisture beneath the wallpaper will prevent proper adhesion.
- Smooth: Fill any holes or cracks with spackle, sand them smooth, and wipe away dust. For heavily textured walls, it is recommended to skim coat and sand them smooth, or apply a wall liner first. Peel & stick wallpaper adheres best to smooth surfaces.
- Prime (Optional but Recommended for Certain Surfaces): For freshly painted walls (allow at least 3-4 weeks for paint to cure fully), highly porous surfaces, or walls previously covered with dark paint that might show through lighter wallpaper, apply a high-quality, oil-based primer or a specific wallpaper primer. This creates a uniform, slightly textured surface for optimal adhesion and easier future removal. Allow primer to dry completely per manufacturer instructions.
Step 2: Measure and Cut Your First Strip
Start with the least conspicuous wall, or a corner, moving away from a door or window frame. This allows for practice and hides any slight imperfections.
- Measure Wall Height: Measure from the baseboard to the ceiling where your first strip will go. Add 4-6 inches (2-3 inches for top and bottom trim) to this measurement.
- Cut Strip: Unroll your wallpaper and cut the first strip to this adjusted length using your utility knife. If your wallpaper has a repeating pattern, ensure you cut to align with the pattern for subsequent strips.
- Draw Plumb Line: Using your level or plumb bob, draw a straight vertical line on your wall, marking where the edge of your first strip will go. This ensures your first strip is perfectly straight, which is critical for the entire installation. Start about 1/2 inch from the corner or edge, allowing for a slight overlap.
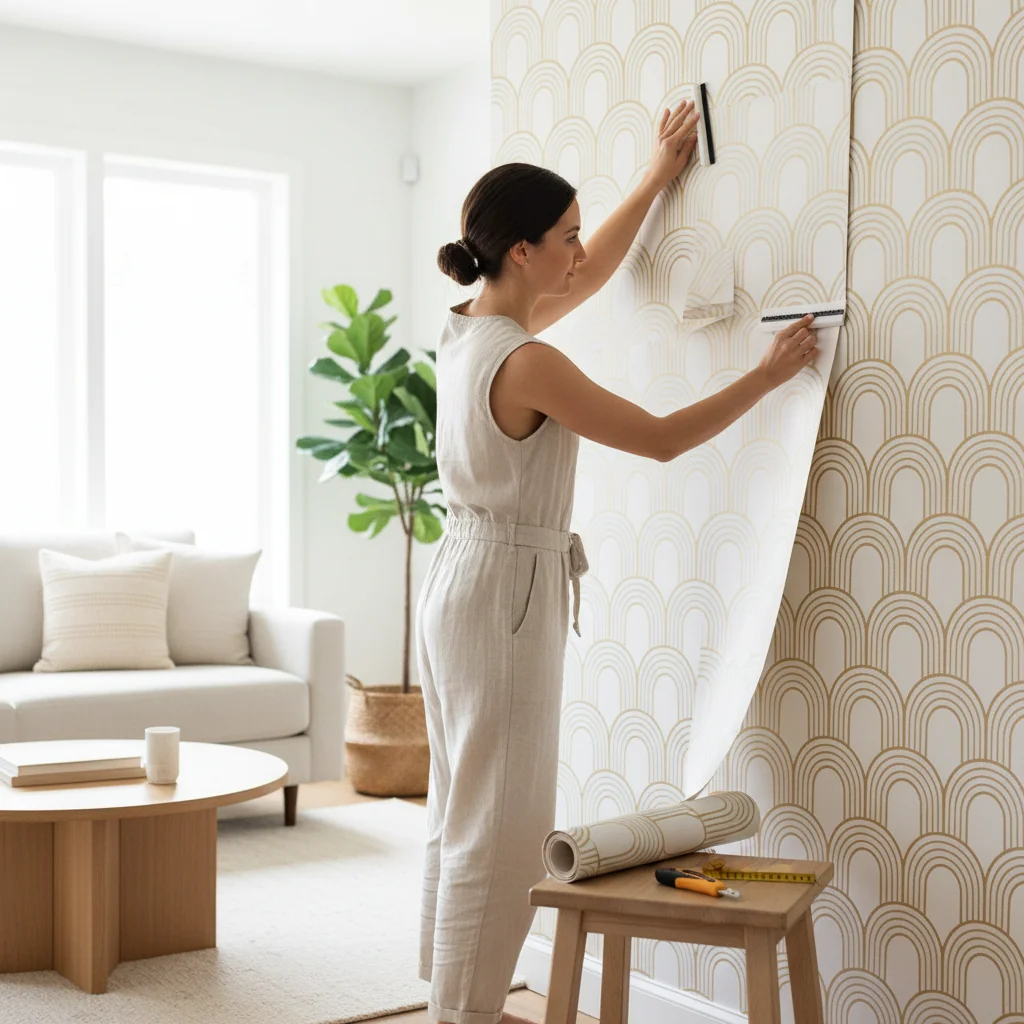
Step 3: Apply the First Strip
- Peel and Position: Carefully peel back about 6-12 inches of the backing paper from the top of your first strip. Align the exposed adhesive edge with your plumb line, allowing the excess 2-3 inches to overlap the ceiling line.
- Adhere and Smooth: Press the top portion of the strip firmly to the wall. Slowly peel down more of the backing paper with one hand while using your smoothing tool with the other hand to press the wallpaper onto the wall. Work from the center outwards to push out any air bubbles. Do not peel the entire backing off at once.
- Reposition (If Needed): If you encounter bubbles or misalignment, gently peel back the wallpaper to the problematic area and reapply, smoothing it carefully. The repositionable nature of peel & stick wallpaper is a key advantage here.
Step 4: Trim Excess
- Top and Bottom: Once the strip is fully adhered, use your smoothing tool to press the wallpaper firmly into the crease where the wall meets the ceiling and the baseboard. Use a sharp utility knife and a straightedge (like a metal ruler or the smoothing tool itself) to carefully trim off the excess wallpaper at both the top and bottom. Change blades frequently for clean cuts.
Step 5: Apply Subsequent Strips (Pattern Matching)
- Measure and Cut Next Strip: Cut your next strip, again adding 4-6 inches for trim. If your wallpaper has a pattern, unroll it and align the pattern on the new strip with the pattern on the previously installed strip *before* cutting. This is where the pattern repeat dimension becomes crucial.
- Overlap and Align: When applying the second strip, butt its edge directly against the first strip, or slightly overlap by about 1/16th of an inch, depending on the manufacturer’s instructions. Carefully align the pattern as you work your way down the wall, peeling the backing and smoothing as before.
- Seam Smoothing: Once two strips are side-by-side, use your smoothing tool to firmly press down the seam, ensuring it is flat and secure.
Step 6: Working Around Obstacles (Windows, Doors, Outlets)
- Outlets/Switches: Turn off power at the circuit breaker. Loosen the cover plate screws (do not remove them). Apply the wallpaper over the outlet, then use your utility knife to carefully cut an “X” from corner to corner over the opening. Trim the excess paper around the opening and replace the cover plate over the wallpaper.
- Windows/Doors: Apply the wallpaper over the opening. Once adhered, use your utility knife to cut away the excess paper, leaving a clean edge around the frame.
Step 7: Final Touches and Troubleshooting
- Bubbles: For any remaining small bubbles, gently try to smooth them out towards the nearest edge. If persistent, you can carefully pierce a tiny hole with a pin and smooth the air out.
- Edges: Ensure all edges are firmly pressed down. If an edge lifts, you can sometimes re-adhere it by pressing firmly or using a hairdryer on a low setting to warm the adhesive slightly, then pressing.
- Clean Up: Wipe down the installed wallpaper with a clean, dry lint-free cloth to remove any smudges or pencil marks.
By following these detailed steps, you can achieve a professional and beautiful peel & stick wallpaper installation that transforms your space with confidence and precision. Starhouse emphasizes thorough preparation as the cornerstone of any successful design project.
Care and Maintenance: Preserving Your Wallpaper’s Beauty
Proper care and routine maintenance are essential to preserve the aesthetic integrity and extend the lifespan of your peel & stick wallpaper, ensuring it remains vibrant and securely adhered for years. While designed for durability, consistent attention to cleaning and protection against common stressors will maximize its visual appeal and functional performance. Neglecting these steps can lead to premature wear, discoloration, or lifting edges.
Regular Cleaning for Longevity:
The majority of peel & stick wallpapers, especially those made from vinyl, are designed for easy cleaning. Regular, gentle cleaning is key to preventing dirt and grime buildup.
- Dusting: Routinely dust your wallpaper using a soft, dry cloth, a feather duster, or the brush attachment of your vacuum cleaner. This prevents dust accumulation that can dull the pattern over time.
- Spot Cleaning: For minor marks or smudges, immediately blot the area with a clean, damp sponge or soft cloth. Use only plain water. For more stubborn spots, a very mild, diluted non-abrasive soap solution (like a few drops of dish soap in water) can be used. Apply the solution to the cloth, not directly to the wallpaper. Gently wipe the stain, then immediately wipe the area with a clean, damp cloth to remove any soap residue, and finally, pat dry with a clean, dry cloth.
- Avoid Harsh Cleaners: Never use abrasive cleaners, scouring pads, bleach, or strong chemical solvents (e.g., ammonia-based cleaners, paint thinners). These can damage the wallpaper’s finish, strip the color, or degrade the adhesive, leading to peeling.
- Test in an Inconspicuous Area: Before applying any cleaning solution to a visible area, always test it on a small, hidden spot (e.g., behind a piece of furniture or in a closet) to ensure it does not cause discoloration or damage.
Protecting Against Damage:
While peel & stick wallpaper is robust, certain precautions can further extend its life.
- Avoid Direct Sunlight: Prolonged exposure to direct sunlight can cause wallpaper colors to fade over time. If possible, use curtains, blinds, or UV-filtering window treatments on windows directly facing wallpapered walls.
- Manage Humidity: In high-humidity environments like bathrooms, ensure proper ventilation. While many vinyl peel & stick wallpapers are water-resistant, excessive, constant moisture can eventually affect adhesion or lead to mold growth behind the paper if the wall itself is not adequately prepared. A well-ventilated space is always recommended.
- Protect from Physical Abrasion: Be mindful of furniture being moved against wallpapered walls, sharp objects, or pets that might scratch or tear the surface. Use furniture pads or position items strategically to minimize contact.
- Prevent Edge Lifting: Pay attention to the edges and seams. If you notice any lifting, gently press them back down. For persistent lifting, a small amount of clear wallpaper seam adhesive can be applied sparingly with a fine brush, then pressed firmly. This is a rare occurrence with quality peel & stick, but can happen if the wall was not perfectly clean or smooth during installation.
Long-Term Considerations:
- Temperature Stability: Extreme temperature fluctuations can affect the adhesive. Maintain a relatively stable room temperature, particularly during the initial curing period after installation.
- Repositioning: While repositionable during installation, avoid repeatedly peeling and sticking the wallpaper once it has fully adhered, as this can weaken the adhesive over time.
- Storage of Leftovers: If you have leftover rolls for future repairs, store them in a cool, dry place, away from direct sunlight and extreme temperatures, in their original packaging to protect the adhesive.
By integrating these simple care and maintenance practices into your routine, your peel & stick wallpaper will continue to enhance your home with its vibrant patterns and textures, maintaining its fresh, newly installed appearance for years to come. Starhouse advises reviewing specific care instructions provided with each wallpaper product, as material compositions can vary.
Styling and Pairing: Integrating Wallpaper into Your Design Scheme
Strategic styling and thoughtful pairing are crucial for seamlessly integrating peel & stick wallpaper into your overall interior design scheme, enhancing the room’s character without overwhelming it. The goal is to create a cohesive and visually appealing environment where the wallpaper acts as a complementary or focal element, rather than a standalone feature. This involves considering color, texture, scale, and the existing elements of your space.
1. The Power of the Accent Wall:
The most popular and impactful way to use peel & stick wallpaper is to create a feature or accent wall. This approach allows for a bold pattern or color statement without dominating the entire room.
- Choosing the Wall: Select a wall that naturally draws the eye, such as the wall behind a bed, sofa, dining table, or a prominent wall in an entryway. This transforms an ordinary wall into a focal point.
- Contrast or Complement: The accent wall can either contrast sharply with the other painted walls (e.g., a dark patterned wallpaper against light-painted walls) or complement them with a coordinating color or a subtle texture. Ensure the pattern scale is appropriate for the wall’s size; a large pattern needs room to breathe.
- Balance: Balance the visual weight of the accent wall with other elements in the room. If the wallpaper is busy, keep furniture and décor on that wall simpler.
2. Full Room Immersion:
For a more enveloping and dramatic effect, wallpapering an entire room can create a truly immersive experience. This is particularly effective in smaller spaces like powder rooms, or in bedrooms and dining rooms where a consistent ambiance is desired.
- Subtle Patterns: For full rooms, consider smaller, more delicate patterns, subtle textures, or tone-on-tone designs that add depth without overwhelming the senses. This creates a sophisticated backdrop rather than a jarring visual.
- Color Consistency: Ensure the dominant colors in the wallpaper are echoed in other elements of the room, such as throw pillows, curtains, or artwork, to maintain cohesion.
- Lighting: Pay attention to how the wallpaper interacts with natural and artificial light across all walls. Reflective finishes can brighten a full room, while matte finishes create a cozier feel.
3. Coordinating Colors and Textures:
Successful styling often comes down to harmonious color and texture pairing.
- Color Palette: Identify the primary and secondary colors in your chosen wallpaper. Use these colors as a guide for selecting paint colors for adjacent walls, upholstery, and decorative accessories. Aim for a palette of 3-5 colors for a balanced look.
- Texture Play: If your wallpaper has a distinct texture (e.g., faux grasscloth, linen print), introduce complementary textures in your textiles (velvet, wool, silk), rugs, and furniture finishes (wood, metal, stone) to add depth and tactile interest to the room.
- Pattern Mixing: If combining wallpaper with other patterned fabrics (e.g., on cushions or drapes), ensure there’s a variation in scale. Mix a large-scale wallpaper pattern with small-scale fabric patterns, or vice versa. Always include a solid or subtly textured element to provide visual rest.
4. Integrating with Furniture and Artwork:
The wallpaper should enhance, not compete with, your furniture and artwork.
- Background for Artwork: A subtle, textured, or tone-on-tone wallpaper can serve as an exquisite backdrop for showcasing art. For bolder wallpapers, consider framing artwork with wide, simple mats and frames to create a clear boundary.
- Furniture Pairing: If your furniture is ornate or highly detailed, a simpler wallpaper pattern might be more appropriate. Conversely, sleek, minimalist furniture can be elevated by a more dramatic wallpaper. Ensure there’s enough visual contrast between the furniture and the wall to make both elements stand out.
5. Beyond Walls: Creative Applications:
Peel & stick wallpaper’s versatility extends to various surfaces beyond traditional walls.
- Furniture Refurbishment: Update dressers, cabinets, tabletops, or bookshelves by applying wallpaper to panels or entire surfaces. This is a cost-effective way to personalize and refresh tired pieces.
- Stair Risers: Add a surprising pop of pattern to stair risers for a unique architectural detail.
- Bookcases and Shelves: Line the back of a bookcase or the inside of open shelves to add color and pattern, making your displayed items pop.
- Backsplashes: Certain water-resistant vinyl peel & stick wallpapers can serve as temporary or low-traffic backsplashes in kitchens or laundry rooms.
By thoughtfully considering these styling and pairing principles, you can leverage the transformative power of peel & stick wallpaper to create spaces that are not only beautiful but also reflect a sophisticated and cohesive design sensibility. Starhouse encourages creative exploration, providing a diverse range of designs to inspire your unique vision.
Common Mistakes to Avoid When Using Peel & Stick Wallpaper
Avoiding common pitfalls ensures a professional-looking and durable peel & stick wallpaper application, preventing issues like peeling edges, bubbles, or misaligned patterns. Many installation problems stem from inadequate preparation or rushing the process, underscoring the importance of precision and patience. Being aware of these common errors can save significant time and effort.
1. Inadequate Wall Preparation:
This is the most frequent and critical mistake. Peel & stick wallpaper requires a clean, dry, and smooth surface for optimal adhesion.
- Mistake: Applying wallpaper to dirty, dusty, greasy, or uneven walls. This includes walls with flaking paint or residual adhesive from previous coverings.
- Correction: Thoroughly clean walls with a mild detergent, rinse, and allow to dry completely (24-48 hours). Fill all holes and cracks, then sand smooth. For heavily textured walls, skim coating or applying a wall liner is essential.
2. Ignoring Paint Curing Time:
Freshly painted walls can off-gas, affecting adhesive bond.
- Mistake: Applying peel & stick wallpaper to newly painted walls before the paint has fully cured.
- Correction: Allow freshly painted walls to cure for a minimum of 3-4 weeks. For darker paints or specific paint types, a high-quality primer specifically designed for wallpaper adherence can also aid in creating a stable surface.
3. Incorrect Measurement and Under-ordering:
Running out of wallpaper mid-project, especially if dye lots vary, is a significant setback.
- Mistake: Not accurately measuring wall dimensions, failing to account for pattern repeat, or neglecting to purchase extra for waste and errors.
- Correction: Measure wall height and width at multiple points, using the largest dimensions. Always add 4-6 inches for trim allowance per strip. For patterned wallpaper, factor in the pattern repeat. Purchase at least 10-15% extra material to account for mistakes, pattern matching, and future repairs.
4. Neglecting the Plumb Line:
Starting crooked can cascade into a visibly misaligned installation.
- Mistake: Freehanding the first strip without a vertical guide, leading to strips that gradually lean or become uneven.
- Correction: Always use a level or plumb bob to draw a perfectly straight vertical line on your wall where the edge of your first strip will be placed. This ensures every subsequent strip aligns correctly.
5. Removing the Entire Backing at Once:
This leads to sticky, unmanageable sheets and trapped bubbles.
- Mistake: Peeling off the entire adhesive backing before applying the strip to the wall.
- Correction: Work incrementally. Peel back only 6-12 inches of the backing at the top, align, and press. Slowly peel down more backing as you smooth the wallpaper onto the wall, working from the center outwards.
6. Not Using Proper Tools for Smoothing and Trimming:
Fingers or dull blades create an unprofessional finish.
- Mistake: Using hands to smooth, resulting in bubbles, or using dull utility knife blades, causing jagged edges and tearing.
- Correction: Invest in a plastic smoothing tool (squeegee) to apply even pressure and remove air bubbles effectively. Use a sharp utility knife with fresh blades for precise, clean cuts, changing blades frequently.
7. Rushing the Installation:
Patience is a virtue in wallpapering.
- Mistake: Trying to complete the project too quickly, leading to misalignment, bubbles, and frustration.
- Correction: Allocate ample time for the project. Take breaks if needed. The repositionable nature of peel & stick allows for adjustments, so use this feature to your advantage.
8. Overstretching the Material:
Some materials, particularly certain vinyls, can stretch when pulled too hard.
- Mistake: Pulling or stretching the wallpaper aggressively during application or repositioning. This can cause pattern distortion and gaps between strips once it relaxes.
- Correction: Apply gently. If repositioning, peel back slowly and carefully without excessive tension. The material should be laid, not stretched.
By diligently avoiding these common mistakes, your peel & stick wallpaper project will proceed more smoothly, resulting in a beautiful, durable, and professional-looking transformation for your space. Starhouse emphasizes that attention to detail in preparation and application is the hallmark of any successful design endeavor.
Sources
Frequently Asked Questions (FAQ)
Is peel & stick wallpaper truly removable without damaging walls?
Yes, peel & stick wallpaper is specifically engineered with a low-tack adhesive that allows for clean, damage-free removal from properly prepared, smooth, painted walls. It leaves no sticky residue or paint damage when removed correctly, making it ideal for renters or temporary design changes.
Can I install peel & stick wallpaper in a bathroom or other high-humidity areas?
Many vinyl-based peel & stick wallpapers are water-resistant and suitable for bathrooms or kitchens, provided the area has adequate ventilation. Fabric-based options are generally less suitable for high-moisture environments. Always check the product specifications for moisture resistance before installation in such areas.
How long does peel & stick wallpaper typically last?
With proper installation on a well-prepared surface and consistent care, high-quality peel & stick wallpaper can last for 5 to 10 years or even longer. Its lifespan is significantly influenced by environmental factors like humidity and direct sunlight, as well as the quality of the initial application.
Can peel & stick wallpaper be applied over textured walls?
Peel & stick wallpaper adheres best to smooth, flat surfaces. Applying it over textured walls (e.g., orange peel, knockdown, or heavily sanded walls) is not recommended as the texture will show through, and adhesion may be compromised, leading to peeling. For textured walls, skim coating or applying a wall liner first is necessary to create a smooth base.
How do I clean peel & stick wallpaper?
Most peel & stick wallpapers can be gently cleaned by dusting regularly with a soft, dry cloth. For spots, use a damp sponge or cloth with plain water, or a very mild, diluted soap solution for stubborn marks. Always wipe dry immediately and avoid abrasive cleaners or harsh chemicals, as these can damage the finish or adhesive.
What essential tools do I need for installation?
For a successful installation, you will need a tape measure, pencil, level or plumb bob, utility knife with fresh blades, and a plastic smoothing tool (squeegee). A step stool or ladder is also essential for reaching higher areas of the wall.
Is peel & stick wallpaper truly renter-friendly?
Yes, peel & stick wallpaper is widely considered renter-friendly due to its damage-free removal properties. It allows tenants to personalize their living spaces without permanent alterations, preserving the original wall surface and typically ensuring the return of security deposits, provided the walls were properly prepared and the wallpaper removed correctly.
Conclusion
Peel & stick wallpaper stands as a testament to innovation in home décor, offering an accessible, versatile, and high-impact solution for transforming any interior space. From its effortless installation and damage-free removal to its expansive range of materials, patterns, and finishes, this modern wallcovering empowers individuals to express their unique aesthetic with confidence and flexibility. It democratizes sophisticated design, making it possible for both seasoned designers and DIY enthusiasts to achieve professional-level results without the commitment or complexity of traditional methods.
At Starhouse, we understand the profound impact that thoughtful design can have on a living environment. Our curated collection of peel & stick wallpaper is selected with an unwavering commitment to quality, style, and performance, ensuring that every pattern and texture contributes to a truly aspirational space. We believe that your home should be a reflection of your personality and a sanctuary that inspires daily.
As we meticulously curate our catalog to bring you the finest in home furnishings and décor, we invite you to be a part of this exciting journey. Your vision helps shape our offerings. We are building a collection that truly resonates with discerning homeowners across the United States, and your input is invaluable. To share what you’re looking for in your ideal space and gain early access to our meticulously selected collections, we encourage you to tell us what you’re looking for. Join the Starhouse community and be among the first to explore transformative design solutions that elevate every room in your home.