Achieving a truly impeccable wallcovering installation is an art form, and at its foundation lies a crucial, often underestimated, preparatory material: wallpaper liner. This specialized substrate, applied directly to your wall surface before your chosen wallpaper, serves as a meticulous canvas conditioner, rectifying minor imperfections, providing a uniform texture, and significantly extending the lifespan and aesthetic integrity of your decorative wallcovering. It is a non-negotiable step for discerning homeowners and designers aiming for a flawless, professional-grade finish that elevates the entire aesthetic of a room.
Wallpaper liner is not merely a functional layer; it is an investment in the longevity and visual impact of your interior design. It creates an ideal bonding surface, minimizes the visibility of wall imperfections, and can even offer additional benefits such as thermal insulation or acoustic dampening. Understanding the nuances of wallpaper liner—from its various types and materials to precise installation techniques and long-term care—empowers you to make informed decisions that culminate in a truly sophisticated and enduring design statement. This comprehensive guide from Starhouse provides the authoritative insights you need to master this essential element of refined wall décor.
Key Takeaways
- Wallpaper liner is a foundational material applied before wallpaper to create a smooth, uniform surface, crucial for a professional, long-lasting finish.
- Various types of liner, including non-woven, paper, fiberglass, and thermal/acoustic, cater to different wall conditions and functional requirements.
- Proper wall preparation—cleaning, patching, sanding, and priming—is essential for optimal adhesion and performance of the liner.
- Accurate measurement and precise installation techniques, including proper drying times, are critical for a seamless and durable application.
- Wallpaper liner offers benefits beyond smoothing, such as enhancing thermal insulation, improving acoustic dampening, and simplifying future wallpaper removal.
- Avoiding common mistakes like insufficient drying or improper wall preparation ensures the longevity and aesthetic quality of your wallpaper installation.
What is Wallpaper Liner, and Why is it Essential for a Flawless Finish?
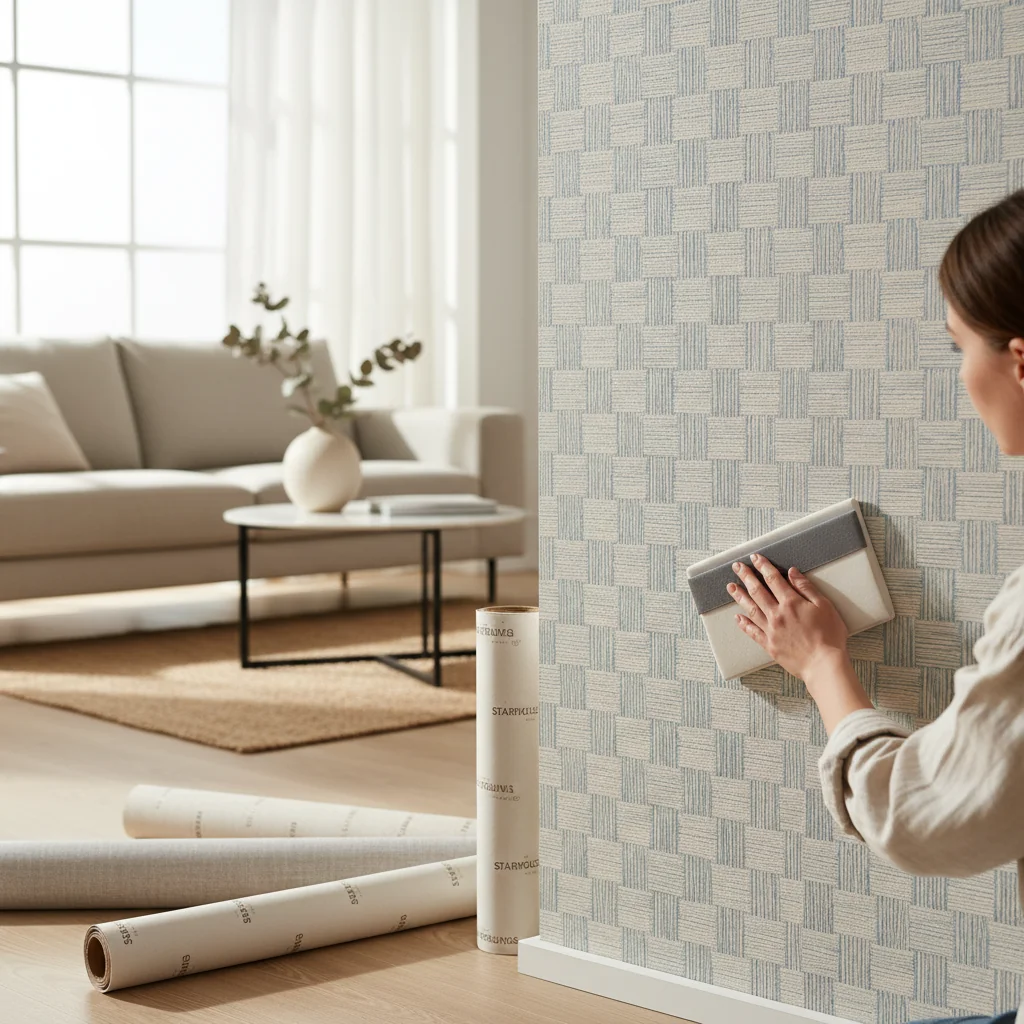
Wallpaper liner is a preparatory material applied to walls before wallpapering to create an optimal, smooth, and uniform surface, ensuring a superior finish and longevity for your chosen wall covering. This specialized paper or non-woven material acts as an intermediary layer, meticulously designed to resolve common wall imperfections and enhance the overall performance of your decorative wallpaper. Its primary function is to provide a perfectly conditioned substrate, which is critical for achieving the high-end, seamless aesthetic that defines truly sophisticated interiors.
The essential role of wallpaper liner cannot be overstated. Without it, even the most exquisite wallpaper can appear compromised by underlying wall flaws. Wallpaper liner effectively conceals minor cracks, uneven textures, and patched areas, presenting a consistently smooth surface that prevents these imperfections from telegraphing through the delicate wallpaper. It also provides a uniform color base, preventing old paint colors or wall repairs from showing through lighter or translucent wallpapers, which is a common issue with direct application.
Beyond its aesthetic contributions, wallpaper liner offers significant functional benefits that extend the life and improve the performance of your wallpaper.
Here are the key reasons wallpaper liner is indispensable:
- Surface Smoothing: It effectively bridges minor cracks, conceals patched areas, and evens out slight textural inconsistencies, creating a perfectly smooth canvas. This is particularly important for older homes or walls with previous damage.
- Enhanced Adhesion: The liner provides a consistent, porous surface that optimizes the adhesion of wallpaper paste. This prevents lifting, bubbling, and peeling, ensuring your wallpaper remains securely in place for years.
- Uniform Base Color: It creates a neutral, uniform color foundation, preventing any underlying wall colors or patterns from showing through your chosen wallpaper, especially with lighter or more delicate designs.
- Easier Removal: When applied correctly, wallpaper liner helps protect the drywall beneath. It allows the wallpaper to be removed more cleanly and easily in the future, often peeling away in full sheets without damaging the wall surface, which saves significant time and effort during redecoration.
- Increased Durability: The additional layer of liner adds structural integrity to the wallcovering system, making the entire installation more resistant to minor impacts and temperature fluctuations.
- Insulation and Sound Dampening: Certain types of wallpaper liner are specifically engineered with thermal or acoustic properties, contributing to improved energy efficiency and reduced noise transmission within a room.
In essence, wallpaper liner is a strategic investment that safeguards the beauty and longevity of your wallpaper, ensuring that your design vision is realized with uncompromising quality and a truly polished finish. It is the unseen foundation that supports the visible artistry of your chosen wallcovering.
The Different Types of Wallpaper Liner: Materials and Their Applications
Wallpaper liner is available in several distinct types, primarily differentiated by their material composition, each designed to address specific wall conditions and functional requirements, from smoothing minor flaws to providing insulation. Understanding these variations is crucial for selecting the optimal liner that will best serve your project’s unique demands and ensure the longevity and impeccable finish of your chosen wallpaper. The material dictates the liner’s thickness, texture, and inherent properties, directly impacting its performance.
Each type of liner offers specific advantages, making it suitable for particular scenarios. Choosing wisely ensures that the liner performs its intended function effectively, creating the perfect foundation for your decorative wallcovering.
Here is a detailed breakdown of the primary types of wallpaper liner:
1. Non-Woven Liner (Non-Pasted and Pre-Pasted)
Non-woven liner is a highly popular and versatile choice, composed of synthetic fibers bonded together. This construction grants it exceptional strength, flexibility, and dimensional stability.
-
Key Characteristics:
- Durability: Highly tear-resistant and resilient.
- Dimensional Stability: Resists shrinking or expanding when wet, leading to fewer seams and a smoother finish.
- Breathability: Allows walls to breathe, which can be beneficial in preventing moisture buildup.
- Ease of Use: Often easier to handle and cut than traditional paper liners. Many non-woven liners are “paste-the-wall” products, meaning the adhesive is applied directly to the wall, simplifying installation. Pre-pasted versions only require activation with water.
- Strippability: Generally designed for clean, dry stripping from the wall when it’s time for redecoration, often without damaging the underlying surface.
-
Ideal Applications:
- Walls with minor imperfections, hairline cracks, or slight textural variations.
- As a base for delicate or high-end wallpapers, providing a stable and smooth substrate.
- For homeowners seeking an easier installation and removal process.
- In areas where breathability is desired.
2. Paper Liner (Traditional Lining Paper)
Traditional paper liner, often referred to as lining paper, is made from wood pulp and is typically thicker than standard wallpaper. It has been a staple in wall preparation for decades.
-
Key Characteristics:
- Absorbency: Highly absorbent, which can be beneficial for evening out wall porosity but requires careful paste application and drying.
- Thickness: Available in various thicknesses (e.g., 800, 1000, 1200, 1400, 1700 grade), with thicker grades offering more effective concealment of imperfections. The grade number typically refers to the weight per roll or density.
- Cost-Effective: Generally more economical than non-woven alternatives.
- Requires Pasting: Always requires separate wallpaper paste applied to the liner itself.
-
Ideal Applications:
- Walls with moderate imperfections, rough plaster, or uneven paint.
- As a base for traditional, heavier wallpapers that benefit from a very absorbent and robust substrate.
- When budget is a primary consideration.
- For creating a truly uniform surface texture on very old or damaged walls.
3. Fiberglass Liner (Glass Fiber Wallcoverings)
Fiberglass liner, also known as glass fiber wallcovering or sometimes “paintable wallpaper,” is woven from fine glass fibers. It is exceptionally durable and often used in high-traffic or commercial settings.
-
Key Characteristics:
- Extreme Durability: Highly resistant to tears, impacts, and abrasions. It can reinforce walls, preventing new cracks.
- Fire Retardant: Inherently fire-resistant, making it suitable for commercial or institutional applications.
- Mold and Mildew Resistant: Does not absorb moisture, inhibiting the growth of mold and mildew.
- Breathable: Allows moisture vapor to pass through.
- Paintable: Designed to be painted over, rather than wallpapered over, providing a durable, textured, or smooth finish. While it can be a base for some wallpapers, its primary use is as a paintable finish itself.
-
Ideal Applications:
- Walls requiring significant reinforcement or protection against damage.
- Areas with high humidity or moisture concerns (e.g., bathrooms, kitchens).
- Commercial spaces, hallways, and high-traffic residential areas.
- When a highly durable, paintable textured finish is desired.
- For covering heavily damaged or uneven surfaces that require significant structural masking.
4. Thermal and Acoustic Liner
These specialized liners are engineered to provide additional functional benefits beyond surface preparation, incorporating materials that enhance insulation or sound dampening.
-
Key Characteristics:
- Thermal Insulation: Typically made from materials like expanded polystyrene or felt, these liners reduce heat loss through walls, improving energy efficiency. They can make rooms feel warmer and help reduce heating costs.
- Acoustic Dampening: Constructed with dense, sound-absorbing materials, these liners help reduce sound transmission between rooms and can improve the acoustics within a space by minimizing echoes.
- Thickness: Generally thicker and softer than other liners due to their insulating properties.
- Surface Smoothing: While their primary function is insulation, their thickness also effectively masks significant wall imperfections.
-
Ideal Applications:
- Rooms with cold exterior walls or those prone to heat loss.
- Bedrooms, home offices, or media rooms where sound reduction is desired.
- Apartments or multi-family dwellings to mitigate noise transfer.
- As a base for wallpaper in situations where both surface preparation and functional benefits are paramount.
Choosing the correct type of wallpaper liner is a foundational decision that impacts the entire wallcovering project. It is imperative to match the liner to both the condition of your walls and the specific requirements of your chosen wallpaper.
| Liner Type | Primary Material | Key Characteristic | Ideal Application | Benefits | Considerations |
|---|---|---|---|---|---|
| Non-Woven Liner | Synthetic fibers | Dimensional stability, strippable | Minor wall imperfections, delicate wallpapers, DIY-friendly projects | Easy to install/remove, durable, breathable, stable | Higher cost than paper, requires specific non-woven paste (if non-pasted) |
| Paper Liner (Lining Paper) | Wood pulp | Absorbent, various thicknesses | Moderate wall imperfections, rough plaster, traditional wallpapers | Cost-effective, excellent for evening out porosity, robust base | Can expand/contract when wet, requires separate paste, more challenging removal |
| Fiberglass Liner | Woven glass fibers | Extreme durability, fire-retardant, paintable | High-traffic areas, commercial spaces, heavily damaged walls, moisture-prone areas | Reinforces walls, mold/mildew resistant, very long-lasting | Requires special adhesive, often painted over rather than wallpapered, can be challenging to cut |
| Thermal/Acoustic Liner | Expanded polystyrene, felt, dense fibers | Insulating (thermal/sound) | Cold exterior walls, noisy rooms, improving energy efficiency/acoustics | Reduces heat loss, dampens sound, covers significant imperfections | Thicker to work with, can be more expensive, requires specific heavy-duty adhesive |
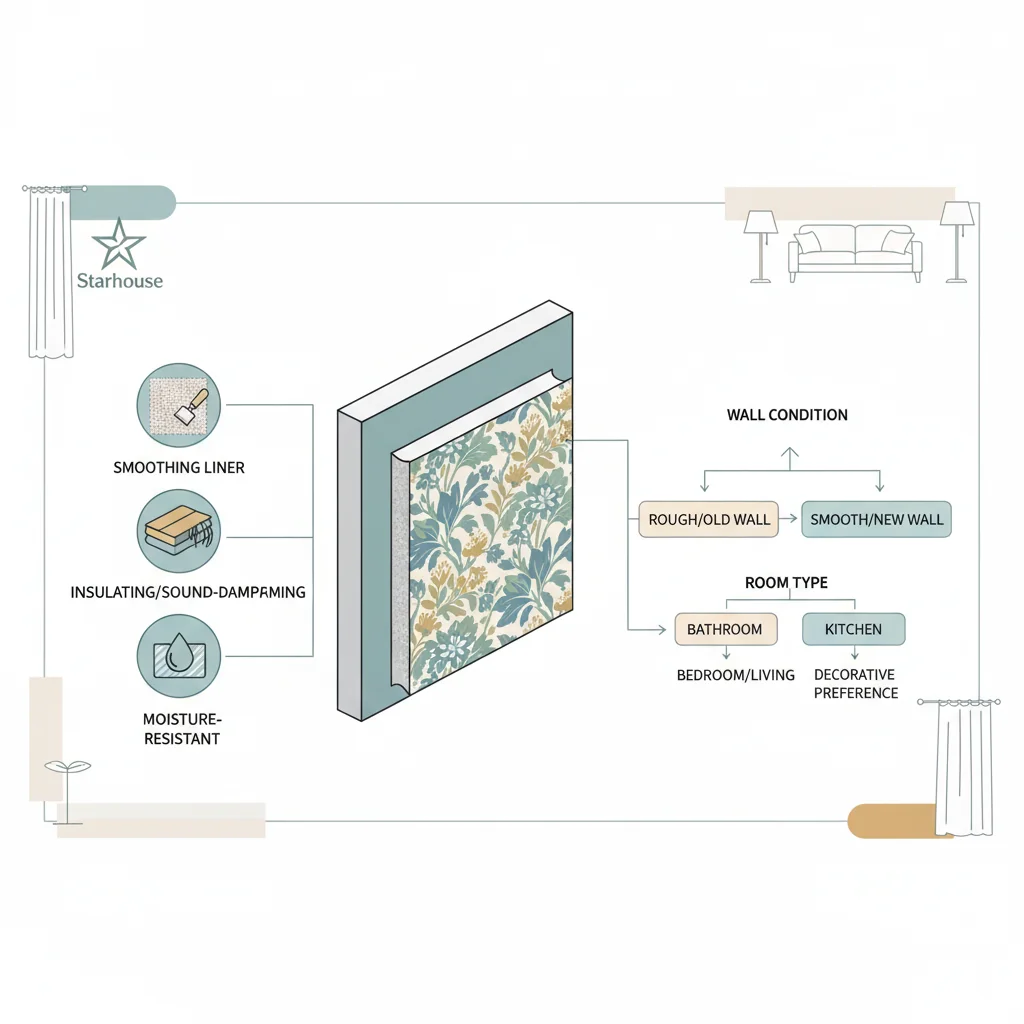
Choosing the Right Wallpaper Liner for Your Project: A Comprehensive Guide
Selecting the appropriate wallpaper liner hinges on a careful assessment of your existing wall conditions, the specific type of wallpaper you intend to install, and any additional functional benefits you aim to achieve, such as enhanced insulation or sound dampening. A precise match between your project’s needs and the liner’s properties ensures optimal performance, a flawless finish, and maximum longevity for your wallcovering. This decision is critical and should be made before purchasing any materials.
The process of choosing the correct liner is methodical, requiring you to evaluate several key factors. Rushing this step can lead to disappointing results, such as visible wall imperfections, poor adhesion, or a compromised aesthetic.
1. Assess Your Wall Condition
This is the most critical factor. The state of your walls dictates the type and thickness of liner required.
- Smooth, Pristine Walls: If your walls are already perfectly smooth, clean, and uniformly colored, you may not require a liner for surface correction. However, a thin, non-woven liner can still offer benefits like easier future wallpaper removal and a consistent base for delicate wallpapers.
- Minor Imperfections (hairline cracks, small patches, slight texture): A medium-weight non-woven liner (e.g., 150-200 gsm) or a standard 1000-1200 grade paper liner is highly effective. These will smooth out the surface without adding excessive bulk.
- Moderate Imperfections (rough plaster, uneven paint, old wallpaper residue): Opt for a thicker paper liner (1400-1700 grade) or a heavy-duty non-woven liner (200-250 gsm). These offer greater concealing power and provide a more robust surface for wallpaper adhesion.
- Heavily Damaged or Textured Walls (e.g., old paneling, minor brick texture, significant cracks): Fiberglass liner is an excellent choice for structural reinforcement and covering significant textural differences. Thermal/acoustic liners, due to their thickness, can also effectively mask substantial imperfections while providing added benefits. In some extreme cases, a skim coat of plaster may be necessary before any liner application.
- Porous Walls (e.g., new drywall, highly absorbent surfaces): A traditional paper liner is excellent for evening out porosity, providing a consistent absorption rate for wallpaper paste. Non-woven liners also work well, especially if you prime the wall first.
2. Consider Your Wallpaper Type
The characteristics of your chosen wallpaper also influence the liner selection.
- Delicate, Thin, or Light-Colored Wallpapers: These are highly susceptible to telegraphing underlying wall imperfections or color variations. A high-quality, smooth non-woven liner or a uniformly colored paper liner is essential to provide a pristine, neutral base.
- Heavy, Textured, or Embossed Wallpapers: These typically require a very stable and robust substrate for proper adhesion. A heavy-grade paper liner or a strong non-woven liner will provide the necessary support and prevent sagging or lifting.
- Vinyl or Washable Wallpapers: These are generally more forgiving but still benefit from a smooth, stable liner to prevent bubbling and ensure a professional finish. Non-woven liners are often preferred for their dimensional stability.
- Dark-Colored or Heavily Patterned Wallpapers: While these are less likely to show minor wall imperfections, a liner still aids in easier removal and provides a consistent surface for optimal adhesion. A standard non-woven or paper liner is usually sufficient.
3. Desired Additional Benefits
Evaluate if your project has requirements beyond just surface preparation.
- Thermal Insulation: If you have cold exterior walls or are looking to improve energy efficiency, a thermal liner is the correct choice. These can reduce heat loss by up to 25%, making your room feel significantly warmer.
- Acoustic Dampening: For bedrooms, home offices, or areas where noise reduction is desired, an acoustic liner will help absorb sound and minimize transmission. This is particularly beneficial in multi-story homes or apartments.
- Wall Reinforcement: In high-traffic areas or on walls prone to cracking, fiberglass liner provides exceptional structural reinforcement and impact resistance.
4. Ease of Installation and Future Removal
Your comfort level with wallpapering and long-term plans can also guide your decision.
- DIY-Friendly: Non-woven paste-the-wall liners are generally considered the easiest for DIYers due to their dimensional stability and simple application process. Pre-pasted liners also simplify the process.
- Future Redecoration: If you anticipate changing your wallpaper frequently, a non-woven liner is highly recommended because it is designed for clean, dry stripping, protecting the underlying wall.
By systematically evaluating these factors, you can confidently select the wallpaper liner that not only addresses your current wall conditions but also enhances the performance and aesthetic appeal of your chosen wallpaper, ensuring a lasting and beautiful result.
Preparing Your Walls for Wallpaper Liner: The Foundation of Success
Thorough wall preparation is a non-negotiable prerequisite for applying wallpaper liner successfully, involving meticulous cleaning, patching, sanding, and priming to ensure optimal adhesion and a uniformly smooth base. This critical phase establishes the integrity of your wallcovering project, directly influencing the longevity, appearance, and ease of future removal of both the liner and the final wallpaper. Skipping or rushing any of these steps inevitably leads to compromised results, such as visible imperfections, bubbling, peeling, or adhesion failures.
The goal of wall preparation is to create a surface that is clean, dry, smooth, sound, and uniformly absorbent. Each step plays a vital role in achieving this ideal substrate.
1. Clear the Room and Protect Surfaces
- Remove Obstacles: Take down all wall hangings, mirrors, picture frames, and any surface-mounted fixtures like light switch covers and outlet plates. For safety, turn off power to the room at the circuit breaker before removing electrical covers.
- Move Furniture: Relocate furniture to the center of the room or remove it entirely. Cover remaining furniture and the floor with drop cloths to protect them from dust, water, and adhesive.
2. Clean the Walls Thoroughly
Dust, grease, and grime are common enemies of adhesion.
- Dusting: Use a soft brush or a vacuum cleaner with a brush attachment to remove all loose dust and cobwebs from the walls and ceiling.
- Washing: Wash walls with a solution of mild detergent (e.g., dish soap) and warm water, or a specialized wall cleaner. For greasy areas, such as kitchens, a degreaser is essential. Rinse thoroughly with clean water using a sponge.
- Drying: Allow walls to dry completely, which can take several hours, or even overnight, depending on humidity. Use fans to expedite the process if needed.
3. Repair Imperfections
Even minor flaws can show through wallpaper.
- Fill Holes and Cracks: Use spackling compound or joint compound to fill any nail holes, dents, or cracks. For larger holes, apply in thin layers, allowing each layer to dry before applying the next.
- Smooth Bumps: Scrape off any loose paint, wallpaper adhesive residue, or bumps with a putty knife or scraper.
- Sand Smooth: Once patches are completely dry, sand them smooth with fine-grit sandpaper (120-180 grit). Ensure the patched areas are flush with the surrounding wall surface. Feather the edges to avoid visible lines.
- Clean Dust: Wipe down the walls again with a damp cloth to remove all sanding dust, then allow to dry.
4. Address Existing Wallcoverings (If Applicable)
- Remove Old Wallpaper: It is almost always recommended to remove old wallpaper before applying liner. Layering new over old can lead to adhesion issues, bubbling, and an uneven finish. Use a wallpaper steamer or a wallpaper stripper solution for effective removal. Ensure all adhesive residue is scraped off and the wall is clean.
- Textured Wallcoverings: If the existing wall has a heavily textured wallcovering (e.g., anaglypta), it is best to remove it. If removal is not feasible, a thick fiberglass liner or a thermal liner may offer some concealment, but a perfectly smooth finish is difficult to guarantee without removal.
5. Prime the Walls
Priming is a non-negotiable step that significantly improves adhesion and simplifies future removal.
-
Purpose of Primer:
- Seals Porous Surfaces: Primer creates a barrier that prevents the wall from absorbing too much adhesive, ensuring it stays on the surface of the liner for a strong bond. This is crucial for new drywall or freshly patched areas.
- Creates a Uniform Surface: It evens out the absorption rate across the entire wall, preventing “hot spots” where adhesive might dry too quickly.
- Improves Adhesion: Provides a slightly tacky surface that the liner (and subsequently the wallpaper) can grip onto firmly.
- Aids Future Removal: The primer creates a protective layer over the drywall, allowing wallpaper and liner to be removed more easily without damaging the underlying surface. This is a critical function often overlooked. York Wallcoverings explicitly recommends using a primer/sealer for optimal results and future strippability (York Wallcoverings).
-
Types of Primer:
- Acrylic-Based (Water-Based) Primer: Suitable for most wall types, dries quickly, and cleans up easily with water. Look for primers specifically formulated for wallcovering applications (often called “wallpaper primer” or “wallcovering primer”).
- Oil-Based (Alkyd) Primer: Recommended for glossy surfaces, stained walls (e.g., water stains, smoke), or highly porous surfaces. It offers superior sealing but has a stronger odor and requires mineral spirits for cleanup.
- Application: Apply primer evenly with a roller and brush, covering the entire wall surface. Allow it to dry completely according to the manufacturer’s instructions, typically 2-4 hours, or overnight for oil-based primers.
By meticulously executing these preparation steps, you establish a professional-grade foundation that ensures your wallpaper liner adheres flawlessly, performs optimally, and contributes to a truly exquisite and enduring wallcovering installation.
Step-by-Step Installation Guide for Wallpaper Liner
Installing wallpaper liner requires precise measurement, careful application, and adherence to specific drying times to create a seamless foundation for your final wallcovering. A methodical approach ensures optimal adhesion, a smooth surface free of imperfections, and a professional-grade result. Accuracy at each stage is paramount, as any errors in liner installation will inevitably compromise the appearance of your decorative wallpaper.
Before you begin, ensure your walls are meticulously prepared as outlined in the previous section: clean, smooth, dry, and primed. This preparation is the bedrock of successful liner installation.
Tools and Materials Required:
- Wallpaper liner (selected type)
- Wallpaper paste (if non-pasted liner)
- Large pasting brush or roller (for paste application)
- Wallpaper smoothing tool (smoother brush or plastic squeegee)
- Utility knife with fresh blades
- Long straightedge or metal ruler
- Measuring tape
- Pencil
- Level or plumb bob
- Seam roller (optional, but recommended)
- Clean sponges and buckets of water
- Drop cloths
- Step ladder
Step 1: Mark Your Starting Point and Plumb Line
- Identify Starting Wall: Begin in an inconspicuous corner or near a door frame, working away from the main light source (e.g., a window) to minimize visible seams.
- Measure and Mark: Measure the width of your liner roll. From your chosen starting corner, measure out slightly less than the width of the roll (e.g., if a 20.5-inch roll, measure 19.5 inches).
- Draw a Plumb Line: Use a level or plumb bob to draw a perfectly vertical line from the ceiling to the baseboard at your marked point. This line is crucial for ensuring your first strip of liner is straight, which dictates the straightness of all subsequent strips.
Step 2: Measure and Cut Your First Strip
- Measure Wall Height: Measure the height of your wall from ceiling to baseboard.
- Add Overlap: Add 4-6 inches to this measurement (2-3 inches for the top and 2-3 inches for the bottom) for trimming. This excess allows for minor adjustments and guarantees a clean edge.
- Cut Liner: Unroll your liner and carefully cut the first strip to this length using your utility knife and straightedge on a protected surface.
Step 3: Apply Adhesive (If Non-Pasted Liner)
- Prepare Paste: Mix your wallpaper paste according to the manufacturer’s instructions.
- Apply to Liner (Traditional Method): Lay the cut strip face down on a clean pasting table. Apply a generous, even layer of paste to the back of the entire strip, working from the center outwards to the edges. Ensure edges are well-covered.
- Book the Liner: Gently fold each end of the pasted strip towards the center, pasted sides together, without creasing. This allows the paste to “relax” and soak into the liner, making it more pliable and preventing bubbles. Follow the paste manufacturer’s recommended booking time, typically 5-10 minutes.
- Apply to Wall (Paste-the-Wall Liner): If using a paste-the-wall non-woven liner, apply the paste directly to the wall section where the first strip will go, slightly wider than the liner strip itself.
- For Pre-Pasted Liner: Submerge the rolled strip in a water tray for the time specified by the manufacturer (usually 30-60 seconds) to activate the adhesive. Gently pull it out, allowing excess water to drip off. Book the liner as described above if recommended.
Step 4: Hang the First Strip
- Position Top: Carry the booked liner to the wall. Align the top edge of the liner with the ceiling, allowing for the 2-3 inch overlap. Carefully align the right edge of the liner with your plumb line.
- Smooth Down: As you unfold the liner downwards, use your smoothing tool to gently press it against the wall, working from the center outwards to remove air bubbles and ensure full contact. Work downwards, making sure to keep it aligned with the plumb line.
- Check for Bubbles: If you see bubbles, gently lift the liner and reposition, then smooth again. Small bubbles often disappear as the liner dries, but large ones need immediate attention.
Step 5: Trim Excess
- Trim Top and Bottom: Use your utility knife and a long straightedge (or the edge of your smoothing tool) to carefully trim the excess liner at the ceiling and baseboard. Ensure your knife blade is sharp for clean cuts.
Step 6: Hang Subsequent Strips
- Butt Seams: For subsequent strips, measure and cut as before. Apply paste (if necessary) and book. Carefully butt the edge of the new strip directly against the edge of the previous strip, ensuring no overlap and no gap. The goal is a seamless appearance.
- Smooth and Trim: Smooth each strip as you did the first, removing air bubbles. Trim excess at the top and bottom.
- Seam Rolling (Optional but Recommended): For a professional finish, gently roll over the seams with a seam roller to ensure maximum adhesion without flattening the paper or squeezing out too much paste. Be careful not to over-roll, especially with delicate liners.
- Wipe Excess Paste: Immediately wipe away any excess paste from the face of the liner or seams with a clean, damp sponge. Change water frequently.
Step 7: Address Corners and Obstacles
- Inside Corners: When you reach an inside corner, allow the liner to wrap around the corner by about 1/4 to 1/2 inch. Cut the strip vertically at the corner, creating an overlap. Then, use a level to draw a new plumb line on the adjacent wall, starting the next strip from this line, slightly overlapping the cut edge from the first wall.
- Outside Corners: Wrap the liner around the outside corner by about 1/2 to 1 inch. Trim the excess on the adjacent wall to create a clean, crisp edge.
- Outlets/Switches: Once a strip is smoothed over an outlet or switch box, carefully make an “X” cut from corner to corner over the opening. Then, trim the excess liner around the perimeter of the box, ensuring it tucks neatly under the cover plate.
Step 8: Allow to Dry Completely
- Drying Time: Allow the wallpaper liner to dry completely, typically 24-48 hours, before applying your decorative wallpaper. This is a critical step; insufficient drying time can lead to bubbling or adhesion issues with the final wallpaper. Ensure good ventilation in the room, but avoid drafts or extreme temperature changes, which can cause the liner to dry too quickly and potentially shrink or crack. Maintain a consistent room temperature (around 68-72°F / 20-22°C) and moderate humidity.
By following these detailed steps, you will achieve a perfectly installed wallpaper liner, providing the ideal, smooth, and stable foundation for your chosen wallpaper, ensuring a beautiful and long-lasting result.
As you embark on these detailed steps to perfect your home’s foundation, remember that the right materials make all the difference. While Starhouse is curating its collection of exquisite home décor, we invite you to share your vision with us. Tell us what you’re looking for, and get early access to our curated selections designed to elevate every room. Visit https://starhouseusa.online/ to connect with us.
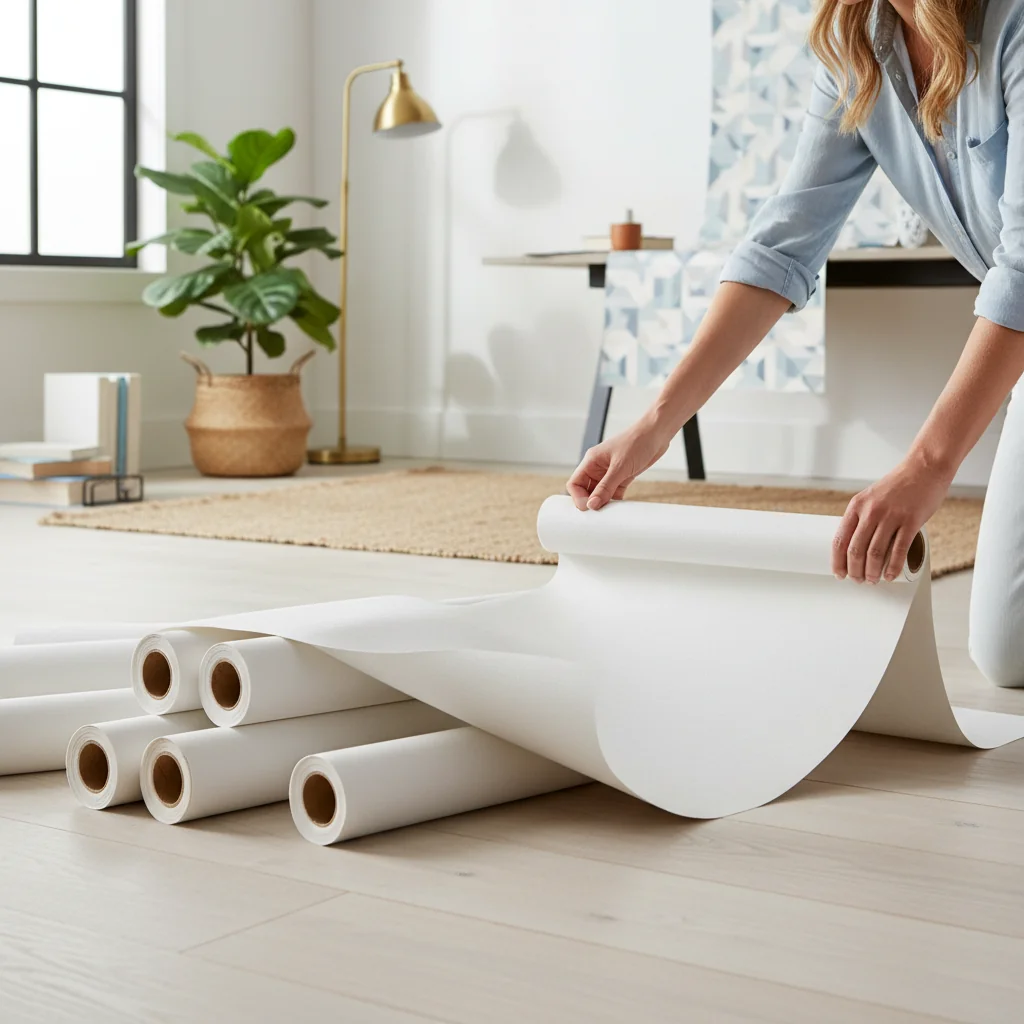
Sizing and Measuring: Ensuring You Purchase Enough Wallpaper Liner
Accurately sizing and measuring your space for wallpaper liner is crucial to ensure you purchase sufficient material, preventing costly reorders and project delays, and involves calculating the total wall area while accounting for potential waste. Underestimating can halt your project mid-way, while overestimating leads to unnecessary expense and leftover materials. Precision in this stage is a hallmark of professional planning and execution, guaranteeing a seamless workflow.
The process is straightforward but requires careful attention to detail. Always measure twice and calculate once to minimize errors.
Step 1: Gather Your Tools
- Measuring tape (a long, retractable metal one is best)
- Pencil and paper or calculator
- Step ladder (if needed for high walls)
Step 2: Measure Each Wall
- Measure Height: Measure the height of each wall from the baseboard to the ceiling. If the height varies slightly, use the tallest measurement for that wall.
- Measure Width: Measure the width of each wall from corner to corner.
- Record Measurements: Write down the height and width for each individual wall. For example: Wall A: 8 ft H x 12 ft W; Wall B: 8 ft H x 10 ft W.
Step 3: Calculate the Total Square Footage of the Walls
-
Area of Each Wall: For each wall, multiply its height by its width to get the square footage.
Example: Wall A (8 ft H x 12 ft W) = 96 sq ft. Wall B (8 ft H x 10 ft W) = 80 sq ft. -
Total Wall Area: Add the square footage of all walls together to get the total area to be covered.
Example (for a room with 4 walls): 96 sq ft + 80 sq ft + 96 sq ft + 80 sq ft = 352 sq ft.
Step 4: Account for Doors and Windows (Optional but Recommended for Accuracy)
- Measure Openings: Measure the height and width of all doors and windows.
-
Calculate Area of Openings: Multiply height by width for each opening.
Example: Door (7 ft H x 3 ft W) = 21 sq ft. Window (4 ft H x 4 ft W) = 16 sq ft. -
Subtract Opening Area: Add up the areas of all openings and subtract this total from your total wall area.
Example: 352 sq ft (total wall area) – 21 sq ft (door) – 16 sq ft (window) = 315 sq ft (adjusted total).
Note: For liner, this subtraction is less critical than for patterned wallpaper, as liner typically has no pattern match. However, for very large openings, it can significantly reduce material waste. For small openings, it’s often simpler to ignore them and let the extra material act as a waste allowance.
Step 5: Add a Waste Allowance
This is a crucial step to ensure you have enough material for trimming, mistakes, and potential future repairs.
-
Standard Allowance: Always add a minimum of 10-15% to your adjusted total square footage. For complex rooms with many corners, windows, or doors, consider adding 15-20%. Liner generally requires less waste allowance than patterned wallpaper, which needs to account for pattern repeats.
Example: 315 sq ft (adjusted total) + 15% (47.25 sq ft) = 362.25 sq ft. Round up to 363 sq ft.
Step 6: Determine How Many Rolls You Need
- Check Roll Coverage: Wallpaper liner rolls are typically sold in standard sizes, often covering approximately 56 square feet per roll (for a standard single roll) or 112 square feet (for a standard double roll, which is common). Always check the manufacturer’s stated square footage coverage on the product packaging.
-
Calculate Rolls: Divide your total required square footage (including waste allowance) by the square footage covered by one roll.
Example: If one roll covers 56 sq ft: 363 sq ft / 56 sq ft/roll = 6.48 rolls. Always round up to the next whole number. In this case, you would need 7 rolls.
Example: If one double roll covers 112 sq ft: 363 sq ft / 112 sq ft/double roll = 3.24 double rolls. Round up to 4 double rolls.
Important Considerations:
- Standard Roll Dimensions: A common “single roll” of wallpaper liner in the U.S. is approximately 20.5 inches wide by 16.5 feet long, covering about 28 square feet. However, most retailers sell “double rolls” or “bolt rolls” which are 20.5 inches wide by 33 feet long, covering about 56 square feet. Always confirm the exact dimensions and coverage of the specific product you are purchasing.
- Horizontal Application: Some experts recommend hanging certain types of liner (especially thicker paper liners) horizontally, or “cross-lining,” to help prevent seams from showing through the final wallpaper. If you choose this method, your waste factor might be slightly higher due to more trimming at the top and bottom of each horizontal strip. This method is particularly useful for very thin or delicate wallpapers.
- Purchase from the Same Batch: While less critical for liner than for patterned wallpaper, it’s still good practice to purchase all your liner from the same production batch if possible, to ensure consistency in material and thickness.
By diligently following these measuring and calculation steps, you guarantee that you acquire the precise amount of wallpaper liner needed for your project, avoiding frustrating delays and ensuring a smooth, efficient installation process.
Common Mistakes to Avoid When Working with Wallpaper Liner
Avoiding common pitfalls when installing wallpaper liner, such as inadequate wall preparation or improper drying, is paramount to achieving a professional-grade finish and preventing future issues with your final wallcovering. Even experienced DIYers can overlook subtle details that compromise the integrity and aesthetic appeal of the entire project. Understanding and preempting these errors ensures a robust, enduring, and visually superior result that reflects the quality Starhouse embodies.
Meticulous attention to detail at each stage of the liner application process is not merely a recommendation; it is a strict requirement for a flawless outcome.
1. Inadequate Wall Preparation
- The Mistake: Failing to thoroughly clean, patch, sand, and prime walls before application. This includes leaving old adhesive residue, dirt, grease, or glossy paint surfaces untreated.
- The Consequence: Poor adhesion leading to bubbling, peeling, or lifting of the liner. Imperfections (cracks, bumps) telegraphing through the liner and subsequent wallpaper. Uneven absorbency of the wall causing inconsistent drying and adhesion.
- The Fix: Always dedicate ample time to wall preparation. Wash walls with a cleaner, fill and sand all imperfections until smooth, and then apply a high-quality, acrylic-based wallpaper primer/sealer. Ensure the primer dries completely.
2. Insufficient Drying Time Between Layers
- The Mistake: Applying wallpaper over the liner before the liner has fully dried and cured.
- The Consequence: Trapped moisture can lead to bubbling, mold growth, and compromised adhesion of both the liner and the final wallpaper. The liner may shift or shrink as it dries, affecting the wallpaper above it.
- The Fix: Allow wallpaper liner to dry for a minimum of 24 hours, and ideally 48 hours, before applying wallpaper. Ensure good ventilation in the room, but avoid excessive drafts or extreme temperature fluctuations.
3. Incorrect Adhesive Choice or Application
- The Mistake: Using the wrong type of adhesive for your specific liner (e.g., standard paste for non-woven liner) or applying it inconsistently (too thick, too thin, or unevenly).
- The Consequence: Poor adhesion, visible seams, bubbles, or the liner falling off the wall. Too much paste can squeeze out and cause stains; too little results in lifting.
- The Fix: Always use the adhesive recommended by the liner manufacturer. Apply paste evenly and thoroughly, especially to edges. For non-woven liners, a “paste-the-wall” adhesive is often recommended.
4. Improper Booking of Liner
- The Mistake: Skipping the “booking” step (folding pasted liner onto itself) or not allowing sufficient booking time for traditional paper liners.
- The Consequence: Liner strips become difficult to handle, expand unevenly on the wall, leading to bubbles, wrinkles, and visible seams.
- The Fix: For traditional paper liners, always book the pasted strips for 5-10 minutes (or as per adhesive instructions) to allow the paste to fully penetrate and relax the paper. Non-woven liners typically do not require booking, or only a very short period.
5. Overlapping Seams Instead of Butt-Joining
- The Mistake: Overlapping the edges of liner strips, especially with thicker materials.
- The Consequence: Visible ridges or lines will be apparent through the final wallpaper, creating an unprofessional and unsightly finish.
- The Fix: Always butt-join liner strips tightly together, ensuring the edges meet perfectly without overlapping or gapping. Use a seam roller gently to secure the seam without flattening the material excessively.
6. Not Using a Plumb Line
- The Mistake: Relying on the corner of the room or eye-balling the first strip, assuming it is perfectly straight.
- The Consequence: The first strip will be off-vertical, causing all subsequent strips to be crooked, leading to misaligned patterns and uneven trimming at the ceiling and baseboard.
- The Fix: Always use a level or plumb bob to draw a perfectly vertical line for your first strip. This establishes a true vertical reference for the entire room.
7. Ignoring Air Bubbles During Installation
- The Mistake: Leaving air bubbles trapped under the liner, assuming they will dry out.
- The Consequence: Bubbles will likely remain, creating unsightly bumps and potentially weakening the adhesion of both the liner and the wallpaper.
- The Fix: Thoroughly smooth each strip from the center outwards to push out all air bubbles. For persistent bubbles, gently lift the liner and re-smooth. For small, stubborn bubbles, a wallpaper syringe can be used to inject a tiny amount of paste and then smooth.
8. Improper Trimming
- The Mistake: Using a dull utility knife blade or improper trimming techniques at the ceiling, baseboard, and around openings.
- The Consequence: Ragged edges, torn liner, or damage to the wall surface, which will be visible through the final wallpaper.
- The Fix: Always use a fresh, sharp utility knife blade for each trimming session. Use a straightedge or the edge of your smoothing tool as a guide for clean, precise cuts. Change blades frequently.
By consciously avoiding these common errors, you can ensure your wallpaper liner installation is robust, smooth, and provides the impeccable foundation necessary for a truly sophisticated and long-lasting wallpaper application.
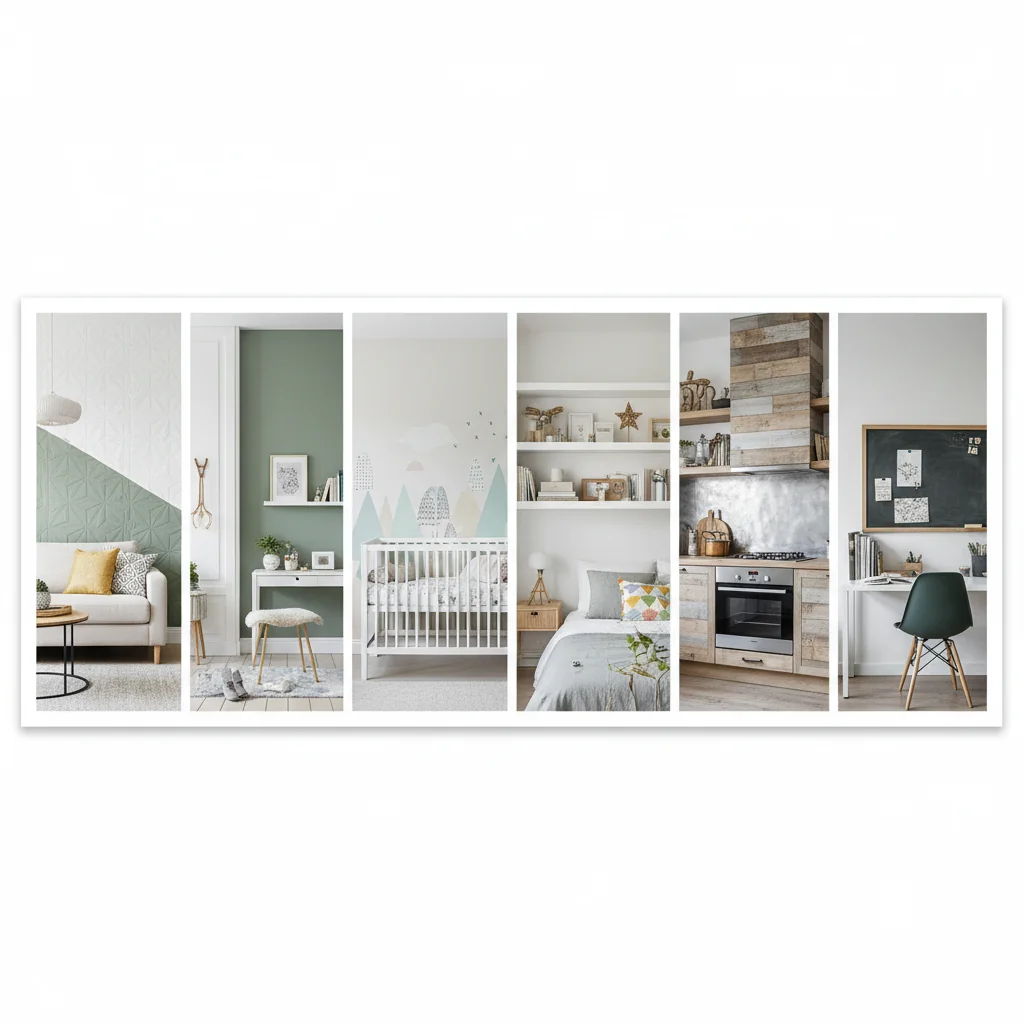
Enhancing Your Home with Wallpaper Liner: Beyond Just a Smooth Surface
Wallpaper liner offers significant advantages beyond merely smoothing wall imperfections, serving as a versatile tool to enhance your home’s thermal efficiency, mitigate sound transfer, and effectively prepare challenging surfaces like textured walls for wallpaper application. Its multifaceted utility makes it an indispensable component for homeowners and designers seeking to elevate both the aesthetic and functional performance of their living spaces. The strategic application of specific liner types can transform a room in ways that extend far beyond visual appeal.
These often-overlooked benefits underscore the value of choosing the right liner, converting a purely decorative project into one that contributes tangibly to comfort, energy savings, and structural integrity.
1. Thermal Insulation and Energy Efficiency
- How it Works: Thermal liners, often made from materials like expanded polystyrene (EPS) foam or specialized insulating felts, create a barrier that reduces heat transfer through walls. These materials trap air, which is a poor conductor of heat, thereby slowing the rate at which heat escapes during colder months and enters during warmer months.
-
Benefits:
- Reduced Heat Loss: Can decrease heat loss through exterior walls by up to 15-25%, making rooms feel noticeably warmer and more comfortable.
- Lower Energy Bills: By improving insulation, less energy is required to heat or cool your home, leading to tangible savings on utility bills.
- Mitigates Condensation: The warmer surface temperature of the wall can help reduce condensation, which is a common issue on cold exterior walls and can lead to mold and mildew.
- Covers Significant Imperfections: Due to their thickness, thermal liners are excellent at concealing substantial wall damage or unevenness.
- Ideal Use: Rooms with cold exterior walls, older homes with poor insulation, basements, or any space where improving thermal comfort and energy efficiency is a priority.
2. Acoustic Dampening and Sound Reduction
- How it Works: Acoustic liners are engineered with dense, sound-absorbing materials that help to mitigate sound transmission. They work by absorbing sound waves rather than reflecting them, reducing both airborne noise (e.g., voices, music) and impact noise (e.g., footsteps from an upstairs room).
-
Benefits:
- Reduced Noise Transmission: Significantly decreases the amount of sound passing through walls, creating quieter living environments. This is particularly beneficial in multi-family dwellings, semi-detached homes, or rooms adjacent to noisy areas.
- Improved Room Acoustics: Minimizes echo and reverberation within a room, making it feel calmer and more comfortable, especially for activities like watching TV, listening to music, or holding conversations.
- Enhanced Privacy: Contributes to greater privacy between rooms.
- Ideal Use: Bedrooms, home offices, nurseries, media rooms, apartments, or any space where peace, quiet, and improved sound quality are desired.
3. Covering Challenging or Textured Walls
- How it Works: Thicker liners, especially fiberglass or heavy-grade paper and thermal liners, possess the bulk and rigidity to effectively bridge and smooth over heavily textured or damaged surfaces that would otherwise be unsuitable for direct wallpaper application.
-
Benefits:
- Smooths Rough Plaster: Transforms old, crumbling, or uneven plaster walls into a perfectly smooth surface.
- Masks Light Paneling/Woodchip: Can effectively cover the grooves of thin paneling or the texture of old woodchip wallpaper, providing a flat base without the need for extensive skim coating.
- Conceals Brick/Concrete Imperfections: While not designed for major structural changes, thick liners can mask minor textural irregularities in brick or concrete walls, preparing them for a smooth wallpaper finish.
- Reinforces Weak Surfaces: Fiberglass liner, in particular, can add significant structural stability to older, slightly cracked walls, preventing new cracks from forming.
- Ideal Use: Renovations of older homes, covering dated wall finishes, or preparing industrial-style walls for a softer, wallpapered look.
4. Protecting Walls and Simplifying Future Redecoration
- How it Works: When properly installed over a primed wall, the liner acts as a sacrificial layer, protecting the underlying drywall.
-
Benefits:
- Damage Prevention: Prevents wallpaper adhesive from directly bonding to and potentially damaging the drywall surface.
- Easier Removal: Allows for clean, dry stripping of wallpaper (and often the liner itself) in full sheets when it’s time to redecorate, saving significant effort and mess.
- Cost-Effective Redecoration: Reduces the need for extensive wall repair or re-priming during subsequent redecorations.
- Ideal Use: Any home where redecoration is anticipated in the future, or where preserving the integrity of the underlying wall is a priority.
By considering these expanded capabilities, wallpaper liner becomes more than just a functional preparatory step; it transforms into a strategic design element that contributes significantly to the comfort, efficiency, and long-term value of your home.
Care and Maintenance of Wallpaper Liner (Before Wallpaper Application)
Proper care and maintenance of wallpaper liner primarily involve protecting its integrity and cleanliness during the installation and drying phases, ensuring it remains a pristine foundation for your chosen wallpaper. Since wallpaper liner is an underlayer, its “maintenance” is largely preventative, focused on preserving its optimal condition until the final wallcovering is applied. Any damage or contamination to the liner before wallpapering can directly compromise the aesthetic and longevity of your entire wall décor project.
The period between liner installation and wallpaper application is critical. During this time, the liner is vulnerable and requires specific attention to ensure it performs its intended role flawlessly.
1. Ensure Complete Drying
- Critical Period: The most important aspect of liner care is allowing it to dry completely. This typically takes 24-48 hours, depending on the liner type, adhesive, and ambient humidity.
- Maintain Stable Environment: Keep the room at a consistent, moderate temperature (ideally 68-72°F or 20-22°C) and avoid extreme humidity fluctuations.
- Avoid Drafts: While good ventilation is necessary, avoid direct drafts from open windows or strong fans, as rapid drying can cause the liner to shrink unevenly or lift at the seams.
- Visual Inspection: Before wallpapering, visually inspect the entire surface. The liner should appear uniformly dry, smooth, and firmly adhered, with no visible damp spots or lifting edges.
2. Protect from Damage
- Physical Protection: Once installed, the liner is susceptible to dents, tears, or scuffs. Exercise caution when moving furniture or equipment around the room. Avoid leaning objects against the newly lined walls.
- Children and Pets: Keep children and pets away from the freshly lined walls to prevent accidental damage during the drying period.
- Sharp Objects: Be mindful of tools, ladders, or anything with sharp edges that could tear or puncture the liner.
3. Keep it Clean
- Dust and Debris: Dust can accumulate on the liner surface, especially if there’s a delay before wallpapering. Gently wipe down the walls with a clean, dry, soft cloth or a soft-bristled brush just before wallpaper application. Avoid abrasive materials that could scuff the surface.
- Stains: If the liner gets accidentally marked or stained (e.g., from a pencil mark or a light smudge), attempt to gently clean it with a barely damp sponge and clean water. Blot, rather than rub, to avoid damaging the liner or pushing moisture into the adhesive. For stubborn marks, assess if the area can be carefully patched or if the entire strip needs replacement.
- Adhesive Residue: Ensure any excess adhesive that squeezed out during installation was promptly wiped away. Dried adhesive residue can create bumps under the wallpaper or prevent proper adhesion.
4. Address Issues Promptly
- Bubbles: If large bubbles appear during drying, try to smooth them out immediately with a smoothing tool. If they persist after drying, a small incision with a utility knife and a dab of paste can sometimes fix them, followed by re-smoothing.
- Lifting Seams/Edges: If seams or edges lift, reapply a small amount of appropriate adhesive with a fine brush and press firmly back into place. Roll gently with a seam roller. Address these issues before wallpapering, as they will be magnified by the top layer.
5. Maintain a Consistent Environment
- Temperature and Humidity: After the initial drying, maintain a consistent room temperature and humidity level until the wallpaper is applied. Significant fluctuations can cause the liner to react, potentially leading to issues.
By adhering to these careful practices, you safeguard the integrity of your wallpaper liner, ensuring it provides the flawless, stable, and ready-to-wallpaper surface that is essential for a truly distinguished and long-lasting wall décor project.
Trends in Wall Preparation: Innovations in Liner Technology
The landscape of wall preparation is continuously evolving, with recent innovations in wallpaper liner technology focusing on enhancing ease of application, improving environmental sustainability, and integrating advanced functional benefits like superior thermal and acoustic performance. These advancements reflect a growing demand for products that not only simplify the installation process but also contribute to healthier, more comfortable, and energy-efficient living spaces. Modern liner solutions are more sophisticated than ever, offering tailored answers to contemporary design challenges.
As interior design trends lean towards personalization and sustainability, wallpaper liner manufacturers are responding with products that align with these values, providing both aesthetic and practical improvements.
1. Enhanced Ease of Application: “Paste-the-Wall” and Peel-and-Stick Liners
- Paste-the-Wall Non-Woven Liners: This technology, borrowed from wallpaper itself, simplifies the process significantly. Instead of pasting the liner sheet, the adhesive is applied directly to the wall. This eliminates the need for a pasting table, reduces mess, and makes the liner easier to position and reposition. Non-woven materials also offer excellent dimensional stability, meaning they won’t stretch or shrink when wet, resulting in fewer bubbles and perfectly butted seams.
- Peel-and-Stick Liners: Emerging as an ultra-convenient option, peel-and-stick liners feature a self-adhesive backing, similar to peel-and-stick wallpaper. This completely eliminates the need for external paste, making installation incredibly fast and clean. While still less common than traditional liners, their popularity is growing, particularly for DIY projects and temporary installations. They are ideal for creating a smooth surface over minor imperfections for peel-and-stick wallpapers.
2. Advanced Functional Benefits: Integrated Solutions
- Improved Thermal Performance: Newer thermal liners are becoming thinner yet more effective, utilizing advanced insulating materials like aerogels or multi-layered composites. These innovations allow for significant heat retention without adding excessive bulk to the wall, making them suitable for a wider range of projects.
- Superior Acoustic Dampening: Manufacturers are developing liners with enhanced sound-absorbing properties, often incorporating recycled felt or specialized foam layers. These products are designed to meet stricter acoustic standards, providing more effective noise reduction for residential and commercial applications.
- Moisture Management: Some liners are now engineered with improved breathability or moisture-resistant properties, helping to manage humidity levels within walls and reduce the risk of mold and mildew, particularly in damp environments like basements or bathrooms.
3. Sustainability and Eco-Friendly Options
- Recycled Materials: A significant trend is the incorporation of recycled content, such as post-consumer paper or textile fibers, into liner production. This reduces landfill waste and the demand for virgin resources.
- Responsibly Sourced Materials: Liners made from sustainably managed forests (FSC-certified) are becoming more prevalent, ensuring that raw materials are harvested ethically.
- Low-VOC Formulations: Manufacturers are increasingly producing liners and adhesives with low or zero Volatile Organic Compounds (VOCs), contributing to better indoor air quality and healthier living environments. This aligns with a broader consumer demand for non-toxic home products.
- Biodegradable and Compostable Options: While still niche, research is ongoing into fully biodegradable or compostable liner materials, aiming to minimize environmental impact at the end of the product’s life cycle.
4. Universal Compatibility and Versatility
- Multi-Purpose Liners: The market is seeing more “universal” liners designed to be compatible with a wider range of wallpaper types and wall conditions. These versatile products aim to simplify selection for consumers.
- Reinforcing Properties: Liners that offer both smoothing and reinforcing properties (e.g., combining non-woven strength with a subtle fiberglass mesh) are gaining traction, providing a robust solution for challenging walls.
These innovations underscore a commitment to making wall preparation more efficient, environmentally conscious, and functionally beneficial. As Starhouse curates its collection, we recognize the importance of these foundational technologies in achieving the refined and sustainable interiors our customers desire. The future of wall décor is not just about beautiful patterns, but also about intelligent, high-performance substrates that make these designs possible.
- “Paste-the-Wall” Technology: Simplifies application by allowing adhesive to be applied directly to the wall, eliminating the need for a pasting table and reducing mess.
- Peel-and-Stick Formulations: Offers ultimate convenience with self-adhesive backings, ideal for quick DIY projects and temporary installations.
- Advanced Thermal Insulators: Thinner, more efficient liners using innovative materials like aerogels to enhance energy savings without adding bulk.
- Superior Acoustic Dampeners: Engineered with specialized dense fibers to significantly reduce sound transmission and improve room acoustics.
- Eco-Friendly Compositions: Increasing use of recycled content, sustainably sourced fibers, and low-VOC formulations to promote healthier indoor environments and reduce environmental impact.
- Multi-Functional Liners: Products designed to offer a combination of benefits, such as smoothing, reinforcing, and insulating, in a single application.
Sources
Frequently Asked Questions About Wallpaper Liner
Can I put wallpaper liner over painted walls?
Yes, you can apply wallpaper liner over painted walls, provided the paint is in good condition, clean, dry, and properly primed. Glossy or semi-gloss paints must be lightly sanded to create a “tooth” for adhesion, and then all painted surfaces should be primed with a high-quality acrylic-based wallpaper primer/sealer to ensure optimal adhesion and ease of future removal.
Do I need to prime after applying wallpaper liner?
No, you do not typically need to prime the wallpaper liner itself before applying wallpaper. The liner is designed to provide a consistent, ready-to-wallpaper surface. However, it is absolutely essential to prime the bare wall *before* applying the liner to ensure proper adhesion of the liner and to protect the underlying wall surface for future removal.
How long does wallpaper liner need to dry?
Wallpaper liner requires a minimum of 24 hours to dry completely, and ideally 48 hours, before you proceed with wallpapering. This crucial drying period ensures that all moisture from the adhesive has evaporated, preventing bubbling, shrinking, or adhesion issues with the final wallpaper layer. Maintain a consistent room temperature and avoid drafts during this time.
Can wallpaper liner cover textured walls like paneling or brick?
Yes, thicker types of wallpaper liner, such as heavy-grade paper liner, fiberglass liner, or thermal/acoustic liners, can effectively cover minor to moderate textures like light paneling grooves or subtle brick imperfections. For deeply textured surfaces or significant irregularities, a skim coat of plaster may be necessary before applying the liner to achieve a truly smooth finish.
Is wallpaper liner difficult to remove?
When installed correctly over a properly primed wall, non-woven wallpaper liner is generally designed to be easily strippable, often coming off in dry sheets without damaging the underlying wall. Traditional paper liners can be more challenging to remove, but the initial priming of the wall significantly aids in their removal compared to direct application on unprimed walls.
What’s the difference between wallpaper liner and lining paper?
The terms “wallpaper liner” and “lining paper” are often used interchangeably to refer to the preparatory material applied to walls before wallpaper. Historically, “lining paper” referred specifically to traditional paper-based liners made from wood pulp. Today, “wallpaper liner” is a broader term encompassing various materials, including non-woven, fiberglass, and specialized thermal/acoustic types, all serving the same fundamental purpose of creating an optimal surface for wallpaper.
Can I paint over wallpaper liner instead of wallpapering?
Yes, you can paint over certain types of wallpaper liner, particularly fiberglass liner (often called “paintable wallpaper”) or specific non-woven liners designed for painting. These liners often have a smooth or lightly textured surface that accepts paint well. Traditional paper liners or thermal liners may not be ideal for painting unless they are specifically marketed as paintable, as they may absorb paint unevenly or show texture that is not intended to be visible.
Conclusion: The Unseen Foundation of Exquisite Wall Décor
Wallpaper liner, while often unseen, is the indispensable foundation upon which truly exquisite and enduring wall décor is built. It is not merely an optional step but a strategic investment that ensures the flawless finish, extended lifespan, and superior performance of your chosen wallpaper. From meticulously smoothing imperfections and providing a uniform canvas to offering tangible benefits like thermal insulation and acoustic dampening, the right wallpaper liner elevates a room beyond surface aesthetics, contributing to comfort, efficiency, and long-term value.
Mastering the selection, preparation, and installation of wallpaper liner is a hallmark of sophisticated design and meticulous craftsmanship. By understanding its diverse types, applications, and the common pitfalls to avoid, you equip yourself with the knowledge to transform any space with confidence and precision. At Starhouse, we believe that every detail, however subtle, contributes to the overarching beauty and functionality of your home. A perfectly prepared wall is the silent promise of a spectacular interior.
As Starhouse curates its collection of exceptional home furnishings, wall décor, and accessories, we are building a selection designed to inspire and transform. We invite you to be part of this journey. Share your vision, tell us what you’re looking for in your ideal living space, and gain early access to our exclusive offerings. Visit https://starhouseusa.online/ and tell us what you’re looking for to embark on a new chapter of elevated home design.