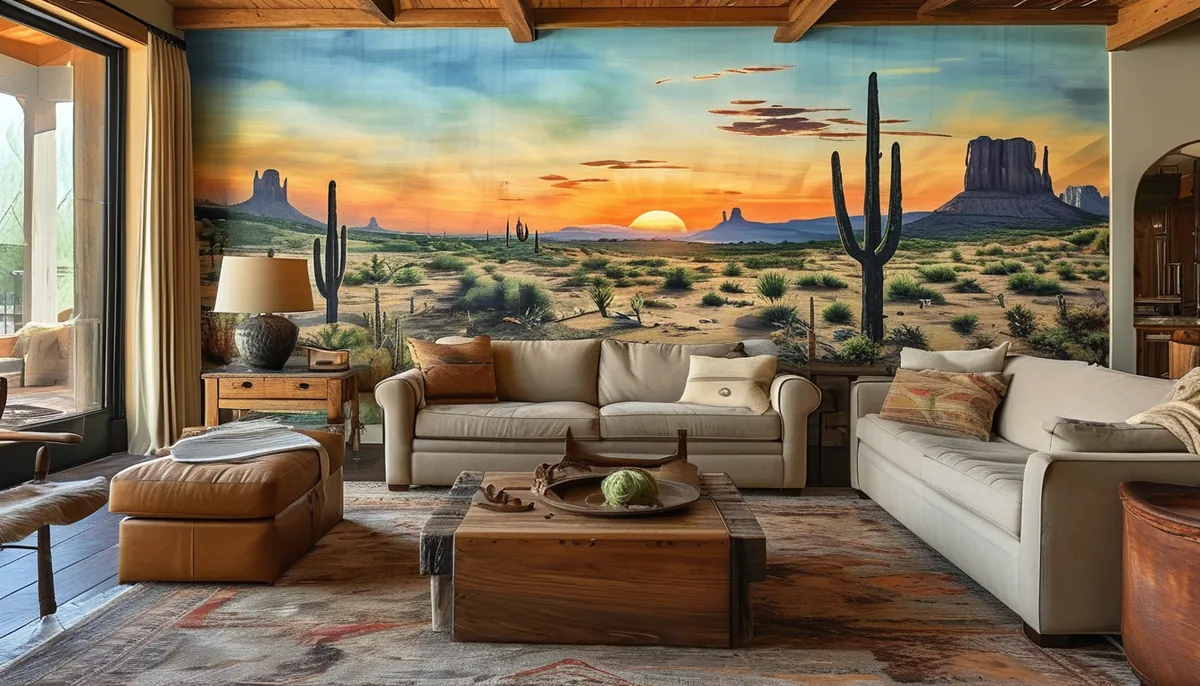
Choosing the right western wallpaper mural transforms a room from ordinary to extraordinary, infusing it with the rugged spirit of the American West. Unlike standard wallpaper, murals are large-scale artworks designed to be the focal point of a wall, creating an immersive experience.
Choosing your western mural theme
Western-themed murals offer a diverse range of styles, each evoking a unique aspect of the West. Consider the mood you want to create.
Desert landscapes
Vast, arid vistas with dramatic rock formations, cacti, and expansive skies. These murals bring a sense of tranquility and natural beauty. Look for designs featuring mesas, canyons, or Joshua trees. The color palette often includes earthy tones like sand, terracotta, and deep blues.
Rodeo and ranch life
Capture the excitement and action of rodeo events or the serene, hardworking atmosphere of a ranch. Murals might depict horses, cowboys in action, cattle drives, or classic ranch scenes with barns and fences. These designs add a dynamic and adventurous feel to any space.
Cowboy and Native American motifs
Focus on iconic symbols of cowboy culture, such as boots, hats, lassos, or vintage Western towns. Alternatively, explore Native American-inspired art, featuring tribal patterns, sacred animals like eagles or wolves, and traditional imagery. These add a layer of history and cultural richness.
Mountain and forest scenes
While not exclusively desert, many Western regions boast stunning mountain ranges and pine forests. Murals depicting snow-capped peaks, winding rivers, or dense woodlands can create a cozy, adventurous atmosphere. These often feature a cooler color scheme with greens, grays, and whites.
Material matters: Vinyl, Non-woven, and Peel-and-Stick
The material of your western wallpaper mural significantly impacts its durability, ease of installation, and final appearance. Understanding these differences helps you make an informed choice.
Vinyl wallpaper
Durable and washable, vinyl is a popular choice for high-traffic areas or rooms prone to moisture, like bathrooms or kitchens. It can withstand scrubbing, making it practical for maintaining the mural’s pristine look. However, it can be less breathable than other options.
Non-woven (or paste-the-wall) wallpaper
This is a robust and breathable material made from a blend of paper and synthetic fibers. Non-woven wallpapers are generally easier to hang than traditional paper because the paste is applied directly to the wall, not the paper itself. They are also easier to remove, often peeling off in large strips without damaging the underlying wall. This makes them ideal for renters or those who like to redecorate frequently.
Peel-and-stick wallpaper
The easiest option for DIY installation, peel-and-stick murals are essentially large decals. They are made from a vinyl material with a strong adhesive backing. You simply peel off the backing and apply the mural directly to your wall. They are repositionable and removable, making them perfect for temporary decorations or for those who are hesitant about permanent changes. The adhesive can sometimes be less forgiving on textured walls, and they may not be as long-lasting as traditional wallpapers in very humid conditions.
Sizing and scale: Getting it right
A mural’s impact depends heavily on its size and how it scales with your room. Measure your wall carefully before ordering.
Measure your wall
Record the width and height of the wall where you intend to hang the mural. Most mural suppliers offer standard sizes, but many also provide custom sizing. It’s crucial to get accurate measurements to ensure the mural fits perfectly without awkward cropping or excessive trimming.
Consider the room’s proportions
A very large mural in a small room can feel overwhelming, while a small mural on a vast wall can get lost. Think about the ceiling height and the overall dimensions of the space. A taller room can accommodate a mural with more vertical emphasis, while a wider room might suit a panoramic scene. You can often find murals that are designed to be trimmed to fit specific dimensions, offering flexibility.
Placement is key
Decide where the focal point of the mural will be. Will it be centered on the wall, or will it be positioned to complement existing furniture or architectural features? For example, placing a mountain range mural behind a sofa can create a stunning backdrop, while a desert scene might work well behind a bed.
Installation tips for a flawless finish
Proper installation is critical to achieving a professional look and ensuring your mural lasts. Follow these steps carefully.
Prepare the wall
The wall must be clean, dry, and smooth. Remove any old wallpaper, fill holes, and sand down any imperfections. For a smooth finish, especially with peel-and-stick options, priming the wall is often recommended. Ensure the surface is free of dust and grease.
Follow the manufacturer’s instructions
Each mural type and brand may have slightly different installation procedures. Always read and follow the specific instructions provided by the manufacturer. This typically includes details on paste application (if applicable), alignment of panels, and drying times.
Working with panels
Most large murals come in multiple numbered panels. Start with panel one, usually at the left side of the wall, and work your way across. Align the edges precisely, either butt-jointed (edges touching) or slightly overlapped, depending on the mural type. Use a smoothing tool (like a wallpaper brush or squeegee) to press out air bubbles and ensure adhesion.
Trimming excess material
Once the mural is applied, you may need to trim any excess material at the ceiling, baseboard, and corners. Use a sharp utility knife and a straight edge for clean, precise cuts. Take your time with this step, as it makes a significant difference in the final appearance.
Dealing with bubbles and wrinkles
Minor bubbles can sometimes be gently pushed towards the edges with a smoothing tool. For stubborn bubbles or wrinkles, you might be able to carefully lift the edge of the panel, reposition it, and re-smooth. If using non-woven or paste-the-wall paper, minor imperfections can sometimes be smoothed out as you go. For peel-and-stick, repositioning is key.
Common mistakes to avoid
Even with the best intentions, some installation errors can detract from your beautiful western mural.
Inadequate wall preparation
Hanging a mural over a dirty, greasy, or uneven surface is a recipe for disaster. The adhesive won’t bond properly, leading to peeling, bubbling, or an uneven finish. Always prioritize thorough cleaning and surface preparation.
Improper panel alignment
Even a slight misalignment between panels can make the overall image look distorted or unprofessional. Pay close attention to the seams and ensure they line up perfectly before smoothing down the material. Take your time and consider using painter’s tape to hold panels in place temporarily while you check alignment.
Using the wrong tools
A dull knife, an inadequate smoothing tool, or the wrong type of paste can all lead to frustration and a poor finish. Invest in quality tools specifically designed for wallpaper installation. A sharp blade is essential for clean cuts.
Ignoring humidity and temperature
Extreme temperatures or high humidity during installation can affect how the adhesive sets and the wallpaper dries. Ensure your room is at a stable, moderate temperature and humidity level for the best results. This is particularly important for peel-and-stick options, where the adhesive performance can be temperature-sensitive.
Integrating your mural with decor
Once your western wallpaper mural is up, it’s time to tie the room together.
Complementary color palettes
Choose furniture, textiles, and decor items that echo the colors found in the mural. If your mural features a sunset over the desert, incorporate burnt oranges, deep reds, and sandy beiges into your furnishings. If it’s a mountain scene, lean into natural wood tones, greens, and grays.
Material choices
Natural materials like wood, leather, stone, and wrought iron complement western themes beautifully. Consider wooden furniture, leather upholstery, or accents like a stone fireplace surround. These textures add depth and authenticity to the space.
Accessorizing with western flair
Add finishing touches that enhance the western theme without overwhelming the mural. Think about items like rustic lanterns, vintage-style signs, Native American-inspired rugs, or decorative antlers (faux or real, ethically sourced). Keep the accessorizing balanced so the mural remains the star.
A western wallpaper mural is more than just wall covering; it’s a statement piece that can transport you and your guests to the heart of the West. By carefully selecting your theme, material, and ensuring proper installation, you can create a stunning and authentic space. Explore the possibilities of transforming your space with stunning wallpaper murals to find the perfect backdrop for your rustic vision.