Removing old wallpaper can seem like a daunting task, often perceived as one of the most challenging aspects of a home renovation project, yet with the right approach, tools, and understanding of various wallpaper types, this process can be managed efficiently and effectively to reveal a pristine surface ready for its next transformation. This comprehensive guide from Starhouse provides precise, authoritative insights into every facet of wallpaper removal, from initial assessment and preparation to execution and post-removal care, ensuring your walls are perfectly prepared for a fresh aesthetic.
Key Takeaways
- Successful wallpaper removal hinges on accurately identifying the wallpaper type and underlying wall surface to select the most effective method.
- Thorough preparation, including protecting floors, furniture, and electrical outlets, is paramount for safety and to minimize cleanup.
- Utilize specialized tools such as scoring devices, spray bottles, and scrapers, or consider a steamer for stubborn applications.
- Always test a small, inconspicuous area first to determine the optimal removal technique and prevent wall damage.
- Lead-based paint testing is a critical safety step for homes built before 1978, as disturbing old wallpaper could expose hazardous layers.
- Post-removal, meticulously clean all adhesive residue and promptly repair any wall imperfections to achieve a smooth, ready-to-finish surface.
Understanding Different Wallpaper Types and Their Impact on Removal
Different wallpaper types require varied removal approaches due to their composition, adhesive characteristics, and the underlying wall surface, making identification a crucial first step for efficient and damage-free removal. The method chosen for wallpaper removal is directly dictated by how the paper is constructed and the adhesive used, influencing the necessary tools and techniques. Understanding these distinctions prevents unnecessary effort and potential damage to your walls.
Wallpaper is a material used to cover and decorate the interior walls of homes, offices, and other buildings, typically sold in rolls and applied to a wall using a paste. Its composition ranges from simple paper to complex vinyl and fabric blends, each designed for specific aesthetic and functional purposes, and each presenting unique challenges during removal.
Traditional Paper-Based Wallpaper
Traditional paper-based wallpapers, often cellulose-based, are typically the most challenging to remove when applied with conventional paste. These wallpapers absorb moisture readily, but their paper composition means they can tear easily and often leave layers of backing paper or adhesive behind. They require thorough saturation with a stripping solution to dissolve the adhesive beneath.
- Characteristics: Often thin, can be porous, may have decorative top layers.
- Removal Impact: Prone to tearing, requires extensive soaking, often leaves a fibrous backing layer. Multiple passes with a scraper and stripper are common.
- Ideal Method: Scoring and soaking with a commercial stripper or warm water solution.
Solid Vinyl Wallpaper
Solid vinyl wallpaper is constructed with a durable vinyl layer bonded to a paper or fabric backing, offering excellent durability and washability due to its impervious surface. This type is generally easier to remove than traditional paper, as the vinyl face often peels away from the backing. The vinyl layer acts as a barrier, preventing moisture from reaching the adhesive. Therefore, the vinyl face must first be removed, or the surface must be scored to allow the stripping solution to penetrate to the adhesive.
- Characteristics: Thick, durable, moisture-resistant, often has a textured finish.
- Removal Impact: The vinyl face can often be peeled off in full sheets (dry stripping), leaving a paper backing that then needs to be soaked and scraped.
- Ideal Method: Dry stripping the vinyl face, then scoring and soaking the remaining paper backing.
Vinyl-Coated Paper Wallpaper
Vinyl-coated paper wallpaper features a decorative paper layer with a thin, clear vinyl coating, providing some moisture resistance and making it more durable than traditional paper. While more resilient than pure paper, this coating still prevents effective penetration of stripping solutions if not properly scored. The paper backing is still vulnerable to tearing, similar to traditional paper.
- Characteristics: Paper base with a thin vinyl topcoat, semi-washable.
- Removal Impact: Requires scoring to allow stripping solution to reach the paper and adhesive. Can tear easily once wet.
- Ideal Method: Thorough scoring, followed by soaking with a stripping solution.
Non-Woven Wallpaper
Non-woven wallpaper is made from a blend of natural and synthetic fibers, making it exceptionally strong, breathable, and dimensionally stable. This material is widely recognized for its “strippable” or “peelable” properties, meaning it can often be removed dry, in full sheets, without extensive soaking or scraping. This ease of removal is a significant advantage, often leaving minimal residue.
- Characteristics: Tear-resistant, breathable, often labeled “strippable” or “peelable.”
- Removal Impact: Typically the easiest to remove, often peeling off in large, intact sheets without damaging the wall. Leaves minimal adhesive residue.
- Ideal Method: Dry stripping, starting from a corner or seam.
Peel-and-Stick Wallpaper (Temporary/Removable)
Peel-and-stick wallpaper, also known as temporary wallpaper, features an adhesive backing that is activated by pressure, eliminating the need for traditional paste. Designed for easy application and removal, this type is ideal for renters or those who frequently update their decor. While generally simple to remove, older or sun-exposed installations might leave adhesive residue.
- Characteristics: Self-adhesive, often made of vinyl or fabric, designed for temporary application.
- Removal Impact: Generally peels off cleanly without damaging walls or leaving significant residue. Gentle heat can assist if it becomes stubborn.
- Ideal Method: Gentle, slow peeling. A hairdryer can be used on low heat for stubborn spots.
Fabric-Backed Wallpaper
Fabric-backed wallpapers consist of a textile layer laminated to a paper or non-woven backing, offering a luxurious texture and often superior durability. These are less common in residential settings but require careful consideration during removal. The fabric layer can be difficult to saturate, and the backing may be strongly adhered. Sometimes, the fabric face can be peeled, leaving a backing to be treated.
- Characteristics: Textile surface (silk, linen, grasscloth), often heavy and luxurious.
- Removal Impact: Can be challenging; requires careful assessment to determine if the fabric face can be peeled from the backing. May require extensive steaming or strong strippers.
- Ideal Method: Often steaming is most effective, or specialized commercial strippers.
Mylar/Foil Wallpaper
Mylar or foil wallpapers feature a metallic or reflective surface bonded to a paper backing, creating a distinctive, often shiny, aesthetic. The Mylar or foil layer is impervious to moisture, making scoring an absolute necessity for any liquid stripping method to reach the adhesive. Without proper scoring, these wallpapers will not respond to traditional soaking techniques.
- Characteristics: Metallic or reflective surface, very low porosity.
- Removal Impact: The metallic surface prevents water penetration, so thorough scoring is critical before applying any liquid stripper.
- Ideal Method: Aggressive scoring, followed by strong chemical stripper application and steaming.
Determining Your Wallpaper Type
To identify your wallpaper type, begin by examining a loose seam or corner. If you can easily peel a layer off, observe its composition. If it feels like plastic or vinyl and comes off in full sheets, it’s likely solid vinyl or non-woven. If it tears like paper or leaves a fibrous backing, it’s probably traditional paper or vinyl-coated paper. For self-adhesive types, the backing will be sticky. When in doubt, assume it’s a type that requires scoring and soaking for effective removal.
Accurate identification is the cornerstone of efficient wallpaper removal. Proceeding without this initial assessment can lead to frustration, extended project times, and potential damage to your walls. Starhouse advocates for a meticulous approach, ensuring each step is informed by precise knowledge.
Essential Tools and Materials for Wallpaper Removal
Successful wallpaper removal necessitates a specific array of tools and materials designed to loosen adhesive, protect surfaces, and safely prepare the walls for their next finish. Gathering these items before you begin streamlines the process, minimizes interruptions, and ensures you have the right equipment for any challenge that arises during the project. The effectiveness of your removal process is directly correlated with the quality and appropriateness of your tools.
Before embarking on wallpaper removal, ensure you have these essential items readily available:
Safety Gear
Prioritizing personal safety is non-negotiable during any home renovation project involving chemicals or dust.
- Safety Glasses: Protect your eyes from falling debris, splashes from stripping solutions, and steam.
- Rubber Gloves: Essential for protecting your hands from chemical irritants in stripping solutions and prolonged exposure to water.
- Face Mask/Respirator: Crucial when working with chemical strippers to prevent inhalation of fumes and to avoid inhaling dust if sanding is required post-removal.
- Long-Sleeved Shirt and Pants: Provide skin protection from irritants and splashes.
Wall Preparation and Protection
Protecting your surrounding environment is as important as protecting yourself.
- Drop Cloths/Plastic Sheeting: Heavy-duty canvas drop cloths or plastic sheeting are indispensable for protecting floors, furniture, and baseboards from water, stripping solutions, and wallpaper debris. Secure them with painter’s tape.
- Painter’s Tape: Used to secure drop cloths, seal electrical outlets and switches, and protect trim.
- Utility Knife/Box Cutter: For scoring wallpaper, cutting away stubborn sections, or precisely trimming plastic sheeting.
Wallpaper Scoring Tools
Scoring tools are fundamental for allowing stripping solutions to penetrate the wallpaper’s surface, especially for vinyl or coated papers.
- Wallpaper Scorer (e.g., Paper Tiger): This specialized tool features small, sharp wheels that create tiny perforations in the wallpaper without damaging the drywall beneath. It is highly effective for breaking the surface tension of vinyl or coated papers, allowing removal solutions to reach the adhesive.
- Coarse Sandpaper (optional): In some cases, light sanding can be used to abrade the surface of very stubborn, non-perforated wallpaper to aid solution penetration, though this carries a higher risk of wall damage.
Application and Removal Tools
These tools are directly involved in applying solutions and physically removing the wallpaper.
- Spray Bottle: An essential tool for evenly applying water or stripping solution to the wallpaper. Look for a durable bottle with an adjustable nozzle for fine mist or direct stream.
- Bucket(s): Necessary for mixing stripping solutions, holding warm water, and rinsing sponges.
- Large Sponge: For wiping down walls, applying solutions, and cleaning adhesive residue.
- Wallpaper Scrapers (e.g., 2-inch, 4-inch, or 6-inch putty knife): Choose scrapers with dull, flexible blades to minimize damage to the wall surface. A 2-inch scraper is good for tight spots, while a wider 4-inch or 6-inch scraper covers more area. Avoid sharp blades that can gouge drywall.
- Broad Knife/Drywall Trowel: Useful for larger areas, providing leverage for stubborn sections, and for applying joint compound if wall repairs are needed.
- Steam Wallpaper Stripper: The Family Handyman identifies steam strippers as highly effective for stubborn, multi-layered wallpaper. These devices heat water to produce steam, which penetrates and loosens wallpaper adhesive. They are particularly effective for older, multi-layered, or difficult-to-remove papers where chemical solutions may be less effective.
- Trash Bags: For immediate disposal of removed wallpaper and debris, preventing it from sticking to floors or other surfaces.
Cleaning and Post-Removal Supplies
Once the wallpaper is off, the work isn’t finished. These items ensure a clean, smooth surface.
- Adhesive Remover: Commercial products specifically designed to dissolve residual wallpaper paste. These are often more effective than general cleaning solutions for persistent glue.
- Warm Water and Dish Soap: A simple, effective solution for cleaning up minor adhesive residue.
- Clean Rags/Microfiber Cloths: For wiping down walls and ensuring all residue is removed.
- Sanding Sponge/Fine-Grit Sandpaper: For smoothing out minor imperfections or remaining adhesive bumps after cleaning.
- Primer (specifically for bare drywall or previously wallpapered surfaces): Essential for sealing the wall and creating a consistent surface for new paint or wallpaper.

Chemical vs. Non-Chemical Strippers
The choice between chemical and non-chemical stripping solutions impacts both effectiveness and safety protocols.
- Commercial Wallpaper Strippers: These are formulated to chemically break down wallpaper adhesive. They come in liquid, gel, or concentrate forms and vary in strength. Always follow manufacturer instructions and ensure adequate ventilation. The Family Handyman provides a list of effective commercial wallpaper removers, noting their varying strengths and applications.
- Homemade Solutions: A mixture of hot water and liquid dish soap (a few tablespoons per gallon) or hot water and white vinegar (1:1 ratio) can be surprisingly effective for permeable wallpapers. These are less aggressive and more environmentally friendly alternatives.
- Enzymatic Removers: These specialized removers use enzymes to break down organic components in wallpaper paste, making them effective for older, starch-based adhesives. They are generally safer than harsh chemical strippers.
Having the correct tools and materials at your disposal transforms a potentially frustrating task into a manageable and efficient process. Starhouse recommends investing in quality tools to achieve professional-grade results and protect your home’s integrity.
Preparing Your Space for Wallpaper Removal
Thorough preparation of the room is a critical prerequisite for efficient and safe wallpaper removal, protecting floors, furniture, and electrical outlets from water, chemicals, and debris. This preparatory phase minimizes potential damage, simplifies cleanup, and ensures a safer working environment, ultimately streamlining the entire removal process. Skipping this vital step can lead to costly repairs and extensive post-project cleaning.
Step 1: Clear the Room
Begin by removing all furniture, wall hangings, and decorative items from the room. If large furniture cannot be moved, consolidate it to the center of the room and cover it completely with plastic sheeting. This ensures unhindered access to all wall surfaces and protects your belongings from dust, moisture, and stripping solutions.
Step 2: Protect Floors and Baseboards
Lay down heavy-duty drop cloths or thick plastic sheeting to cover the entire floor area, extending up to and over the baseboards. Secure the edges of the sheeting with painter’s tape to prevent slippage and create a continuous protective barrier. This prevents water damage, chemical stains, and adhesive residue from adhering to your flooring.
Step 3: Disconnect Power and Secure Electrical Outlets
For safety, turn off the electricity to the room at the circuit breaker. This is a non-negotiable step when working with water or steam near electrical outlets and switches. Once power is off, use painter’s tape to cover all electrical outlets, light switches, and wall-mounted fixtures. This prevents moisture from entering electrical components, which could cause short circuits or pose a shock hazard.
Step 4: Remove Wall Fixtures and Trim Plates
Carefully remove all switch plates, outlet covers, light fixtures, and thermostat covers from the walls. Place screws and small components in a labeled bag to prevent loss and simplify reinstallation. This provides full access to the wallpaper beneath and prevents damage to these fixtures during the removal process.
Step 5: Inspect Walls for Damage and Test for Lead Paint
Before applying any moisture or pressure, conduct a thorough inspection of the walls for existing damage such as cracks, holes, or loose drywall tape. Addressing these issues post-removal will be easier, but knowing their location helps avoid aggravating them during the process.
Lead-based paint is paint that contains lead, a toxic metal, and was commonly used in homes built before 1978. Disturbing surfaces painted with lead-based paint, such as during wallpaper removal, can release hazardous lead dust or chips, posing serious health risks, particularly to children and pregnant women. If your home was built before 1978, it is imperative to test for lead-based paint before beginning any wallpaper removal.
The U.S. Environmental Protection Agency (EPA) provides comprehensive guidelines on lead-based paint and demolition, emphasizing the importance of testing and safe handling. Lead test kits are available at most hardware stores and provide a quick indication. If lead paint is detected, or if you are unsure, consult a certified lead abatement professional. Proceeding without this critical step in older homes can lead to significant health hazards and regulatory violations.
Step 6: Perform a Test Patch
Before committing to a full-scale removal method, always perform a test patch in an inconspicuous area, such as behind a door or in a closet. This allows you to determine the wallpaper type, the adhesive’s tenacity, and the wall’s reaction to your chosen removal solution or steamer. This step is invaluable for identifying the most effective technique and preventing damage to the entire wall. Different wallpapers and adhesives react uniquely, and a test patch provides empirical data for your specific situation.
By meticulously preparing your space, you establish a controlled and safe environment for wallpaper removal. This proactive approach not only protects your home and health but also sets the foundation for a smoother, more successful renovation. Starhouse emphasizes that careful preparation is not merely a suggestion but a fundamental requirement for achieving impeccable results.
Step-by-Step Guide to Wallpaper Removal Techniques
The most effective wallpaper removal technique depends on the wallpaper type, the adhesive used, and the underlying wall surface, but generally involves a systematic process of scoring, saturating, and carefully scraping the material away. Each method requires precision and patience, ensuring minimal damage to the drywall beneath and preparing the surface for its next finish. Selecting the correct technique is paramount to a successful outcome.
Method 1: Scoring and Soaking (for Permeable & Vinyl-Coated Wallpapers)
This is the most common method for traditional paper, vinyl-coated paper, and any wallpaper that allows moisture to penetrate after its surface is broken.
Materials Needed:
- Wallpaper scorer (e.g., Paper Tiger)
- Spray bottle
- Warm water and liquid dish soap (or commercial wallpaper stripper)
- Sponge
- Wallpaper scraper (dull, flexible blade)
- Trash bags
Procedure:
- Score the Wallpaper: Using a wallpaper scorer, lightly perforate the entire surface of the wallpaper. Apply firm, even pressure, making circular motions or overlapping vertical and horizontal passes. The goal is to create tiny holes that allow the stripping solution to reach the adhesive without gouging the drywall. For vinyl-coated papers, ensure the vinyl layer is adequately punctured.
- Prepare the Stripping Solution: For a DIY solution, mix warm water with a few tablespoons of liquid dish soap in a spray bottle. Alternatively, dilute a commercial wallpaper stripper according to the manufacturer’s instructions.
- Saturate the Wallpaper: Generously spray a section of the wallpaper, approximately 3×3 feet, with the stripping solution. Ensure the entire area is thoroughly wet, but avoid over-saturating to the point of running excessively down the wall or pooling on the floor.
- Allow Dwell Time: Let the solution penetrate for 15-20 minutes. This dwell time is crucial for the solution to dissolve the adhesive. If the wallpaper begins to dry, re-spray it. Do not let it dry out completely.
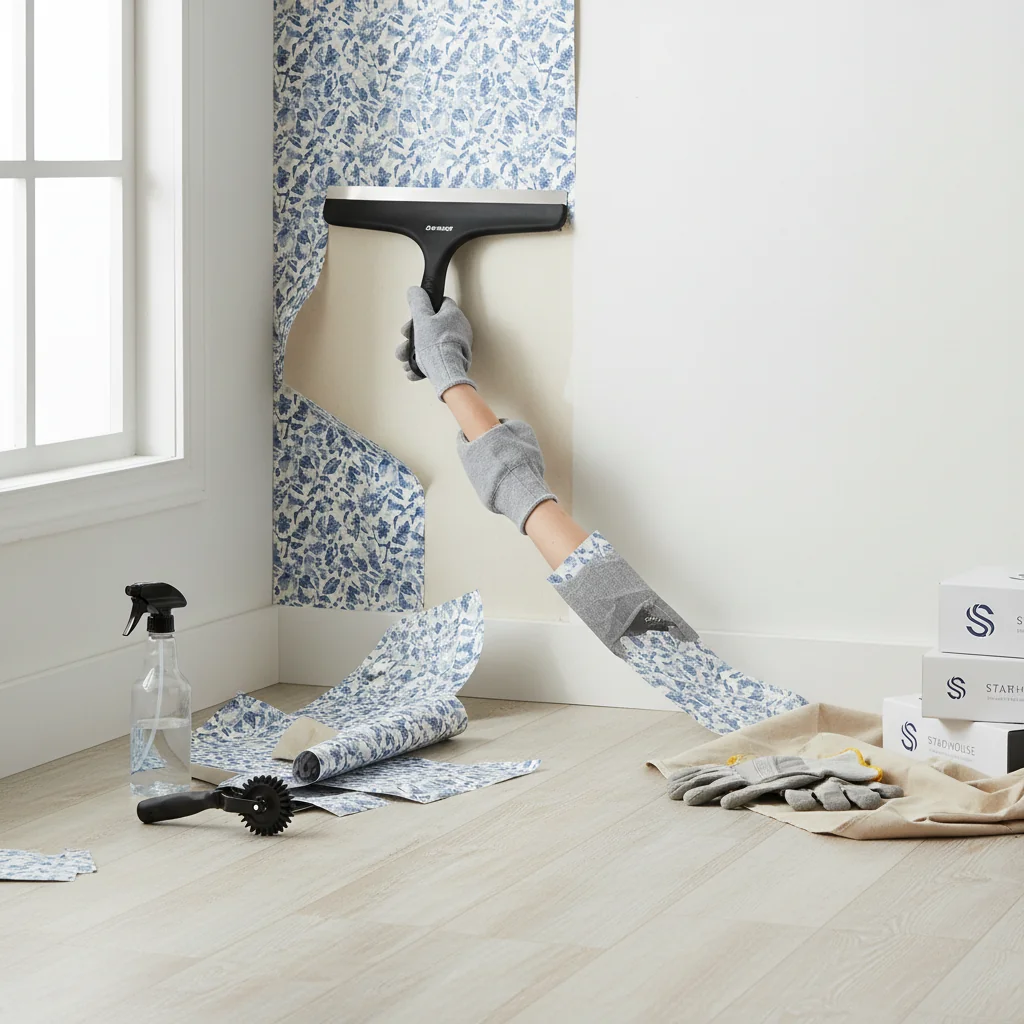
- Begin Scraping: Starting from a seam or a loose corner, gently slide your wallpaper scraper under the moistened paper at a shallow angle (approximately 30-45 degrees). Apply consistent, upward pressure to lift the paper from the wall. Work in small sections, always scraping upward to prevent gravity from pulling the paper down into the solution and re-adhering.
- Repeat and Clean: Continue working in 3×3 foot sections, re-scoring and re-soaking as needed. Immediately collect removed wallpaper in trash bags to prevent it from sticking to other surfaces. After removing all wallpaper from a section, use a sponge with clean water to wipe down the wall, removing any remaining adhesive residue.
Method 2: Steaming (for Stubborn or Multiple Layers)
A wallpaper steamer is highly effective for very old wallpaper, multiple layers, or papers with particularly stubborn adhesives that resist chemical solutions. The steam penetrates the paper and melts the adhesive.
Materials Needed:
- Wallpaper steamer (rentable from hardware stores or purchase small models)
- Extension cord (rated for outdoor/heavy-duty use)
- Bucket for water
- Wallpaper scraper
- Safety gloves and glasses
- Trash bags
Procedure:
- Fill and Heat Steamer: Fill the steamer reservoir with clean water according to the manufacturer’s instructions. Plug it in and allow it to heat up until steam is consistently produced from the steam plate.
- Score (if necessary): For vinyl or coated papers, lightly score the surface with a wallpaper scorer to allow the steam to penetrate more effectively.
- Apply Steam: Hold the steam plate firmly against a section of the wallpaper for 20-30 seconds. You will observe the wallpaper changing color or becoming visibly wet beneath the surface. Do not hold the plate in one spot for too long, as this can damage the drywall.
- Scrape Immediately: As soon as you remove the steam plate, use your wallpaper scraper to gently lift the softened wallpaper. Work quickly while the area is still warm and moist. The paper should peel away in larger sections than with soaking methods.
- Work Systematically: Move around the room, steaming and scraping in small, manageable sections. Overlap your steaming areas slightly to ensure continuous moisture.
- Clean as You Go: Wipe down exposed wall sections with a damp sponge to remove any residual adhesive while it’s still pliable.
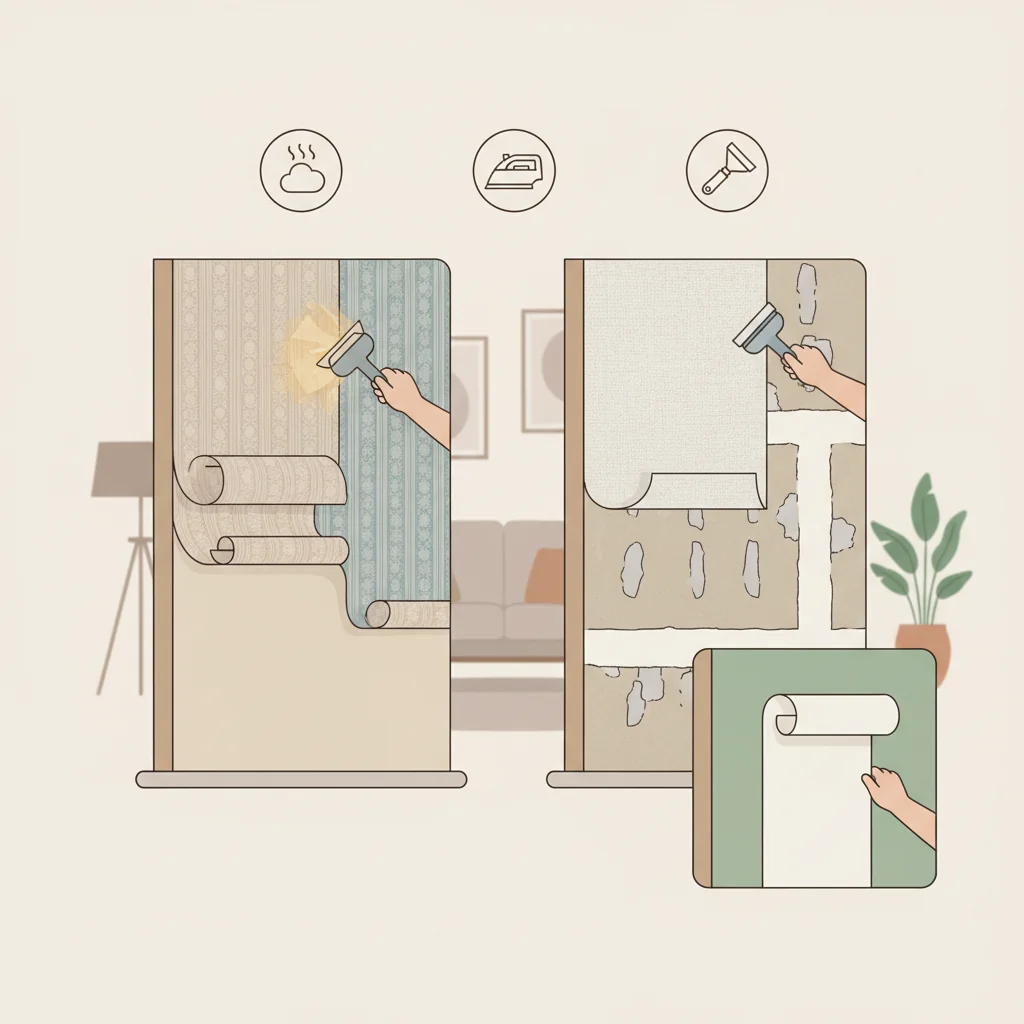
Method 3: Peel-and-Stick Wallpaper Removal
Designed for temporary application, peel-and-stick wallpaper is generally the easiest to remove, often coming off in full sheets.
Materials Needed:
- Hair dryer or heat gun (on low setting)
- Fingernail or plastic scraper (optional)
- Clean cloth and rubbing alcohol/goo remover (for residue)
Procedure:
- Locate a Seam: Find a top corner or seam of the wallpaper.
- Apply Gentle Heat (if needed): If the wallpaper is not peeling easily, use a hairdryer on a low heat setting or a heat gun from a safe distance (several inches away) to warm a small section. The heat softens the adhesive.
- Peel Slowly and Evenly: Starting from the corner, slowly and steadily peel the wallpaper downward at a 45-degree angle. Avoid pulling straight out, which can tear the paper or pull off drywall. If it resists, apply more heat.
- Address Residue: Most peel-and-stick wallpapers leave minimal residue. If any sticky spots remain, wipe them with a clean cloth dampened with rubbing alcohol or a commercial adhesive remover.
Method 4: Dry Stripping (for “Strippable” or Non-Woven Wallpapers)
Some modern wallpapers, particularly non-woven types, are manufactured to be “strippable,” meaning they can be removed dry without the need for water or chemicals.
Materials Needed:
- Utility knife (optional, for starting a seam)
- Fingernail or plastic scraper
- Trash bags
Procedure:
- Locate a Seam: Find a top corner or seam where the wallpaper meets the ceiling or another wall. If no seam is easily accessible, use a utility knife to carefully lift a small edge.
- Grasp and Peel: Firmly grasp the edge of the wallpaper and slowly pull it downwards at a 45-degree angle. The paper should come off in large, intact sheets.
- Continue Systematically: Work your way across the wall, pulling down each strip. If the paper tears, restart from the point of the tear.
- Check for Residue: While strippable wallpapers typically leave little to no adhesive, inspect the wall carefully for any lingering stickiness.
Comparison of Wallpaper Removal Techniques
The following table provides a quick reference for choosing the appropriate removal method based on common wallpaper types and associated factors.
| Technique | Ideal Wallpaper Types | Adhesive Type | Tools Required | Difficulty Level | Pros | Cons |
|---|---|---|---|---|---|---|
| Scoring & Soaking | Traditional paper, vinyl-coated paper, older porous wallpapers | Starch-based, cellulose, some vinyl adhesives | Scorer, spray bottle, stripper/water, scraper, sponge | Medium | Effective for common types; relatively inexpensive | Can be messy; time-consuming; may damage drywall if not careful |
| Steaming | Multi-layered, stubborn, very old wallpaper, difficult adhesives | All types, especially stubborn, dried adhesives | Steamer, scraper, safety gear | Medium-High | Highly effective for tough jobs; avoids chemicals | Can be slow; steamer rental/purchase cost; risk of drywall damage if overheated |
| Peel-and-Stick | Self-adhesive temporary wallpapers | Pressure-sensitive adhesive | Fingernail/plastic scraper, hairdryer (optional) | Low | Very easy; minimal residue; no chemicals/water | Older or sun-exposed may leave residue; not for traditional papers |
| Dry Stripping | Non-woven, “strippable” vinyl wallpapers | Specific peelable adhesives | Utility knife (optional), hands | Low | Fastest and cleanest method; no chemicals/water | Only works for specific wallpaper types; may leave some backing |
Employing the correct technique for your specific wallpaper ensures a more efficient, less damaging, and ultimately more satisfying removal process. Starhouse advises careful consideration of these methods to achieve the best possible outcome for your walls.
Dealing with Stubborn Adhesive and Wall Repair
After wallpaper removal, residual adhesive must be thoroughly cleaned, and any wall damage repaired to prepare the surface for new finishes, as a smooth, clean wall is foundational to any subsequent decorative application. Neglecting these steps can lead to paint peeling, new wallpaper failing to adhere properly, or an uneven finish that detracts from your design. Meticulous post-removal treatment ensures a professional-grade result.
Step 1: Removing Residual Adhesive
Even after the wallpaper is gone, a sticky residue often remains, which must be completely removed. This adhesive layer, if left untreated, can prevent new paint or wallpaper from adhering correctly, leading to bubbling, cracking, or peeling.
- Warm Water and Dish Soap: For light to moderate adhesive residue, a mixture of warm water and a few drops of liquid dish soap is often effective. Apply the solution with a large sponge, allowing it to soak for a few minutes to soften the glue. Then, gently scrub the wall in circular motions, rinsing the sponge frequently.
- White Vinegar Solution: A 1:1 mixture of warm water and white vinegar can also be used as an effective, natural adhesive remover. The acetic acid in vinegar helps to dissolve many types of wallpaper paste. Apply as with the dish soap solution.
- Commercial Adhesive Removers: For particularly stubborn or dried-on adhesive, a commercial wallpaper adhesive remover is often necessary. These products are specifically formulated to break down various types of glue. Always follow the manufacturer’s instructions, ensuring adequate ventilation and wearing appropriate safety gear (gloves, eye protection). Spray or wipe the solution onto the adhesive, allow it to dwell for the recommended time, and then scrape or wipe away the softened glue.
- Gentle Scraping: Use a dull wallpaper scraper or putty knife to carefully scrape away softened adhesive. Hold the scraper at a shallow angle to avoid gouging the drywall.
- Final Wipe Down: After removing all visible adhesive, wipe down the entire wall with a clean, damp cloth to remove any lingering residue or cleaning solution. The wall should feel smooth and clean to the touch.
Step 2: Inspecting and Cleaning the Walls
Once the adhesive is gone, allow the walls to dry completely, then perform a detailed inspection. Look for any remaining adhesive spots, small tears in the drywall paper, gouges, or nail holes. A clean, smooth surface is paramount for successful redecoration.
- Sanding: Lightly sand any rough spots or tiny bumps of dried adhesive with fine-grit sandpaper (120-150 grit) or a sanding sponge. Sand gently to avoid damaging the drywall paper.
- Dust Removal: After sanding, thoroughly wipe down the walls with a damp cloth to remove all sanding dust. Dust can interfere with primer and paint adhesion.
Step 3: Wall Repair
Wallpaper removal can sometimes reveal or cause minor damage to the drywall, such as small tears in the paper facing, gouges, or nail holes. These imperfections must be repaired before priming and painting or re-wallpapering.
- Patching Small Holes and Gouges: Use lightweight spackle or joint compound to fill in nail holes, screw holes, and minor gouges. Apply a small amount with a putty knife, pressing it firmly into the hole. Scrape off any excess to create a smooth, flush surface.
- Repairing Drywall Tears: If the drywall paper has torn (often called “fuzzies” or “paper tears”), lightly sand the edges of the tear to remove loose fibers. Apply a thin coat of joint compound over the torn area, feathering the edges outward. This seals the paper and creates a smooth surface.
- Addressing Larger Damage: For larger holes or significant damage, you may need to use a drywall patch kit or cut out and replace a section of drywall. These repairs require more advanced techniques and materials, such as drywall mesh tape and multiple layers of joint compound.
- Sanding Repairs Smooth: Once the spackle or joint compound is completely dry (follow manufacturer’s drying times, typically several hours), lightly sand the repaired areas with fine-grit sandpaper until they are perfectly smooth and flush with the surrounding wall.
- Dust Removal (again): Wipe down all repaired and sanded areas with a damp cloth to remove dust.
Step 4: Priming the Walls
Priming is a critical final step after wallpaper removal and wall repair, serving multiple essential functions.
Wall primer is a preparatory coating applied to walls before painting or wallpapering to seal the surface, promote adhesion of the topcoat, and ensure a uniform finish. It creates a barrier that prevents residual adhesive from bleeding through new paint or wallpaper, equalizes porosity, and improves the overall durability and appearance of the final finish.
- Sealing the Surface: Primer seals any remaining adhesive residue, preventing it from bleeding through new paint or causing new wallpaper to bubble. It also seals porous drywall, ensuring an even absorption of paint.
- Promoting Adhesion: A good primer creates a uniform, slightly textured surface that paint or new wallpaper can adhere to effectively, preventing peeling or poor coverage.
- Blocking Stains: Stain-blocking primers are particularly useful for walls that had very old or stained wallpaper, preventing discoloration from showing through the new finish.
- Evening Out Porosity: Different areas of the wall (bare drywall, patched sections, original painted areas) will have varying levels of porosity. Primer evens out these differences, ensuring a consistent finish.
- Types of Primer: Use a high-quality, oil-based or shellac-based primer/sealer specifically designed for previously wallpapered or repaired surfaces. These types are most effective at sealing in residual adhesive and preventing future issues. Apply one to two coats according to manufacturer instructions, allowing adequate drying time between coats.
By diligently tackling adhesive removal, wall repair, and proper priming, you establish an immaculate foundation. This meticulous attention to detail ensures that your next decorative choice—whether it’s a fresh coat of paint or a new Starhouse wallpaper—will achieve its full aesthetic potential, appearing flawless and durable for years to come.
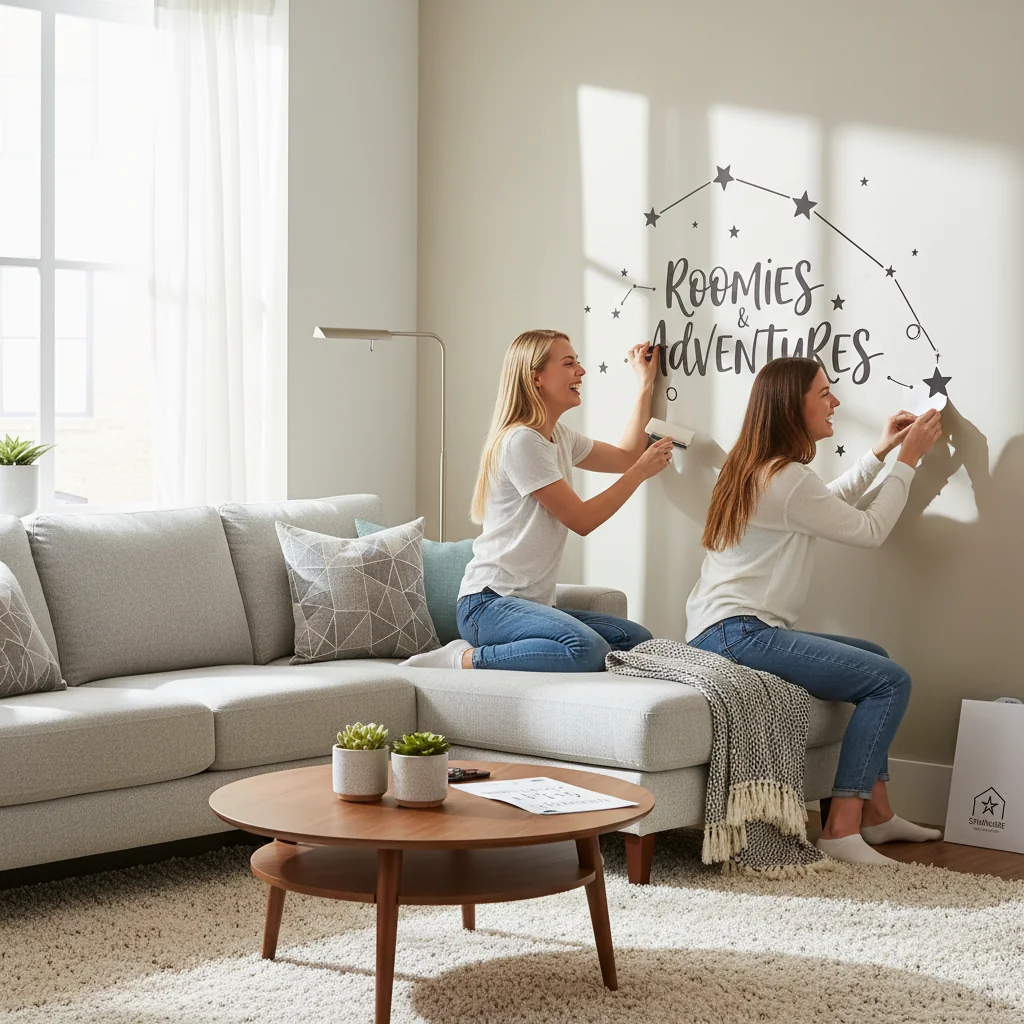
We understand that embarking on a home transformation can bring a cascade of questions, from the foundational elements like wall preparation to the final touches of decor. As Starhouse curates its definitive collection of home furnishings, textiles, lighting, and exquisite wall décor, we are eager to understand what truly inspires your living spaces. Share your aspirations, your challenges, and your vision for your home. Your input directly shapes our offerings, ensuring we provide exactly what you need to create a space that reflects your unique style and comfort. We invite you to tell us what you’re looking for and get early access to our curated selections, designed to elevate every room.
Common Mistakes to Avoid During Wallpaper Removal
Avoiding common pitfalls during wallpaper removal prevents damage to walls, reduces frustration, and ensures a smoother, more efficient process, ultimately saving significant time and potential repair costs. Many challenges encountered during wallpaper removal stem from overlooking critical preparatory steps or employing incorrect techniques. Recognizing and circumventing these errors is essential for a successful outcome.
1. Inadequate Surface Preparation
One of the most frequent mistakes is failing to properly prepare the room before starting. This includes not clearing furniture, neglecting to protect floors and electrical outlets, or skipping the crucial step of turning off power to the room. The consequences range from damaged belongings and stained floors to hazardous electrical incidents.
Correction: Always dedicate sufficient time to thoroughly prepare your space. Move or cover all furniture, lay down heavy-duty drop cloths, tape off and cover electrical outlets, and always turn off the circuit breaker to the room.
2. Not Identifying Wallpaper Type or Testing a Small Area
Proceeding with a generic removal method without first identifying the wallpaper type or performing a test patch is a recipe for frustration and potential wall damage. Different wallpapers require different approaches; a method effective for one type may be entirely useless or even harmful for another.
Correction: Before any widespread application, identify your wallpaper type and conduct a test patch in an inconspicuous area. This will reveal the most effective method and prevent damage to larger sections of your wall.
3. Insufficient Soaking Time or Solution Application
Rushing the soaking process or not applying enough stripping solution is a common error that leads to wallpaper tearing into small, stubborn pieces, making removal arduous. The adhesive needs adequate time to fully dissolve and release its bond.
Correction: Be generous with your stripping solution and allow the recommended dwell time (typically 15-20 minutes). If the wallpaper starts to dry, re-spray it. Patience during this phase significantly reduces scraping effort.
4. Using Overly Sharp or Incorrect Scrapers
Employing a sharp putty knife or a scraper at a steep angle can easily gouge and damage the drywall paper beneath the wallpaper. This damage then requires additional repair work, adding time and cost to your project.
Correction: Use a dull, flexible wallpaper scraper or a putty knife with a blunted edge. Hold the scraper at a shallow angle (30-45 degrees) to gently lift the paper without digging into the wall. Replace sharp blades with dull ones for this specific task.
5. Over-Saturating Drywall
While soaking is crucial, over-saturating the drywall, particularly in areas where the paper facing is already compromised, can lead to significant damage. Excess water can cause drywall to soften, swell, or even crumble, necessitating extensive repairs.
Correction: Apply stripping solutions evenly and directly to the wallpaper, avoiding excessive runoff. For areas where drywall is exposed or damaged, use a less aggressive approach or minimize direct liquid application. Steaming, while effective, also requires careful timing to avoid over-wetting.
6. Neglecting Lead-Based Paint Concerns
In homes built before 1978, disturbing old wallpaper can expose or release lead-based paint particles, posing a serious health hazard. Failing to test for lead paint before starting removal is a critical oversight.
Correction: Always test for lead-based paint in older homes. If lead paint is present, consult with certified professionals who specialize in lead-safe work practices to ensure safety and compliance with EPA regulations.
7. Not Removing All Adhesive Residue
Leaving behind sticky adhesive residue is a common mistake that will inevitably cause problems with subsequent finishes. New paint will not adhere properly, leading to cracking or peeling, and new wallpaper will bubble or fail to stick.
Correction: After all wallpaper is removed, meticulously clean the walls with warm water, dish soap, or a commercial adhesive remover. Wipe down the entire surface until it feels completely smooth and non-tacky. A final rinse with clean water is often beneficial.
8. Skipping the Priming Step
After successful wallpaper and adhesive removal, skipping the priming step is a significant error. Primer serves to seal the wall, block any residual stains or adhesive, and create a uniform surface for new paint or wallpaper.
Correction: Always apply a high-quality, oil-based or shellac-based primer/sealer specifically designed for previously wallpapered or repaired surfaces. This ensures optimal adhesion and a professional-looking finish for your next decorative layer.
9. Rushing the Process
Wallpaper removal is a task that rewards patience. Rushing through any step—from preparation to soaking to scraping—increases the likelihood of mistakes, damage, and ultimately, a less satisfactory result.
Correction: Allocate ample time for each stage of the removal process. Work in small, manageable sections, and do not proceed to the next step until the current one is thoroughly completed. Patience is your most valuable tool.
By being aware of these common pitfalls and consciously avoiding them, you can significantly improve the efficiency and success of your wallpaper removal project. Starhouse emphasizes that careful planning and execution are paramount for achieving a pristine foundation for your next design endeavor.
When to Call a Professional: Assessing Your Project
Deciding whether to hire a professional for wallpaper removal hinges on the complexity of the project, the type of wallpaper, the condition of the underlying walls, and your comfort level with extensive DIY tasks. While many wallpaper removal projects are manageable for a diligent homeowner, certain scenarios warrant the expertise of a professional to prevent damage, ensure safety, and achieve optimal results. Recognizing these thresholds can save you time, effort, and potential repair costs.
Factors Indicating Professional Intervention:
1. Multiple Layers of Old Wallpaper
If your walls are adorned with several layers of wallpaper, particularly if applied over decades, the removal process becomes significantly more complex. Each layer likely has different adhesive types, and the cumulative thickness can make penetration by strippers or steam exceptionally difficult. Professionals possess specialized tools and techniques for efficiently tackling multi-layered applications without causing extensive damage to the underlying wall.
2. Wallpaper Applied Over Unprimed Drywall
Wallpaper applied directly to unprimed drywall is one of the most challenging scenarios. Without a protective primer layer, the wallpaper adhesive bonds directly to the paper facing of the drywall. Attempting to remove such wallpaper often results in severe damage, tearing away large sections of the drywall’s paper layer, which necessitates extensive and costly repair work. A professional can assess the risk and employ gentler, more controlled methods or advise on the best repair strategy.
3. Presence of Lead-Based Paint
As previously highlighted, if your home was built before 1978, there’s a significant risk of lead-based paint under the wallpaper. Disturbing these layers can release hazardous lead dust. If testing confirms the presence of lead paint, it is highly recommended to hire a lead-certified professional. These experts are trained in lead-safe work practices, utilizing containment, specialized equipment, and proper disposal methods to protect your household from exposure, ensuring compliance with strict environmental regulations.
4. Extensive Wall Damage Beneath the Wallpaper
Sometimes, wallpaper is used to conceal existing wall imperfections, such as cracks, holes, or uneven surfaces. If you suspect significant underlying damage, a professional can more accurately assess the extent of the problem during removal and provide comprehensive repair solutions, often more efficiently and effectively than a DIY approach. They can seamlessly integrate removal with drywall repair.
5. Delicate or Irreplaceable Wall Surfaces
If the wallpaper is applied to plaster walls, historic surfaces, or other delicate substrates that are particularly susceptible to moisture damage or aggressive scraping, professional expertise is invaluable. Professionals understand how to work with these materials, using methods that preserve the integrity of the underlying structure.
6. Large or High-Ceilinged Rooms
Removing wallpaper from large areas, especially rooms with high ceilings (e.g., foyers, stairwells), requires specialized equipment like scaffolding or tall ladders, as well as significant endurance. These projects are physically demanding and carry increased safety risks for homeowners. Professionals are equipped with the right gear and experience to work safely and efficiently in such environments.
7. Time Constraints or Lack of Experience
Wallpaper removal is a time-consuming and often messy process. If you have tight deadlines for a renovation, lack the necessary experience, or simply do not have the time to dedicate to a meticulous removal, hiring a professional is a practical solution. They can complete the job faster and with a higher degree of precision, allowing you to focus on other aspects of your project.
8. Unresponsive Wallpaper
If, after attempting a test patch or a small section with appropriate techniques, the wallpaper proves exceptionally stubborn and resistant to removal, it may be an indicator that professional intervention is needed. This often points to unusual adhesive compositions or particularly challenging wall conditions that require expert assessment and specialized tools.
While the satisfaction of a DIY project is undeniable, knowing when to enlist professional help is a mark of a discerning homeowner. For projects presenting significant challenges or safety concerns, engaging a qualified expert ensures the integrity of your home and the quality of your renovation. Starhouse supports informed decisions, advocating for professional assistance when the scope or complexity of wallpaper removal exceeds comfortable DIY capabilities.
Sources
- How to Remove Wallpaper in 6 Steps | Benjamin Moore
- Lead-Based Paint and Demolition | US EPA
- 9 Best Wallpaper Removers | The Family Handyman
Frequently Asked Questions About Wallpaper Removal
How long does wallpaper removal typically take?
Wallpaper removal time varies significantly based on the type of wallpaper, the adhesive, the number of layers, and the size of the room, but a single layer in an average 10×12 foot room can take anywhere from 8 to 24 hours of active work for a DIY enthusiast.
Can I paint over wallpaper instead of removing it?
While technically possible, painting over wallpaper is generally not recommended as it can lead to bubbling, peeling, and an uneven finish, and will make future removal significantly more difficult. The moisture from paint can reactivate the adhesive, causing the paper to lift or warp, and seams may become more prominent.
What’s the best way to remove wallpaper glue residue?
The best way to remove wallpaper glue residue is by using a solution of warm water and liquid dish soap, or a commercial wallpaper adhesive remover, applied with a sponge and then gently scraped or wiped away. Ensure all residue is removed until the wall feels smooth and clean to prevent issues with new finishes.
Will removing wallpaper damage my drywall?
Removing wallpaper can damage drywall, especially if the wallpaper was applied to unprimed drywall, if too much water is used, or if sharp tools are used improperly. Damage typically manifests as torn paper facing or gouges, which require repair before painting or re-wallpapering.
Is it necessary to prime walls after wallpaper removal?
Yes, it is absolutely necessary to prime walls after wallpaper removal, especially with an oil-based or shellac-based primer, to seal any residual adhesive, prevent stains from bleeding through new paint, equalize surface porosity, and ensure optimal adhesion for your new finish.
Can I use a fabric softener solution for wallpaper removal?
A solution of warm water and fabric softener (1:1 ratio) can be an effective DIY wallpaper stripper for permeable paper-backed wallpapers, as the softener helps break down the adhesive bond. However, it may not be strong enough for vinyl wallpapers or very old, stubborn adhesives and results can be inconsistent.
What should I do if I find mold behind the wallpaper?
If you find mold behind the wallpaper, immediately cease removal and address the mold issue. For small areas (less than 10 sq ft), you can typically clean it with a bleach solution (1 cup bleach per gallon of water) or a commercial mold remover while wearing appropriate PPE. For larger areas or persistent mold, consult a mold remediation specialist to ensure proper and safe removal, as mold indicates a moisture problem that must be resolved.
Conclusion
Wallpaper removal, while often perceived as a formidable undertaking, is a highly manageable project when approached with comprehensive knowledge, the right tools, and meticulous execution. From accurately identifying your wallpaper type to diligently preparing your space, applying the most effective removal technique, and meticulously cleaning and repairing your walls, each step contributes to a flawless foundation for your next design vision. This guide has provided the precise, authoritative insights necessary to navigate the process with confidence, transforming outdated surfaces into pristine canvases.
At Starhouse, we understand that every detail contributes to the overall ambiance and function of your home. A perfectly prepared wall is the first brushstroke in creating a space that truly resonates with your personal style and comfort. As we meticulously curate our inaugural collection of wall décor, furnishings, textiles, lighting, and accessories, your insights are invaluable to us. We are building a collection designed to inspire and elevate every room, reflecting the discerning tastes of homeowners like you.
We invite you to share your design aspirations, your current challenges, and what you envision for your ideal living spaces. Your input directly influences the exquisite pieces and essential solutions we bring to Starhouse. Join our community and tell us what you’re looking for to gain early access to our curated selections, designed to help you create a home that is both beautiful and uniquely yours.