Click vinyl wallpaper represents a significant advancement in interior surfacing, offering homeowners and designers a durable, versatile, and aesthetically compelling alternative to traditional paint or conventional wallpapers. This innovative wallcovering leverages advanced material science to deliver exceptional performance, combining the visual appeal of intricate patterns and textures with the practical benefits of vinyl construction, including superior resistance to moisture and wear, alongside simplified installation processes.
At Starhouse, we understand that selecting the right wall treatment is pivotal to defining the character and comfort of your home. Our curated collection emphasizes solutions that not only elevate design but also deliver lasting value and functionality. Click vinyl wallpaper stands out as a prime example, providing a robust, low-maintenance, and stylish option for virtually any room. Its construction, typically featuring a layered composition with a strong vinyl face and a specialized backing, ensures both visual depth and enduring resilience, making it a smart investment for spaces that demand both beauty and practicality.
Key Takeaways
- Durability and Water Resistance: Click vinyl wallpaper is engineered for exceptional longevity and moisture resistance, making it suitable for high-traffic areas, kitchens, and bathrooms where traditional wallpapers falter.
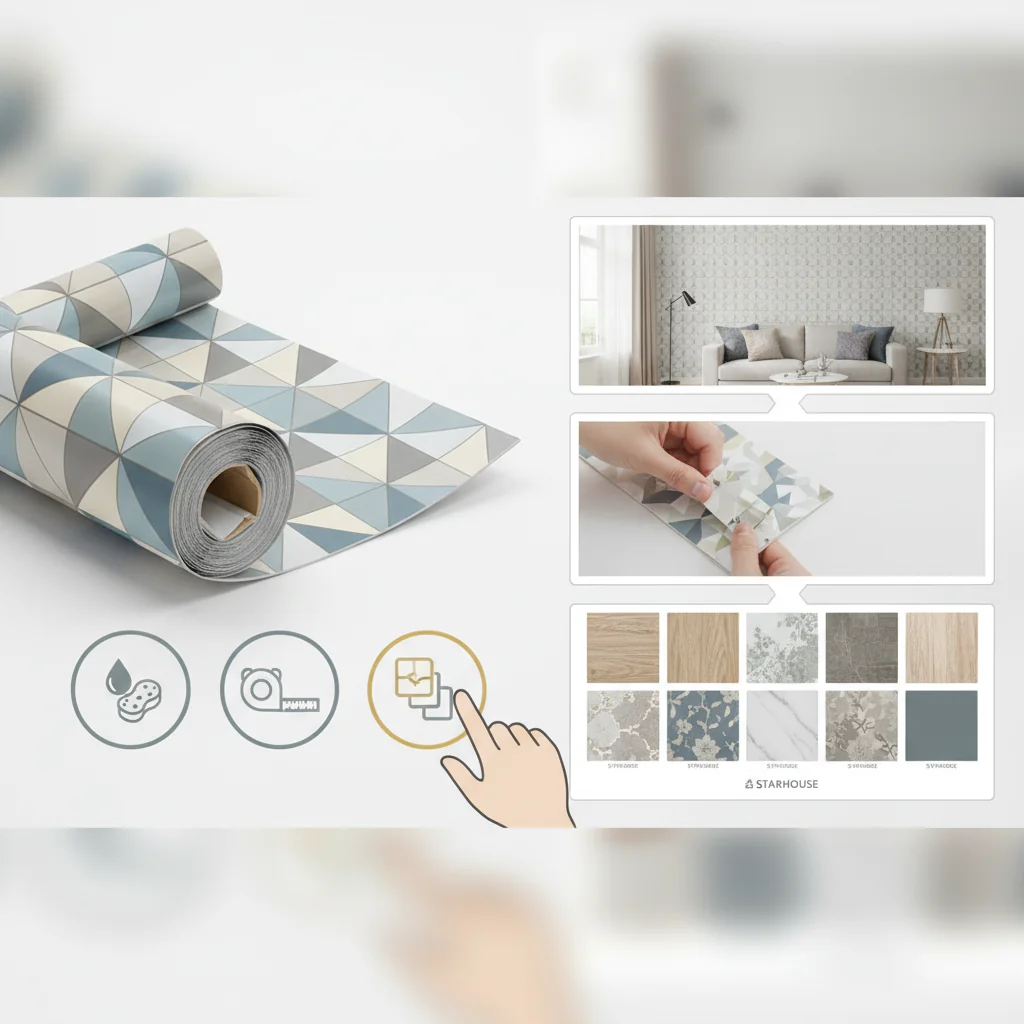
- Ease of Installation: Available in peel-and-stick, pre-pasted, and paste-the-wall formats, this wallcovering simplifies the installation process, often enabling competent DIY application with professional-grade results.
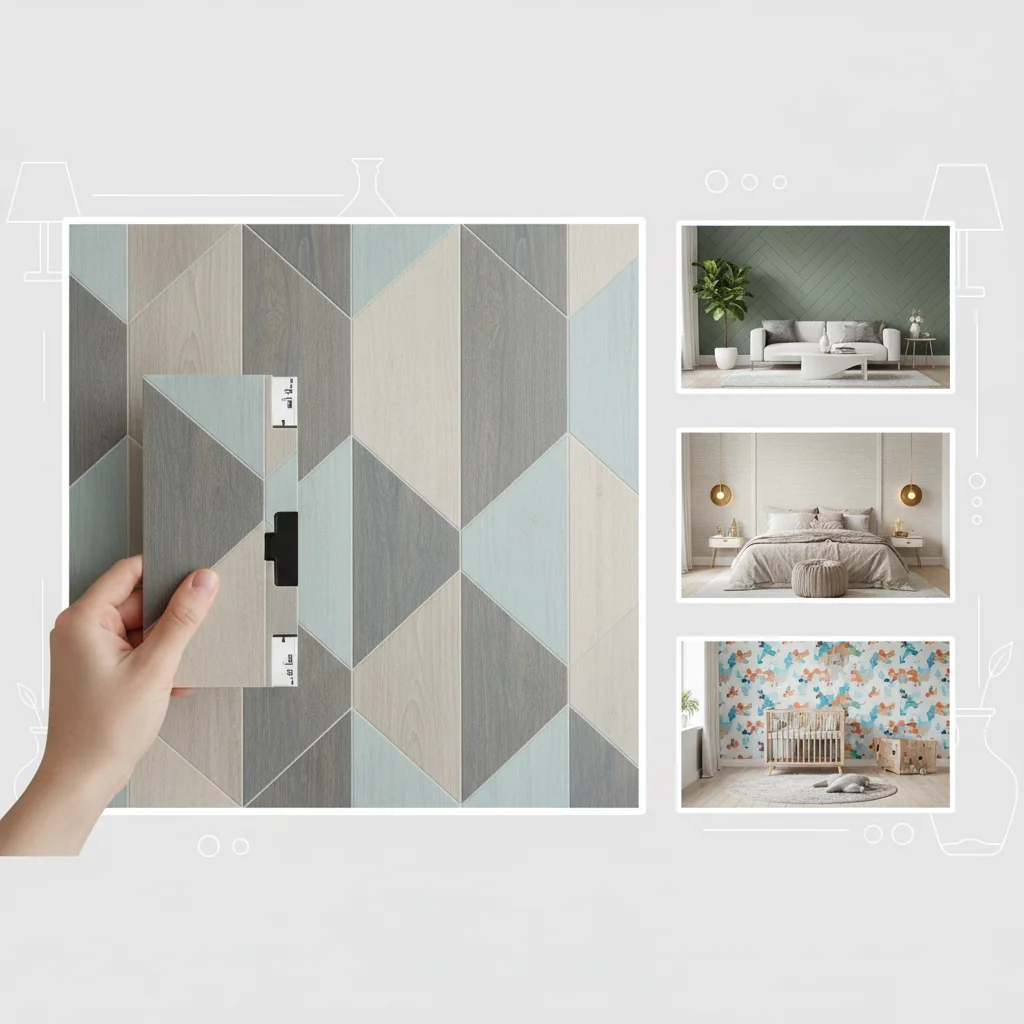
- Vast Aesthetic Versatility: It offers an expansive range of designs, including realistic textural illusions like wood, brick, and fabric, alongside intricate patterns and vibrant murals, catering to virtually any interior design style.
- Low Maintenance: The durable vinyl surface is easily cleaned with a damp cloth, resisting stains and scuffs, which significantly reduces long-term upkeep compared to painted surfaces or delicate paper wallpapers.
- Enhanced Indoor Air Quality: Modern click vinyl wallpapers often feature low-VOC formulations, contributing to healthier indoor environments, a critical consideration for contemporary homes.
- Long-Term Value: Despite a potentially higher initial cost than paint, the superior durability, longevity, and reduced maintenance requirements of click vinyl wallpaper offer substantial long-term value and aesthetic integrity.
What is Click Vinyl Wallpaper? An In-Depth Look at its Composition and Core Benefits
Click vinyl wallpaper is a sophisticated wallcovering solution characterized by its layered construction, which imparts exceptional durability, water resistance, and aesthetic versatility, distinguishing it from traditional paper-based or fabric wallcoverings. This advanced material, engineered for both residential and commercial applications, offers a robust and low-maintenance alternative for enhancing interior spaces with significant visual impact and practical advantages.
At its core, click vinyl wallpaper is composed of several distinct layers, each contributing to its overall performance and appearance. Typically, these layers include a backing material, a vinyl substrate, a printed design layer, and a protective top coat. The synergy of these components results in a product that is not only visually appealing but also highly functional, designed to withstand the rigors of daily life and maintain its pristine condition over an extended period. The term “click” is often used metaphorically to denote the ease and precision of installation, echoing the snap-together convenience found in click-lock flooring systems, although the installation methods for vinyl wallpaper vary.
Composition of Click Vinyl Wallpaper
Understanding the layered structure of click vinyl wallpaper illuminates its superior characteristics:
- Backing Material: This is the innermost layer, designed to adhere to the wall surface. Common backing materials include non-woven fabric, paper, or woven fabric. Non-woven backings are particularly popular for their tear resistance and ease of removal, often allowing for paste-the-wall applications where adhesive is applied directly to the wall, not the wallpaper itself.
- Vinyl Substrate: The primary component, typically made from polyvinyl chloride (PVC), provides the inherent strength, flexibility, and water resistance of the wallpaper. This layer is engineered to be robust, resisting punctures, tears, and abrasions more effectively than paper-based alternatives.
- Printed Design Layer: This layer carries the aesthetic appeal, showcasing an extensive array of colors, patterns, textures, and photographic reproductions. Advanced printing technologies allow for incredibly realistic simulations of natural materials like wood grain, stone, brick, fabric, and intricate artistic motifs.
- Protective Top Coat: The outermost layer is a clear, durable finish that seals and protects the printed design from environmental factors. This coating enhances resistance to scratches, scuffs, UV fading, and moisture, making the wallpaper easy to clean and preserving its vibrancy over time.
Core Benefits of Click Vinyl Wallpaper
The engineered composition of click vinyl wallpaper translates into a multitude of advantages for homeowners and designers:
- Exceptional Durability: The robust vinyl layer and protective top coat render these wallpapers highly resistant to physical damage, including scratches, dents, and scuffs. This makes them an ideal choice for high-traffic areas such as hallways, children’s rooms, and commercial spaces.
- Superior Water Resistance: Unlike traditional paper wallpapers that can warp or degrade with moisture exposure, vinyl wallcoverings are inherently water-resistant. This quality makes them perfectly suited for moisture-prone environments like bathrooms, kitchens, and laundry rooms, where splashes and humidity are common concerns.
- Effortless Maintenance: The smooth, non-porous surface of vinyl wallpaper is remarkably easy to clean. Most spills and marks can be wiped away with a damp cloth and mild detergent, eliminating the need for specialized cleaning products or laborious processes. This ensures the walls remain fresh and hygienic with minimal effort.
- Simplified Installation: Modern click vinyl wallpapers are designed for straightforward application. Options like peel-and-stick versions feature self-adhesive backings, while paste-the-wall types allow for adhesive application directly to the wall, simplifying alignment and reducing mess. This often makes DIY installation feasible for those with a moderate skill level.
- Versatile Aesthetic Options: The printing capabilities on vinyl are virtually limitless, offering an unparalleled range of designs. From sophisticated geometrics and classic damasks to realistic textural illusions and expansive murals, click vinyl wallpaper can achieve any desired aesthetic, allowing for personalized and impactful interior statements.
- Enhanced Longevity: Due to their inherent durability and resistance to wear, tear, and fading, click vinyl wallpapers boast a significantly longer lifespan than many other wall treatments. This longevity translates into a sound investment, as walls retain their aesthetic appeal and structural integrity for many years, reducing the frequency and cost of redecorating.
- Improved Acoustics: The thickness and material composition of some vinyl wallcoverings can contribute to a marginal improvement in room acoustics, absorbing sound waves more effectively than a bare painted wall.
- Conceals Wall Imperfections: The substantial nature of vinyl wallpaper can effectively mask minor wall imperfections, such as hairline cracks or uneven textures, providing a smooth and flawless finish without extensive wall preparation.
In essence, click vinyl wallpaper is a high-performance wallcovering that marries aesthetic sophistication with practical resilience. It offers a compelling solution for creating impactful, durable, and easily maintainable interior spaces, aligning perfectly with Starhouse’s commitment to curating products that enhance both the beauty and functionality of your home.
Types of Click Vinyl Wallpaper: Beyond the Basic Roll
Click vinyl wallpaper encompasses a diverse range of products, each engineered with specific installation methods and performance characteristics to suit various project requirements and preferences. Understanding these distinctions is crucial for selecting the optimal wallcovering that aligns with your design vision, installation comfort level, and long-term maintenance expectations.
The primary classifications often relate to their backing material and adhesive application method, which directly impacts the ease of installation and, in some cases, the ease of removal. From the DIY-friendly convenience of peel-and-stick to the professional finish of paste-the-wall options, the market offers sophisticated solutions for every type of decorator.
Key Types of Click Vinyl Wallpaper
Here, we detail the most prevalent types of click vinyl wallpaper, highlighting their unique attributes:
1. Peel-and-Stick Vinyl Wallpaper (Self-Adhesive)
Peel-and-stick vinyl wallpaper is a self-adhesive wallcovering that features a pre-applied adhesive layer on its backing, protected by a removable liner. This design allows for direct application to a clean, smooth wall surface by simply peeling off the backing and pressing the wallpaper into place. It is renowned for its user-friendly installation process, making it an exceptionally popular choice for DIY enthusiasts, renters, and those seeking temporary or frequently changeable design solutions.
- Installation: The most straightforward method. Requires no external glues or pastes. Simply cut to size, peel the backing, and smooth onto the wall.
- Removal: Generally designed for clean removal without damaging the wall surface or leaving sticky residue, especially when applied to properly primed walls. This makes it ideal for apartments or spaces where design updates are frequent.
- Best For: Accent walls, rental properties, temporary decor, DIY projects, furniture upcycling, and small spaces like powder rooms or closet interiors.
- Considerations: Surface preparation is critical; walls must be exceptionally smooth, clean, and primed for optimal adhesion and to prevent bubbling. Not all peel-and-stick options are as durable as their traditional counterparts, though quality has significantly improved.
2. Pre-Pasted Vinyl Wallpaper
Pre-pasted vinyl wallpaper features a dry adhesive coating on its backing that is activated by water, eliminating the need for separate glue application. This type offers a convenient middle ground between peel-and-stick and paste-the-wall options, providing a relatively clean and efficient installation process for those comfortable with traditional wallpapering techniques.
- Installation: Rolls are typically cut to length, then dipped in a water tray or sprayed with water to activate the adhesive. The moistened strip is then applied to the wall. This method allows for some repositioning during installation.
- Removal: Depending on the adhesive type and backing, removal can range from strippable (comes off in full sheets) to peelable (top layer peels, leaving backing) or even washable.
- Best For: Full room applications, homeowners looking for a balance of ease and durability, and those who prefer a more traditional wallpaper feel without the mess of separate paste.
- Considerations: Requires a water trough or spray bottle, and careful handling to avoid over-wetting or creasing. The adhesive bond is strong but generally allows for easier removal than unpasted options.
3. Paste-the-Wall Vinyl Wallpaper (Non-Woven Backing)
Paste-the-wall vinyl wallpaper features a durable non-woven backing, which allows the adhesive to be applied directly to the wall surface rather than the wallpaper itself. This innovative installation method significantly simplifies the process, reduces mess, and makes handling the wallpaper strips much easier, leading to a smoother, more professional finish. The non-woven backing also contributes to its stability and ease of removal.
- Installation: Adhesive is rolled or brushed directly onto the wall section where the strip will be applied. The dry wallpaper strip is then positioned onto the pasted wall. This method prevents the wallpaper from expanding when wet, minimizing bubbling and stretching, and allows for easy repositioning.
- Removal: Non-woven paste-the-wall wallpapers are typically “strippable,” meaning they can be dry-stripped from the wall in full sheets without leaving significant residue or damaging the drywall. This makes redecorating much simpler.
- Best For: Achieving a high-quality, professional finish in any room, including high-humidity areas, and for homeowners who value durability and ease of future redecoration.
- Considerations: Requires a specific wallpaper paste (often a ready-mixed, heavy-duty clear paste) and the necessary tools for paste application.
4. Unpasted Vinyl Wallpaper (Traditional)
Unpasted vinyl wallpaper requires the application of a separate wallpaper adhesive (paste) to its backing before installation. This is the most traditional method, offering a strong, long-lasting bond and often associated with heavier-duty commercial-grade vinyls. While it demands more effort and skill, it allows for precise control over adhesive type and quantity.
- Installation: Paste is applied to the back of each wallpaper strip, which then needs to “book” (fold paste-to-paste) for a few minutes to allow the adhesive to activate and the paper to relax before hanging. This requires more experience and can be messier.
- Removal: Often more challenging to remove than other types, typically requiring a steamer or chemical stripper, and may leave residue or damage the wall surface if not properly prepared.
- Best For: Permanent installations, commercial projects, and areas where maximum adhesion and durability are paramount, often chosen by professional installers.
- Considerations: Most labor-intensive installation. Requires careful measurement, cutting, pasting, and booking. Not recommended for novice DIYers.
5. Textured Vinyl Wallpaper
Textured vinyl wallpaper features an embossed or raised surface that mimics tactile materials like fabric, stucco, plaster, wood grain, or even subtle geometric patterns. This added dimension creates visual depth and interest, transforming flat walls into dynamic surfaces. It can be found in peel-and-stick, pre-pasted, and paste-the-wall formats.
- Aesthetic Impact: Adds tactile quality and visual richness to a space, making it feel more luxurious or rustic depending on the texture.
- Durability: The texture can also help to conceal minor wall imperfections and add another layer of resilience.
- Best For: Creating focal points, adding warmth and sophistication, or achieving specific design aesthetics like industrial chic or natural organic.
- Considerations: Textured surfaces may accumulate dust more readily and require gentle cleaning to preserve the embossed details.
6. Heavy-Duty/Commercial Grade Vinyl Wallpaper
This category refers to vinyl wallpapers engineered for extreme durability and longevity, typically thicker and more robust than standard residential options. They are often rated by industry standards (e.g., Type I, Type II) for their resistance to abrasion, impact, and fire. These are usually unpasted or paste-the-wall types.
- Durability: Designed to withstand significant wear and tear, making them ideal for commercial settings, public spaces, and high-traffic residential areas.
- Thickness: Generally thicker, ranging from 15 mil to 25 mil or more, which provides superior protection and can better conceal wall imperfections.
- Best For: Commercial offices, hospitality environments, healthcare facilities, and highly active residential areas where maximum resilience is required.
- Considerations: Can be more challenging to install due to their weight and rigidity, often requiring professional expertise.
Each type of click vinyl wallpaper offers distinct advantages, allowing for tailored solutions that meet specific functional and aesthetic demands. Starhouse curates a selection that balances innovative design with practical installation, ensuring that you can find the perfect fit for your home transformation project.
Exploring the Styles and Aesthetics: Design Versatility for Every Vision
Click vinyl wallpaper stands as a remarkably versatile design tool, capable of transforming any space to reflect a specific aesthetic, from minimalist modernity to opulent traditionalism. Its advanced printing technology allows for the reproduction of an astonishing array of patterns, textures, and visual effects, providing designers and homeowners with an expansive palette to realize their interior visions.
The ability of vinyl wallpaper to convincingly mimic natural materials, replicate intricate artistic designs, and carry bold, contemporary graphics makes it an unparalleled choice for achieving diverse stylistic expressions. Whether you aim to create a serene sanctuary, a vibrant focal point, or a sophisticated backdrop, there is a click vinyl wallpaper style perfectly suited to your aspirations.
Diverse Design Styles Achievable with Click Vinyl Wallpaper
Let’s delve into the breadth of styles that can be masterfully executed using click vinyl wallpaper:
1. Modern & Minimalist
This style emphasizes clean lines, geometric precision, and a restrained color palette, often focusing on functionality and simplicity. Click vinyl wallpaper delivers this aesthetic through subtle textures, monochromatic schemes, and abstract patterns.
- Patterns: Geometric shapes (e.g., hexagons, chevrons, linear designs), subtle abstract motifs, solid colors with a tactile finish (e.g., faux concrete, brushed metal).
- Colors: Neutrals (grays, whites, blacks, taupes), muted pastels, or bold single-color statements.
- Impact: Creates a sophisticated, uncluttered, and serene environment, promoting a sense of calm and order.
- Ideal Rooms: Living rooms, home offices, bedrooms, and contemporary dining areas.
2. Traditional & Classic
Rooted in historical design periods, traditional styles evoke a sense of timeless elegance, formality, and intricate detail. Vinyl wallpaper excels at replicating the rich patterns and luxurious textures associated with these aesthetics.
- Patterns: Damasks, florals (e.g., chintz, botanical prints), toile, stripes, and classical motifs.
- Colors: Deep jewel tones (emerald, ruby, sapphire), rich golds, creams, and muted historical palettes.
- Impact: Imbues a space with grandeur, warmth, and a sense of enduring sophistication.
- Ideal Rooms: Formal dining rooms, master bedrooms, studies, and entryways.
3. Rustic & Farmhouse
Celebrating natural materials, worn textures, and a comfortable, unpretentious charm, rustic and farmhouse styles are effortlessly achieved with vinyl wallpaper that mimics organic elements.
- Patterns: Faux wood planks (shiplap, reclaimed wood), brick, stone, linen textures, subtle plaids, and botanical illustrations.
- Colors: Earth tones, weathered grays, warm whites, muted blues, and natural greens.
- Impact: Creates a cozy, inviting, and authentic atmosphere reminiscent of country living.
- Ideal Rooms: Kitchens, breakfast nooks, living rooms, and cabins.
4. Bohemian & Eclectic
Characterized by a free-spirited, artistic, and globally inspired approach, these styles blend diverse patterns, textures, and colors. Vinyl wallpaper can introduce bold statements and intricate global motifs.
- Patterns: Intricate mandalas, Moroccan tiles, ikat, tribal prints, large-scale botanicals, and abstract art.
- Colors: Rich, vibrant hues (fuchsia, turquoise, orange), layered with earthy tones and metallics.
- Impact: Fosters a personalized, well-traveled, and creatively expressive environment.
- Ideal Rooms: Creative studios, living rooms, bedrooms, and spaces designed for personal expression.
5. Art Deco & Glam
This style is defined by geometric patterns, metallic accents, and a sense of opulent luxury from the 1920s and 30s. Vinyl wallpaper can capture its distinct elegance and boldness.
- Patterns: Fan shapes, sunbursts, chevrons, geometric repeats, stylized animal prints, and metallic accents.
- Colors: Black, gold, silver, deep blues, emerald green, and rich purples.
- Impact: Creates a luxurious, sophisticated, and dramatic ambiance with a touch of vintage glamour.
- Ideal Rooms: Powder rooms, formal living spaces, bars, and master suites.
6. Coastal & Nautical
Evoking the serene and refreshing atmosphere of the seaside, coastal and nautical styles rely on light colors, natural textures, and marine-inspired motifs.
- Patterns: Subtle stripes, coral, seashells, anchors, weathered wood, and seagrass textures.
- Colors: Whites, blues (navy, sky, aqua), sandy beiges, and soft greens.
- Impact: Instills a calm, airy, and relaxed feeling, reminiscent of a beach retreat.
- Ideal Rooms: Bathrooms, sunrooms, bedrooms, and beach houses.
7. Industrial Chic
This style celebrates raw, utilitarian elements often found in factories and warehouses. Vinyl wallpaper can convincingly replicate the grittiness and authenticity of industrial materials.
- Patterns: Faux concrete, exposed brick, distressed metal, corrugated steel, and abstract urban graphics.
- Colors: Grays, blacks, whites, and metallic tones, often with pops of warm industrial colors like rust.
- Impact: Creates a rugged, edgy, and modern aesthetic with a sense of urban sophistication.
- Ideal Rooms: Lofts, urban apartments, offices, and accent walls in contemporary living spaces.
8. Children’s & Playful
Designed to inspire imagination and joy, children’s wallpaper often features vibrant colors, whimsical characters, and engaging themes. Vinyl’s durability and easy cleanability make it perfect for these spaces.
- Patterns: Thematic designs (e.g., jungle animals, outer space, fairy tales), polka dots, stripes, or educational motifs.
- Colors: Bright, cheerful palettes, pastels, or bold primary colors.
- Impact: Creates a stimulating, fun, and personalized environment for children.
- Ideal Rooms: Nurseries, children’s bedrooms, and playrooms.
9. Mural Options
Beyond repeating patterns, click vinyl wallpaper is also available as large-scale murals. These single, expansive images can cover an entire wall, creating a dramatic focal point or an immersive environment.
- Imagery: Scenic landscapes, cityscapes, abstract art, historical maps, or custom photographic prints.
- Impact: Transforms a wall into a work of art, opening up small spaces or creating a grand statement.
- Ideal Rooms: Feature walls in living rooms, dining rooms, bedrooms, or commercial lobbies.
The extensive aesthetic range of click vinyl wallpaper ensures that regardless of your preferred interior design style, there is a pattern, texture, or mural that can perfectly articulate your vision. Starhouse is dedicated to offering a collection that reflects this vast diversity, empowering you to create spaces that are uniquely yours.
Materials and Construction: Understanding What Makes Quality Vinyl Wallpaper
The superior performance and aesthetic fidelity of click vinyl wallpaper are direct results of its meticulously engineered material composition and construction. Quality vinyl wallpaper is not merely a decorative covering; it is a sophisticated, multi-layered product designed for durability, ease of maintenance, and environmental responsibility, making the choice of materials paramount to its overall value and longevity.
Understanding the components—from the vinyl itself to the backing and protective coatings—empowers consumers to make informed decisions that align with their functional needs, aesthetic preferences, and health considerations. The innovation in material science has also led to options that address concerns regarding indoor air quality and sustainability, ensuring that modern vinyl wallcoverings are both beautiful and responsible.
Key Material Components and Their Significance
1. Vinyl Composition: PVC and Beyond
The primary material in the face layer of most click vinyl wallpaper is polyvinyl chloride (PVC). PVC is prized for its inherent strength, flexibility, and resistance to water, chemicals, and abrasion. However, the quality and formulation of PVC can vary significantly:
- Standard PVC: Offers excellent durability and water resistance, making it a robust choice for various applications.
- Phthalate-Free Vinyl: Modern advancements have led to the development of phthalate-free PVC, which eliminates certain plasticizers that have raised health concerns. This option contributes to improved indoor air quality and is a preferred choice for residential settings, especially children’s rooms.
- Chlorine-Free Vinyl (Polyolefin/PET): For those seeking even greater environmental consideration, some manufacturers offer chlorine-free vinyl alternatives, often made from polyolefin or recycled PET (polyethylene terephthalate). These materials provide comparable performance characteristics while minimizing environmental impact during production and disposal.
The thickness of the vinyl layer, often measured in mils (thousandths of an inch) or gauges, directly correlates with its durability and ability to conceal minor wall imperfections. Thicker vinyls (e.g., 15-25 mil) are generally more robust and resistant to impact than thinner counterparts.
2. Backing Materials: The Foundation for Adhesion and Removal
The backing layer is critical for the wallpaper’s adhesion to the wall and its ease of installation and removal. Different backing types offer distinct advantages:
- Non-Woven Backing: Composed of a blend of natural and synthetic fibers, non-woven backings are exceptionally dimensionally stable, meaning they resist stretching or shrinking when wet. This characteristic is ideal for “paste-the-wall” applications, where adhesive is applied directly to the wall, making installation cleaner and easier. Non-woven backings are also typically “strippable,” allowing for dry removal in full sheets without damaging the wall.
- Paper Backing: Traditional paper backings offer a good surface for adhesive absorption. However, they can expand when wet and contract as they dry, potentially leading to seams that pull apart. Removal often requires steaming or soaking.
- Fabric Backing: Less common in residential click vinyl wallpaper, fabric backings (e.g., cotton, polyester) are often used in heavy-duty commercial wallcoverings for added strength and tear resistance. They typically require a strong, heavy-duty paste.
- Self-Adhesive Backing: Found in peel-and-stick vinyl wallpapers, this backing features a pre-applied pressure-sensitive adhesive protected by a release liner. It offers the simplest installation and is designed for clean removal, making it ideal for temporary applications or rentals.
3. Print Quality: Defining the Aesthetic Realism
The quality of the printed design layer is paramount to the wallpaper’s aesthetic appeal and realism. High-resolution printing technologies and advanced ink formulations are essential for:
- Clarity and Detail: Ensuring intricate patterns, fine lines, and photographic images are rendered with crispness and precision.
- Color Fidelity: Achieving accurate and vibrant color reproduction that matches the intended design.
- Textural Illusion: Convincingly mimicking the look of natural materials like wood, stone, or fabric, often enhanced by embossing techniques that align with the printed pattern (registered embossing).
- Ink Types: Modern vinyl wallpapers often utilize environmentally friendly, water-based, or UV-cured inks that are durable and resistant to fading.
4. Protective Coatings: Enhancing Durability and Cleanability
The outermost layer is a clear, protective top coat that significantly contributes to the wallpaper’s long-term performance:
- Abrasion Resistance: A robust top coat protects the printed design from scuffs, scratches, and general wear and tear, crucial for high-traffic areas.
- UV Resistance: UV stabilizers in the coating help prevent the colors from fading when exposed to sunlight, maintaining the wallpaper’s vibrancy over time.
- Stain Resistance: The non-porous nature of the protective layer makes the surface highly resistant to stains, allowing most spills to be wiped clean easily.
- Antimicrobial Properties: Some specialized vinyl wallcoverings incorporate antimicrobial agents into their top coat, inhibiting the growth of mold, mildew, and bacteria, making them suitable for healthcare settings or humid environments.
Indoor Air Quality and Sustainability Considerations
A significant advancement in click vinyl wallpaper manufacturing is the focus on indoor air quality and environmental responsibility. Concerns about Volatile Organic Compounds (VOCs) have led to the development of low-VOC and no-VOC formulations.
Volatile Organic Compounds (VOCs) are organic chemicals that have a high vapor pressure at ordinary room temperature, causing them to evaporate and enter the surrounding air, potentially impacting indoor air quality. Reputable manufacturers now prioritize reducing or eliminating VOCs in their products, including adhesives and inks. Certifications from third-party organizations play a crucial role in verifying these claims.
For instance, products certified by programs like GREENGUARD Certification by UL ensure that wallcoverings meet stringent chemical emissions limits, contributing to healthier indoor environments. When selecting click vinyl wallpaper, seeking out products with such certifications provides assurance of their commitment to indoor air quality.
Furthermore, some brands are exploring options for recycled content in their vinyl or backing materials and developing products that are easier to recycle at the end of their lifecycle. Starhouse is committed to curating options that not only meet high aesthetic and performance standards but also align with a growing demand for sustainable and health-conscious home décor solutions.
How to Choose the Right Click Vinyl Wallpaper for Your Space
Selecting the ideal click vinyl wallpaper involves a thoughtful assessment of several critical factors, ensuring the chosen design not only enhances your aesthetic vision but also meets the practical demands of your specific environment. The right wallpaper integrates seamlessly with your existing décor, performs optimally in its intended location, and aligns with your lifestyle and installation preferences.
This decision-making process moves beyond mere pattern preference, requiring a strategic evaluation of durability needs, lighting conditions, room functionality, and your comfort level with different installation methods. By systematically addressing these considerations, you can confidently choose a click vinyl wallpaper that delivers lasting beauty and satisfaction.
Key Factors for Informed Selection
1. Room Functionality and Traffic Level
The primary use of a room dictates the required durability and resistance of your wallpaper:
- High-Traffic Areas (Hallways, Entryways, Kids’ Rooms): These spaces require the most durable options. Opt for heavy-duty vinyl wallpaper (e.g., thicker vinyl, commercial-grade) with excellent abrasion and scuff resistance. Washability is paramount for easy cleaning of marks and spills.
- Moisture-Prone Areas (Kitchens, Bathrooms, Laundry Rooms): Water and humidity resistance are non-negotiable. Choose vinyl wallpaper explicitly rated for moisture, often with a waterproof or highly water-resistant surface. These options prevent mold and mildew growth and ensure the wallpaper remains intact despite splashes and steam.
- Living Rooms & Dining Rooms: While durability is still important, these areas often allow for a wider range of aesthetic choices. You can prioritize design and texture, though washability remains a beneficial feature.
- Bedrooms & Home Offices: These spaces generally experience less wear and tear, allowing for more delicate patterns or highly textured options. Focus can shift more towards creating a desired ambiance and personal expression.
2. Lighting Conditions and Room Orientation
Natural and artificial light significantly impact how wallpaper appears in a room:
- North-Facing Rooms: Tend to receive cooler, indirect light. Opt for wallpapers with warm undertones (creams, yellows, soft oranges) or designs that reflect light (subtle metallics, lighter shades) to prevent the room from feeling too dim or cold.
- South-Facing Rooms: Bathed in bright, warm light throughout the day. These rooms can handle deeper, cooler colors or bolder patterns without feeling overwhelmed.
- East-Facing Rooms: Receive bright morning light. Consider patterns that look good in both bright and dimmer light as the day progresses.
- West-Facing Rooms: Get intense afternoon and evening light. Wallpapers that can soften this strong light or capitalize on dramatic shadows can be effective.
- Artificial Lighting: Consider how your lighting fixtures will illuminate the wallpaper. Textured or metallic wallpapers can create interesting shadows and highlights under specific lighting.
3. Existing Décor and Color Palette
Your wallpaper should complement or thoughtfully contrast with your current furnishings, textiles, and paint colors:
- Harmonious Integration: Select patterns and colors that share common elements with your existing palette. For example, if your furniture has warm wood tones, choose wallpaper with warm-neutral or complementary color accents.
- Creating Contrast: A bold wallpaper can serve as a striking accent against a neutral room. Ensure the contrast is intentional and visually balanced.
- Scale and Proportion: A large, bold pattern can overwhelm a small room, while a tiny, intricate pattern might get lost in a vast space. Match the scale of the pattern to the size of the room and the wall you intend to cover.
- Consider the “Fifth Wall”: If your ceiling is also part of your design plan, ensure the wallpaper choice for walls complements it.
4. Pattern Scale and Visual Impact
The size and complexity of a pattern have a direct effect on the perceived size and feel of a room:
- Small Rooms: Smaller patterns, subtle textures, or lighter colors can make a compact space feel larger and more open. Avoid overly large or busy patterns that can make the walls feel like they are closing in.
- Large Rooms: Can accommodate larger, more dramatic patterns and deeper colors without feeling overwhelmed. Large-scale murals are particularly effective in expansive spaces.
- Vertical Patterns: Stripes or patterns with a strong vertical orientation can make ceilings appear higher.
- Horizontal Patterns: Can make a room feel wider or longer, but may also make ceilings feel lower.
- Busy Patterns: Best used on an accent wall to create a focal point, rather than on all four walls, which can feel overwhelming.
5. Installation Method Preference: DIY vs. Professional
Your comfort and skill level with wallpaper installation will influence the type of vinyl wallpaper you choose:
- DIY-Friendly: Peel-and-stick and paste-the-wall options are generally the most accessible for DIYers. Peel-and-stick requires minimal tools and no messy paste, while paste-the-wall is less messy than traditional unpasted methods.
- Professional Installation Recommended: Unpasted vinyl wallpapers, heavy-duty commercial grades, or complex murals often benefit from professional installation to ensure a flawless finish, especially if you lack experience.
- Tools and Time: Consider the time commitment and the tools required for each method. Peel-and-stick is fastest; unpasted is most time-consuming.
6. Budget Considerations
Click vinyl wallpaper varies in price based on material quality, brand, design complexity, and type:
- Price Range: Expect prices to range from approximately $0.50 to $5.00 per square foot, or $30 to $200+ per roll (a standard double roll covers about 56 sq ft). High-end, custom, or designer vinyl wallpapers can exceed these ranges.
- Long-Term Value: While initial cost might be higher than paint, consider the longevity, durability, and reduced maintenance of quality vinyl wallpaper. It often proves to be a more cost-effective solution over several years.
- Installation Costs: Factor in potential professional installation costs, which can range from $1-$7 per square foot, depending on location and complexity.
7. Sustainability and Indoor Air Quality
For health-conscious consumers, material composition is a key factor:
- Low-VOC/Phthalate-Free: Prioritize vinyl wallpapers that are certified low-VOC or explicitly state they are phthalate-free. This is particularly important for bedrooms, nurseries, and for individuals with sensitivities.
- Certifications: Look for third-party certifications such as GREENGUARD Gold, which verifies products meet rigorous chemical emission standards for healthier indoor environments.
By carefully evaluating these factors, you can confidently navigate the vast selection of click vinyl wallpaper and choose a product that perfectly enhances your home, reflecting both your personal style and practical needs. Starhouse is dedicated to guiding you through this selection process, offering expertly curated options that embody both beauty and performance.
As you consider the myriad possibilities, remember that your home is a reflection of your unique taste and aspirations. We are here to help you discover the perfect wallcovering that speaks to your vision. To explore options tailored to your specific desires and to gain early access to our curated collections, we invite you to tell us what you’re looking for. Share your preferences, and let us help you transform your space with unparalleled style and quality.
Precise Sizing and Measuring for Flawless Installation
Accurate sizing and meticulous measuring are the foundational steps for any successful click vinyl wallpaper installation, ensuring a seamless finish, minimizing waste, and preventing costly errors. Underestimating or miscalculating your material needs can lead to frustrating delays, mismatched patterns, and an unprofessional appearance. This critical phase requires careful attention to detail, accounting for wall dimensions, pattern repeats, and potential irregularities like doors and windows.
By following a systematic approach to measuring and calculating, you establish a precise plan that streamlines the installation process, reduces stress, and guarantees you have sufficient material to complete your project with confidence and a professional-grade outcome.
Essential Tools for Accurate Measurement
Before you begin, gather these fundamental tools:
- Reliable Tape Measure: A retractable tape measure, preferably 25 feet or longer, with clear markings in inches and feet.
- Pencil: For marking measurements directly on the wall or on your calculations.
- Level or Plumb Bob: Essential for ensuring your initial vertical lines are perfectly straight, which is crucial for pattern alignment.
- Step Ladder or Stepladder: To safely reach the full height of your walls.
- Notebook and Calculator: For recording measurements and performing calculations.
Step-by-Step Guide to Measuring Your Walls
1. Measure Wall Height
For each wall you plan to wallpaper, measure the height from the baseboard to the ceiling. Take at least three measurements across the width of the wall (left, middle, right) to account for any variations in ceiling or floor level. Use the longest measurement as your standard height for cutting strips.
Example: If a wall is 8 feet, 10 inches at its shortest point and 9 feet, 1 inch at its longest, use 9 feet, 1 inch as your working height.
2. Measure Wall Width
Measure the total width of each wall you intend to cover. If you have multiple walls, measure each one separately.
Example: A wall is 12 feet, 6 inches wide.
3. Calculate Total Square Footage
Multiply the height of each wall by its width to get the square footage. Sum the square footage for all walls to get your total area to be covered.
Formula: (Height in feet) x (Width in feet) = Square Footage (sq ft)
Example: If a wall is 9.08 feet (9’1″) high and 12.5 feet (12’6″) wide, the area is 9.08 * 12.5 = 113.5 sq ft.
4. Account for Openings (Doors and Windows)
While you won’t wallpaper over doors and windows, it’s generally recommended to include their areas in your initial calculation and then subtract them, but only if they are significantly large. For smaller openings, or if you’re conservative, you can simply include them in your total and rely on your waste allowance to cover the difference. For larger openings:
- Measure the height and width of each door and window.
- Calculate their individual square footage.
- Subtract these areas from your total wall square footage.
However, many professionals advise against subtracting small openings as the waste generated from pattern matching around these areas often equals or exceeds the material saved. It’s safer to rely on your waste allowance.
5. Factor in Pattern Repeat (Critical for Seamless Design)
This is perhaps the most crucial step for patterned wallpaper. The pattern repeat is the distance on the wallpaper roll before the design begins to repeat itself. This measurement is typically provided on the wallpaper label or product description.
- Straight Match: The pattern matches straight across at the same height on adjacent strips. This is the simplest repeat to work with.
- Drop Match: The pattern matches on adjacent strips, but the design drops down by a specific amount (e.g., half a repeat). This requires more material and careful alignment.
- Random Match: There is no pattern to match, allowing strips to be hung side-by-side without alignment. This is common for textures or subtle patterns and results in minimal waste.
For patterned wallpaper, you must add extra length to each cut strip to ensure the pattern aligns perfectly between strips. The general rule is to add one full pattern repeat to each strip’s calculated height. This accounts for trimming and matching.
Example: If your wall height is 9 feet (108 inches) and the pattern repeat is 21 inches, each strip should be cut to 108 + 21 = 129 inches (10 feet, 9 inches).
6. Calculate Number of Strips Needed
Determine the width of your wallpaper roll (e.g., 20.5 inches, 27 inches, 36 inches). Divide the total width of your walls by the width of one strip to find out how many strips you’ll need.
Formula: (Total Wall Width in inches) / (Wallpaper Strip Width in inches) = Number of Strips
Always round up to the nearest whole number of strips.
Example: If your total wall width is 150 inches and your wallpaper is 20.5 inches wide, you need 150 / 20.5 = 7.32 strips. Round up to 8 strips.
7. Calculate Number of Rolls Needed
Wallpaper rolls are sold in various lengths (e.g., single roll, double roll). A standard double roll typically covers about 56 square feet and is approximately 33 feet long by 20.5 inches wide. However, always check the specific dimensions on your chosen wallpaper’s product label.
First, calculate how many full strips you can get from one roll, considering the added length for pattern repeat.
Formula: (Length of Roll in inches) / (Length of one cut strip in inches) = Strips per Roll
Again, round down to the nearest whole number for strips per roll, as you can only get full strips.
Example: A double roll is 396 inches long (33 feet). If each cut strip is 129 inches long (from step 5), then 396 / 129 = 3.06 strips. So, you get 3 full strips per roll.
Next, divide the total number of strips needed (from step 6) by the number of strips per roll (from the previous calculation).
Formula: (Total Strips Needed) / (Strips per Roll) = Number of Rolls
Always round up to the nearest whole number of rolls.
Example: If you need 8 strips (from step 6) and get 3 strips per roll, you need 8 / 3 = 2.67 rolls. Round up to 3 rolls.
8. Add Waste Allowance
Always purchase an additional 10-15% extra material to account for trimming, pattern matching, mistakes, and future repairs. For complex patterns or unusually shaped rooms, lean towards the higher end of this allowance (15%).
Formula: (Number of Rolls Calculated) x 1.15 (for 15% allowance) = Total Rolls to Purchase
Example: If you calculated 3 rolls, then 3 x 1.15 = 3.45. Round up to 4 rolls.
Summary of Measuring Steps:
- Measure the height of each wall (baseboard to ceiling) at several points, noting the longest.
- Measure the total width of each wall.
- Calculate the total square footage for all walls.
- Note the wallpaper’s pattern repeat (if any).
- Determine the required length of each cut strip (wall height + one pattern repeat).
- Calculate the total number of strips needed based on wall width and wallpaper roll width.
- Calculate how many full strips you can get from one roll.
- Divide total strips needed by strips per roll to find the initial number of rolls.
- Add a 10-15% waste allowance to the final roll count and round up.
By diligently following these steps, you will accurately determine the amount of click vinyl wallpaper required for your project, ensuring a smooth installation and a stunning final result. Remember, precision in measuring is an investment in the success of your wall transformation.
Installation Best Practices: A Professional Finish for Your Walls
Achieving a flawless, professional-grade finish with click vinyl wallpaper hinges on meticulous preparation and adherence to best installation practices, regardless of the specific type of wallpaper chosen. While the inherent properties of vinyl wallpaper, such as its durability and ease of handling, simplify the process, skipping critical steps can compromise the final appearance and longevity of your wallcovering.
A successful installation transforms your space with precision and elegance, making your walls a true design statement. This section outlines the essential steps and considerations for applying click vinyl wallpaper, ensuring a smooth, bubble-free, and perfectly aligned result.
1. Acclimation and Inspection
Allow your wallpaper to acclimate to the room’s environment for at least 24-48 hours before installation. Unroll the wallpaper and let it sit in the room where it will be installed. This prevents potential shrinkage or expansion after installation due to temperature and humidity differences, which can lead to gaps or bubbling. During this time, carefully inspect each roll for any manufacturing defects, color variations, or damage. It is crucial to do this before cutting, as most suppliers will not accept returns once the material has been cut.
2. Thorough Surface Preparation
Proper wall preparation is the single most important factor for a successful and lasting wallpaper installation. Neglecting this step can lead to adhesion issues, visible imperfections, and premature peeling.
- Clean the Walls: Wash walls thoroughly with a mild detergent (like TSP substitute) and warm water to remove dirt, grease, and grime. Rinse completely with clean water and allow to dry fully (24 hours).
- Patch and Smooth: Fill any holes, cracks, or imperfections with spackle or joint compound. Sand these areas smooth once dry. Even minor bumps can be visible through wallpaper.
- Remove Old Wallpaper: If applicable, completely remove existing wallpaper. Do not wallpaper over old wallpaper, as it can cause adhesion problems and telegraph textures.
- Prime the Walls: Apply a high-quality wallpaper primer (also known as a “sizing” or “wall-prep”) to all surfaces. Primer creates a uniform, slightly textured surface that enhances adhesion, prevents the wall from absorbing too much adhesive, and facilitates easier removal in the future. Allow primer to dry completely according to manufacturer instructions, typically 2-4 hours.
- Remove Obstructions: Turn off power to outlets and light switches, then remove their covers.
3. Essential Tools for Installation
Having the right tools at hand makes the process significantly smoother:
- Tape measure
- Long straight edge (e.g., 4-foot level or metal ruler)
- Utility knife with fresh, sharp blades (change frequently)
- Smoother or plastic squeegee (for peel-and-stick)
- Wallpaper brush or smoothing tool (for paste-the-wall/pre-pasted)
- Seam roller (for traditional vinyl)
- Bucket and sponge
- Plumb bob or laser level
- Pencil
- Scissors
- Step ladder
- Drop cloths
- Wallpaper paste (if unpasted or paste-the-wall)
- Water tray (if pre-pasted)
4. Layout and Planning
Before cutting, plan your layout. Start your first strip in an inconspicuous corner or near a door frame, but always use a plumb line to ensure the first strip is perfectly vertical. This sets the stage for all subsequent strips. For patterned wallpaper, consider where the pattern will fall around windows or features.
5. Cutting the Strips
Based on your precise measurements (including pattern repeat and extra allowance for trimming at top and bottom, typically 2-4 inches per strip), cut your wallpaper strips. Label the back of each strip with its number and direction (e.g., “Strip 1 – Top”).
6. Installation Methods by Type
a. Peel-and-Stick Vinyl Wallpaper Installation
- Mark Your Line: Use a plumb bob or laser level to draw a perfectly vertical line on the wall, starting about 1-2 inches less than the width of your wallpaper strip from a corner or door frame. This ensures your first strip is straight.
- Peel and Position: Peel back 6-12 inches of the backing paper from the top of your first strip. Align the top edge of the wallpaper with the ceiling line (or desired starting point) and the side edge with your plumb line, leaving a small overlap (about 1-2 inches) onto the ceiling and adjacent wall/corner for trimming.
- Smooth Down: Press the exposed adhesive portion to the wall. Slowly peel more of the backing paper downwards with one hand while using a smoother or squeegee with the other hand to smooth the wallpaper onto the wall, working from the center outwards to push out air bubbles.
- Trim Excess: Once the strip is fully applied, use your utility knife and a straight edge to carefully trim the excess wallpaper at the ceiling, baseboard, and corner.
- Repeat: For subsequent strips, align the next strip to the edge of the previous one, carefully matching the pattern if applicable. Overlap seams slightly (as per manufacturer instructions for non-butt-jointed papers) or butt them tightly for seamless looks.
b. Paste-the-Wall Vinyl Wallpaper Installation
- Mark Your Line: As with peel-and-stick, draw a plumb line for your first strip.
- Apply Paste to Wall: Using a roller or brush, apply a generous, even coat of wallpaper paste directly to the wall section where your first strip will go, extending slightly beyond the width of the strip.
- Hang the Strip: Take your dry wallpaper strip and carefully align its top edge with the ceiling and its side edge with your plumb line, leaving an overlap for trimming.
- Smooth and Trim: Use a wallpaper brush or smoothing tool to press the strip firmly onto the pasted wall, working from the center outwards to remove air bubbles. Trim excess at the top and bottom.
- Repeat: Apply paste for the next section of the wall, then hang the next strip, carefully aligning the pattern and butting the edges tightly against the previous strip. Smooth out seams.
c. Pre-Pasted Vinyl Wallpaper Installation
- Mark Your Line: Draw a plumb line on the wall for your first strip.
- Activate Adhesive: “Book” the cut strip by folding the pasted sides together, adhesive to adhesive, without creasing. Let it rest for the recommended “booking time” (usually 5-10 minutes) to allow the adhesive to activate fully. Alternatively, slowly pull the strip through a water tray.
- Hang and Smooth: Unfold the top portion of the booked strip and align it with the ceiling and plumb line, leaving overlap. Unfold the bottom portion and smooth the entire strip onto the wall with a wallpaper brush, working out bubbles.
- Trim and Repeat: Trim excess and repeat the process for subsequent strips, ensuring pattern match and tight seams.
7. Dealing with Obstacles (Corners, Outlets, Windows)
- Inside Corners: Hang the strip, extending it about 1/2 inch onto the adjacent wall. Use a straight edge and utility knife to cut precisely into the corner. Start the next strip on the adjacent wall by drawing a plumb line 1/2 inch from the corner, overlapping the previous strip.
- Outside Corners: Wrap the wallpaper around the corner by about 1 inch. Use a straight edge and utility knife to trim the excess. The next strip should be aligned with a plumb line drawn slightly away from the corner, overlapping the previous strip.
- Outlets/Switches: With power OFF, remove covers. Hang the wallpaper over the opening. Carefully make an X-cut over the opening, then trim around the edges of the box. Replace cover after wallpaper is dry.
- Windows/Doors: Hang the strip over the opening. Make relief cuts at the corners of the opening, then trim the excess wallpaper using a straight edge and utility knife.
8. Final Smoothing and Clean-Up
After all strips are hung, go over all seams with a seam roller (for traditional vinyl) to ensure a secure bond. Use a damp, clean sponge to wipe away any excess adhesive from the surface of the wallpaper or ceiling/baseboards. Allow the wallpaper to dry completely, typically 24-48 hours, before replacing outlet covers or hanging wall decor.
By investing time in meticulous preparation and following these best practices, you ensure that your click vinyl wallpaper installation is not only successful but also a testament to quality craftsmanship and enduring beauty. Starhouse supports your journey by providing insights that help you achieve professional results in your home transformations.
Care and Maintenance: Preserving the Beauty of Your Investment
Proper care and routine maintenance are essential for preserving the pristine appearance and extending the lifespan of your click vinyl wallpaper, ensuring it remains a vibrant and durable feature in your home for years to come. Unlike more delicate wallcoverings or painted surfaces that may require frequent touch-ups, vinyl wallpaper is specifically engineered for low maintenance and high resilience, but it still benefits from a consistent cleaning regimen.
Understanding the correct cleaning techniques and proactive measures to prevent damage will protect your investment, keeping your walls looking fresh, clean, and as captivating as the day they were installed. This straightforward approach to care ensures your home continues to reflect the sophisticated design aesthetic you envisioned.
General Cleaning and Routine Maintenance
The non-porous and durable surface of click vinyl wallpaper makes it exceptionally easy to clean. Most routine maintenance involves simple steps:
- Regular Dusting: Dust your wallpaper regularly, just as you would any other wall surface. Use a soft, dry cloth, a feather duster, or the brush attachment of your vacuum cleaner to remove accumulated dust and cobwebs. This prevents dirt from building up and becoming harder to remove later.
- Gentle Wiping: For general dirt or light smudges, wipe the surface with a soft cloth dampened with plain warm water. Avoid excessive scrubbing, especially on textured wallpapers, which could potentially dull the finish or dislodge embossed details over time.
- Mild Detergent Solution: For more persistent dirt or grime, prepare a solution of warm water and a small amount of mild, non-abrasive household detergent (e.g., dish soap). Dampen a clean sponge or cloth with this solution, wring it out thoroughly to remove excess water, and gently wipe the affected area.
- Rinse and Dry: After cleaning with detergent, wipe the area again with a clean, water-dampened cloth to remove any soap residue. Immediately follow with a dry, soft cloth to blot the area dry. This prevents water spots and ensures the surface is completely dry.
- Work Top to Bottom: When cleaning an entire wall, always work from the top down. This prevents dirty water from dripping onto already clean sections and leaving streaks.
Specific Stain Removal Techniques
While click vinyl wallpaper is stain-resistant, accidents can happen. Prompt action is key to successful stain removal:
- Grease/Oil Stains: For fresh grease or oil, gently blot with a paper towel to absorb as much as possible. Then, use the mild detergent solution described above. For tougher grease, a small amount of rubbing alcohol on a clean cloth can be used as a spot treatment, but always test in an inconspicuous area first.
- Ink/Marker Stains: These can be challenging. Try rubbing alcohol or a specialized vinyl cleaner (test first). Apply to a clean cloth and blot the stain. Avoid aggressive rubbing, which can spread the ink.
- Food Stains: Most food stains will lift with a mild detergent solution. For colored food stains, a diluted bleach solution (1 part bleach to 10 parts water) can be used sparingly on white or light-colored vinyl, but *never* on colored or patterned wallpaper without a prior discreet test, as it can cause discoloration.
- Scuff Marks: For light scuff marks, a pencil eraser can sometimes remove them. For deeper scuffs, a mild abrasive cleaner (like a “magic eraser” type product) can be used, but with extreme caution and only after testing in an unseen area, as it can potentially damage the finish or remove print.
- Mold/Mildew: While vinyl wallpaper is moisture-resistant, mold or mildew can grow on the surface if conditions are consistently damp. Clean with a solution of white vinegar (1 part) and water (1 part), or a mild bleach solution (test first). Ensure the area is thoroughly dried afterward, and address the underlying moisture issue.
Important Precaution: Always test any cleaning solution or method on an inconspicuous area of the wallpaper (e.g., behind a piece of furniture, in a closet, or on a leftover scrap) before applying it to a visible section. This verifies that the cleaner will not damage the finish, fade colors, or leave a residue.
Avoiding Damage and Enhancing Longevity
Proactive measures can significantly extend the life and beauty of your click vinyl wallpaper:
- Protect from Sharp Objects: Be mindful of sharp furniture edges, artwork, or objects that could scratch or puncture the wallpaper.
- Manage Moisture: In high-humidity areas like bathrooms, ensure adequate ventilation (e.g., using an exhaust fan) to prevent excessive moisture buildup on the walls, even for water-resistant vinyl.
- Address Peeling Seams Promptly: If a seam starts to lift, re-adhere it immediately with a high-quality seam adhesive. Addressing this early prevents further peeling and damage.
- Minimize Direct Sunlight: While many vinyl wallpapers have UV-resistant coatings, prolonged exposure to intense, direct sunlight can still contribute to gradual fading over many years. Use blinds, curtains, or UV-filtering window films in rooms with strong sun exposure.
- Avoid Harsh Chemicals: Never use abrasive cleaners, strong solvents (like paint thinner or acetone), steel wool, or highly acidic/alkaline cleaning agents on your vinyl wallpaper, as these can permanently damage the surface or dull the finish.
By integrating these simple yet effective care and maintenance practices into your home routine, your click vinyl wallpaper will continue to provide a beautiful, durable, and inspiring backdrop for your living spaces for many years to come. Starhouse advocates for thoughtful product care as an extension of our commitment to quality and lasting design.
Styling and Pairing: Integrating Click Vinyl Wallpaper into Your Design Scheme
Integrating click vinyl wallpaper effectively into your interior design scheme is an art form that transcends mere wall coverage; it involves thoughtful consideration of how patterns, textures, and colors interact with your existing furniture, textiles, and lighting. This strategic approach elevates your space, creating a cohesive and impactful aesthetic that reflects your personal style and enhances the room’s functionality.
With its vast design versatility, click vinyl wallpaper offers endless possibilities for creating focal points, adding depth, or setting an overarching mood. By understanding how to pair it with other elements and utilize it creatively, you can transform ordinary walls into extraordinary backdrops, making your home a true expression of curated design.
Strategic Integration Techniques
1. The Power of the Accent Wall
An accent wall is a single wall covered in a bold pattern, vibrant color, or distinct texture, serving as the room’s focal point. Click vinyl wallpaper is exceptionally suited for this purpose due to its wide range of dramatic designs.
- Placement: Typically, the wall behind a significant piece of furniture (e.g., the headboard in a bedroom, the sofa in a living room, or a fireplace wall) is chosen for an accent.
- Pattern Choice: Opt for a pattern that makes a statement—a large-scale floral, a geometric, a realistic faux material like brick or concrete, or a captivating mural.
- Color Palette: Select colors that either boldly contrast with the surrounding walls or subtly pull an accent color from your existing decor.
- Impact: Creates drama, adds depth, and draws the eye, making the room feel more intentional and sophisticated without overwhelming the entire space.
2. Full Room Coverage: Creating an Immersive Experience
Covering all walls in a room with click vinyl wallpaper creates an immersive and enveloping atmosphere. This approach requires careful consideration to avoid overwhelming the space.
- Subtle Patterns: For full room coverage, often choose patterns that are less busy, such as subtle textures (grasscloth, linen), small-scale geometrics, tone-on-tone designs, or light, airy botanicals.
- Color Consistency: Maintain a consistent color palette throughout the room, allowing the wallpaper to act as a sophisticated backdrop rather than a dominant feature.
- Impact: Achieves a cohesive, polished, and often luxurious feel, making the room feel more intimate and finished.
- Considerations: Ensure the chosen pattern doesn’t make the room feel smaller or too busy. Use light-colored patterns in smaller rooms.
3. Pairing with Paint Colors
The interplay between wallpaper and painted walls is crucial for a harmonious design.
- Complementary Colors: Select paint colors for adjacent walls that complement a dominant or accent color within your wallpaper pattern. Use a color wheel to identify harmonious pairings.
- Neutral Backdrops: If your wallpaper is bold, paint the remaining walls in a neutral shade (white, gray, beige) that allows the wallpaper to shine without competition.
- Picking Up a Secondary Color: Choose a less prominent color from your wallpaper pattern and use it as the paint color for a subtle, cohesive link.
- Test Swatches: Always test paint swatches next to your wallpaper sample under various lighting conditions before committing.
4. Integrating with Furniture & Textiles
The textures and patterns in your wallpaper should flow seamlessly with your furniture and soft furnishings.
- Balance Patterns: If your wallpaper features a busy pattern, opt for solid-colored furniture and textiles, or those with very subtle patterns. Conversely, a subtle wallpaper can allow for more patterned upholstery or throw pillows.
- Texture Play: Use wallpaper to introduce texture (e.g., faux grasscloth, concrete, wood grain) that complements the textures of your furniture (e.g., velvet sofa, woven rug, wooden table). This adds tactile interest and depth.
- Color Echoes: Repeat colors from your wallpaper in your cushions, curtains, or decorative accessories to create a unified look.
- Scale Harmony: Ensure the scale of patterns on your wallpaper, furniture, and textiles feels balanced. Avoid too many large or too many small patterns competing in one space.
5. Lighting Considerations
Lighting significantly impacts how wallpaper appears, highlighting its texture and colors.
- Accent Lighting: Use sconces, picture lights, or recessed lighting to illuminate an accent wall, drawing attention to its pattern and texture.
- Natural Light: Consider how natural light hits the wallpaper throughout the day. Metallic or subtly textured wallpapers can shimmer and change appearance, adding dynamic interest.
- Shadow Play: Textured wallpapers create interesting shadows, adding depth and dimension to a room, especially when lit from an angle.
6. Using Click Vinyl Wallpaper in Unexpected Places
Beyond traditional wall applications, click vinyl wallpaper offers creative opportunities for unique design statements:
- Ceilings: A wallpapered ceiling (the “fifth wall”) can add unexpected drama, texture, or pattern, making a room feel more intimate or grand, depending on the design.
- Inside Bookcases or Shelves: Lining the back of a bookcase or open shelving unit with a complementary wallpaper adds a pop of color, pattern, or texture, elevating the piece.
- Furniture Upcycling: Use peel-and-stick vinyl wallpaper to refresh old furniture pieces—dressers, tabletops, or cabinet doors—giving them a custom, high-end look.
- Drawer Liners: A subtle touch of pattern inside drawers can add a luxurious detail.
- Backsplashes: In kitchens or bathrooms, water-resistant vinyl wallpaper can be used as a temporary or budget-friendly backsplash alternative, particularly peel-and-stick options. Ensure it is properly sealed and protected from direct water exposure.
Creative Styling Ideas:
- Create Zones: Use different wallpapers or a combination of wallpaper and paint to define distinct zones within an open-concept living space.
- Frame It: Apply wallpaper within wall molding or wainscoting to create a framed art effect or enhance architectural details.
- Mix and Match: For the bold designer, combine two complementary wallpapers on different walls or within different sections of the same wall, ensuring a cohesive color story.
- Monochromatic Layering: Choose a textured vinyl wallpaper in the same color family as your paint for a subtle, sophisticated layered look.
By approaching click vinyl wallpaper as a versatile design element, rather than just a wall covering, you unlock its full potential to create spaces that are truly unique, stylish, and deeply personal. Starhouse champions this creative spirit, offering a collection that inspires and enables you to curate a home that is both beautiful and authentically yours.
Current Trends in Click Vinyl Wallpaper Design (UPDATED: June 2026)
The world of interior design is in constant evolution, and click vinyl wallpaper, with its adaptability and advanced manufacturing capabilities, consistently reflects and drives contemporary aesthetic movements. As of June 2026, designers and homeowners are gravitating towards styles that prioritize connection to nature, embrace tactile experiences, and celebrate personal expression, all while maintaining a strong emphasis on sustainability and durability.
These trends are shaping the patterns, textures, and color palettes available in vinyl wallcoverings, making it easier than ever to incorporate cutting-edge design into your home. From serene biophilic motifs to bold, maximalist statements, click vinyl wallpaper offers a sophisticated means to update and personalize any interior space, aligning with current desires for both beauty and mindful living.
Leading Design Trends in Click Vinyl Wallpaper
1. Biophilic Designs and Nature-Inspired Motifs
The desire to connect with the natural world continues to be a dominant force, leading to a surge in biophilic designs. Click vinyl wallpaper excels at bringing the outdoors in through realistic and abstract interpretations of nature.
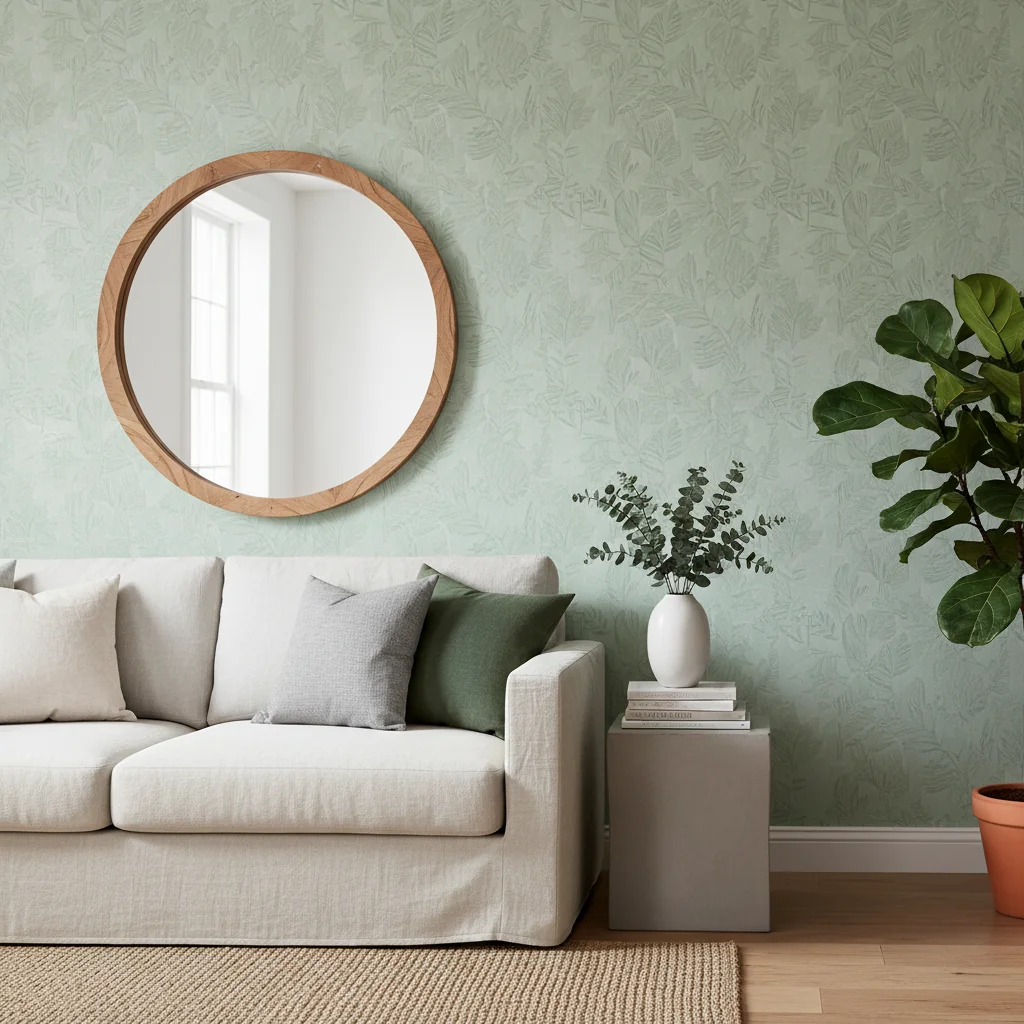
- Botanical Prints: Large-scale florals, lush jungle foliage, delicate wildflowers, and intricate botanical illustrations remain highly popular.
- Earthy Textures: Faux grasscloth, woven natural fibers, cork, and raw linen textures provide a calming, organic backdrop.
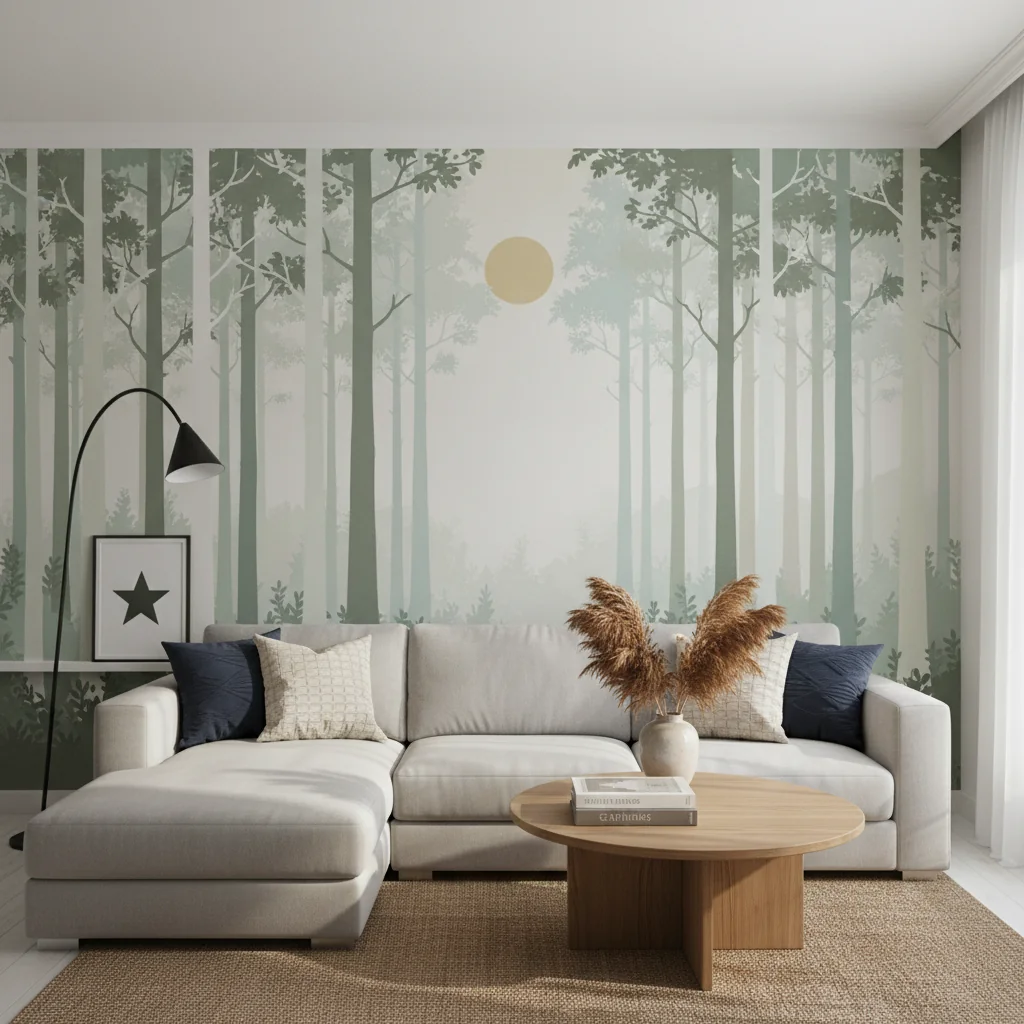
- Natural Scapes: Murals depicting serene forests, misty mountains, tranquil seascapes, or abstract natural patterns create immersive environments.
- Color Palettes: Dominated by greens (sage, olive, emerald), blues (sky, ocean), warm neutrals, and earthy browns.
- Impact: Fosters a sense of calm, well-being, and a connection to the environment, ideal for bedrooms, living rooms, and home offices.
2. Textural Illusions: Hyper-Realistic Faux Finishes
Advancements in printing and embossing technology allow vinyl wallpaper to create incredibly convincing textural illusions, adding depth and character to walls without the cost or complexity of real materials.
- Faux Concrete & Plaster: Industrial chic and wabi-sabi aesthetics are driving demand for wallpapers that mimic the raw, imperfect beauty of concrete, stucco, and Venetian plaster.
- Distressed Wood & Shiplap: Weathered wood panels, rustic shiplap, and reclaimed timber looks continue to be favored for farmhouse, coastal, and industrial styles.
- Marble & Terrazzo: Luxurious marble veins and speckled terrazzo patterns bring a touch of classic elegance and contemporary flair to any room.
- Fabric Textures: Subtle weaves, silk, linen, and velvet textures add softness and sophistication.
- Impact: Adds tactile interest, architectural detail, and a sense of authenticity, often at a fraction of the cost and installation effort of genuine materials.
3. Geometric Abstractions and Modern Minimalism
Clean lines, abstract forms, and minimalist aesthetics continue to define contemporary design, with vinyl wallpaper offering sharp, precise patterns.
- Bold Geometrics: Large-scale geometric patterns, interlocking shapes, and optical illusions create dynamic focal points.
- Abstract Art: Brushstroke patterns, watercolor effects, and fluid abstract designs bring an artistic touch to walls.
- Subtle Patterns: Tone-on-tone patterns, micro-geometrics, and understated textures provide a sophisticated backdrop without overwhelming a minimalist space.
- Color Palettes: Often monochromatic (grays, whites, blacks), with occasional pops of primary or jewel tones.
- Impact: Creates a sense of order, sophistication, and contemporary elegance, perfect for modern urban homes.
4. Mural Mania: Large-Scale Art for Walls
Wall murals are no longer just for children’s rooms; they are a powerful tool for creating dramatic, immersive, and personalized spaces for adults.
- Scenic Landscapes: Expansive views of natural wonders, cityscapes, or abstract vistas that transform an entire wall into a window to another world.
- Artistic Expressions: Large-scale reproductions of classical art, contemporary paintings, or custom digital art pieces.
- Thematic Storytelling: Murals that tell a story or evoke a specific mood, suitable for feature walls in living rooms, dining areas, and master bedrooms.
- Impact: Creates a powerful focal point, adds depth to a room, and allows for unparalleled personal expression.
5. Dark & Moody Palettes
A departure from all-white interiors, designers are embracing rich, deep, and saturated colors to create dramatic and intimate spaces.
- Deep Hues: Navy blue, forest green, charcoal gray, deep plum, and earthy terracotta are popular choices.
- Subtle Patterns: Often paired with subtle textures, tone-on-tone patterns, or metallic accents to add interest without overwhelming the dark backdrop.
- Impact: Creates a sense of coziness, luxury, and sophistication, particularly effective in bedrooms, dining rooms, and studies.
- Pairing: Best balanced with lighter furniture, reflective surfaces, and ample lighting to prevent the room from feeling too heavy.
6. Sustainable and Health-Conscious Options
With increasing awareness of environmental impact and indoor air quality, sustainable and low-VOC vinyl wallpapers are gaining significant traction.
- Low-VOC & Phthalate-Free: Demand for products that meet stringent indoor air quality standards (e.g., GREENGUARD Gold certified) is high.
- Recycled Content: Wallpapers incorporating recycled materials in their backing or vinyl layers are becoming more available.
- Eco-Friendly Inks: Water-based or UV-cured inks that are less harmful to the environment are preferred.
- Impact: Provides peace of mind for health-conscious consumers and contributes to a healthier indoor environment.
7. Maximalism and Grandmillennial Style
A backlash against strict minimalism, these trends celebrate layers of pattern, color, and texture, often with a nostalgic nod to traditional aesthetics but with a fresh, contemporary twist.
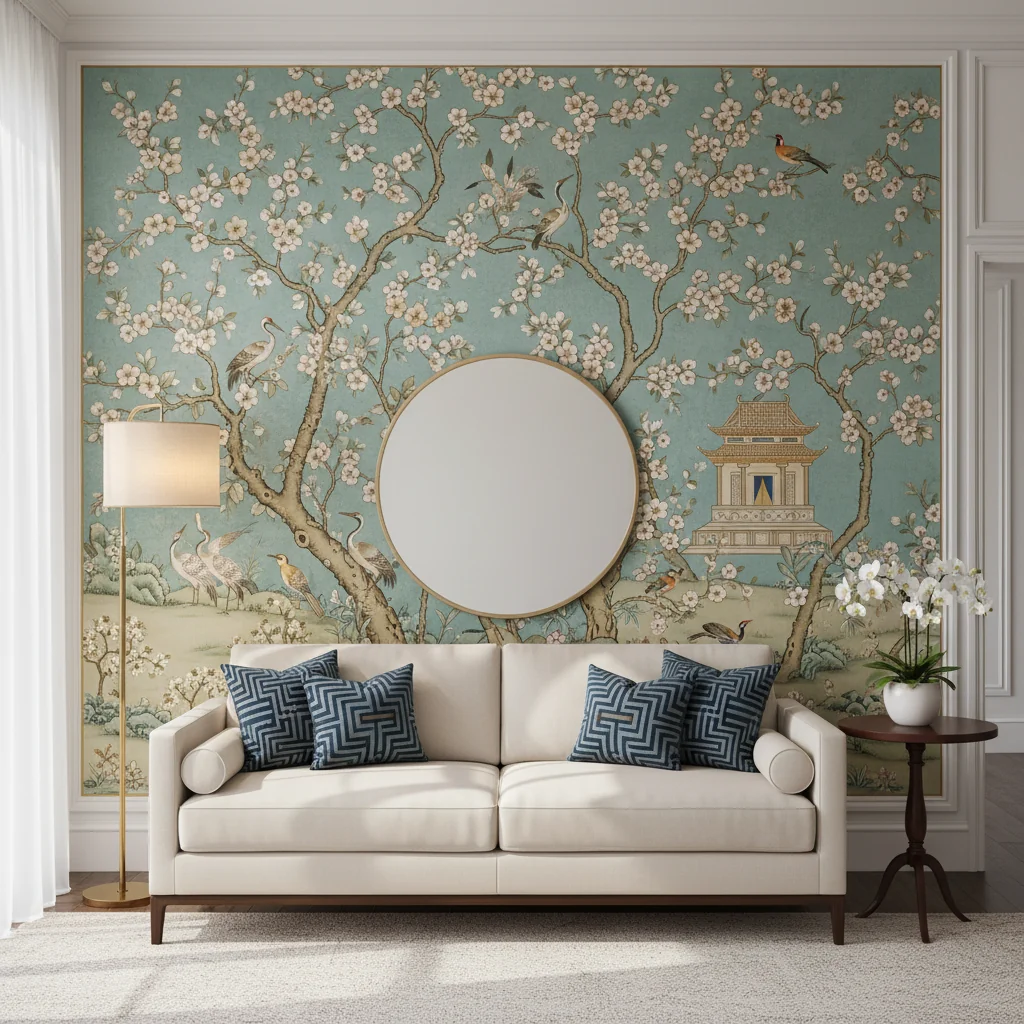
- Bold Florals & Chinoiserie: Large, vibrant floral patterns, often with a vintage feel, and intricate Chinoiserie designs are making a comeback.
- Mixed Patterns: Combining different patterns (e.g., stripes with florals, geometrics with botanicals) in a cohesive color palette.
- Rich Color Combinations: Unexpected pairings of jewel tones, pastels, and bright hues.
- Impact: Creates dynamic, personality-filled spaces that feel curated, eclectic, and full of life.
The current landscape of click vinyl wallpaper design offers a dynamic blend of natural inspiration, technological innovation, and diverse stylistic expressions. Starhouse is dedicated to staying at the forefront of these trends, curating a collection that allows you to bring the most desirable and durable wallcoverings into your home, ensuring your space remains stylish, functional, and reflective of the latest in interior design.
Common Mistakes to Avoid When Working with Click Vinyl Wallpaper
Even with the inherent ease and durability of click vinyl wallpaper, certain common mistakes can undermine the success of your installation and diminish the aesthetic appeal of your finished space. Recognizing and actively avoiding these pitfalls is crucial for achieving a professional-grade result and ensuring the longevity of your wallcovering. A successful wallpaper project is often defined by what you prevent rather than just what you do correctly.
From inadequate preparation to rushing the installation process, these errors can lead to frustrations, wasted materials, and a less-than-perfect finish. By being mindful of these common missteps, you can approach your wallpaper project with greater confidence and precision, ensuring a stunning and durable outcome.
Key Mistakes to Sidestep for a Flawless Finish
1. Inadequate Surface Preparation
Failing to properly prepare your walls is the most frequent and detrimental mistake in wallpaper installation. This includes neglecting to clean, patch, sand, or prime the walls. Any dust, grease, loose paint, or uneven textures will telegraph through the wallpaper, creating bumps, bubbles, or preventing proper adhesion. Old wallpaper must always be removed completely.
- Solution: Thoroughly clean walls, patch and sand all imperfections, and apply a high-quality wallpaper primer (sizing) to create a smooth, clean, and uniformly absorbent surface. Allow primer to dry completely.
2. Incorrect Measurements and Insufficient Material
Underestimating the amount of wallpaper needed or making errors in measuring wall dimensions and pattern repeats leads to running out of material mid-project or having noticeable seams. This can result in mismatched dye lots, forcing you to purchase more rolls that may not perfectly match in color or pattern. Not accounting for pattern repeat is a particularly common error for novices.
- Solution: Measure meticulously, accounting for all wall heights and widths. Always factor in the pattern repeat for each strip and add a 10-15% waste allowance to your total roll count. Double-check all calculations.
3. Ignoring Pattern Repeat and Misaligned Seams
Forgetting to account for the pattern repeat when cutting strips, or failing to align the pattern precisely between adjacent strips, results in a disjointed and unprofessional appearance. Similarly, inconsistent butt joints or overlapping seams (when the wallpaper is designed for butt joints) can create visible lines and detract from the seamless look.
- Solution: Carefully identify the pattern repeat on your wallpaper label. Cut strips sequentially, ensuring the pattern aligns perfectly from strip to strip. Practice matching on a dry run. For butt-jointed wallpapers, ensure edges meet tightly without overlapping.
4. Skipping Acclimation and Inspection
Installing wallpaper immediately after purchase, without allowing it to acclimate to the room’s temperature and humidity, can lead to post-installation shrinkage or expansion, causing gaps at seams or bubbling. Not inspecting rolls before cutting means you might install a defective roll, realizing the issue only after it’s too late for a return.
- Solution: Let wallpaper rolls acclimate in the room for 24-48 hours. Unroll and inspect each roll for defects, color variations, or damage before cutting any strips.
5. Improper Tools or Dull Blades
Using the wrong tools (e.g., a painting roller instead of a smoother) or working with dull utility knife blades can cause tears, uneven cuts, bubbles, and damage to the wallpaper. A dull blade will snag and rip, leaving ragged edges.
- Solution: Invest in the correct wallpaper installation tools: a good smoother/squeegee, a plumb bob or laser level, a long straight edge, and a utility knife with plenty of fresh, sharp blades. Change blades frequently (after every 2-3 strips for sharp cuts).
6. Rushing the Installation Process
Attempting to complete the project too quickly often leads to shortcuts in preparation, hasty measurements, and sloppy application. This results in bubbles, misaligned patterns, visible seams, and poor adhesion.
- Solution: Allocate ample time for each stage of the project—preparation, measuring, cutting, and hanging. Work methodically and patiently. Wallpapering is a process that rewards precision over speed.
7. Inconsistent Adhesive Application (for Pasted Options)
For pre-pasted or unpasted vinyl wallpapers, inconsistent adhesive application (too little, too much, or unevenly spread) leads to areas that don’t stick properly, causing bubbling, peeling, or sliding. For paste-the-wall, uneven paste can also cause issues.
- Solution: If pre-pasted, ensure adequate booking time. If unpasted, apply paste evenly and thoroughly to the entire backing of the strip. For paste-the-wall, ensure the wall section is uniformly covered with paste.
8. Not Using a Plumb Line for the First Strip
Starting your first strip without establishing a perfectly vertical plumb line can result in all subsequent strips gradually slanting, leading to crooked patterns and noticeable irregularities, especially in corners.
- Solution: Always use a plumb bob or laser level to draw a straight vertical line on your starting wall. Align the first strip precisely with this line, as it dictates the straightness of the entire installation.
9. Overlooking Obstacles (Outlets, Windows)
Failing to properly account for and cut around outlets, switches, windows, and doors during installation can result in awkward cuts, visible gaps, or an unfinished appearance.
- Solution: Turn off power and remove outlet/switch covers. Make careful relief cuts and trim precisely around all obstacles. Reinstall covers only after the wallpaper has fully dried.
10. Improper Cleaning and Maintenance
Using harsh chemicals, abrasive scrubbers, or excessive water during cleaning can damage the vinyl surface, dull the finish, or cause the wallpaper to peel prematurely.
- Solution: Adhere to the manufacturer’s cleaning instructions. Use only mild detergents, soft cloths, and avoid saturating the wallpaper. Test any new cleaning solution in an inconspicuous area first.
By consciously avoiding these common mistakes, you can ensure your click vinyl wallpaper project is a smooth, rewarding experience, culminating in a beautiful and enduring transformation of your home. Starhouse is dedicated to empowering you with the knowledge and tools for successful design endeavors.
Sources
- GREENGUARD Certification | UL | https://www.ul.com/services/ul-greenguard-certification
Frequently Asked Questions About Click Vinyl Wallpaper
Is click vinyl wallpaper truly waterproof?
Click vinyl wallpaper is highly water-resistant, and many varieties are designed to be waterproof on their surface, meaning the vinyl face layer repels water and can be wiped clean. However, it is crucial to understand that the seams are not inherently waterproof, and prolonged exposure to direct water streams or standing water can still allow moisture to penetrate behind the wallpaper, potentially leading to adhesion issues or mold growth in the backing. For areas with constant direct water contact, such as inside a shower, a fully waterproof, sealed surface is required.
Can I install click vinyl wallpaper over textured walls?
Installing click vinyl wallpaper directly over textured walls, such as orange peel or knockdown finishes, is generally not recommended as the texture will likely show through the wallpaper, compromising its smooth appearance and potentially affecting adhesion. For best results, walls should be as smooth as possible. This typically requires skimming the walls with joint compound to create an even surface, followed by sanding and priming, before wallpaper installation.
How easy is it to remove peel-and-stick vinyl wallpaper?
Peel-and-stick vinyl wallpaper is designed for relatively easy and clean removal, making it an excellent choice for temporary decor or rental properties. When applied to a properly primed, smooth, and clean surface, it typically peels off in full sheets without damaging the wall or leaving significant adhesive residue. For best results, remove it slowly and gently, pulling downwards at a 45-degree angle. However, removal ease can vary depending on the specific product’s adhesive strength, the wall’s surface condition, and how long it has been installed.
What is the lifespan of click vinyl wallpaper?
The lifespan of high-quality click vinyl wallpaper is substantial, often ranging from 10 to 15 years or even longer with proper installation and maintenance. Its durability, resistance to scuffs, tears, and moisture, and UV-resistant coatings contribute to its longevity. Factors influencing its lifespan include the quality of the material, the environment it’s in (e.g., high humidity), the care it receives, and the quality of the initial wall preparation and installation.
Is vinyl wallpaper safe for indoor air quality?
Modern click vinyl wallpapers from reputable manufacturers are increasingly designed with indoor air quality in mind. Many products are now low-VOC (Volatile Organic Compound) or phthalate-free, significantly reducing the emission of harmful chemicals into your home. To ensure optimal indoor air quality, look for vinyl wallpapers that carry third-party certifications such as GREENGUARD Gold, which verifies that products meet rigorous chemical emission standards for healthier environments. These certifications provide assurance that the wallpaper contributes minimally to indoor air pollution.
Can I paint over click vinyl wallpaper?
While it is technically possible to paint over some types of vinyl wallpaper, it is generally not recommended for optimal results. The vinyl surface is often non-porous and can be difficult for paint to adhere to effectively, potentially leading to peeling, chipping, or an uneven finish. Additionally, painting over textured vinyl wallpaper will obscure its intended tactile design. For a superior finish and to ensure paint adhesion, it is always best practice to remove the wallpaper completely, prepare the wall surface, and then paint.
What’s the difference between peel-and-stick and traditional vinyl wallpaper?
The primary difference between peel-and-stick and traditional vinyl wallpaper lies in their adhesive application and backing. Peel-and-stick vinyl wallpaper features a pre-applied, pressure-sensitive adhesive on its backing, protected by a removable liner, making installation as simple as peeling and sticking without external glues. Traditional vinyl wallpaper (which includes pre-pasted, paste-the-wall, and unpasted types) requires either water activation of a dry adhesive or the application of a separate wallpaper paste. Peel-and-stick is often more temporary and DIY-friendly, while traditional options typically offer a more permanent bond and a wider range of heavy-duty commercial-grade options.
Conclusion: Elevate Your Walls with Starhouse
Click vinyl wallpaper stands as a testament to innovation in home décor, offering an unparalleled combination of aesthetic versatility, enduring durability, and practical functionality. Throughout this comprehensive guide, we have explored its intricate composition, diverse types, boundless styling potential, and the meticulous considerations required for flawless installation and lasting care. From transforming high-traffic hallways to elevating serene bedrooms, this sophisticated wallcovering provides a robust and beautiful solution for every interior design aspiration.
At Starhouse, we believe that your home should be a canvas for your unique story and a sanctuary that reflects your deepest desires for comfort and style. Our commitment is to curate a collection of wall décor and furnishings that not only meet the highest standards of quality and design but also empower you to create spaces that are truly exceptional. Click vinyl wallpaper, with its blend of resilience and beauty, embodies this philosophy, offering a smart investment in the aesthetic and functional integrity of your home.
As you envision the next chapter for your living spaces, consider the transformative power of click vinyl wallpaper. It offers the ability to infuse texture, pattern, and color with confidence, knowing that your choice is both aspirational and practical. To help us shape our upcoming collections and ensure we bring you precisely what you need for your design projects, we invite your valuable input. Share your vision, your preferences, and your dream home elements with us.
We are meticulously curating our collection, ensuring every piece resonates with our brand’s promise of sophisticated design and enduring quality. Be among the first to discover our exceptional offerings and gain early access to designs tailored to your tastes. Tell us what you’re looking for in your next home transformation, and let Starhouse help you define the beauty of your space.