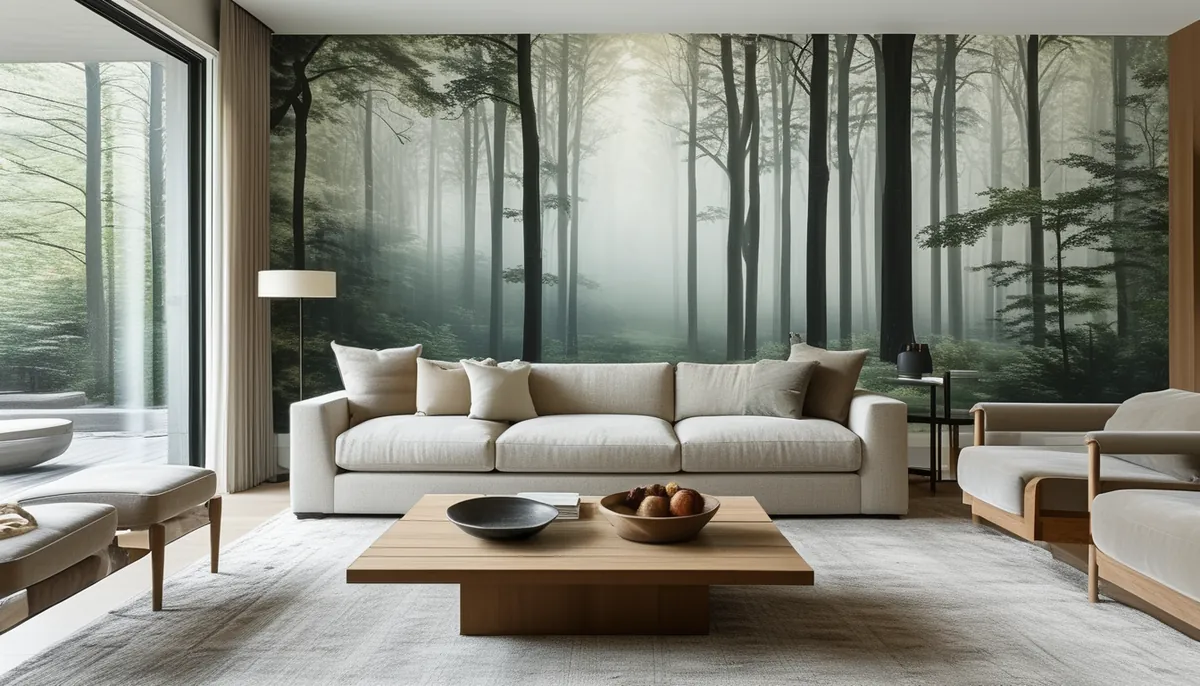
When you’re looking for a wallpaper that makes a statement, Rebel Walls wallpapers stand out. They offer a vast collection of wall murals and patterns, moving beyond traditional repeating designs to create immersive environments. Unlike standard wallpapers, many Rebel Walls products are designed for a more impactful, singular visual. This guide will help you navigate their offerings and ensure a successful installation.
Understanding Rebel Walls’ product types
Rebel Walls categorizes its products mainly by material and installation method. You’ll encounter:
- Non-woven wallpaper: This is the most common type. It’s durable, breathable, and easier to hang than traditional paper. The material is strong, resisting tearing during installation. It’s also strippable when dry, meaning you can pull it off the wall in large pieces without excessive soaking.
- Peel and stick wallpaper: A subset of non-woven, this option is often a vinyl-based material with a strong adhesive backing. It’s ideal for renters or for areas where you might want to change the decor frequently. The adhesive is designed to hold firmly but also allow for repositioning during application and removal without damaging the wall surface, provided the wall is properly prepared.
- Wall murals: These are large-scale designs, often custom-printed to fit your wall dimensions. They are the signature product of Rebel Walls, featuring everything from realistic landscapes and cityscapes to abstract art and intricate patterns. Murals are typically printed on a high-quality non-woven material.
How to choose your Rebel Walls wallpaper
Selecting the right design is the first crucial step. Consider these factors:
Scale and design impact
Rebel Walls excels in large-scale, impactful designs. Think about the room’s purpose and the feeling you want to evoke. A dramatic landscape mural might be perfect for a living room or bedroom, while a more subtle, textured pattern could work in a dining room or hallway. For smaller rooms, a bold design can make them feel larger and more dynamic, but avoid overwhelming the space. Conversely, in a very large room, a significant mural can add intimacy and character.
Color palette and existing decor
Ensure the wallpaper’s colors complement your existing furniture, flooring, and decor. If your room has many colors, a more neutral or monochromatic design might be best. If your decor is minimalist, a vibrant Rebel Walls wallpaper can become the focal point. Pay attention to the undertones of the colors – warm or cool – and how they will interact with your room’s natural and artificial light.
Wall condition and preparation
Your wall’s surface is critical for a good wallpaper installation, especially with adhesive types. Walls must be clean, dry, smooth, and free of defects. Any bumps, holes, or old, peeling paint will show through and can compromise adhesion. If you have imperfections, consider using a wallpaper liner to create a smooth, uniform surface. For peel and stick, ensure walls are not overly glossy, as this can prevent proper adhesion. A light sanding of high-gloss paint can help.
Room type and moisture levels
For areas with high humidity, like bathrooms or kitchens, choose wallpapers specifically rated for these environments. While many non-woven wallpapers are somewhat resistant, vinyl-backed or specially treated options are best. Always check the product specifications. For living rooms, bedrooms, and offices, most Rebel Walls non-woven wallpapers will perform well.
Installation: DIY vs. Professional
While many Rebel Walls wallpapers are designed for easier installation, the complexity of murals and the need for precision might lead you to consider professional help.
DIY installation steps for non-woven wallpaper
- Gather your tools: You’ll need a straight edge, a sharp utility knife or scissors, a smoothing tool (like a plastic smoother or a wallpaper brush), a stepladder, a measuring tape, a bucket for water (if using traditional paste), a seam roller, and potentially a primer.
- Prepare the wall: Clean the wall thoroughly. If necessary, apply a wallpaper primer. This seals the wall and ensures better adhesion and easier removal later. For non-woven, you usually paste the wall directly, so primer is essential.
- Measure and cut: Measure your wall height and add a few inches at the top and bottom for trimming. If you have a mural, ensure you have the correct panels and the order is correct. Most Rebel Walls murals come with numbered panels.
- Apply adhesive: For non-woven, apply the paste directly to the wall using a roller, working in sections slightly wider than the wallpaper panel. Follow the specific paste recommendations for your wallpaper.
- Hang the first panel: Align the first panel carefully at a corner or starting point, ensuring it’s perfectly vertical using a level. Press it onto the pasted wall, smoothing out any air bubbles from the center outwards with your smoothing tool.
- Hang subsequent panels: Place the next panel next to the first, butting the edges together precisely. Do not overlap unless specifically instructed (which is rare for non-woven). Continue smoothing out air bubbles.
- Trim excess: Once the panel is in place and smoothed, use your straight edge and utility knife to carefully trim the excess paper at the ceiling and baseboard.
- Repeat: Continue hanging panels until the wall is covered.
- Seam finishing: Use a seam roller gently on the seams to ensure they are flat and well-adhered.
Peel and stick installation
Peel and stick is generally more forgiving for DIYers:
- Prepare the wall: Clean and dry the wall. Ensure it’s smooth. Avoid using primers designed for traditional wallpaper; they can make the adhesive too sticky or cause issues.
- Measure and cut: Measure your wall and cut your panels, adding a little extra at the top and bottom.
- Peel and stick: Peel back a few inches of the backing paper from the top of the panel. Align it carefully with your starting point (often a corner or ceiling line).
- Apply and smooth: Slowly peel off the backing paper as you press the wallpaper onto the wall, smoothing out air bubbles as you go. A plastic smoother is very effective here. You can often lift and reposition peel and stick if you make a mistake, as long as you do it gently and quickly.
- Trim excess: Trim carefully at the top and bottom.
When to hire a professional
Consider a professional installer if:
- You are tackling a large, complex mural with multiple panels and precise alignment is critical.
- Your walls have significant imperfections that require professional repair.
- You are not confident in your DIY skills or have limited time.
- The wallpaper is particularly expensive, and you want to minimize the risk of errors.
Maintaining your Rebel Walls wallpaper
Proper care will keep your wallpaper looking great for years. For most non-woven and vinyl wallpapers, a gentle cleaning is sufficient.
- Dusting: Regularly dust the wallpaper with a soft, dry cloth or a feather duster.
- Spot cleaning: For light marks or smudges, use a damp (not wet) cloth with a little mild soap. Gently wipe the affected area. Avoid harsh scrubbing, which can damage the print or material.
- Avoid moisture: Even in moisture-resistant wallpapers, prolonged exposure to direct water can cause damage. Ensure bathrooms are well-ventilated.
Rebel Walls offers a way to create truly unique and personalized spaces. By understanding the product types, carefully selecting your design, and following proper installation guidelines—whether DIY or professional—you can achieve a stunning transformation in your home. For more on transforming your walls, explore guides on paintable wallpaper or discover the elegance of damask wallpaper.