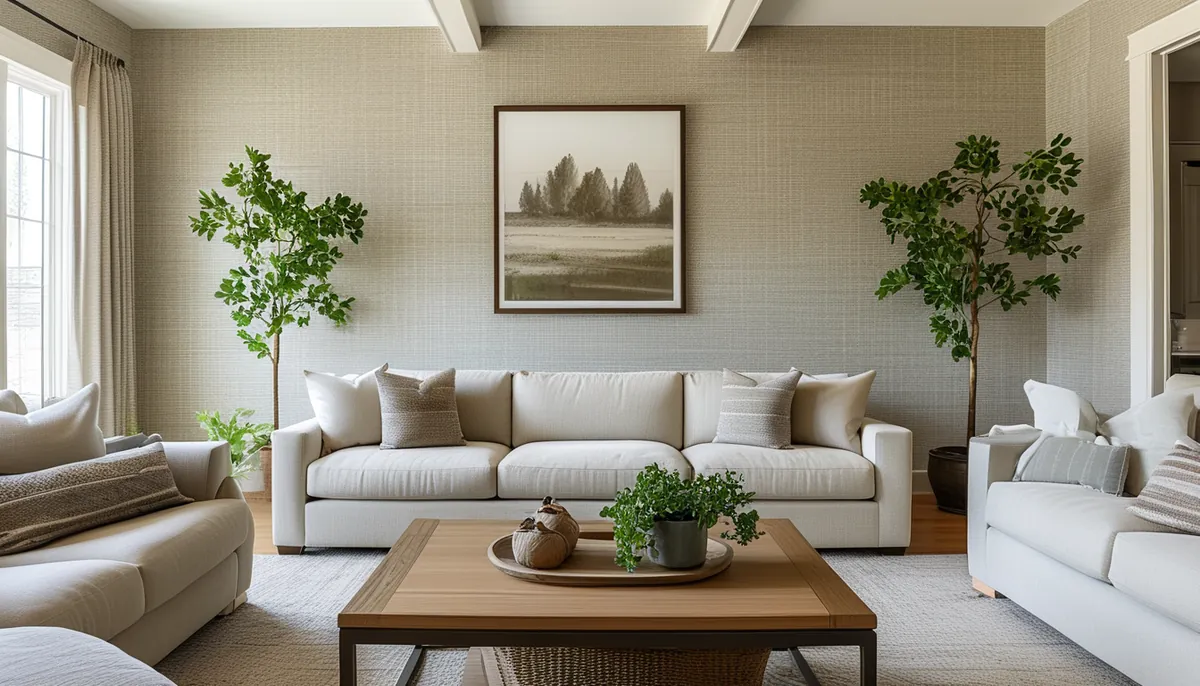
When you’re choosing wallpaper for house walls, the first decision isn’t the pattern, it’s the material. Each type of wallpaper has a specific backing and surface, affecting its durability, ease of installation, and suitability for different rooms.
Understanding the construction of wallpaper—paper, vinyl, non-woven, or fabric—will dictate how it performs. This is crucial because not all wallpapers are created equal, and using the wrong type in a high-moisture area like a bathroom or kitchen can lead to peeling, bubbling, or even mold growth.
Choosing the right wallpaper material
The core component that makes wallpaper stick and adhere to your wall is its backing. Different materials offer varying degrees of washability, strippability, and breathability.
Paper wallpaper
Traditional paper wallpaper is made from a single layer of paper, sometimes with a printed design. It’s the most budget-friendly option but also the least durable. It’s susceptible to moisture damage, tearing, and fading.
Pros:
- Inexpensive.
- Wide variety of patterns and colors.
Cons:
- Not washable or scrubbable.
- Prone to tearing during installation.
- Damaged by moisture; unsuitable for bathrooms or kitchens.
- Can yellow or fade over time.
Installation typically involves applying paste to the back of the paper and the wall (booking the paper) or using a paste-the-wall method depending on the specific product. Seams can be visible if not perfectly aligned, and removal can be difficult, sometimes requiring steaming.
Vinyl wallpaper
Vinyl wallpaper has a paper or fabric backing with a solid vinyl coating on top. This coating makes it highly durable, washable, and water-resistant. It’s a popular choice for high-traffic areas and rooms prone to moisture.
Pros:
- Highly durable and resistant to tearing.
- Washable and scrubbable, making it easy to clean.
- Water-resistant; suitable for kitchens and bathrooms.
- Hides minor wall imperfections well.
Cons:
- Can be more expensive than paper wallpaper.
- Less breathable, which could be an issue in very humid climates if not properly ventilated.
- Some vinyl wallpapers can have a ‘plastic’ feel.
Vinyl wallpapers are usually categorized further:
- Paper-backed vinyl: The most common type. The vinyl layer is applied over a paper backing.
- Fabric-backed vinyl: A more robust option with a fabric backing. It’s stronger and more durable.
- Expanded vinyl: This type has a textured, slightly padded surface created by heating the vinyl, which gives it a raised pattern. It’s good at hiding wall imperfections.
For installation, many vinyl wallpapers are ‘peel and stick,’ meaning they have an adhesive backing. Others require a specific wallpaper paste. Stripping vinyl wallpaper can sometimes be challenging, often requiring a steamer if it’s old or was installed with heavy-duty adhesive.
Non-woven wallpaper
Non-woven wallpaper is made from a blend of synthetic fibers and paper pulp. This construction makes it breathable, durable, and easy to install and remove. It’s a modern favorite for its versatility.
Pros:
- Breathable, reducing the risk of mold growth.
- Durable and resistant to tearing.
- Easy to hang and reposition during installation.
- Strippable: peels off the wall in large sheets without residue.
- Dimensionally stable: won’t expand or contract significantly with humidity changes.
Cons:
- Can be more expensive than basic paper or vinyl.
- May not be as easily washable as solid vinyl, depending on the finish.
The key advantage of non-woven wallpaper is the ‘paste-the-wall’ installation method. You apply paste directly to the wall, hang the dry paper, and can often slide it into place. This makes it significantly easier for DIYers. Its breathability also means it’s a good choice for older homes or areas where moisture might be a concern, provided it’s not a direct water-splashing zone.
Fabric wallpaper
Fabric wallpaper, often called textile wallpaper, features a fabric surface—such as silk, linen, cotton, or grasscloth—adhering to a paper or non-woven backing. It adds a luxurious texture and depth to walls.
Pros:
- Adds rich texture, warmth, and acoustic benefits.
- Visually appealing with a sophisticated, natural look.
- Can be durable depending on the fabric.
Cons:
- Generally the most expensive option.
- Not washable; prone to staining.
- Requires careful installation to avoid damaging the fabric.
- Can be difficult to clean.
- Susceptible to damage from pets or children.
Grasscloth, a popular type of natural grass wallpaper, is a prime example. It’s beautiful but delicate. Installation for fabric wallpapers usually requires a professional due to their cost and sensitivity. They are best suited for low-traffic areas like master bedrooms or formal living rooms where they can be admired without much wear and tear.
Paintable wallpaper
Paintable wallpaper is typically a textured, embossed paper or vinyl product designed to be painted over. It’s excellent for covering imperfect walls, providing a subtle texture, or creating a custom look.
Pros:
- Can be painted any color to match your decor.
- Hides minor wall imperfections and cracks.
- Provides a textured finish that adds interest.
- Can be repainted multiple times.
Cons:
- Requires painting, adding an extra step and cost.
- The texture can wear down with repeated repainting.
- Installation is similar to other wallpaper types, requiring care.
This is a great option if you’re looking for the look of wallpaper but want the flexibility of paint. For more details, you can explore Transform Your Walls with Paintable Wallpaper: The Ultimate Guide.
Preparing your walls for wallpaper
Proper wall preparation is the most critical step for a professional-looking wallpaper installation. Skipping or rushing this stage guarantees problems, from bubbles and seams that show to wallpaper that peels off prematurely.
Cleaning the walls
All walls must be clean, dry, and free of dust, grease, and old adhesive. Use a mild detergent or TSP (trisodium phosphate) substitute mixed with water. Rinse thoroughly to remove any residue from the cleaning solution. For greasy marks, especially in kitchens, a degreaser might be necessary.
Repairing imperfections
Fill any holes from nails or screws with spackling compound. Sand smooth once dry. Large cracks or gouges should be repaired with joint compound. Ensure all repairs are sanded flush with the wall surface. Any bumps or uneven spots will telegraph through the wallpaper, especially with thinner materials.
Stripping old wallpaper
If you have old wallpaper, it must be completely removed. Most modern wallpapers are strippable, meaning they peel off dry. However, older wallpapers, vinyl-coated ones, or those applied with heavy-duty adhesive may require a wallpaper steamer or a strong stripping solution. Be patient; scraping too aggressively can damage the drywall underneath. After stripping, wash the walls to remove any residual paste.
Priming the walls
A primer is essential, especially over bare drywall, repaired areas, or dark colors you’re covering. Use a high-quality wallpaper primer. This creates a uniform surface, seals porous areas, and ensures the wallpaper adhesive will adhere properly. It also makes future wallpaper removal much easier, acting as a release agent. If you’re covering a dark color with a light wallpaper, a tinted primer can prevent the old color from showing through.
For walls that are in poor condition or have multiple layers of old wallpaper, consider using a wallpaper liner. A liner paper is a thick, durable paper applied directly to the wall to create a perfectly smooth, stable surface for your final wallpaper choice. It’s an essential tool for achieving a flawless finish on imperfect walls.
Wallpaper installation steps
The installation process can vary slightly depending on the type of wallpaper, but the core steps remain consistent. Patience and precision are key.
Measuring and cutting
Measure the height of your walls, adding at least 4 inches (10 cm) for trimming at the ceiling and baseboard. Cut your first strip, ensuring it’s perfectly straight. Use a sharp utility knife and a straight edge for clean cuts. For patterned wallpaper, you’ll need to match the pattern repeat between strips, which often means cutting longer pieces to allow for the pattern alignment. Always cut a few extra strips in case of mistakes or future repairs.
Applying the adhesive
Paste-the-wall: This is the easiest method for most DIYers, especially with non-woven wallpapers. Apply an even coat of wallpaper paste to a section of the wall, slightly wider than your wallpaper strip. Follow the paste manufacturer’s instructions regarding application and ‘booking’ time if required by the product.
Paste-the-paper: For traditional paper or some vinyl wallpapers, you’ll apply paste to the back of the cut strip. Spread it evenly, ensuring full coverage. Then, ‘book’ the paper by folding the pasted sides together, sticky side in, without creasing. Let it rest for the time recommended by the manufacturer (usually 5-10 minutes) to allow the paste to activate and the paper to expand slightly. This prevents shrinking on the wall.
Peel-and-stick: Some vinyl wallpapers and many removable options come with their own adhesive backing. Simply peel off the backing and apply the wallpaper to the wall.
Hanging the first strip
Start in a corner or a prominent visible area. Use a plumb line or a level to ensure your first strip is perfectly vertical. This is critical, as subsequent strips will be hung straight relative to this first one. Overlap the first strip slightly into the corner if desired, or trim it precisely. Smooth the wallpaper onto the pasted wall using a wallpaper brush or smoothing tool, working from the center outwards to push out air bubbles and excess paste. Ensure the edges are pressed firmly.
Hanging subsequent strips
Hang the next strip butting its edge tightly against the first strip. For patterned wallpaper, align the pattern repeat carefully. Use a seam roller gently over the seams to ensure they are flat and adhere well. Avoid pressing too hard, which can flatten the texture or squeeze out paste from behind.
Trimming
Once a strip is smoothed and in place, use a sharp utility knife and a broad knife or straight edge to trim the excess wallpaper at the ceiling and baseboard. Make clean, smooth cuts. For inside corners, you might slightly overlap the paper onto the adjacent wall and then carefully trim it, or you can use a technique called ‘corner wrap’ where you wrap the paper around the corner by about 1/2 inch (1.25 cm) and then start the next wall’s paper butted up against this wrapped edge.
Dealing with obstacles
For outlets and switches, turn off the power first. Hang the wallpaper over the opening, then carefully cut an ‘X’ in the center of the opening. Trim the excess wallpaper from the edges of the outlet or switch box. For windows and doors, cut the wallpaper up to the frame, then trim away the excess.
Cleaning up
Wipe away any excess paste immediately with a damp sponge or cloth. Be careful not to smudge the wallpaper surface, especially if it’s textured or a delicate material. Rinse your sponge frequently.
Wallpaper for different rooms
The best wallpaper for house walls depends heavily on the room’s function and potential for moisture and wear.
Living rooms and dining rooms
These are typically lower-traffic areas where aesthetics are paramount. You have a lot of flexibility here. Consider elegant damask patterns for a classic feel, or perhaps a sophisticated floral or abstract design. Natural textures like grasscloth or linen-look non-wovens can add warmth and depth. Discover the Timeless Elegance of Damask Wallpaper for Your Walls for inspiration.
Bedrooms
Bedrooms are personal sanctuaries. You can opt for calming, serene patterns, bold statement walls, or subtle textures. Consider breathable non-woven papers or fabric wallpapers for a touch of luxury. The goal is to create a relaxing atmosphere.
Kitchens
Kitchens require durable, washable, and moisture-resistant wallpaper. Vinyl wallpapers are ideal here. Look for patterns that can withstand splashes and grease, and can be easily wiped clean. Avoid paper-based wallpapers.
Bathrooms
Similar to kitchens, bathrooms demand moisture resistance. Vinyl or specially treated non-woven wallpapers are your best bet. Ensure good ventilation in the bathroom to prevent moisture buildup behind the wallpaper. Some people opt for peel-and-stick vinyl for easier replacement after moisture damage.
Hallways and entryways
These are high-traffic areas. Durability and washability are important. Vinyl or robust non-woven wallpapers are recommended. A bold pattern can make a strong first impression, or a subtle texture can add sophistication.
Kids’ rooms
Durability, cleanability, and fun are key. Vinyl or washable non-woven wallpapers are essential. Consider playful patterns or designs that can be easily wiped clean of crayon marks or sticky fingers. Removable wallpaper options can also be great for temporary decor or if you anticipate frequent changes.
Common mistakes to avoid
Even with the best intentions, certain mistakes can sabotage your wallpaper project.
1. Inadequate wall preparation
As mentioned, this is the biggest pitfall. Skipping cleaning, not repairing holes, or not priming adequately will lead to adhesion issues, bubbles, and an unprofessional finish. Always prep your walls thoroughly.
2. Using the wrong paste
Different wallpaper types require specific pastes. Using a paste that’s too weak won’t hold, and one that’s too strong might damage delicate papers or be difficult to remove. Always follow the wallpaper manufacturer’s recommendation for paste type.
3. Not checking the pattern repeat
For patterned wallpaper, not accounting for the pattern repeat will result in misaligned designs between strips, creating a jarring visual effect. Always check the pattern repeat specification on the roll and cut accordingly.
4. Cutting corners on tools
Using a dull knife for trimming, a poor-quality smoothing tool, or an inadequate brush can lead to ripped paper, visible seams, or air bubbles. Invest in good quality tools for a smoother installation.
5. Ignoring moisture
Using standard paper wallpaper in a bathroom or kitchen is a recipe for disaster. Always select a material appropriate for the room’s humidity and potential for splashes.
6. Trying to rush the process
Wallpapering requires patience. Rushing through cleaning, pasting, hanging, or trimming will almost certainly lead to mistakes that are difficult to fix later.
Maintaining your wallpaper
Keeping your wallpaper looking its best involves regular, gentle care.
- Dusting: Regularly dust your wallpaper with a soft brush or a vacuum cleaner brush attachment.
- Spot cleaning: For washable wallpapers (vinyl or scrubbable non-wovens), use a soft sponge and mild soap and water. Work from the bottom up to avoid streaks. Rinse with a clean, damp sponge and dry with a soft cloth. Always test in an inconspicuous area first.
- Avoid harsh chemicals: Never use abrasive cleaners or solvents, as they can damage the wallpaper’s surface or print.
- Address damage promptly: If you notice peeling edges or small tears, repair them as soon as possible with a bit of wallpaper adhesive or a suitable wallpaper repair kit to prevent further damage.
By understanding the different types of wallpaper available, preparing your walls meticulously, and following proper installation techniques, you can successfully transform your home’s walls and enjoy a beautiful, lasting finish.