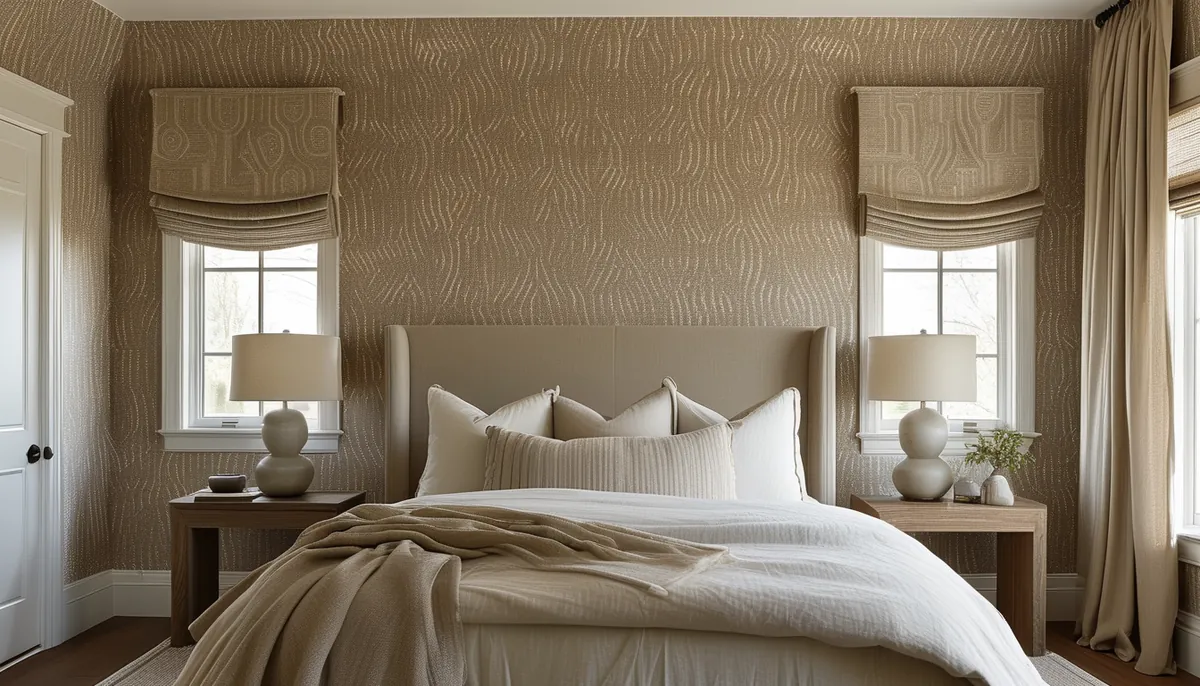
Your bedroom ceiling is often the first thing you see when you wake up and the last thing you see before you sleep. It’s a vast, often overlooked surface that offers a prime opportunity to make a statement. Applying wallpaper to your bedroom ceiling can elevate the room from ordinary to extraordinary, adding personality, depth, and a touch of luxury. This guide will walk you through everything you need to consider before, during, and after the installation of ceiling wallpaper.
Why wallpaper your bedroom ceiling?
A blank white ceiling can be a missed opportunity. Wallpapering your ceiling can:
- Create a focal point: It draws the eye upward, adding an unexpected element of design.
- Add depth and dimension: Patterns, especially darker or more intricate ones, can make a room feel cozier or more expansive, depending on the design.
- Enhance your room’s theme: Whether you’re going for a serene, bohemian, or modern vibe, the right wallpaper can tie everything together.
- Introduce color and texture: It’s a way to incorporate bold colors or subtle textures without overwhelming the walls.
- Disguise imperfections: A busy pattern can hide minor flaws in the drywall or plaster.
Types of wallpaper suitable for ceilings
Not all wallpapers are created equal, and some are better suited for ceiling application than others. The primary considerations are durability, ease of installation, and pattern matching.
Peel and stick wallpaper
This is often the go-to for DIYers tackling ceilings. Peel and stick wallpaper is a vinyl-based material with an adhesive backing. You simply peel off the backing and apply it directly to the surface.
- Pros: Extremely easy to install and remove, forgiving of minor mistakes (you can reposition it), no paste required, and generally more durable than traditional paper. This makes it ideal for renters or those who like to redecorate frequently. You can discover the best high-quality options in our guide to high-quality peel and stick wallpaper.
- Cons: Can be more expensive per roll than traditional wallpaper. Some very textured or heavily patterned peel and stick papers can be challenging to align perfectly on a ceiling due to their weight and the difficulty of working overhead.
Traditional (Pasteable) Wallpaper
This is the classic wallpaper that requires a separate wallpaper paste to adhere to the wall. It’s typically made from paper, vinyl, or a vinyl-coated paper.
- Pros: Often more affordable than peel and stick. Comes in a vast array of materials, textures, and finishes. Can be very durable when properly installed.
- Cons: Requires more skill and patience to install, especially on a ceiling. Messy process involving paste application. Mistakes are harder to correct, and removal can be more labor-intensive. Pattern matching can be tricky when working overhead.
Solid Vinyl Wallpaper
Made entirely of vinyl, these wallpapers are highly durable, scrubbable, and water-resistant. They are excellent for high-traffic areas and can withstand moisture well.
- Pros: Very durable and easy to clean, making them a good choice for busy households. Good resistance to moisture.
- Cons: Can be less breathable than other types. Installation can be more challenging due to the material’s thickness and tendency to expand slightly with paste.
Textured Wallpaper
This category includes wallpapers with raised patterns or textures, such as grasscloth, fabric-backed vinyl, or embossed papers.
- Pros: Adds significant visual and tactile interest. Can hide minor imperfections in the ceiling surface very well.
- Cons: Can be more difficult to pattern match, especially intricate textures. Some textures may be harder to clean.
Choosing the right wallpaper for your bedroom ceiling
Selecting the perfect wallpaper involves considering the room’s style, the ceiling’s height, and your personal preferences. Here’s how to make the best choice:
Consider the scale of the pattern
The size of the pattern should complement your room’s dimensions.
- Large patterns: Can make a room with a high ceiling feel grander and more dramatic. However, in a room with a low ceiling, a large, bold pattern can feel overwhelming and make the space seem smaller.
- Small patterns: Often work well in smaller rooms or those with lower ceilings. They add detail without dominating the space. They can also create a sense of spaciousness.
- Fretwork or damask patterns: These intricate designs can add a touch of classic elegance. Ensure you have enough ceiling space to appreciate the details.
Think about color and light
The color of the wallpaper will significantly impact the room’s ambiance.
- Light colors and subtle patterns: Can make a bedroom feel airy, bright, and more spacious. They reflect light well, which is beneficial for rooms with limited natural light or lower ceilings.
- Dark colors and bold patterns: Can create a cozy, intimate, and luxurious atmosphere. They work best in larger bedrooms or those with higher ceilings. Dark ceilings can make a room feel warmer and more enveloping, perfect for a restful retreat.
Match your personal style
Your bedroom should be a reflection of you. Consider your existing decor and the mood you want to create.
- Bohemian: Consider patterns with floral motifs, global-inspired designs, or natural textures. Explore beautiful flowers on wallpaper or unique global patterns.
- Modern/Minimalist: Opt for geometric patterns, solid colors with subtle textures, or abstract designs.
- Traditional/Classic: Damask, toile, or subtle striped patterns can add timeless elegance.
- Rustic/Farmhouse: Consider patterns that mimic wood, stone, or subtle natural elements. Explore designs like stunning Yellowstone wallpaper for a touch of nature.
Consider the ceiling height
This is crucial for visual impact.
- Low ceilings: Lighter colors, vertical stripes, or smaller, repeating patterns can help create an illusion of height. Avoid very dark colors or large, overwhelming patterns that can make the ceiling feel closer.
- High ceilings: You have more freedom here. Darker colors, large dramatic patterns, or even murals can be used to bring the ceiling down visually and make the room feel cozier.
Preparation is key for ceiling wallpaper installation
Proper preparation ensures a smooth installation and a professional-looking finish. This is especially critical when working overhead.
Clean the ceiling surface
The ceiling must be clean, dry, and free of any grease, dust, or old wallpaper residue. Use a mild detergent and water, followed by a clean rinse. If there are any signs of mold or mildew, treat the area thoroughly.
Repair imperfections
Fill any holes, cracks, or significant bumps with joint compound. Sand the area smooth once dry. This is essential because wallpaper will highlight, not hide, uneven surfaces.
Prime the ceiling
Applying a coat of primer designed for wallpaper is highly recommended, especially for traditional wallpaper and porous surfaces. A good primer ensures better adhesion, makes future removal easier, and provides a uniform surface for the wallpaper to stick to. For peel and stick, priming is often optional but can still improve adhesion on certain surfaces.
Measure and cut your wallpaper
Measure the ceiling area you plan to cover. It’s best to work in sections. For each section, cut a piece of wallpaper that is slightly larger than the area – add about 4-6 inches extra all around for trimming. This extra allows for adjustments and ensures complete coverage, especially if you have intricate ceiling details or beams.
How to install wallpaper on a bedroom ceiling
Working on a ceiling is physically demanding and requires patience. It’s often easier with a partner.
For peel and stick wallpaper:
- Start at a straight edge: Usually, the edge of the ceiling closest to a wall or a corner.
- Peel back a few inches of the backing: Do not remove it all at once.
- Align the edge of the wallpaper with the ceiling edge: Ensure it’s straight and at least an inch or two overlaps onto the wall for trimming.
- Adhere the exposed portion: Smooth it down with a wallpaper smoother or a clean, dry cloth, working from the center outwards to push out air bubbles.
- Gradually peel the backing: As you smooth the wallpaper onto the ceiling, continue to peel the backing away slowly. Keep the wallpaper taut but not stretched.
- Overlap seams (if recommended by the manufacturer): Some peel and stick papers can be overlapped slightly, while others are designed for butt joints. Check the product instructions.
- Trim the edges: Once the panel is applied, use a sharp utility knife or a craft knife and a straight edge (like a metal ruler or a seam roller) to carefully trim the excess wallpaper along the wall and any corners.
- Repeat: Continue with the next panel, ensuring a tight seam and proper pattern alignment if applicable.
For traditional (pasteable) wallpaper:
- Prepare your paste: Mix the wallpaper paste according to the manufacturer’s instructions.
- Apply paste: Lay your cut wallpaper panel paste-side up on a clean pasting table or protected surface. Apply an even coat of paste, ensuring it covers the entire back of the paper, paying attention to the edges.
- Book the paper: Fold the pasted wallpaper onto itself (paste-to-paste), bringing the top edge down to meet the bottom edge, and the bottom edge up to meet the top. This