A “roommates wall decal” is a popular, versatile, and temporary decorative element designed to adhere smoothly to interior walls, offering a commitment-free way to transform any space. These peel-and-stick designs, often popularized by brands like RoomMates, provide an accessible solution for homeowners and renters alike to infuse personality, style, and visual interest into their environments without the permanence or extensive labor of paint or traditional wallpaper. At Starhouse, we understand the dynamic nature of contemporary living and curate wall decor solutions that combine aesthetic appeal with practical application, ensuring your home reflects your evolving taste with ease and sophistication.
Key Takeaways
- Roommates wall decals offer a highly versatile, commitment-free method for transforming interior spaces, ideal for renters and those who frequently update their decor.
- These decals are available in a vast array of types, from graphic illustrations and text to faux finishes and 3D effects, catering to diverse design aesthetics and functional needs.
- Primarily crafted from durable vinyl or fabric, wall decals utilize low-tack, repositionable adhesives designed to prevent wall damage upon removal.
- Successful application hinges on meticulous surface preparation, precise measurement, and careful, bubble-free installation using appropriate tools like a squeegee.
- Proper care, including gentle cleaning and avoiding harsh conditions, significantly extends the lifespan and maintains the aesthetic integrity of wall decals.
- Integrating decals effectively into a room’s design involves considering scale, color palette, existing furnishings, and the creation of focal points.
Understanding Roommates Wall Decals: What Are They?
Roommates wall decals, a term that has become synonymous with removable wall decor, are self-adhesive decorative elements designed to be applied and removed from interior surfaces without causing damage or leaving residue. These versatile design tools offer an immediate and impactful way to personalize spaces, ranging from subtle accents to full-wall murals, and are particularly favored for their flexibility and ease of use.
The concept of wall decals originated from vinyl sign-making technology, adapting durable yet flexible materials for interior design applications. What began as simple graphic cutouts has evolved into a sophisticated range of products, incorporating intricate designs, realistic textures, and high-resolution imagery. The term “Roommates wall decal” often refers to the broader category of peel-and-stick wall decor, much like “Kleenex” is used for facial tissues, due to the brand’s prominent market presence and pioneering role in making these products widely accessible for home decoration.
The Appeal of Removable Wall Decor
The primary allure of these decals lies in their non-permanent nature. This characteristic makes them an ideal solution for a variety of living situations and design needs:
- Renter-Friendly: For individuals living in rented apartments or homes, wall decals provide a creative outlet to personalize their space without violating lease agreements that often prohibit painting or permanent alterations.
- Design Flexibility: Homeowners can experiment with bold patterns, vibrant colors, or thematic designs without the long-term commitment. If tastes change or a room’s function evolves, the decal can be easily removed and replaced.
- Cost-Effective: Compared to professional painting, traditional wallpaper installation, or custom murals, wall decals offer a significantly more economical path to achieving a high-impact aesthetic transformation.
- Ease of Application: Most decals are designed for DIY installation, requiring minimal tools and no specialized skills, making them accessible to virtually anyone.
- Damage-Free Removal: High-quality decals are engineered with specific adhesives that bond sufficiently for application but release cleanly from properly prepared surfaces, leaving walls pristine.
Distinction from Other Wall Coverings
While often grouped with other wall treatments, it is crucial to understand how wall decals differ from options like traditional wallpaper, peel-and-stick wallpaper, and stenciling:
- Traditional Wallpaper: Requires paste, specialized tools, and significant effort for both application and removal, often leading to wall damage. Decals are typically smaller, more specific design elements.
- Peel-and-Stick Wallpaper: While also removable, peel-and-stick wallpaper covers entire walls or large sections with a continuous pattern. Decals are often individual design units or large, self-contained images. The adhesive on peel-and-stick wallpaper is designed for broader, more consistent coverage, whereas decal adhesives are optimized for discrete elements.
- Paint: A permanent solution that demands extensive preparation, drying time, and re-painting for changes. Decals offer instant gratification and reversibility.
- Stenciling: Involves painting a pattern onto a wall using a stencil, which is labor-intensive, requires artistic skill, and is permanent once applied. Decals replicate the patterned look without the effort or permanence.
A “roommates wall decal” is a pre-designed, self-adhesive graphic or pattern printed on a flexible material, typically vinyl or fabric, that can be applied to and removed from smooth interior surfaces without causing damage. This definition highlights their key characteristics: pre-designed, self-adhesive, and removable, making them a cornerstone of modern, flexible home decor.
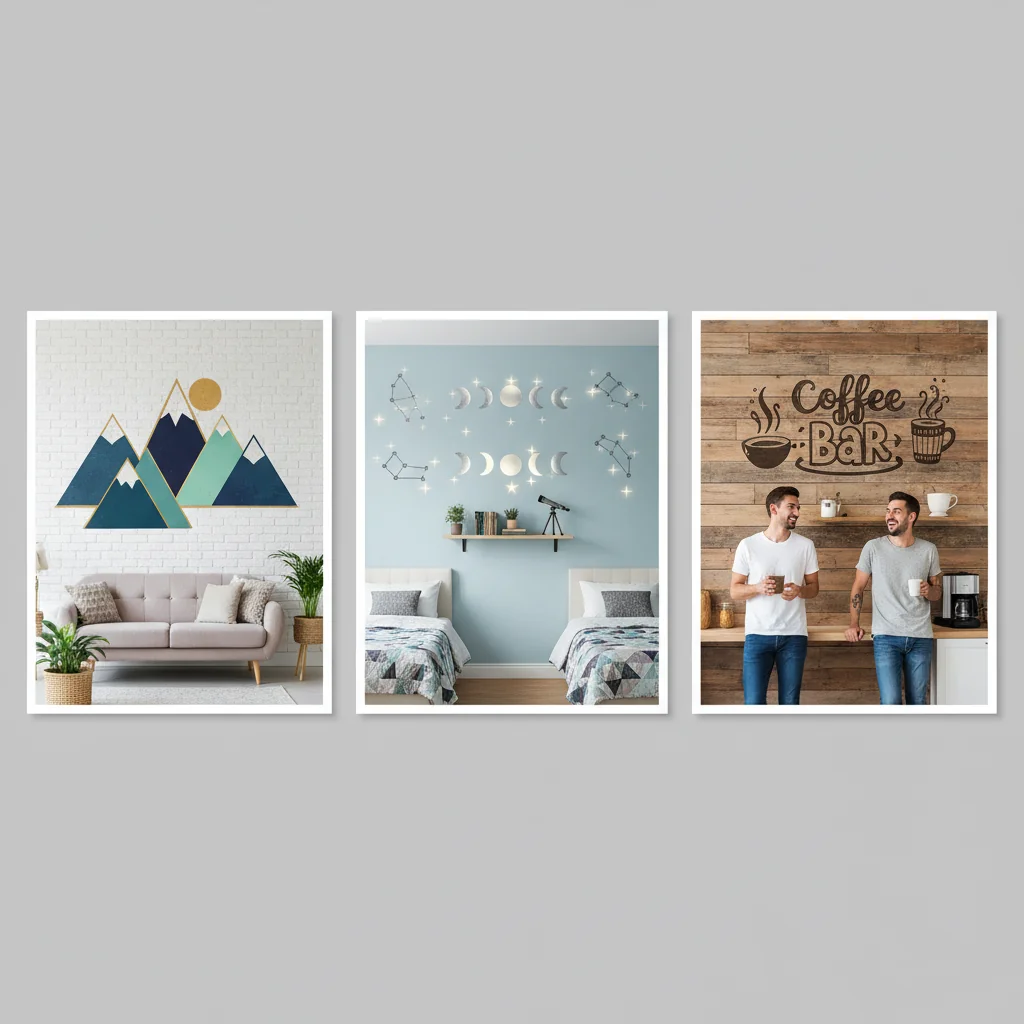
The Versatility of Wall Decals: Types and Styles
The versatility of wall decals is evident in the expansive array of types and styles available, ensuring there is a perfect option to complement virtually any interior design aesthetic or functional requirement. From subtle accents to bold statements, these decorative elements provide endless possibilities for personalizing a space.
Starhouse curates collections that span the spectrum of design, offering solutions that range from whimsical and playful to sophisticated and architectural. Understanding the different categories and how they align with various design philosophies is key to making an informed choice.
Common Types of Wall Decals
The functional and aesthetic categories of wall decals are diverse:
-
Graphic and Illustrative Decals: These are the most common type, featuring a wide range of imagery.
- Abstract and Geometric: Characterized by shapes, lines, and patterns that create a modern, dynamic look. They can range from minimalist circles to complex tessellations.
- Botanical and Nature-Inspired: Depicting leaves, flowers, trees, mountains, or entire landscapes. These bring an element of biophilic design indoors, promoting tranquility and connection to nature.
- Animal and Wildlife: Popular for nurseries, children’s rooms, or even sophisticated spaces with stylized animal motifs.
- Faux Windows/Doors: Decals that create the illusion of an additional architectural feature, often used to expand a small space or add visual interest to a blank wall.
-
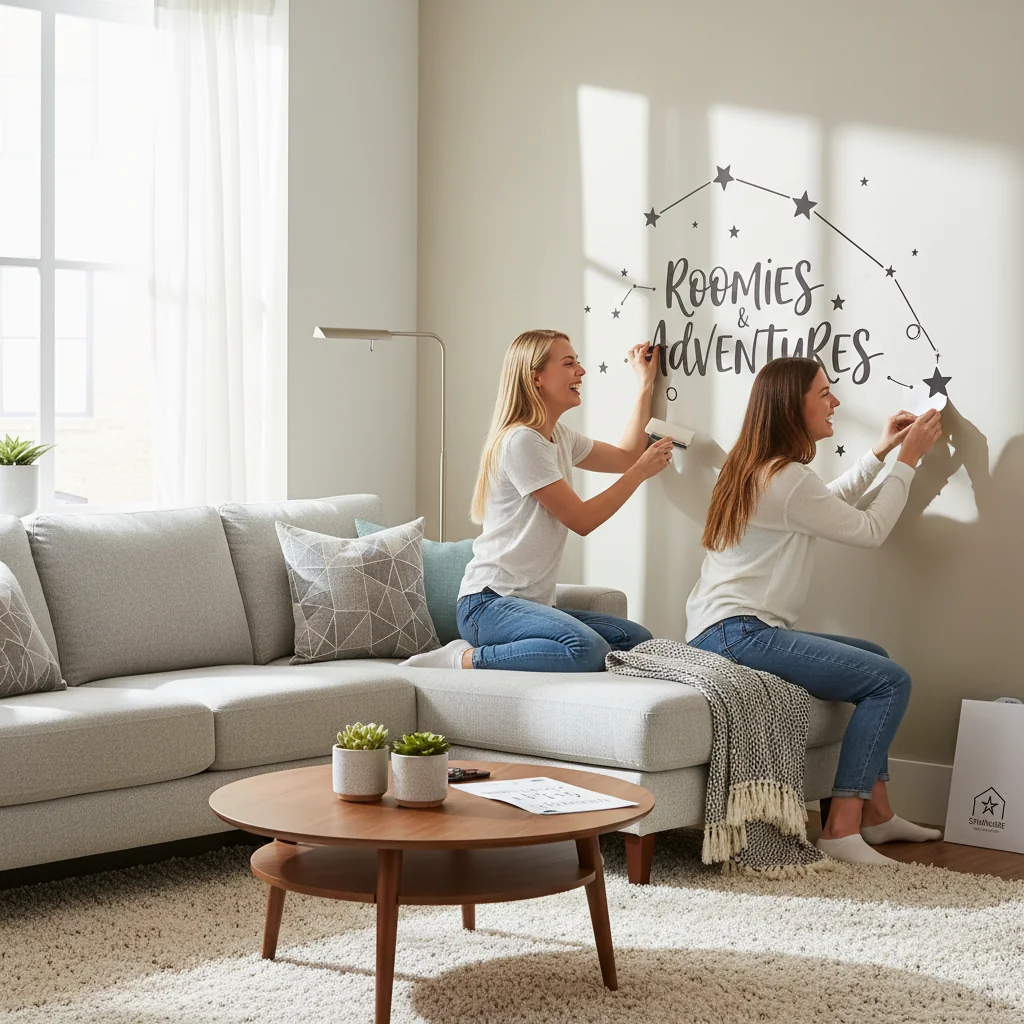
Text-Based Decals: These decals feature words, phrases, quotes, or monograms, acting as powerful statements or personalized touches.
- Inspirational Quotes: Popular for home offices, bedrooms, or living areas, offering daily motivation or reflecting personal values.
- Monograms and Names: Ideal for personalizing nurseries, children’s rooms, or master bedrooms, providing a bespoke touch.
- Typography Art: Decals that use different fonts and arrangements to create a visually appealing textual design, even without a specific message.
-
Faux Finish Decals: Designed to mimic the appearance of expensive or labor-intensive materials, offering a high-end look at a fraction of the cost and effort.
- Faux Brick or Stone: Creates an industrial or rustic aesthetic, perfect for accent walls.
- Faux Wood Grain: Can replicate shiplap, reclaimed wood, or paneling, adding warmth and texture.
- Faux Marble or Concrete: Introduces a touch of modern luxury or urban grit without the weight or cost of real materials.
- Tile Decals: Specifically designed for kitchens or bathrooms, these can cover existing tiles or create a tiled effect on a smooth wall, offering a temporary backsplash solution.
-
Educational and Thematic Decals: Primarily used in children’s spaces or classrooms, these combine decor with learning.
- Maps and Globes: World maps, constellations, or local city maps.
- Growth Charts: Functional and decorative, allowing families to track a child’s height over time.
- Alphabet and Number Decals: Engaging visual aids for early childhood development.
-
Specialty Decals:
- Chalkboard and Dry-Erase Decals: Functional surfaces for notes, drawings, or calendars, often found in kitchens, home offices, or playrooms.
- 3D or Dimensional Decals: While still flat, these often use clever shading or layered elements to create an illusion of depth or texture. Some may have slight physical relief.
- Mirrored or Metallic Decals: Offer reflective qualities, adding a touch of glamour and helping to bounce light around a room.
- Custom Decals: Many manufacturers offer bespoke services, allowing customers to turn their own designs, logos, or photographs into wall decals.
Popular Design Styles Enhanced by Decals
Wall decals are instrumental in defining or enhancing various interior design styles:
- Minimalist: Simple geometric shapes, line art, or subtle abstract patterns in neutral tones complement a minimalist aesthetic without cluttering the space.
- Scandinavian: Nature-inspired motifs like simple trees, mountains, or stylized animals, often in muted colors, align perfectly with the clean, functional, and cozy principles of Scandinavian design.
- Bohemian: Intricate mandalas, eclectic floral patterns, or global-inspired designs in rich, earthy tones or vibrant hues contribute to a free-spirited, layered look.
- Industrial: Faux brick, concrete, or exposed piping decals can instantly inject an urban, edgy feel into a space, complementing metal accents and raw textures.
- Farmhouse: Shiplap, rustic wood grain, or charming animal silhouettes (like chickens or cows) in distressed finishes align with the warm, inviting, and slightly rustic character of farmhouse decor.
- Modern and Contemporary: Bold geometric patterns, abstract art, or sleek metallic designs in a clean color palette emphasize the clean lines and innovative forms of modern design.
- Traditional: Classic floral motifs, damask patterns, or elegant textual quotes, often in a more subdued color scheme, can add a refined touch to traditional interiors.
- Eclectic: Decals allow for playful mixing and matching of various styles, colors, and patterns, creating a uniquely curated and personal space.
- Art Deco: Geometric patterns, fan shapes, or stylized sunbursts, often in metallic gold or silver, can evoke the glamour and sophistication of the Art Deco era.
- Mid-Century Modern: Abstract organic shapes, atomic-inspired designs, or simple graphic patterns in a retro color palette can perfectly capture the essence of this iconic style.
The breadth of options ensures that whether a client seeks a temporary solution for a rental, a thematic element for a child’s room, or a sophisticated artistic statement for a living area, a “roommates wall decal” can fulfill the vision with precision and style. Starhouse emphasizes that the key is to select a decal type and style that not only appeals aesthetically but also harmonizes with the room’s function and existing decor, creating a cohesive and impactful design.
Materials and Adhesives: What Are Wall Decals Made Of?
The performance, durability, and aesthetic quality of wall decals are fundamentally determined by the materials used for the graphic itself and the adhesive backing. Understanding these components is crucial for selecting a decal that will adhere correctly, look exceptional, and remove cleanly without damaging your wall surfaces.
Starhouse ensures that all curated wall decor options utilize high-quality materials and advanced adhesive technologies, providing both visual appeal and reliable functionality. The primary materials are vinyl and fabric, each offering distinct characteristics.
Primary Decal Materials
Wall decals are predominantly manufactured from two main types of materials:
-
Vinyl (PVC – Polyvinyl Chloride):
Vinyl is the most common material for wall decals due to its durability, versatility, and cost-effectiveness. It is a plastic-based material that can be engineered with various finishes and properties.
- Durability: Vinyl is highly resilient to moisture, fading, and tearing, making it suitable for high-traffic areas or spaces where occasional cleaning is necessary. It typically maintains its color vibrancy for years.
- Finishes: Available in matte, gloss, and sometimes satin finishes. Matte vinyl is often preferred for wall decals as it reduces glare and provides a painted-on look, integrating more seamlessly with the wall surface. Glossy vinyl can offer a vibrant, reflective quality that makes colors pop.
- Print Quality: Vinyl provides an excellent surface for high-resolution printing, allowing for intricate details, vibrant colors, and photographic quality images.
- Flexibility: While durable, vinyl is also flexible, allowing it to conform slightly to minor wall textures. However, overly textured walls can still pose adhesion challenges.
- Environmental Considerations: Traditional PVC vinyl can raise environmental concerns regarding its production and disposal. Some manufacturers now offer PVC-free or phthalate-free vinyl options, reflecting a growing commitment to sustainability.
-
Fabric (Polyester Textile):
Fabric decals, often made from finely woven polyester textile, offer a more premium look and feel. They are increasingly popular for their unique aesthetic and enhanced user experience.
- Texture and Finish: Fabric decals have a subtle, woven texture that gives them a sophisticated, high-end appearance, often described as feeling like a fine canvas. They typically have a matte finish, which absorbs light and reduces reflections, contributing to a truly painted-on or mural-like effect.
- Repositionability: Fabric decals are generally more forgiving during application. Their adhesive often allows for greater repositioning without losing tack, which is beneficial for large or intricate designs.
- Durability: While durable, fabric decals may not be as resistant to harsh cleaning agents or extreme moisture as vinyl. They are less prone to tearing than very thin vinyl.
- Print Quality: Excellent for vibrant colors and detailed graphics, though the fabric texture can impart a slightly softer look compared to the crispness of smooth vinyl.
- Environmental Considerations: Polyester is a synthetic fiber, but many fabric decal options are PVC-free and sometimes made from recycled materials, appealing to eco-conscious consumers.
Adhesive Technologies
The adhesive is perhaps the most critical component of a “roommates wall decal,” as it dictates how well the decal adheres, how long it lasts, and most importantly, how cleanly it removes. Modern wall decals utilize specialized, low-tack, pressure-sensitive adhesives.
- Low-Tack Adhesive: This type of adhesive is engineered to provide sufficient grip for the decal to stay firmly on the wall for extended periods (often years) but with a bond strength that allows for easy and clean removal. It is significantly less aggressive than permanent adhesives found on standard stickers.
- Repositionable Adhesive: Many high-quality decals feature a repositionable adhesive, particularly fabric-based ones. This means the decal can be gently peeled off the wall shortly after initial application and reapplied multiple times without losing its stickiness or damaging the surface. This feature is invaluable for achieving perfect alignment and for correcting minor errors during installation.
- Clean Removal: The hallmark of a quality wall decal adhesive is its ability to be removed without leaving any sticky residue, paint chips, or surface damage. This is especially important for painted drywall, which can be vulnerable to more aggressive adhesives.
Factors Affecting Adhesion and Removal
While decal materials and adhesives are designed for optimal performance, several external factors can influence their effectiveness:
- Wall Surface Texture: Smooth, clean, and flat surfaces provide the best adhesion. Highly textured walls (e.g., heavily stuccoed or plaster walls) can significantly reduce the contact surface area for the adhesive, leading to poor adhesion and premature peeling.
- Paint Type and Condition: Freshly painted walls (within 30 days) may still be off-gassing, which can interfere with adhesive bonding. Low-VOC (Volatile Organic Compound) or stain-resistant paints, particularly those with silicone additives, can also sometimes present adhesion challenges. Matte or eggshell finishes generally work best; high-gloss paints can be too slick, and chalk paints too porous.
- Cleanliness of Surface: Dust, dirt, grease, or grime on the wall will prevent the adhesive from forming a strong bond, leading to bubbling or peeling. Proper cleaning is paramount.
- Environmental Conditions: Extreme temperature fluctuations or high humidity can impact adhesive performance. Decals are best applied in moderate room temperatures (60-80°F or 15-27°C) and average humidity.
- Application Technique: Proper application, including using a squeegee to smooth out air bubbles and ensure full contact, is essential for optimal adhesion.
When selecting a “roommates wall decal,” Starhouse recommends considering not only the visual design but also the material’s suitability for the intended environment and the adhesive’s compatibility with your wall type. Fabric decals offer superior repositionability and a premium matte finish, while vinyl provides robust durability and sharp graphic reproduction. Both are designed for damage-free removal when applied correctly to appropriate surfaces.
Choosing the Perfect Decal: Factors to Consider
Selecting the ideal “roommates wall decal” involves a thoughtful consideration of various factors beyond mere aesthetic appeal, ensuring the chosen design harmonizes with the room’s function, existing decor, and personal style. A well-chosen decal acts as a cohesive element, enhancing the overall design narrative of your space.
Starhouse advises a systematic approach to this selection process, prioritizing both visual impact and practical application. This ensures your decal not only looks stunning but also performs optimally in its intended environment.
1. Room Function and User
The primary purpose of the room and who uses it should heavily influence your decal choice.
- Living Room: Often a communal space, requiring designs that are broadly appealing, sophisticated, or conversation-starting. Large-scale botanical murals, abstract art, or elegant geometric patterns work well.
- Bedroom: A personal sanctuary, lending itself to calming, serene, or romantic designs. Soft floral patterns, subtle landscape scenes, or inspirational text decals can create a tranquil atmosphere.
- Nursery/Children’s Room: Focus on whimsical, educational, or playful themes. Animals, storybook characters, growth charts, or vibrant patterns are excellent choices. Ensure materials are child-safe and easy to clean.
- Home Office: Designs that inspire creativity, focus, or professionalism. World maps, abstract geometric patterns, or minimalist quotes can be effective. Avoid overly distracting designs.
- Kitchen/Dining Area: Food-related themes, botanical elements, or faux tile decals can add charm. Consider durability and ease of cleaning for these high-traffic, potentially splash-prone areas.
- Bathroom: Moisture-resistant designs are crucial. Subtle patterns, aquatic themes, or minimalist line art can enhance a spa-like feel.
2. Existing Decor and Color Palette
The decal must integrate seamlessly with your current furnishings, textiles, and overall color scheme.
- Color Harmony: Choose colors that complement or subtly contrast with your existing wall color, furniture, and accent pieces. Consult a color wheel for guidance on complementary, analogous, or monochromatic schemes.
- Style Cohesion: Ensure the decal’s style (e.g., modern, rustic, bohemian) aligns with the prevailing aesthetic of the room. A contemporary geometric decal might clash in a traditionally furnished space.
- Pattern Integration: If your room already features patterned rugs, curtains, or upholstery, opt for a simpler decal design or one that harmonizes with the existing patterns rather than competing. Solid colors, subtle textures, or abstract shapes can provide balance.
- Theme Consistency: If the room has a specific theme (e.g., coastal, industrial), select a decal that reinforces that theme without being overly literal or cliché.
3. Scale and Proportion
This is a critical design principle. The size of the decal must be appropriate for the wall space and the room’s overall dimensions.
- Small Accents: For subtle touches or to fill a narrow space between windows, smaller decals or a series of coordinated smaller elements work best.
- Focal Points: A large, impactful decal or a full-wall mural can serve as the room’s focal point. Ensure it doesn’t overwhelm the space or compete with other dominant features like a fireplace or a large piece of art.
- Furniture Placement: Consider how the decal will interact with furniture. A decal should not be obscured by a sofa or bed, nor should it look awkwardly cut off. Plan its placement above, beside, or around key furniture pieces.
- Room Size: In smaller rooms, oversized decals can sometimes make the space feel cramped. Conversely, a tiny decal on a vast wall can look lost. Aim for balance.
4. Lighting Conditions
The amount and type of light in a room can affect how a decal appears.
- Natural Light: In rooms with ample natural light, matte finish decals are often preferred as they minimize glare and provide a more integrated, painted-on look.
- Artificial Light: Consider how artificial lighting (overhead, lamps) will interact with the decal. Glossy finishes can create interesting reflections but may also highlight imperfections.
- Color Perception: Colors can appear differently under various lighting conditions. A color that looks vibrant in natural daylight might appear muted under warm artificial light.
5. Wall Surface and Condition
The wall itself plays a crucial role in decal adhesion and longevity.
- Smoothness: Wall decals adhere best to smooth, clean, and flat surfaces. Textured walls (e.g., orange peel, knockdown, heavily plastered) can reduce adhesion and cause the decal to bubble or peel prematurely.
- Paint Type and Age: Allow newly painted walls to cure for at least 30 days before applying decals. Low-VOC or stain-resistant paints (especially those with silicone additives) can sometimes repel adhesives. Matte, eggshell, or satin finishes are generally ideal.
- Cleanliness: Ensure the wall is free from dust, dirt, grease, and moisture before application.
6. Durability and Maintenance Requirements
Consider the decal’s material and how it will hold up in its intended environment.
- High-Traffic Areas: For hallways or children’s playrooms, durable vinyl decals that can be wiped clean are a practical choice.
- Moisture-Prone Areas: In bathrooms or kitchens, opt for vinyl, which is more moisture-resistant than fabric decals.
- Longevity: While decals are temporary, choose materials that will retain their appearance for the desired duration. High-quality vinyl and fabric decals are designed for years of vibrant display.
7. Personal Style and Theme
Ultimately, the decal should resonate with your personal taste and contribute to the desired atmosphere.
- Reflect Your Personality: Choose designs that genuinely appeal to you and reflect your interests, hobbies, or aesthetic preferences.
- Create a Mood: Decide if you want the decal to evoke calm, energy, whimsy, or sophistication, and select designs accordingly.
- Storytelling: Decals can help tell a story or reinforce a theme in a room, such as a travel theme with a world map or a serene retreat with a forest scene.
By carefully evaluating these factors, you can confidently select a “roommates wall decal” that not only enhances your interior design but also serves its purpose effectively and beautifully. Starhouse is dedicated to offering options that meet these discerning criteria, empowering you to create spaces that are both aspirational and deeply personal.
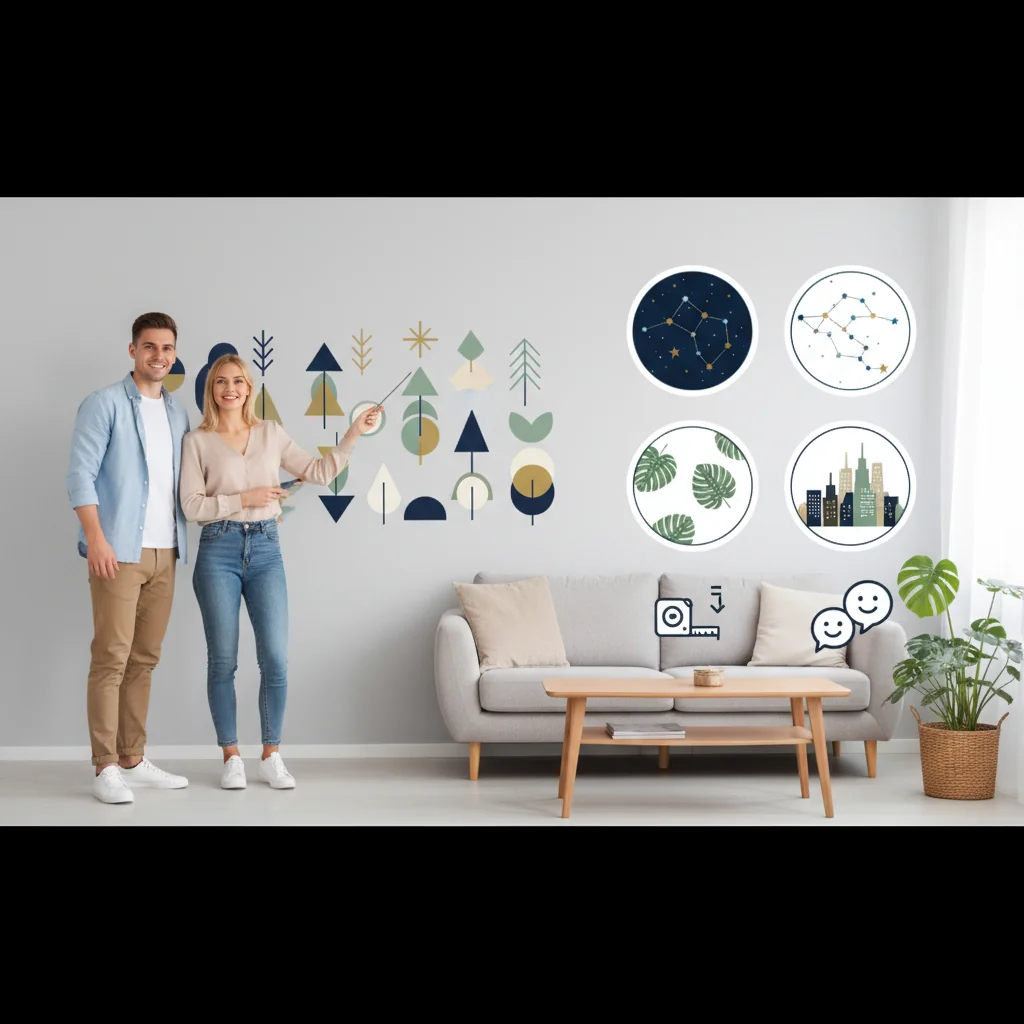
Sizing and Measuring: Ensuring a Flawless Fit
Accurate sizing and meticulous measurement are paramount to the successful application and visual impact of any “roommates wall decal.” A decal that is too large or too small for its intended space, or one that is poorly aligned, can detract significantly from the overall design. Precise planning ensures a seamless, professional finish that enhances your room’s aesthetic.
Starhouse emphasizes that taking the time for careful measurement and visualization before ordering or applying a decal will prevent common pitfalls and guarantee optimal results. This section provides a comprehensive guide to sizing and measuring for various decal applications.
Essential Tools for Measurement
Before you begin, gather the following basic tools:
- Tape Measure: A retractable metal tape measure (at least 25 feet) for accuracy.
- Pencil: For light markings on the wall that can be easily erased.
- Level: A long spirit level (2-4 feet) or a laser level for ensuring horizontal and vertical alignment.
- Step Ladder: For safely reaching higher wall sections.
- Painter’s Tape: Low-tack tape for temporarily positioning decals or creating mock-ups.
- Paper or Cardboard (Optional): For creating physical mock-ups of your decal.
Step-by-Step Measuring Process
1. Measure Your Wall Dimensions
Begin by accurately measuring the area where the decal will be placed.
- Height: Measure from the baseboard to the ceiling (or desired top edge of the decal) at several points across the wall. Walls are rarely perfectly uniform.
- Width: Measure from corner to corner (or desired side edges) at multiple heights.
- Record Measurements: Note down the smallest height and width to ensure your decal fits comfortably within the space. Always measure twice to confirm accuracy.
2. Consider Architectural Features and Furniture Placement
The decal should integrate harmoniously with the room’s existing elements.
- Windows and Doors: Measure the distance from the corners of the wall to the edges of any windows, doors, or archways. Ensure your decal design will not be awkwardly cut off or obscured.
- Outlets and Switches: Mark the locations of any electrical outlets, light switches, or thermostats. For larger decals, you may need to cut around these features during application.
- Furniture: Visualize where major furniture pieces (sofa, bed, dresser, bookshelf) will be located. Measure the height and width of these items. The decal should be positioned to complement, not conflict with, the furniture. For instance, a decal above a headboard should be centered and positioned high enough to be fully visible. Leave adequate clearance (typically 6-12 inches) above furniture.
- Artwork and Shelving: If other wall decor will be present, measure its dimensions and planned placement to ensure the decal contributes to a balanced composition.
3. Determine Decal Placement and Desired Size
This is where design vision meets practical application.
- Focal Point: If the decal is intended as a focal point, it should be centrally located on the chosen wall space, considering the room’s overall symmetry.
- Accent: For smaller accent decals, consider their relation to furniture, mirrors, or existing artwork. They should enhance, not overpower.
- Rule of Thirds: In design, dividing your wall into a 3×3 grid can help you identify aesthetically pleasing points for decal placement. Placing key elements along these lines or at their intersections often creates a more dynamic composition.
- Negative Space: Do not underestimate the importance of negative space. The decal needs room to “breathe” around it. Overfilling a wall can make a room feel cluttered.
- Sizing for Impact: For a significant impact, a decal should generally occupy a substantial portion of its intended wall segment, often 60-80% of the width or height, allowing for comfortable margins. For example, a large tree decal for a 10-foot wide wall might be 6-8 feet wide, leaving 1-2 feet of clear space on either side.
4. Create a Mock-Up (Highly Recommended)
Visualizing the decal in situ is invaluable before committing to application.
- Paper Template: Cut out paper or cardboard shapes that match the dimensions of your chosen decal. Use painter’s tape to temporarily affix these templates to the wall. Step back and observe from different angles and distances.
- Digital Mock-up: If comfortable with photo editing software, take a picture of your wall and digitally overlay the decal image to preview its appearance. Many decal retailers also offer online visualization tools.
- Adjust and Refine: Use the mock-up phase to experiment with different heights, horizontal positions, and orientations. This allows you to fine-tune placement before actual application.
5. Specific Considerations for Different Decal Types
- Full-Wall Murals: These typically come in multiple panels. Measure the wall’s full height and width, ensuring the mural dimensions are slightly larger to allow for trimming. Account for any pattern repeat if applicable.
- Text Decals: For quotes or phrases, consider the length of the text and the font size. Ensure there is enough horizontal space for the entire phrase, and enough vertical space for readability. Use a level to ensure the baseline of the text is perfectly straight.
- Multiple Decals/Repeating Patterns: If applying several individual decals or a repeating pattern, plan the spacing between each element. Use a ruler or a template to maintain consistent gaps.
- Corner Wraps: If a decal is intended to wrap around a corner, measure both wall sections and ensure the design will flow seamlessly.
By following these detailed measuring and sizing guidelines, you establish a solid foundation for a successful decal application. Starhouse advocates for this methodical approach, as it transforms the process from a potential challenge into a precise and rewarding design endeavor, ensuring your “roommates wall decal” truly elevates your space.
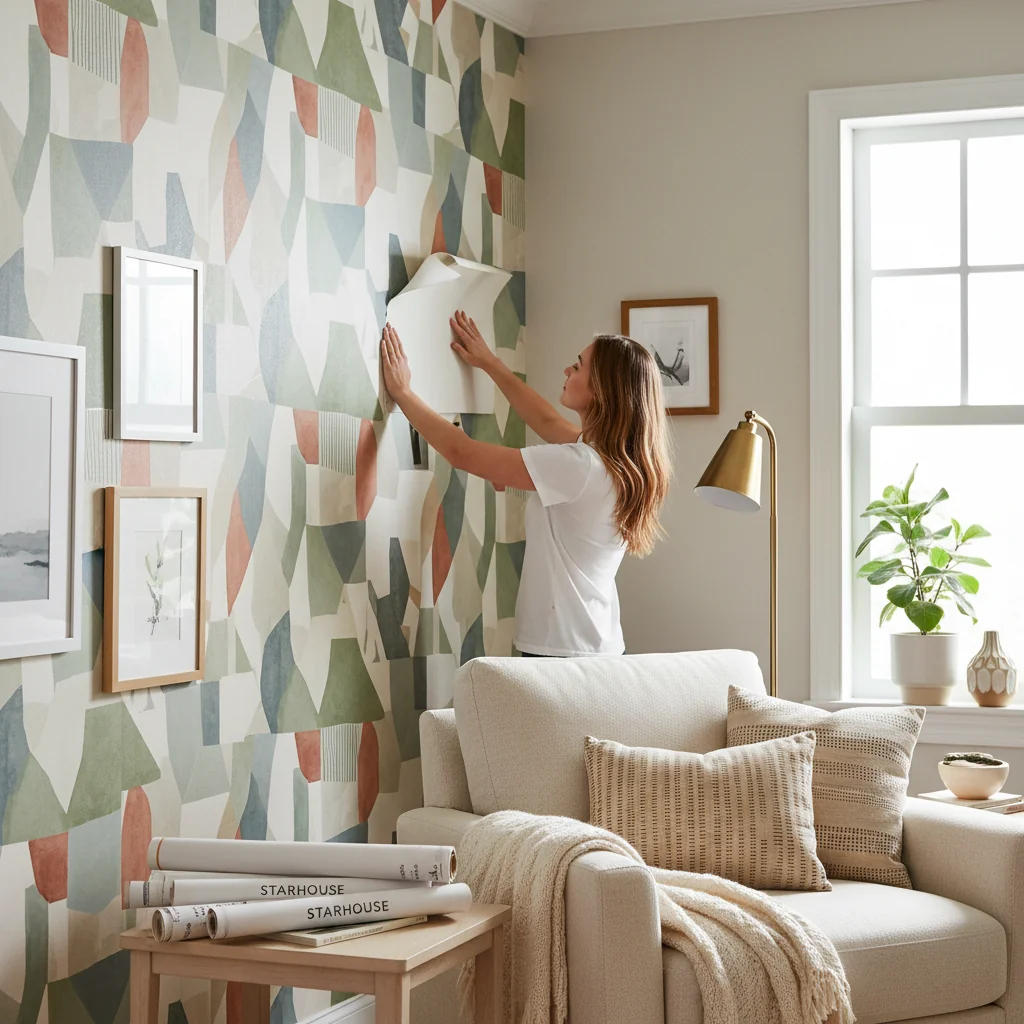
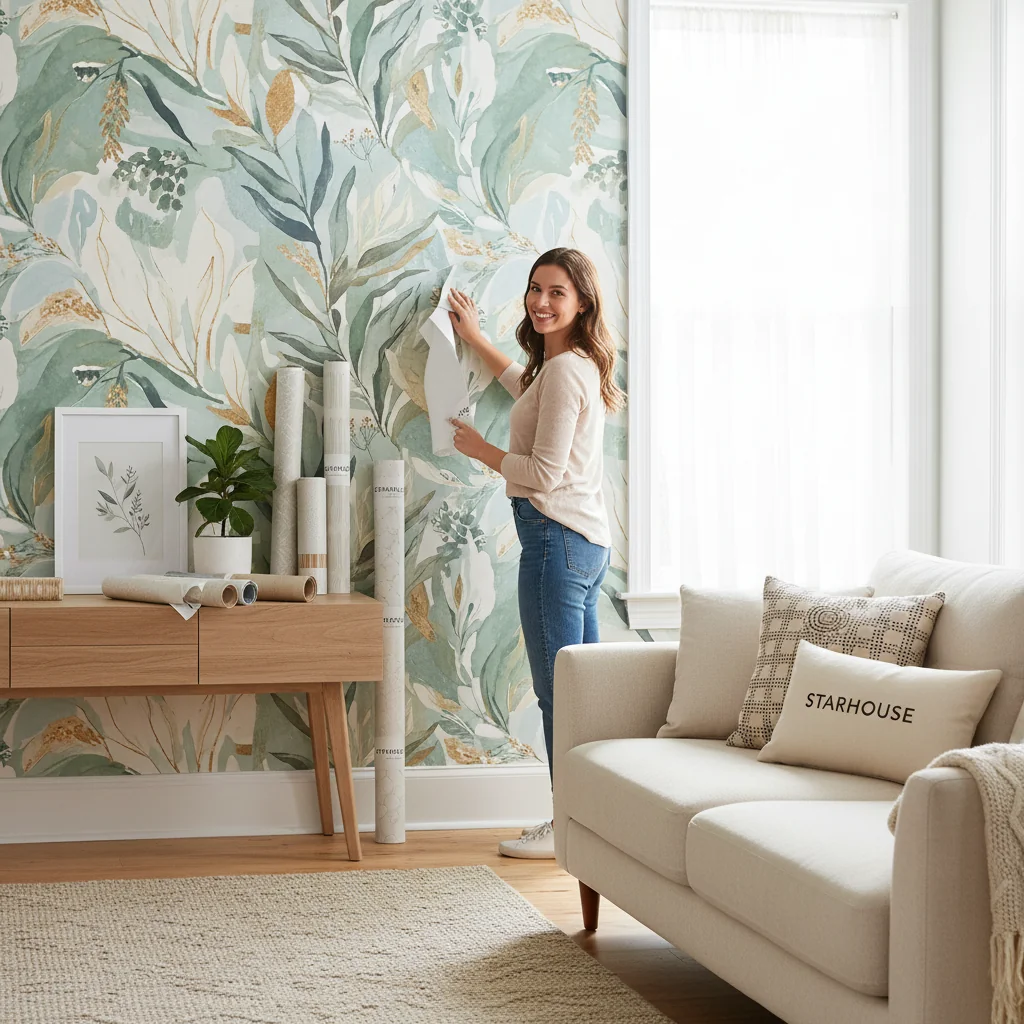
Application and Installation: A Step-by-Step Guide
The successful application of a “roommates wall decal” is a straightforward process that requires patience, precision, and adherence to specific steps. While the peel-and-stick nature makes it accessible for DIY enthusiasts, proper technique is essential to avoid bubbles, wrinkles, and ensure optimal adhesion and longevity. Starhouse provides these authoritative instructions to guide you through a flawless installation.
Tools Required for Application
- Clean Cloth or Sponge: For wall preparation.
- Mild Soap and Water: For cleaning the wall.
- Rubbing Alcohol (Optional): For final degreasing on stubborn surfaces.
- Tape Measure: For accurate positioning.
- Pencil: For light markings.
- Level: To ensure straight alignment.
- Painter’s Tape: For temporary positioning.
- Squeegee or Credit Card: For smoothing out the decal and removing air bubbles.
- Utility Knife or Craft Knife (Optional): For trimming excess material on large murals or around obstacles.
Step-by-Step Application Process
Step 1: Prepare the Wall Surface (Crucial)
This is the most critical step for ensuring proper adhesion and damage-free removal.
- Clean the Wall: Wipe down the entire application area with a clean, damp cloth or sponge using a mild soap solution. This removes dust, dirt, and grime that could prevent the adhesive from bonding.
- Rinse and Dry: Rinse the wall thoroughly with a clean, damp cloth to remove any soap residue. Allow the wall to dry completely, typically for at least 24 hours. Any residual moisture will compromise adhesion.
- Degrease (Optional but Recommended): For kitchens or areas prone to grease, a final wipe with rubbing alcohol on a clean cloth can ensure a perfectly clean surface. Allow to air dry.
- Cure Time for New Paint: If your wall has been recently painted, it is imperative to allow the paint to cure for a minimum of 30 days. Applying decals to uncured paint can lead to bubbling, poor adhesion, and paint removal upon decal extraction.
- Test Area (Recommended): If unsure about your wall’s surface or paint type, apply a small corner of the decal (or a test piece if provided) in an inconspicuous area, leave it for a few days, and then remove it to check for any adverse reactions.
Step 2: Plan and Position the Decal
Careful planning ensures perfect alignment and visual impact.
- Unroll and Flatten: Gently unroll your decal and lay it flat for several hours or overnight, ideally weighted down at the corners, to allow it to relax and flatten. This minimizes curling during application.
- Measure and Mark: Using your tape measure and level, determine the exact desired placement for your decal (refer to the “Sizing and Measuring” section). Lightly mark the wall with a pencil to guide your placement, marking the top edge, center, or corners.
- Temporary Positioning with Painter’s Tape: For larger decals, use painter’s tape to temporarily secure the decal to the wall in its intended position. Step back and assess from different angles. Ensure it is level and centered as desired.
- “Hinge Method” for Large Decals: For very large decals or murals, the hinge method is highly effective. Apply a vertical strip of painter’s tape down the center of the decal, effectively creating two halves. This allows you to work on one side at a time.
Step 3: Apply the Decal
This step requires a steady hand and methodical approach.
- Peel Back the Backing: Starting from a top corner or one side (if using the hinge method), slowly peel back a small section of the backing paper (about 6-12 inches). Do not peel off the entire backing at once.
- Apply to Wall: Carefully align the exposed adhesive portion of the decal with your pencil marks or the top edge of your desired placement. Gently press it onto the wall.
- Smooth and Continue: Using your squeegee or credit card, begin smoothing the decal onto the wall, working from the center outwards or from the applied edge towards the unapplied section. Apply firm, even pressure.
- Gradual Removal of Backing: As you smooth, continue to slowly peel off more of the backing paper in small increments (6-12 inches at a time). Immediately smooth the newly exposed decal onto the wall, pushing out any air bubbles as you go.
- Working with the Hinge Method: If using the hinge method, once one half is applied, remove the central tape hinge, then repeat the peeling and smoothing process for the second half.
- Small Decals: For smaller decals, you may be able to remove the entire backing at once, but still apply from one side or the center outwards to minimize bubbles.
Step 4: Finishing Touches
Ensure the decal is perfectly adhered and any final adjustments are made.
- Firm Smoothing: Once the entire decal is on the wall, go over the entire surface again with your squeegee, applying firm pressure to ensure maximum adhesion, paying special attention to edges and intricate details.
- Remove Air Bubbles: If any small bubbles remain, you can gently push them towards the nearest edge with your squeegee. For stubborn bubbles, a very fine needle can be used to poke a tiny hole, then smooth the air out.
- Trimming (for Murals/Obstacles): For full-wall murals, use a sharp utility knife and a straight edge to carefully trim any excess material along baseboards, ceiling lines, or around outlets/switches. Turn off power to outlets/switches before trimming around them.
- Allow to Cure: While the decal is immediately adhered, the adhesive will continue to strengthen its bond over the next 24-48 hours. Avoid touching or cleaning the decal during this period.
Tips for Troubleshooting Common Issues
- Bubbles: Most bubbles are caused by trapped air during application. Re-squeegee firmly. If persistent, gently lift a small section of the decal and reapply, or use a pinprick for small, isolated bubbles.
- Wrinkles: Wrinkles often occur if the decal is applied too quickly or stretched. If possible, gently lift the wrinkled section and reapply, taking care not to stretch the material.
- Edges Lifting: Ensure the wall was perfectly clean and dry. Use firm pressure with the squeegee along all edges. Sometimes, a hair dryer on a low setting can be used to slightly warm the decal, then press the edges down firmly.
- Misalignment: This is why the temporary positioning and level are crucial. If a large decal is significantly misaligned, it may be best to carefully remove it (if repositionable) and restart.
Following these meticulous application steps will ensure your “roommates wall decal” adheres beautifully and transforms your space exactly as intended, providing a professional and lasting decorative impact. Starhouse stands by the principle that careful installation is the foundation of enduring design.
Care and Maintenance: Preserving Your Decal’s Lifespan
Proper care and routine maintenance are essential for preserving the aesthetic integrity and extending the lifespan of your “roommates wall decal.” While these decorative elements are designed for durability, simple practices can ensure they remain vibrant, securely adhered, and free from damage for years. Starhouse recommends a proactive approach to maintenance to protect your investment and maintain your home’s sophisticated appeal.
General Cleaning Guidelines
Routine cleaning is straightforward but requires gentle handling to avoid damaging the decal’s surface or compromising its adhesive.
- Dusting: For light dust, use a soft, dry microfiber cloth or a feather duster. Gently wipe the surface without applying excessive pressure.
- Spot Cleaning: For smudges, fingerprints, or minor dirt, use a clean, damp (not wet) soft cloth. Lightly blot or wipe the affected area.
- Mild Soap Solution: For more stubborn marks, create a very diluted solution of mild, non-abrasive dish soap and warm water. Dampen a soft cloth with this solution, wring it out thoroughly to remove excess moisture, and gently wipe the decal. Immediately follow with a clean, damp cloth (water only) to remove any soap residue, then gently pat dry with another clean, soft cloth.
- Avoid Harsh Chemicals: Never use abrasive cleaners, bleach, ammonia-based products, or harsh chemical solvents on your decals. These can degrade the material, fade the colors, or dissolve the adhesive, leading to peeling or permanent damage.
- Avoid Scrubbing: Do not scrub or use abrasive sponges or brushes, as this can scratch the decal’s surface or lift its edges.
Environmental Considerations for Longevity
The surrounding environment plays a significant role in how well your decal adheres and ages.
- Temperature and Humidity: Wall decals perform best in stable, moderate indoor temperatures (typically 60-80°F or 15-27°C) and average humidity. Extreme fluctuations or consistently high humidity (e.g., in poorly ventilated bathrooms) can weaken the adhesive bond, leading to lifting or bubbling. Ensure adequate ventilation in moisture-prone areas.
- Direct Sunlight: Prolonged exposure to direct, intense sunlight can cause the decal’s colors to fade over time, particularly for darker or more vibrant hues. While high-quality decals have UV-resistant inks, no material is entirely impervious to sun damage. Consider window treatments (blinds, curtains) to protect decals on sun-exposed walls.
- Heat Sources: Avoid placing decals directly near strong heat sources like radiators, heat vents, or open flames (fireplaces). Excessive heat can cause the material to warp, crack, or the adhesive to fail.
Preventing Premature Peeling
While designed to adhere securely, certain factors can cause decal edges to lift prematurely.
- Ensure Smooth Edges: During application, ensure all edges are firmly pressed down with a squeegee. Periodically check the edges during routine cleaning and gently re-press them if they appear to be lifting.
- Avoid Picking: Resist the urge to pick at the edges or corners of the decal, as this can weaken the adhesive bond and encourage further peeling.
- Children and Pets: In areas accessible to children or pets, take extra precautions. While decals are generally safe, curious hands or paws can pull at edges, leading to damage.
- Wall Surface: As mentioned in the application section, highly textured or improperly prepared walls are the most common cause of poor adhesion and peeling. Ensure your initial surface preparation is thorough.
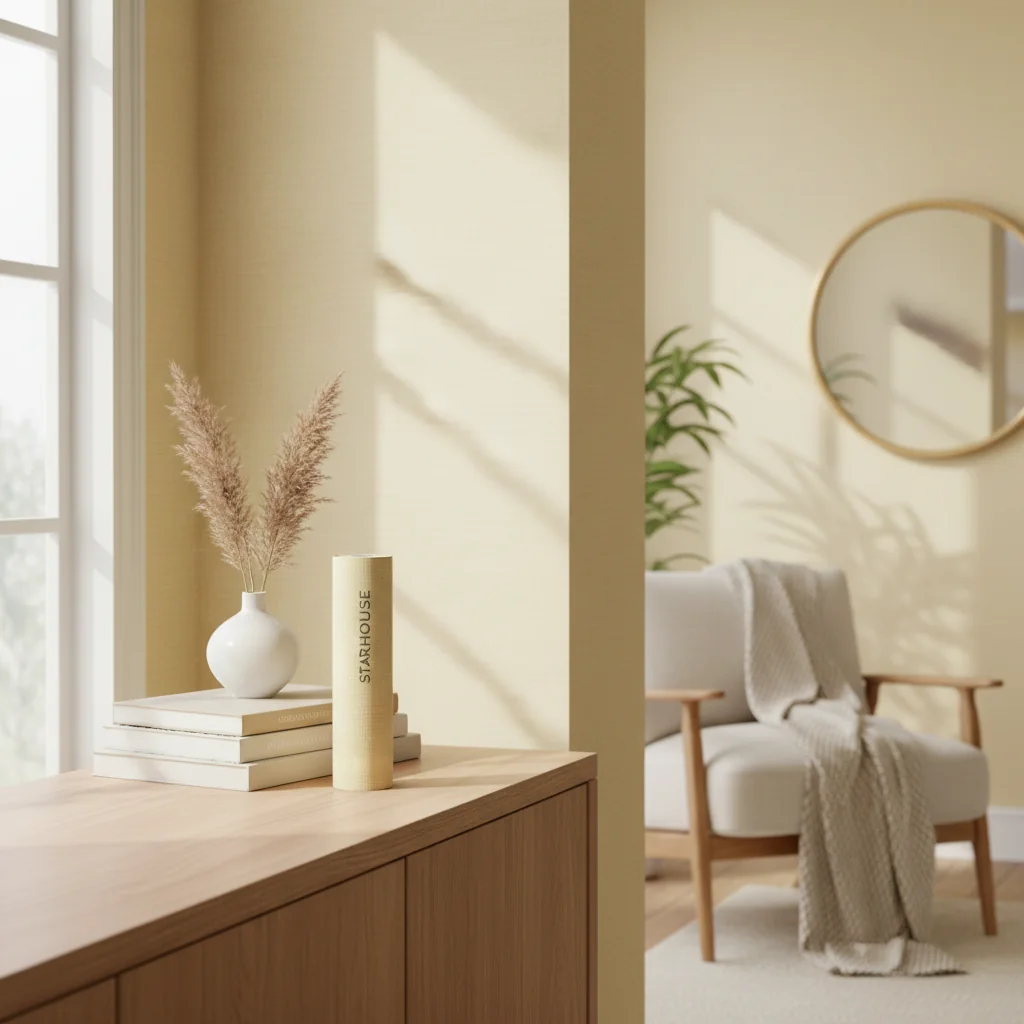
Storage of Removed Decals
Many high-quality fabric and some vinyl decals are designed to be removable and repositionable, meaning they can be stored and reapplied.
- Original Backing Paper: The best way to store a removed decal is to reapply it to its original backing paper. If you no longer have it, use wax paper or parchment paper.
- Roll, Don’t Fold: Gently roll the decal with the backing paper, image side out, to prevent creases or damage. Avoid folding, which can create permanent wrinkles.
- Protective Tube: Store the rolled decal in a sturdy cardboard tube (like the one it came in) to protect it from crushing or bending.
- Cool, Dry Place: Store the tube in a cool, dry place away from direct sunlight and extreme temperatures to preserve the adhesive’s integrity.
By implementing these care and maintenance practices, your “roommates wall decal” will continue to be a striking and effective element of your home decor. Starhouse affirms that mindful attention to these details ensures the enduring beauty and functionality of your chosen wall art.
Styling and Pairing: Integrating Decals into Your Decor
Effectively styling and pairing a “roommates wall decal” involves integrating it seamlessly into your existing interior design, transforming it from a mere sticker into a cohesive and impactful element of your decor. The goal is to create a harmonious visual narrative where the decal complements furniture, textiles, lighting, and other accessories, rather than competing with them. Starhouse advocates for thoughtful integration to achieve a polished, magazine-worthy aesthetic.
1. Creating Focal Points
A well-placed wall decal can serve as the primary focal point of a room, drawing the eye and setting the tone for the entire space.
- Behind a Headboard: A large, abstract, or botanical decal placed centrally behind a bed can create a dramatic and artistic headboard alternative, elevating the bedroom’s design.
- Above a Sofa or Console Table: A sophisticated geometric pattern or a nature-inspired mural can anchor a living room arrangement, providing visual interest above key furniture pieces.
- Defining a Zone: In open-plan living, a large decal can visually delineate a dining area from a living space, creating distinct zones without physical barriers.
- Entryway Statement: A striking decal in an entryway can make a powerful first impression, welcoming guests with a unique design element.
2. Harmonizing with Furniture and Textiles
The decal should work in concert with the room’s furnishings and soft goods.
- Color Coordination: Pick a decal that shares colors with your upholstery, cushions, or curtains. Alternatively, choose a decal in a complementary color to create a pleasing contrast. For example, a blue decal against an orange accent pillow.
- Style Alignment: Ensure the decal’s style matches your furniture. A sleek, modern decal pairs well with minimalist furniture, while a vintage-inspired design complements antique pieces.
- Textural Play: Fabric decals, with their subtle woven texture, can add depth and warmth, especially when paired with natural fibers in textiles like linen or wool. Vinyl decals can offer a smooth, graphic contrast to textured fabrics.
- Scale Balance: Ensure the decal’s size is proportionate to the furniture it accompanies. A small decal above a massive sectional will look lost, while an enormous decal can overpower delicate furniture.
3. Integrating with Lighting
Lighting can dramatically alter the perception of your wall decal.
- Accent Lighting: Use strategically placed accent lighting, such as picture lights or wall sconces, to highlight the decal and bring out its details and colors, especially for murals or intricate designs.
- Shadow Play: For decals with subtle 3D effects or textured finishes, consider how light and shadow will interact with them throughout the day, adding dynamic visual interest.
- Reflective Qualities: If using metallic or glossy decals, consider their placement relative to windows or light fixtures to maximize their reflective properties and brighten the room.
4. Layering with Other Decor Elements
Decals can be layered with other wall decor to create a rich, multi-dimensional look.
- Gallery Walls: Integrate smaller decals into a gallery wall arrangement, mixing them with framed artwork, photographs, and mirrors. Ensure the decal’s style and color palette complement the surrounding pieces.
- Mirrors: Place a decal around a mirror to create a decorative frame, enhancing its visual presence and adding a unique touch.
- Shelving: Use decals to create a backdrop for open shelving, drawing attention to the displayed objects and adding depth behind them.
- Dimensional Elements: Pair decals with wall-mounted sculptures, macramé hangings, or floating shelves to add physical dimension and texture to your wall composition.
5. Color Theory and Contrast
Understanding basic color principles helps in creating impactful and harmonious decal placements.
- Monochromatic Schemes: Use decals in varying shades of your room’s dominant color for a subtle, sophisticated look.
- Analogous Colors: Choose decals in colors adjacent on the color wheel (e.g., blue and green) for a harmonious, flowing feel.
- Complementary Colors: Select decals in colors opposite on the color wheel (e.g., blue and orange) for high contrast and visual energy.
- Neutral Backdrops: On a neutral wall (white, gray, beige), a vibrant decal can provide a much-needed pop of color and personality.
- Dark Walls: A light-colored decal on a dark wall creates dramatic contrast and makes the decal stand out boldly.
6. Thematic Integration
Decals are excellent for reinforcing a room’s theme.
- Biophilic Design: Integrate large botanical or landscape decals to bring the calming influence of nature indoors, especially impactful when paired with natural wood furniture and indoor plants.
- Travel Theme: A world map decal can be surrounded by travel-related souvenirs, photographs, and global textiles.
- Children’s Themes: For a fairy tale room, a castle decal can be paired with whimsical furniture and soft, dreamy lighting.
By thoughtfully applying these styling and pairing techniques, your “roommates wall decal” transcends its function as a temporary wall covering. It becomes an integral part of your home’s design narrative, contributing to an environment that is both aesthetically pleasing and reflective of your personal style. Starhouse encourages you to view decals as powerful design tools, capable of transforming and elevating any room with precision and creative flair.
Starhouse is dedicated to helping you create a home that truly reflects your unique style and aspirations. As we curate our forthcoming collection of exquisite home decor, we invite you to tell us what you’re looking for in your dream space. Your insights help us shape a collection that perfectly aligns with your vision, and you’ll gain early access to our offerings.
Common Mistakes to Avoid
While “roommates wall decals” offer an accessible and forgiving way to decorate, certain common mistakes can undermine their aesthetic impact and longevity. Being aware of these pitfalls is crucial for achieving a professional and satisfying result. Starhouse, committed to empowering discerning homeowners, highlights these errors so you can avoid them and ensure your wall decor project is a success.
1. Inadequate Wall Preparation
This is arguably the most frequent and impactful mistake, leading to poor adhesion and premature peeling.
- Not Cleaning the Wall: Dust, dirt, grease, and even invisible residues on the wall act as barriers between the adhesive and the surface, preventing a strong bond. Always clean the wall thoroughly with mild soap and water, then rinse and dry completely.
- Not Allowing New Paint to Cure: Freshly painted walls off-gas chemicals during their curing process. Applying a decal before the paint has fully cured (minimum 30 days, sometimes longer for certain paint types) can cause bubbling, poor adhesion, and worst of all, peeling paint upon decal removal.
- Ignoring Wall Texture: Decals adhere best to smooth surfaces. Highly textured walls (e.g., orange peel, knockdown, heavily plastered finishes) significantly reduce the contact surface area for the adhesive, leading to edges lifting and the decal looking bumpy.
- Applying to Problematic Paint Types: Some low-VOC, stain-resistant, or “washable” paints contain silicone or other additives that repel adhesives. Always perform a patch test in an inconspicuous area if you suspect your paint might be an issue.
2. Poor Planning and Sizing
Lack of foresight in design and measurement can result in an awkward or unbalanced appearance.
- Incorrect Scale: Choosing a decal that is too small for a large wall makes it look lost, while one that is too large for a small wall can overwhelm the space and make it feel cramped. Always measure your wall and compare it to the decal dimensions.
- Ignoring Furniture Placement: Applying a decal without considering where furniture will sit can lead to it being partially obscured, awkwardly cut off, or positioned too low or high. Plan the decal’s relationship to key furniture pieces.
- Lack of Mock-up: Not using painter’s tape or a paper template to visualize the decal’s placement beforehand can lead to misalignment or regret over the chosen size/position.
- Over-decorating: Trying to fit too many decals or combining a large, busy decal with other prominent wall decor can create a cluttered and visually chaotic space. Less is often more.
3. Rushing the Application Process
Impatience during installation often leads to bubbles, wrinkles, and misalignment.
- Peeling All Backing at Once: For anything but the smallest decals, peeling off the entire backing paper at once is a recipe for disaster. The decal will stick to itself, to you, or to the wall incorrectly, creating irreversible wrinkles and bubbles. Always peel gradually in small increments.
- Not Using a Squeegee Effectively: A squeegee is essential for smoothing out air bubbles and ensuring firm, even adhesion. Not using one, or not applying consistent pressure, will leave air pockets. Work from the center outwards or from one edge, pushing air towards the nearest exit.
- Stretching the Decal: Pulling or stretching the decal material during application can distort the design and make it difficult to align properly. Apply gently and allow the material to lay flat naturally.
- Applying to a Cold Surface: Decals adhere best at room temperature. Applying to a very cold wall can reduce the adhesive’s effectiveness.
4. Inadequate Care and Maintenance
Neglecting ongoing care can shorten the decal’s lifespan and diminish its appearance.
- Using Harsh Cleaners: Abrasive chemicals, bleach, or strong detergents can damage the decal’s material, fade its colors, and degrade the adhesive. Stick to mild soap and water with a soft cloth.
- Aggressive Scrubbing: Scrubbing the decal vigorously can scratch its surface, lift edges, or even tear the material. Gentle wiping is sufficient.
- Exposure to Extreme Conditions: Prolonged direct sunlight can cause fading. High humidity or extreme temperature fluctuations can weaken the adhesive. Be mindful of the decal’s environment.
- Picking at Edges: Repeatedly touching or picking at the edges of a decal will inevitably cause it to lift and peel prematurely.
5. Choosing the Wrong Material for the Environment
Not all decals are suited for all locations.
- Moisture-Prone Areas: While some vinyl decals are moisture-resistant, fabric decals might not be ideal for consistently humid environments like bathrooms, as moisture can affect the adhesive and material.
- High-Traffic Areas: Delicate or very thin decals might not withstand constant brushing or accidental bumps in busy hallways or playrooms. Opt for more robust vinyl in such areas.
By consciously avoiding these common errors, you can ensure your “roommates wall decal” project is not only successful but also adds lasting beauty and style to your home. Starhouse empowers you with the knowledge to make informed decisions and achieve impeccable results in your interior design endeavors.
Trends in Wall Decal Design
The world of interior design is ever-evolving, and “roommates wall decal” trends reflect this dynamic landscape, offering contemporary solutions to personalize spaces. Staying abreast of current design aesthetics can inspire fresh and modern applications for these versatile decorative elements. Starhouse continually observes and curates designs that align with prevailing and emerging trends, ensuring your home remains stylish and relevant.
1. Biophilic Design and Nature-Inspired Motifs
Bringing the outdoors in remains a dominant trend, emphasizing a connection to nature for well-being and tranquility.
- Large-Scale Botanicals: Oversized floral patterns, intricate leaf designs, and lush jungle motifs are popular, often in muted greens, earthy tones, or dramatic black and white.
- Abstract Landscapes: Stylized mountains, serene forest scenes, or flowing water elements offer a calming, artistic interpretation of nature without being overly literal.
- Minimalist Branches and Trees: Simple, elegant tree silhouettes or delicate branch designs evoke nature’s serenity without overwhelming the space, perfect for Scandinavian or minimalist interiors.
2. Geometric Patterns and Abstract Art
Clean lines, bold shapes, and abstract forms continue to be highly sought after, offering a contemporary and sophisticated aesthetic.
- Architectural Geometry: Interlocking lines, repeating patterns, and three-dimensional illusions create a sense of depth and structure, often in monochromatic or two-tone schemes.
- Abstract Brushstrokes: Decals mimicking painterly strokes, watercolor washes, or fluid abstract shapes provide an artistic, gallery-like feel without the commitment of actual paint.
- Art Deco Revival: Geometric patterns inspired by the 1920s and 30s, featuring fan shapes, sunbursts, and bold lines, are making a comeback, often with metallic accents.
3. Textural Illusions and Faux Finishes
Decals that realistically mimic the appearance of expensive or difficult-to-install materials offer high-impact design with ease.
- Faux Concrete and Plaster: These create an urban, industrial, or wabi-sabi aesthetic, adding raw texture and depth to a space.
- Reclaimed Wood and Shiplap: Perfect for farmhouse, rustic, or coastal themes, these decals provide the warmth and character of wood without the weight or installation hassle.
- Subtle Fabric Textures: Beyond just prints, decals with a tactile-like fabric finish are gaining popularity, offering a soft, sophisticated alternative to smooth vinyl.
4. Personalized and Custom Designs
The desire for unique, tailor-made spaces drives demand for personalized wall decor.
- Custom Quotes and Typography: Homeowners are increasingly opting for personalized quotes, family names, or significant dates in bespoke fonts and layouts.
- Photo Murals: High-resolution decals made from personal photographs or custom artwork allow for truly unique and sentimental wall displays.
- Children’s Art Replication: Turning a child’s drawing into a wall decal offers a charming and deeply personal touch to their room.
5. Muted Tones and Earthy Palettes
While vibrant colors always have a place, there’s a strong trend towards softer, more natural color schemes that promote calm and serenity.
- Sage Green and Terracotta: These colors, reflecting nature’s palette, are popular for their soothing qualities and ability to blend seamlessly with various decor styles.
- Warm Neutrals: Cream, beige, and greige decals offer a sophisticated backdrop, allowing other decor elements to shine while maintaining an understated elegance.
- Dusty Blues and Pinks: Soft, desaturated hues are favored for creating tranquil and inviting atmospheres, particularly in bedrooms and nurseries.
6. Line Art and Minimalist Illustrations
Simple, elegant line drawings and minimalist illustrations offer a chic and understated way to add artistic flair.
- Abstract Faces and Figures: One-line drawings of human faces or abstract figures provide a modern, artistic touch.
- Delicate Botanical Outlines: Simple outlines of leaves or flowers create a subtle, sophisticated natural element.
- Geometric Outlines: Minimalist patterns formed by thin lines offer a clean, contemporary aesthetic.
7. Interactive and Functional Decals
Decals that serve a purpose beyond mere decoration are gaining traction.
- Chalkboard and Dry-Erase Surfaces: These functional decals continue to be popular for creating message centers, grocery lists, or children’s drawing areas in kitchens, offices, and playrooms.
- Growth Charts: Decorative growth charts offer a charming way to track children’s height, combining utility with aesthetic appeal.
- Calendar and Planner Decals: Large-scale calendar or weekly planner decals help organize schedules directly on the wall.
The current trends in “roommates wall decal” design emphasize personalization, connection to nature, and sophisticated simplicity. Starhouse remains at the forefront of these developments, curating a collection that allows you to effortlessly infuse your home with contemporary style and timeless elegance.
Roommates Wall Decals vs. Other Wall Coverings
Understanding the distinct characteristics of “roommates wall decals” in comparison to other popular wall coverings is essential for making an informed decision about your interior design project. Each option presents unique advantages and limitations regarding application, durability, cost, and aesthetic impact. Starhouse provides this comprehensive comparison to help you select the most suitable solution for your specific needs and design aspirations.
| Feature | Roommates Wall Decals | Traditional Wallpaper | Peel-and-Stick Wallpaper | Paint | Stenciling |
|---|---|---|---|---|---|
| Description | Self-adhesive graphic elements, individual designs or smaller patterns. | Paper or vinyl rolls applied with paste, often full wall coverage. | Self-adhesive rolls for full wall coverage, removable. | Liquid pigment applied to walls with brushes/rollers. | Paint applied through a cutout template to create patterns. |
| Ease of Application | Very easy DIY, no special tools for most, gradual peel-and-stick. | Complex, requires paste, trimming, pattern matching; often professional installation. | Easy DIY, repositionable, no paste needed, but large rolls can be tricky. | Moderate DIY, requires prep (taping, priming), multiple coats, drying time. | Moderate DIY, requires steady hand, patience, and careful cleanup. |
| Removability | Excellent. Designed for clean, damage-free removal, often repositionable. | Difficult. Requires steaming/soaking, often damages drywall or leaves residue. | Excellent. Designed for clean, damage-free removal, repositionable. | Permanent. Requires re-painting for change. | Permanent. Requires re-painting for change. |
| Durability | Good (1-5+ years), depends on material (vinyl/fabric) and environment. Resistant to fading, some are washable. | Good to Excellent (5-15+ years), depends on material (vinyl, non-woven) and care. | Good (1-5+ years), similar to decals, can be sensitive to moisture/heat at edges. | Excellent (5-10+ years), depends on paint quality and finish. | Excellent (5-10+ years), as durable as the underlying paint. |
| Cost (Approx. USD) | Low to Moderate ($10 – $200+ per design). | Moderate to High ($30 – $300+ per roll, plus installation). | Moderate ($20 – $150+ per roll). | Low to Moderate ($20 – $70 per gallon, plus supplies). | Low to Moderate ($10 – $100 per stencil, plus paint). |
| Customization | High. Vast array of designs, shapes, text; custom options available. | Moderate. Limited to available patterns and colors. | Moderate. Limited to available patterns and colors. | High. Unlimited color choices. | High. Unlimited color choices, custom stencils possible. |
| Aesthetic Impact | Specific focal points, accents, thematic elements, or small murals. | Full-room transformation, traditional patterns, rich textures. | Full-room transformation, modern patterns, often renter-friendly. | Solid color backdrops, mood-setting, foundational for decor. | Repetitive patterns, bespoke artistic touch, integrated with paint. |
| Ideal Use Case | Rentals, children’s rooms, temporary themes, accent walls, personalized touches, low-commitment updates. | Long-term commitment, formal spaces, high-end design, historical restoration. | Rentals, quick makeovers, accent walls, DIY-friendly full-room transformations. | Base color, foundational design, full room transformations, budget-friendly. | Adding custom patterns, intricate details, unique artistic flair, historical accuracy. |
Key Differentiators of Roommates Wall Decals
The table above underscores several key advantages that set “roommates wall decals” apart:
- Unmatched Flexibility and Commitment-Free Design: Decals excel where permanence is undesirable. They are the go-to for renters, students, or anyone who enjoys frequently refreshing their decor without significant investment or effort.
- Targeted Impact: Unlike paint or wallpaper that cover entire surfaces, decals allow for precise, targeted application. This means you can create a specific focal point, add a whimsical touch, or introduce a thematic element without redoing an entire room.
- DIY Accessibility: The ease of application and removal makes decals incredibly accessible for individuals without specialized skills or tools. This empowers homeowners to take creative control of their spaces.
- Cost-Effectiveness for Specific Designs: While full-room decal coverage might approach the cost of paint, individual decals are often a much more economical way to introduce complex graphics, faux textures, or personalized text compared to custom painting or traditional murals.
- Damage-Free Solution: For those concerned about preserving wall integrity, high-quality decals offer peace of mind, removing cleanly without residue or paint damage from properly prepared surfaces.
While traditional and peel-and-stick wallpapers offer full-wall coverage and paint provides a foundational color, “roommates wall decals” carve out a distinct niche for temporary, targeted, and highly personalized design solutions. Starhouse encourages clients to consider their long-term design goals, budget, and desired level of commitment when choosing among these diverse wall covering options, affirming that decals provide unparalleled freedom for creative expression in modern homes.
Sources
No verified authoritative sources were provided for this article.
Frequently Asked Questions
Are roommates wall decals reusable after removal?
Many high-quality fabric wall decals and some vinyl decals are designed to be reusable and repositionable, especially if removed carefully and reapplied to their original backing paper for storage. The adhesive strength may diminish slightly with each reapplication.
Can wall decals be applied to textured walls?
Wall decals adhere best to smooth, flat surfaces. While some fabric decals may conform slightly to very light textures, highly textured walls (e.g., orange peel, knockdown, stucco) generally do not provide enough surface area for the adhesive to form a strong bond, leading to poor adhesion and premature peeling.
How long should I wait after painting before applying a wall decal?
It is crucial to allow newly painted walls to cure for a minimum of 30 days before applying any wall decal. This extended curing time prevents the paint from off-gassing and interfering with the decal’s adhesive, which could lead to bubbling or paint damage upon removal.
How do I clean a wall decal?
To clean a wall decal, gently wipe it with a soft, damp cloth using a mild soap solution, then immediately wipe with a clean, damp cloth to remove soap residue, and pat dry. Avoid abrasive cleaners, harsh chemicals, or scrubbing, as these can damage the decal’s surface and adhesive.
Do wall decals damage walls or remove paint?
High-quality wall decals are specifically designed with low-tack, removable adhesives that should not damage properly prepared, fully cured painted walls upon removal. Damage typically occurs if the wall was not clean, the paint was uncured, or the surface was already compromised.
Can I apply wall decals to wallpaper?
Applying wall decals over wallpaper is not recommended. The decal’s adhesive may not bond securely to the wallpaper’s surface, or worse, it could damage the wallpaper upon removal, especially if the wallpaper itself is not securely adhered to the wall.
How long do wall decals typically last?
With proper application and care, high-quality wall decals can last anywhere from 1 to 5+ years indoors, maintaining their color and adhesion. Longevity is influenced by material quality, environmental conditions (e.g., direct sunlight, humidity), and how frequently the decal is cleaned or touched.
Conclusion
The “roommates wall decal” stands as a testament to the evolution of modern home decor, offering an unparalleled blend of artistic expression, practical flexibility, and sophisticated design. From their origins as simple vinyl cutouts to today’s expansive range of fabric murals, faux finishes, and personalized graphics, these temporary wall treatments empower individuals to curate dynamic and deeply personal living spaces without the constraints of permanence. They are the quintessential solution for renters seeking to infuse personality, homeowners desiring seasonal updates, or anyone wishing to experiment with bold design statements.
Starhouse believes that every element of your home should resonate with your unique style and aspirations. We are dedicated to curating a collection of wall decor and furnishings that embodies precision, quality, and aspirational design, ensuring that transforming your space is an effortless and rewarding experience. By understanding the nuances of materials, mastering application techniques, and embracing thoughtful styling, your chosen wall decal will not merely adhere to a wall, but integrate seamlessly into the narrative of your home, reflecting elegance and individuality.
As Starhouse meticulously crafts its collection to inspire and elevate every room, we invite you to be a part of this exciting journey. Share your vision, tell us what you’re looking for, and gain early access to our forthcoming curated selections that promise to redefine your home’s aesthetic. Visit us at starhouseusa.online and let us help you create the sophisticated, comfortable, and uniquely yours environment you deserve.