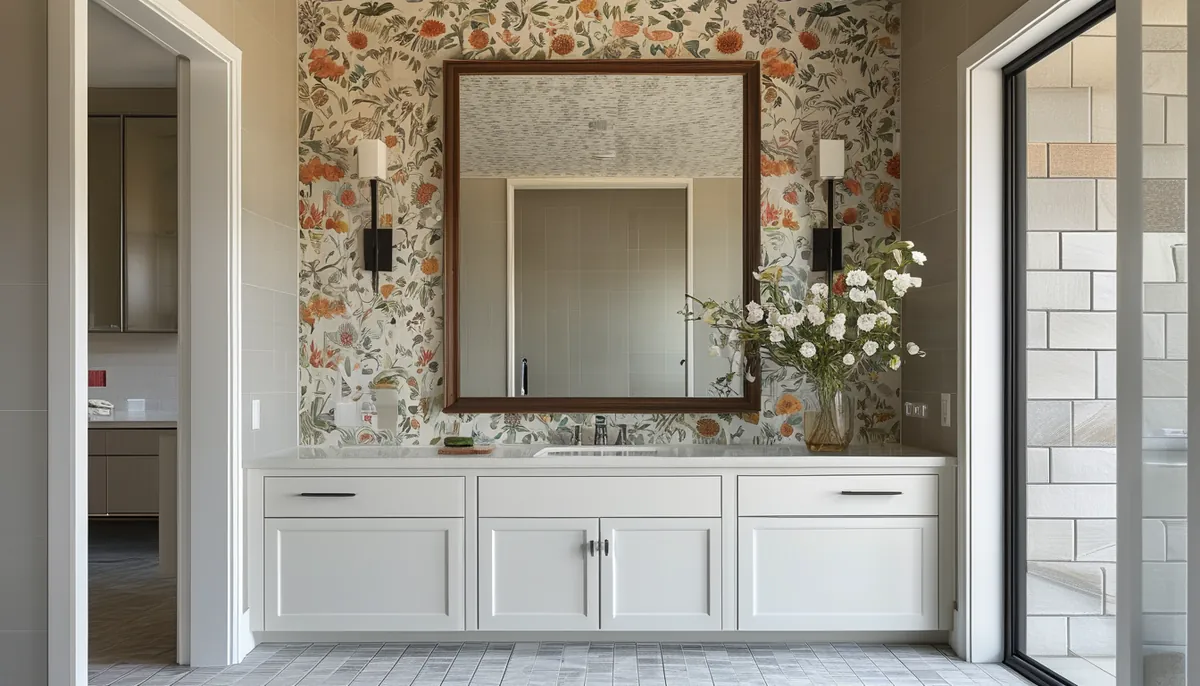
You’re remodeling your bathroom and want to add a special touch, but you’re not ready for a full wallpaper application. A wallpaper border is the perfect solution. It’s easier to install than full wallpaper and can add significant style and personality to a small space like a bathroom. But not all borders are created equal, and using the wrong type in a humid environment like a bathroom can lead to peeling, bubbling, or mold. You need to know what you’re looking for.
vinyl wallpaper borders are best for bathrooms
When selecting a bathroom wallpaper border, prioritize materials that can withstand moisture and are easy to clean. This immediately points you towards vinyl or vinyl-coated options. Why? Because bathrooms are inherently humid environments. Showers, baths, and even sinks release water vapor that can saturate paper-based products, causing them to swell, warp, and eventually detach from the wall. Vinyl’s inherent resistance to moisture makes it the superior choice for durability and longevity in a bathroom setting.
types of vinyl borders
Vinyl borders come in a few forms, each offering different levels of durability and ease of use:
- Solid Vinyl: This is the most robust option. Made from a thick layer of vinyl, solid vinyl borders are highly durable, scrubbable, and excellent at resisting moisture. They are ideal for high-traffic or high-moisture areas within the bathroom, such as around the shower enclosure or above the vanity.
- Vinyl-Coated Paper: These borders have a paper base with a clear vinyl coating on top. They offer good moisture resistance and are often more budget-friendly than solid vinyl. While they can handle typical bathroom humidity, they might not be as resilient as solid vinyl in areas with direct, prolonged contact with water.
- Peel and Stick Vinyl: This is a popular choice for DIYers because it requires no paste and is forgiving if you make a mistake. The adhesive backing allows for easy application and removal, making it a great option for renters or for those who like to change their decor frequently. Many high-quality peel and stick options are vinyl-based and suitable for bathrooms. If you’re considering this format, explore our guide on easy peel and stick wallpaper.
Avoid paper-only or fabric borders in a bathroom. They are not designed to handle the consistent humidity and temperature fluctuations common in this room and will likely fail prematurely.
Understanding border styles and patterns
Once you’ve settled on a material, it’s time to think about aesthetics. Bathroom wallpaper borders come in an endless array of styles and patterns to match any decor.
common border dimensions
Wallpaper borders are typically sold in rolls that are 6 inches to 15 inches wide and 15 feet to 30 feet long. The width you choose will depend on the look you want and the proportion of your walls. A wider border can make a statement and visually lower a ceiling, while a narrower one offers a more subtle accent. Always measure your room’s perimeter to ensure you buy enough rolls, accounting for any pattern repeat and potential mistakes.
pattern considerations for bathrooms
The pattern you choose should complement your existing bathroom fixtures and paint color. Consider these popular options:
- Subtle textures: Faux finishes like grasscloth, linen, or even a subtle damask can add depth without overwhelming the space. These are particularly effective in smaller bathrooms.
- Geometric patterns: Stripes, chevrons, or mosaic-inspired designs can add a modern or retro flair. Ensure the scale of the geometric pattern is appropriate for your bathroom size; large, busy patterns can make a small room feel even smaller.
- Thematic designs: For a coastal or spa-like feel, consider borders with nautical motifs, shells, or even abstract water patterns. If you love florals, explore designs like those in our flowers on wallpaper collection.
- Trompe-l’oeil: Some borders create the illusion of architectural elements like molding or tiling, adding a sophisticated touch.
Think about the overall mood you want to create. Do you want a calm, spa-like retreat, a fun and quirky space, or a more traditional look? Your border choice is a key element in achieving that.
preparing your bathroom walls for border installation
Proper wall preparation is crucial for any wallpaper installation, especially in a bathroom where adhesion is challenged by moisture. Skipping these steps is a common reason for border failure.
cleaning and degreasing
Bathroom walls can accumulate soap scum, toothpaste splatters, and hairspray residue, all of which can prevent the border adhesive from sticking properly. Use a mild detergent or a specialized wallpaper prep solution to thoroughly clean the walls where the border will be applied. Rinse the walls well with clean water and allow them to dry completely. For tough grease or grime, a solution of one part TSP (trisodium phosphate) substitute to four parts water can be effective, but always test in an inconspicuous area first and wear gloves.
repairing imperfections
Smooth, even walls are essential for a seamless border application. Fill any small holes or cracks with spackling paste and sand them smooth once dry. Pay attention to any damage around light switches or outlets. If you have textured walls, a border might adhere, but the texture can also show through or create unevenness. If your walls are in poor condition, consider applying a primer or even a thin layer of smooth drywall compound before proceeding.
priming the walls
Applying a wallpaper primer is highly recommended for several reasons:
- Enhances adhesion: Primer creates a uniform surface that allows the border adhesive to bond better.
- Prevents paste absorption: It seals the porous surface of the drywall or plaster, preventing the adhesive from soaking in too quickly and drying out. This is especially important with paste-the-wall or paste-the-paper borders.
- Facilitates removal: Some primers are designed to make future wallpaper removal easier, which can be a significant advantage.
Use a quality primer specifically designed for wallpaper applications. Allow the primer to dry completely according to the manufacturer’s instructions, typically 24-48 hours, before hanging the border.
how to install a bathroom wallpaper border
Installing a wallpaper border is a manageable DIY project if you follow these steps carefully. Accuracy and patience are key.
measuring and cutting
Before you start applying, measure the total length of the wall space where you want the border to go. Add about 6-10 inches to this measurement for trimming and piecing around corners. If your border has a pattern repeat, you’ll need to account for that when cutting pieces to ensure the pattern aligns correctly. Measure twice, cut once.
applying adhesive (if necessary)
If you’re using a traditional peel-and-stick border, the adhesive is already on the back. For pre-pasted borders, you’ll need to soak them in water according to the manufacturer’s instructions – usually in a special trough or on a clean, flat surface. For unpasted borders, you’ll need to apply wallpaper paste evenly to the back of the border using a roller or brush. Always follow the specific instructions for your chosen border type.
hanging the border
Start in an inconspicuous area, such as behind a door or in a corner, to get a feel for the process. Unroll about 1-2 feet of the border and carefully position it on the wall at the desired height. If you’re using a peel-and-stick border, gently press it into place, working from the center outwards to avoid air bubbles. For pre-pasted or pasted borders, align the top edge with a ceiling, molding, or a pencil line you’ve marked as a guide. Use a smoothing tool (like a plastic smoother or a clean, dry cloth) to press the border onto the wall, working from the center outwards to push out any air or excess paste.
Tip: Use a level or a chalk line to ensure your border is perfectly straight. A crooked border is a very noticeable mistake.
joining pieces and handling corners
When you reach the end of a strip, or need to start a new roll, overlap the next piece slightly (about 1/16 inch) and make a clean, straight cut through both layers with a sharp utility knife and a metal ruler. This creates a ‘butted seam’ which is less visible. For inside corners, gently fold the border to fit, then trim any excess. For outside corners, wrap the border around the corner as far as it will go, then start the next strip on the adjacent wall, butting it up against the corner. Alternatively, you can make a relief cut to help it lie flat.
trimming excess
Once the border is positioned and smoothed, carefully trim any excess material at the ceiling, baseboard, or around windows and doors using a sharp utility knife and a straight edge. Take your time here – clean cuts make a professional finish.
cleaning up
Immediately wipe away any excess paste or water from the border and surrounding walls with a damp sponge or cloth. Dried paste can be difficult to remove and may stain the border. Allow the border to dry completely, which can take 24-48 hours, before exposing it to heavy steam or moisture.
common mistakes to avoid with bathroom wallpaper borders
Even experienced DIYers can make mistakes. Being aware of common pitfalls can save you time, money, and frustration.
using the wrong material
As mentioned, paper-based borders are a recipe for disaster in bathrooms. The constant exposure to humidity will cause them to peel, bubble, and potentially grow mold. Always opt for vinyl or vinyl-coated options for longevity and ease of maintenance.
improper wall preparation
Hanging a border over dirty, greasy, or uneven walls is a sure way to ensure it won’t stick. Skipping the cleaning, repair, and priming steps means the adhesive has nothing solid to grip onto. This is particularly true for peel and stick options, which rely on a clean, smooth surface for maximum adhesion.
not allowing for pattern repeat
If your border has a repeating pattern, failing to account for it when cutting and hanging strips will result in misaligned patterns, especially at seams. This looks unprofessional and can be very distracting. Always check the pattern repeat information on the packaging and plan your cuts accordingly.
cutting corners incorrectly
Corners are often the trickiest part of wallpaper border installation. Rushing through them or not using a sharp blade can lead to torn paper, jagged edges, or gaps. Take your time, use a metal ruler as a guide, and make precise cuts. For challenging corners, a little extra paste or a specialized corner adhesive might be necessary.
using old paste or glue
If you’re working with a pre-pasted border that has been in storage for a while, the paste might have dried out or lost its tackiness. Similarly, using old, clumpy wallpaper paste will not provide adequate adhesion. Always use fresh paste or activate pre-pasted borders according to current manufacturer guidelines.
beyond the bathroom: other places for wallpaper borders
While bathrooms are a prime candidate, wallpaper borders can enhance many other areas of your home. Consider them for:
- Kitchens: Use a washable vinyl border above cabinets or around windows.
- Bedrooms: Add a touch of elegance above a headboard or around a ceiling.
- Living rooms and dining rooms: Create a decorative band along the top of the wall or to frame a specific feature.
- Kids’ rooms: Fun, themed borders can add personality without the commitment of full wallpaper.
- Hallways and entryways: A subtle border can add character to otherwise plain spaces.
For inspiration on transforming spaces with wallpaper, you might find our Rifle Paper Co. wallpaper collection and guides on peel and stick wallpaper helpful.
choosing the right wallpaper border for your style
The best wallpaper border for your bathroom is one that combines the right material, a style you love, and a pattern that fits your existing decor. Whether you prefer a bold statement or a subtle accent, a well-chosen and properly installed border can significantly elevate your bathroom’s design. For more ideas on visually appealing wallpapers, check out Yellowstone wallpaper designs.
Ultimately, the success of your bathroom wallpaper border project hinges on careful selection, meticulous preparation, and patient installation. By understanding the unique demands of a bathroom environment and following best practices, you can achieve a professional-looking result that adds lasting beauty and character to your home.