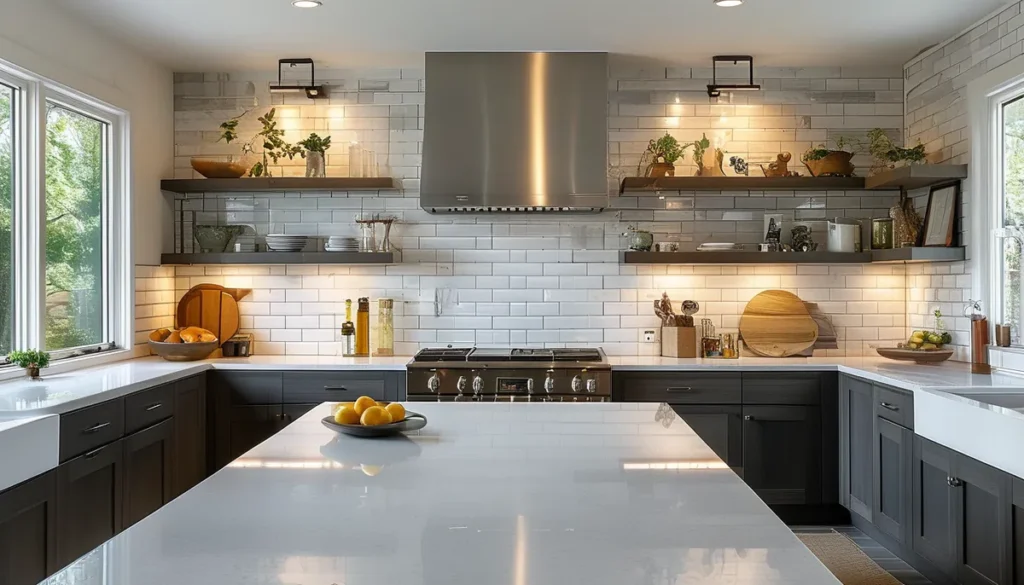
Peel and stick mosaic tile is a popular choice for DIYers looking to add a decorative touch to backsplashes, accent walls, or small bathroom projects. Unlike traditional tile, it doesn’t require grout or specialized tools, making installation seem simple. However, understanding the different types of materials and proper preparation is crucial for a lasting finish.
Understanding peel and stick mosaic tile materials
The vast majority of peel and stick mosaic tiles use a self-adhesive backing applied to a sheet of individual mosaic pieces. The key difference lies in what those mosaic pieces are made of. Each material has its pros and cons regarding durability, water resistance, and appearance.
1. Vinyl or PVC tiles
These are the most common and budget-friendly option. Small mosaic pieces, often designed to mimic glass or stone, are mounted on a flexible vinyl sheet. The adhesive is typically a strong acrylic-based glue.
Pros:
- Inexpensive
- Lightweight and easy to cut
- Water-resistant, suitable for backsplashes
- Wide variety of colors and patterns
Cons:
- Can look less premium than other materials
- May yellow or degrade over time, especially with direct sunlight
- Adhesive can fail in high-heat areas (like directly behind a gas stove) or if the surface isn’t properly prepared. For high-heat areas, consider a heat-resistant backsplash panel behind the cooking surface.
Best for: Kitchen backsplashes (away from direct heat), accent walls in living areas, furniture decoration.
2. Gel or epoxy resin tiles
These tiles feature a clear, slightly domed layer of gel or epoxy resin over a printed design or textured material. This creates a 3D effect and a glossy finish that mimics the look of glass or stone.
Pros:
- Realistic 3D appearance
- Durable and scratch-resistant surface
- Waterproof and easy to clean
- No grout lines to worry about (the resin fills any gaps between mosaic pieces)
Cons:
- Can be more expensive than vinyl
- The adhesive might be less aggressive than on pure vinyl tiles, requiring careful surface prep
- Cutting can be more difficult; a sharp utility knife or specialized craft knife is usually needed.
Best for: Kitchen backsplashes, bathroom backsplashes, shower surrounds (ensure the adhesive is rated for constant moisture), decorative accents.
3. Aluminum or metal composite tiles
These tiles consist of a metal layer (often brushed aluminum or stainless steel) bonded to a core, typically polyethylene or PVC. They offer a modern, sleek aesthetic.
Pros:
- Modern and sophisticated look
- Durable and fire-resistant (important for behind stoves)
- Easy to clean
Cons:
- Can be the most expensive option
- Cutting requires metal shears or a fine-tooth blade on a jigsaw; this is not a DIY-friendly material for complex cuts.
- The metal surface can scratch if abrasive cleaners are used.
- Adhesive strength is critical; ensure the wall surface is perfectly smooth and clean.
Best for: High-end kitchen backsplashes, commercial spaces, modern interior accents.
4. Stone or glass mosaic tiles
While less common in the true ‘peel and stick’ format, some products mimic the look by printing stone or glass patterns onto a vinyl or resin base. Genuine stone or glass mosaics are almost always installed with traditional mortar and grout. If you find a peel and stick product claiming to be real stone or glass, inspect it closely: it’s likely a very thin veneer or a high-quality print on resin.
Key considerations before you buy
Beyond the material, several factors influence your choice and the project’s success. Don’t overlook these details.
Adhesive strength and suitability
The adhesive is the heart of a peel and stick tile. A weak adhesive means tiles will eventually peel away, especially in areas with moisture or temperature fluctuations. Look for products specifically designed for backsplash applications or areas with higher humidity if that’s your intended use. Always test a small sample in an inconspicuous area if possible.
Sheet size and mosaic piece size
Mosaic tiles come in sheets of varying sizes, typically ranging from 10 x 10 inches to 12 x 12 inches (25×25 cm to 30×30 cm). The size of the individual mosaic pieces within the sheet also varies, from tiny 1/2-inch squares to larger 2-inch tiles. Smaller mosaic pieces mean more grout lines (or resin seams in peel and stick), which can be more visually complex but also more forgiving of minor surface imperfections. Larger mosaic pieces offer a cleaner, more streamlined look.
Flexibility and surface conformity
Some peel and stick tiles are quite rigid, while others have more flexibility. Flexible tiles conform better to slightly uneven walls. If your walls aren’t perfectly flat, a more flexible tile will adhere better and look smoother. Rigid tiles can leave small gaps along the edges if the wall has any texture or curvature.
Ease of cutting
If your project involves outlets, windows, or intricate corners, you’ll need to cut the tiles. Vinyl and resin tiles can usually be cut with a sharp utility knife. Metal tiles require specialized tools. Plan your cuts carefully; measure twice, cut once. Make sure you have the right tools on hand before you start, or you risk damaging the tiles or your wall.
Installation: preparation is paramount
This is where many DIY projects go wrong. Skipping or rushing preparation guarantees a poor and potentially short-lived result. Follow these steps meticulously.
1. Clean the surface thoroughly
The adhesive needs a clean, smooth, and dry surface to bond properly. Wash the wall with a degreaser (especially important in kitchens) and then a clean water rinse. Let it dry completely. Avoid harsh chemical cleaners that could leave a residue. Any grease, dirt, dust, or old adhesive residue will prevent the tile from sticking securely.
2. Ensure the surface is smooth and flat
Peel and stick tiles, especially thinner vinyl ones, will highlight every imperfection on the wall. If you have significant bumps, holes, or unevenness, you’ll need to skim coat and sand the wall smooth. For minor texture, a flexible tile might work, but a perfectly smooth surface is always ideal. This is also where peel and stick wallpaper can be a good primer if the wall is too rough for tile.
3. Test the adhesive
Before committing to an entire sheet, peel back a small corner of the backing and press it onto the wall. Leave it for a few minutes, then try to peel it off. If it comes off easily or leaves residue on your fingers, the adhesive might not be strong enough for your needs or the surface isn’t ideal. If it sticks firmly, you’re likely good to go.
4. Plan your layout
Start in a prominent area, often the center of the backsplash above the stove or sink. Work outwards. Use a level to ensure your first sheet is perfectly straight; a crooked start will throw off the entire installation. You can often buy full sheets and cut them to fit the edges or corners. For peel and stick flooring tile, the same principles of layout and starting point apply.
5. Apply the tiles carefully
Peel back only a small portion of the backing at first. Align the sheet precisely where you want it, and press it firmly into place, working from the center outwards to avoid trapping air bubbles. Once positioned, press down all edges and seams. Use a small roller (like a brayer) or a clean cloth to ensure maximum adhesion across the entire sheet. For subsequent sheets, ensure the pattern aligns perfectly and the edges butt up closely without overlapping (unless designed to do so).
6. Cutting around obstacles
For outlets or light switches, carefully measure the opening and mark it on the back of the tile sheet. Use a sharp utility knife to cut out the shape. It’s often easier to cut slightly larger than needed and then trim for a perfect fit. You can also peel the backing off a small section near the outlet, position the tile, and then carefully peel the rest of the backing away as you press the tile into place around the obstacle.
Common mistakes to avoid
Even with the best intentions, certain pitfalls can sabotage your peel and stick mosaic tile project.
- Installing over uneven or dirty surfaces: This is the #1 reason for tiles falling off. Adhesion is everything.
- Not planning for cuts: Underestimating the complexity of cutting around outlets or corners can lead to frustration and ugly results.
- Overlapping sheets: Unless the product is specifically designed for overlap, butt the edges together for a seamless look. Overlapping creates visible ridges and can trap dirt.
- Using in high-heat or constant moisture areas without checking suitability: While many are water-resistant, direct heat from a stove or prolonged immersion can cause adhesive failure or material degradation. For areas behind a direct heat source, consider a different solution or a protective panel. Explore our guide on blue peel and stick tile for color ideas, but remember material suitability is key.
- Forgetting to smooth out air bubbles: Trapped air can weaken the adhesive bond over time and create unsightly bumps. Always use a roller or cloth to press out air as you go.
- Using harsh cleaners: This can damage the surface finish, especially on metal or resin tiles, and potentially degrade the adhesive over time.
Peel and stick mosaic tiles offer a fantastic shortcut to upgrading your home decor. By understanding the material options, preparing your surface diligently, and following a careful installation process, you can achieve a professional-looking result that lasts.