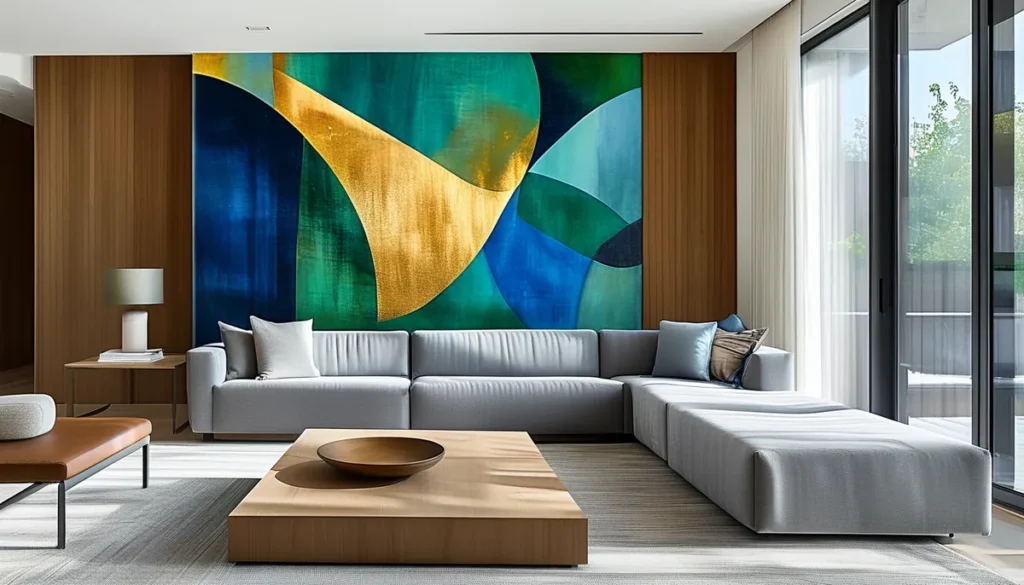
When you’re renting, the thought of painting or making permanent changes can be daunting. Your security deposit is on the line, and landlord approval isn’t always easy to get. That’s where renter friendly peel and stick wallpaper comes in. It’s designed to adhere firmly but remove cleanly, leaving your walls just as you found them. But not all peel and stick is created equal, and choosing the right type is crucial for a successful, damage-free decorating project.
What makes peel and stick wallpaper renter friendly?
The core of renter friendly peel and stick wallpaper lies in its adhesive. It’s engineered to provide enough tack to stay put through seasons but gentle enough to release without tearing paint or drywall paper. This is a critical distinction from permanent or ‘paste the wall’ wallpapers, which are meant to stay put for years and can cause significant damage upon removal.
Key characteristics to look for:
- Adhesive Type: Look for water-based or low-tack acrylic adhesives. These are formulated for temporary applications. Avoid anything described as ‘heavy duty’ or ‘permanent’.
- Material Thickness: Thicker vinyl or PVC-based wallpapers tend to be more forgiving. They can hide minor wall imperfections and are less likely to stretch or tear during application and removal. Thin paper-based options, while sometimes cheaper, can be a gamble in a rental.
- Removability Testing: Reputable brands will often state explicitly that their product is removable and won’t damage standard latex paint when removed properly. Check reviews and product descriptions carefully.
- Intended Use: Some manufacturers specifically market lines as ‘renter friendly’ or ‘removable’. This is your safest bet.
Understanding the material is the first step. The most common materials for high-quality peel and stick are vinyl (PVC) and sometimes PVC-free alternatives. For renter friendly applications, PVC often offers a good balance of durability and removability. You can learn more about the materials in our eco friendly peel and stick wallpaper certifications and materials guide.
Choosing the right design and finish
Beyond the technical aspects, the aesthetic is why you’re choosing wallpaper in the first place. Renter friendly options come in a vast array of designs, from subtle textures to bold patterns and murals.
Pattern Scale and Impact
Consider the scale of your room. A large-scale pattern can make a small room feel grander, while a smaller, denser pattern might be better suited for a larger space to avoid overwhelming it. For a rental, it’s often wise to choose something that complements existing decor or offers a neutral yet stylish backdrop. You want to enhance, not clash.
Matte vs. Satin/Gloss Finishes
Matte finishes tend to be more forgiving on imperfect walls. They absorb light and can hide minor flaws more effectively. They offer a sophisticated, modern look.
Satin or gloss finishes reflect light, which can make a space feel brighter and larger. However, they will also highlight any imperfections on your wall, making proper surface preparation even more critical. If your walls are in great condition, a satin finish can add a touch of elegance.
Texture
Some peel and stick wallpapers offer subtle textures, like linen or grasscloth looks. These can add depth and visual interest. Our guide on grasscloth peel and stick wallpaper can give you ideas for textured looks, even if the material isn’t traditional grasscloth.
Installation: The key to successful removal
Even the best renter friendly peel and stick wallpaper can cause problems if installed incorrectly. The installation process is directly linked to how easily and cleanly it will remove later.
Surface Preparation is Non-Negotiable
This is the single most important step. If you skip this, you risk damaging your walls or having the wallpaper fail to adhere properly.
- Clean the Walls: Dust, dirt, grease, and even cleaning product residue can prevent the adhesive from sticking. Use a mild detergent and water, then rinse thoroughly. Allow walls to dry completely.
- Repair Imperfections: Fill any holes or cracks with spackle and sand them smooth once dry.
- Prime (Sometimes): Most modern peel and stick wallpapers adhere well to standard, painted drywall. However, if your walls have a glossy paint finish, a matte finish, or are significantly textured, a primer might be necessary. A water-based, flat primer is usually recommended. Test a small, inconspicuous area first if unsure. Never apply over old, peeling paint.
- Ensure Walls are Smooth: Any bumps or textures on the wall will show through thinner wallpapers and can create points where the adhesive might not seal properly, leading to peeling edges later.
Measuring and Cutting
Measure your wall height accurately. Most rolls come with grid lines on the backing for easier cutting. Always cut panels slightly longer than needed to allow for trimming at the ceiling and baseboard. For patterned wallpapers, ensure you account for pattern repeat. Plan your layout so that the pattern flows seamlessly across panels. It’s often best to start in a corner or a prominent visual line.
Application Techniques
- Peel Backing Gradually: Don’t peel the entire backing off at once. Start at the top, peel back a few inches of the backing, align the top edge of the wallpaper with your starting point (e.g., ceiling line), and smooth it down.
- Use a Smoothing Tool: A plastic smoother or squeegee is essential. Work from the center outwards to push out air bubbles and ensure firm adhesion. Overlap each stroke slightly.
- Work Slowly and Deliberately: Rushing leads to bubbles and misalignments. If you make a mistake, gently peel back the section and reapply. Most good quality peel and stick allows for repositioning if done carefully and quickly.
- Trim Excess: Use a sharp utility knife or craft knife and a straight edge (like a metal ruler) to trim away excess wallpaper at the ceiling, baseboard, and around outlets or windows. A sharp blade prevents tearing.
Dealing with Corners and Obstacles
Inside Corners: For inside corners, wrap the wallpaper slightly around the corner (about 1/2 inch) and make a relief cut or two if needed to lay flat. Then, apply the next panel to the adjacent wall, overlapping slightly if the pattern allows, or butting it up to the edge of the first piece.
Outside Corners: Wrap the paper around the corner and smooth it down. For a cleaner look, you can score the paper lightly at the corner with a blade and fold it back on itself to create a crisp edge, or trim it precisely at the corner line.
Outlets and Switches: Turn off the power at the breaker. Apply the wallpaper over the outlet/switch plate. Make a small ‘X’ cut in the center of the plate area. Peel back the wallpaper in sections and trim carefully around the opening. Reinstall the plate over the wallpaper.
Removal: The Moment of Truth
Proper removal is just as important as installation for maintaining your renter status. The good news is, if you’ve used a quality renter friendly product and installed it correctly, removal should be straightforward.
The Gentle Approach
- Start at a Corner: Find a loose edge or corner, usually at the top or bottom.
- Peel Slowly and Steadily: Pull the wallpaper down at a 45-degree angle. Avoid yanking. Slow, consistent pressure is key.
- Use Heat (If Needed): If the adhesive is stubborn, a hairdryer on a low-heat setting can help soften it. Hold it a few inches away from the wall and move it constantly. This is especially useful in cooler environments or if the wallpaper has been up for a long time.
- Residue Removal: Most high-quality products leave little to no residue. If any sticky spots remain, they can usually be wiped away with a damp cloth or a mild adhesive remover. Test any remover in an inconspicuous spot first. Avoid abrasive cleaners or scrubbing, which can damage the paint.
What if Paint Comes Off?
This is the nightmare scenario. It can happen if:
- The paint on the wall was old, poorly applied, or not adhered well to begin with.
- You used a wallpaper that wasn’t truly renter friendly.
- You removed the wallpaper too aggressively or used excessive heat.
If minor paint flakes off: You might be able to touch up the spots with matching paint before your landlord inspects. If significant paint is damaged, you may need to inform your landlord and be prepared to cover repair costs.
To minimize this risk, always test the wallpaper’s removability in a hidden spot (like inside a closet) for a few days before tackling a large area. This is part of the due diligence for any high-quality peel and stick wallpaper.
Common Mistakes to Avoid
Making a few common mistakes can turn a dream project into a costly problem. Be aware of these pitfalls:
- Assuming all peel and stick is the same: This is the biggest mistake. Not all are designed for temporary use or easy removal.
- Skipping surface preparation: Dirty, glossy, or damaged walls are recipe for disaster.
- Applying to textured walls: Most peel and stick wallpapers are not designed for heavily textured surfaces like popcorn ceilings or brick.
- Overstretching during application: Pulling too hard can distort the pattern and weaken the adhesive bond.
- Using a dull blade for trimming: This will tear the paper and make for messy edges.
- Not testing in a hidden spot: This is your insurance policy against costly mistakes.
- Not allowing adequate time for removal: Patience during removal, especially if heat is involved, is key.
Beyond the Walls: Other Rental-Friendly Applications
Peel and stick wallpaper isn’t just for walls. It’s a versatile tool for renters looking to personalize their space.
- Cabinet Interiors: Line the inside of kitchen or bathroom cabinets for a pop of color or pattern.
- Backsplashes: Many vinyl-based peel and stick wallpapers can be used as a temporary backsplash in kitchens and bathrooms. Ensure it’s wipeable and moisture-resistant.
- Furniture Facades: Cover the fronts of drawers, tabletops (use with caution and consider a protective clear coat for high-traffic surfaces), or even update an old dresser.
- Stair Risers: Add a graphic element to your staircase by applying wallpaper to the vertical risers.
- Appliance Facades: Give a plain refrigerator or dishwasher a new look. Ensure the surface is smooth and clean.
- Temporary Window Treatments: Frosted or patterned removable films can offer privacy without permanent alteration.
When considering these alternative applications, always prioritize surfaces that are smooth, clean, and free of damage. Test adhesion and removability in an inconspicuous area first. Remember that heat and moisture can affect the adhesive on some products, so choose wisely for areas like kitchen backsplashes or furniture that might see spills.
When to Choose Professional Installation
While peel and stick wallpaper is marketed as a DIY-friendly option, there are times when hiring a professional installer makes sense, even for renters:
- Complex Designs or Large Murals: If you’ve invested in a complex pattern, a large-scale mural, or a design with a critical pattern repeat, a professional can ensure perfect alignment and a seamless finish.
- High Ceilings or Difficult Spaces: Working with tall walls, intricate architectural features, or awkward corners can be challenging. Professionals have the tools and experience to handle these situations efficiently.
- Time Constraints: If you’re on a tight deadline for moving in or need the space ready quickly, professional installation saves you time and potential frustration.
- Peace of Mind: Knowing that the installation is done correctly minimizes the risk of damage during application or removal, protecting your security deposit.
A professional installer can also offer advice on surface preparation and the best type of wallpaper for your specific walls, ensuring a smooth process from start to finish. For more information on choosing the right wallpaper, check out our guide to easy peel and stick wallpaper.
The Cost Factor: Is it Worth It?
Renter friendly peel and stick wallpaper can range from $20 to $100+ per roll, depending on the brand, material, and design complexity. While this might seem like an upfront cost, consider the alternatives:
- Painting: The cost of paint, primer, tools, and the time involved can add up. Plus, you’ll need to repaint before moving out, often to the original color, which is another expense and effort.
- Permanent Wallpaper: This is not an option for most renters due to installation complexity, cost, and the high likelihood of wall damage upon removal.
- Wall Decals or Other Decor: While some can be budget-friendly, they often don’t offer the same transformative impact as a full wall of wallpaper.
When you factor in the ability to customize your living space, avoid the cost and hassle of repainting, and protect your security deposit, renter friendly peel and stick wallpaper often proves to be a cost-effective and highly rewarding decorating solution for renters.
Understanding Wall Surfaces and Paint Types
Not all walls are created equal, and the type of paint you have can significantly impact how well renter friendly peel and stick wallpaper adheres and, more importantly, how cleanly it removes.
Standard Latex Paint
Most modern rentals are painted with standard latex (water-based) paint, usually in a flat or eggshell finish. This is generally the most compatible surface for peel and stick wallpaper. However, the quality of the paint job matters. If the paint is old, chalky, or wasn’t applied properly, it might not have good adhesion to the drywall itself, meaning the wallpaper could pull the paint off during removal.
Satin and Semi-Gloss Paints
These finishes are more durable and washable but have a higher sheen. The smoother, less porous surface can sometimes make it harder for the adhesive to get a strong initial grip. More critically, the increased sheen means any minor imperfections on the wall will be more visible under the wallpaper. If you have these finishes, extra attention to cleaning and potentially a light scuff-sanding (followed by thorough cleaning) in an inconspicuous area might be needed before application. Removal can sometimes be trickier if the adhesive struggles to adhere to the slick surface.
Oil-Based Paints
Less common in residential rentals nowadays, but if you encounter them, they can be problematic. Oil-based paints create a very hard, non-porous surface. While the wallpaper might stick initially, the adhesive may not form a strong bond. Conversely, if the oil paint itself is poorly adhered to the wall, it could peel. It’s crucial to test in a hidden spot.
Textured Walls
Skip the textured walls. While some very light textures might be manageable with thicker, more pliable wallpapers, heavily textured surfaces like popcorn ceilings, orange peel, or knockdown finishes are not suitable for standard peel and stick. The adhesive cannot make full contact, leading to poor adhesion, visible texture showing through, and difficulty in clean removal. Specialized products might exist for certain textures, but for most renters, it’s best to avoid.
Freshly Painted Walls
Allow new paint to cure completely. Latex paint typically cures within 24-48 hours, but full adhesion and off-gassing can take up to 30 days. Applying wallpaper too soon can trap moisture and prevent proper adhesion, or the fresh paint may still be too soft and prone to peeling.
Ensuring Long-Term Adhesion and Preventing Edge Lifting
Once installed, you want your renter friendly peel and stick wallpaper to stay put without peeling at the edges. Several factors contribute to this:
- Properly Sealed Edges: Ensure the wallpaper is pressed firmly against the wall along all edges, especially at the ceiling, baseboard, and around windows/doors. Use your smoothing tool to create a tight seal.
- Avoid Moisture and Steam: While many vinyl wallpapers are somewhat moisture-resistant, excessive steam (like from a hot shower in a small, unventilated bathroom) can weaken the adhesive over time. Ensure good ventilation in high-moisture areas.
- Temperature Fluctuations: Extreme and rapid temperature changes can cause materials to expand and contract, potentially affecting the adhesive bond. Consistent room temperatures are best.
- Physical Contact: Avoid bumping or scraping the wallpaper edges with furniture or during regular cleaning.
- Pre-treatment of Problem Areas: For areas prone to lifting, like near heat sources or in high-traffic zones, a very small amount of wallpaper adhesive (applied sparingly to the wall, not the paper) can be used as a reinforcement, but this is a more advanced technique and should be tested carefully. For most renters, focusing on perfect initial installation is the best preventive measure.
The Role of HOA Rules and Landlord Agreements
Before you even purchase your wallpaper, it’s wise to understand your lease agreement and any Homeowners Association (HOA) rules. While many landlords are amenable to temporary decorating solutions like renter friendly peel and stick wallpaper, some may have specific clauses:
- Lease Clauses: Review your lease for any mention of alterations to walls, including painting, wallpapering, or affixing items. Some leases explicitly prohibit any wall coverings beyond standard paint.
- Landlord Approval: Even if your lease is silent on the matter, it’s often a good idea to get written permission from your landlord. This protects you and ensures transparency. You can explain that you’re using a removable product designed not to damage the walls.
- HOA Regulations: If you live in a condo or townhouse governed by an HOA, there might be aesthetic guidelines, especially for exterior-facing elements. While interior wallpaper is usually a tenant’s or owner’s prerogative, it’s worth checking if you’re in a particularly strict community.
Documenting your agreement with your landlord and keeping a copy of the product’s specifications (especially its removability claims) can provide peace of mind for both parties.
Comparing Renter Friendly Peel and Stick to Other Temporary Decor
Peel and stick wallpaper is a popular choice for renters, but it’s not the only option for temporary decor:
- Removable Wall Decals: These are typically vinyl stickers that can be applied and removed like wallpaper, but they are usually smaller and used for creating specific shapes or designs rather than covering entire walls. They are excellent for accents but less impactful for a full room makeover.
- Fabric Wall Hangings: Large fabric panels or tapestries can cover walls and are easily removed. However, they don’t offer the seamless, painted-on look of wallpaper and can sometimes look unfinished.
- Temporary Wallpaper Adhesives: Some traditional wallpapers can be applied with temporary, strippable adhesives that are designed to release easily. However, this method is often more complex than peel and stick and still carries a risk of minor wall damage.
- Command Strips/Hooks: While great for hanging art and decor, they aren’t a solution for covering walls.
Peel and stick wallpaper offers the best of both worlds for renters: the visual impact of a fully decorated wall with the ease of application and removal comparable to decals.
The Future of Rental Decor: Innovations in Removable Wall Coverings
The market for renter friendly products is constantly evolving. Manufacturers are continually innovating to create materials that are:
- More Sustainable: Development of PVC-free and eco-friendly options is ongoing, aligning with renter demand for sustainable choices. Look for certifications mentioned in our eco friendly peel and stick wallpaper certifications and materials guide.
- Easier to Apply and Remove: New adhesive formulations aim for even better adhesion during use and cleaner release afterward, minimizing the risk of paint damage.
- More Durable and Washable: Improvements in material technology mean that many peel and stick options are now more resistant to scuffs, scratches, and moisture, making them suitable for higher-traffic areas.
- Wider Design Variety: From hyper-realistic textures to custom mural printing, the design possibilities are expanding rapidly.
As the demand for flexible and temporary decorating solutions grows, expect to see even more advanced and user-friendly options emerge in the peel and stick wallpaper market.
Final Checklist for Renter Friendly Success
Before you commit to a design or start installation, run through this quick checklist:
- Verify ‘Renter Friendly’ Claims: Does the product explicitly state it’s removable and won’t damage standard paint?
- Check Material and Thickness: Opt for thicker vinyl or PVC-based options for better durability and forgiveness.
- Read Reviews: Look for feedback specifically about ease of application and, crucially, clean removal.
- Test in a Hidden Area: Apply a sample piece inside a closet or behind a piece of furniture for at least a week to test adhesion and removal.
- Prepare Your Walls Meticulously: Clean, smooth, and repair any imperfections. Prime if necessary.
- Gather Tools: Have a sharp utility knife, smoother, measuring tape, and ladder ready.
- Understand Your Lease: Confirm with your landlord if needed.
By following these steps, you can confidently use renter friendly peel and stick wallpaper to personalize your space without jeopardizing your security deposit or relationship with your landlord. For more general tips on enhancing your home, explore our guide to peel and stick wallpaper.