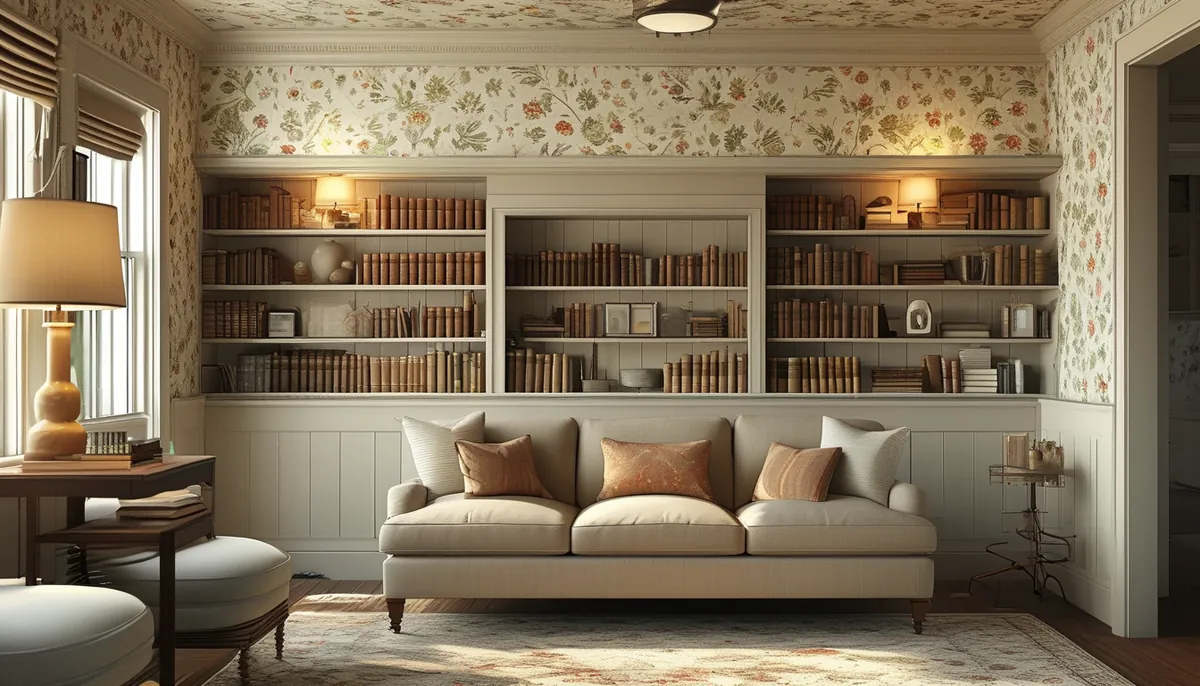
Applying a wallpaper border is often the simplest way to add a decorative flourish to a room without committing to a full wallpaper installation. Vintage wallpaper borders, in particular, offer a nostalgic charm that can evoke specific eras or a timeless aesthetic. When choosing, consider the scale of the pattern relative to your room and furniture, and the overall color palette you’re working with.
Understanding different types of vintage wallpaper borders
Vintage wallpaper borders come in a variety of materials and styles, each offering a different look and installation experience. The most common types you’ll encounter are:
Paper-based borders
These are traditional borders made primarily from paper. They are often the most budget-friendly option. However, they can be less durable and more prone to tearing or damage during application if you’re not careful. They typically require a separate wallpaper paste, applied either to the back of the border or to the wall itself, depending on whether they are pre-pasted or unpasted.
Vinyl-coated borders
Vinyl-coated borders offer increased durability and are more resistant to moisture and staining compared to plain paper borders. This makes them a suitable choice for areas like kitchens or bathrooms where humidity might be a concern, though they are not entirely waterproof. The vinyl coating also makes them easier to clean with a damp cloth. They can be pre-pasted or unpasted and generally adhere well to walls.
Woven fabric or textured borders
For a more luxurious and tactile feel, consider borders made from woven fabrics or other textured materials. These can add depth and sophistication to a room. However, they are often more expensive and can be trickier to install, sometimes requiring specific adhesives and a delicate touch to avoid creasing or damaging the material. Their texture can also make cleaning more challenging.
Peel and stick borders
These are the most user-friendly option, especially for DIYers. Peel and stick borders have an adhesive backing, meaning no paste is needed. You simply peel off the backing and apply the border directly to the wall. They are repositionable to some extent, allowing for minor adjustments during installation. They are also generally easier to remove than traditional pasted borders, making them ideal for renters or for those who like to change their decor frequently. You can explore options for easy peel and stick wallpaper which often includes border options.
Key design elements in vintage wallpaper borders
Vintage wallpaper borders draw inspiration from various historical periods, each with distinct design motifs. Understanding these can help you choose a border that complements your home’s architectural style or your desired aesthetic.
Floral patterns
Floral designs are perennial favorites, and vintage borders are no exception. You’ll find everything from delicate, scattered posies reminiscent of Victorian parlors to bolder, Art Nouveau-inspired blooms. These can bring a touch of nature and softness to a room. Consider how floral patterns can tie into your existing decor, perhaps complementing floral accents in upholstery or art. For inspiration on floral themes, look at beautiful flowers on wallpaper.
Geometric designs
The early to mid-20th century saw a rise in geometric patterns. Think Art Deco sunbursts, mid-century modern chevrons, or repeating squares and circles. These designs offer a sense of order and can add a graphic punch to a space. Geometric borders work well in contemporary settings or to add a retro vibe to more traditional rooms.
Toile and damask
Toile patterns, often featuring pastoral scenes in a single color (typically blue or red on a white or cream background), evoke a classic, rustic elegance. Damask patterns, characterized by their intricate, symmetrical designs, lend an air of sophistication and luxury. Both are timeless choices that can add a refined touch to dining rooms, bedrooms, or studies.
Stripes and checks
Simple yet effective, stripes and checks have always been popular. Vintage borders might feature thin pinstripes, bold block stripes, or classic gingham checks. These patterns are versatile and can be used to add visual interest without overwhelming the space. They are particularly effective for creating a sense of height or width depending on their orientation.
Thematic designs
Some vintage borders feature more specific themes, such as nautical motifs, children’s characters, or even period-specific advertising imagery. These can be fantastic for creating a focal point or adding personality to a themed room, like a nursery or a den.
Where to use vintage wallpaper borders
Wallpaper borders are incredibly versatile and can be used in almost any room to define spaces, add character, or create a decorative accent. The key is to choose a design and placement that enhances the room’s function and style.
Living rooms and sitting areas
In a living room, a border can crown a wall, running just below the ceiling, to add architectural interest or to visually lower a high ceiling. Alternatively, a border can be placed halfway up the wall to visually divide a large space or to highlight a particular feature, like a fireplace or a gallery wall. Consider a subtle floral or geometric pattern to complement your furnishings.
Bedrooms
Bedrooms are ideal for softer, more romantic borders. A delicate floral or toile border placed near the ceiling can create a cozy, enveloping atmosphere. You could also use a border to frame a headboard or to create a decorative band around a wardrobe or closet. For a whimsical touch, explore designs inspired by artists like Rifle Paper Co. which offer a unique, charming aesthetic. Discover more about beautiful Rifle Paper Co. wallpaper.
Kitchens and dining rooms
In kitchens, durability and ease of cleaning are important. Vinyl-coated or peel and stick borders are excellent choices. A border placed above the backsplash or along the top of the cabinets can add a touch of charm without being overly fussy. In dining rooms, borders can add a touch of formality or elegance, especially damask or classic stripe patterns. A border just below the ceiling can frame the room beautifully.
Bathrooms
While moisture resistance is key, traditional wallpaper is not always recommended for steamy bathrooms. However, a well-ventilated bathroom or a powder room can certainly benefit from a border. Vinyl-coated or high-quality peel and stick borders are the best options here. Consider a simple stripe or a subtle pattern to add personality without making the space feel too busy.
Hallways and staircases
Hallways and staircases are often overlooked areas that can be transformed with a simple border. Running a border along the top of the wall in a hallway can make it feel more intentional and less like a pass-through space. In a staircase, a border can be applied at the top of the wall near the ceiling, or even at chair-rail height if applicable, to add visual interest along the ascent.
Children’s rooms and nurseries
This is where borders can really shine with playful and thematic designs. From alphabet borders to whimsical animal patterns, they can add a fun element to a child’s space. Peel and stick options are particularly useful here, as children’s rooms are often redecorated as they grow. You might even find inspiration in nature-themed wallpapers, such as those found in Yellowstone wallpaper designs, for a touch of the outdoors.
Installation guide for vintage wallpaper borders
Proper installation is crucial for a professional-looking finish. While peel and stick borders are the easiest, even traditional paper borders can be applied successfully with careful preparation and technique.
Preparation is key
Before you start, ensure your walls are clean, dry, and smooth. Wash off any dirt, grease, or old adhesive. Fill any holes or cracks and sand them smooth. If your walls are glossy, a light sanding can help the adhesive grip better. For unpasted borders, you may need to size the wall with a wallpaper sizing product to ensure good adhesion and easier removal later.
Measuring and cutting
Measure the length of the wall or area where you plan to apply the border. It’s best to measure in sections, typically from corner to corner. Always add a few extra inches to your measurement for trimming and to account for pattern matching. Cut the border to the required length using a sharp craft knife or scissors. For inside and outside corners, you’ll need to make careful diagonal cuts or relief cuts to ensure a neat fit.
Applying the border
For pre-pasted borders: Follow the manufacturer’s instructions. Usually, this involves soaking the border in water for a specific amount of time to activate the paste. Gently unfold the border and smooth it onto the wall, working from the center outwards to push out any air bubbles or excess paste.
For unpasted borders: Apply the recommended wallpaper paste evenly to the back of the border or to the wall, following the manufacturer’s guidelines. Fold the pasted border onto itself (booking) for a few minutes if instructed, to allow the paste to penetrate. Then, apply to the wall as described above.
For peel and stick borders: Simply peel off the backing a few inches at a time and carefully align the border with your starting point. Press it firmly onto the wall, smoothing out air bubbles as you go. You can often gently lift and reposition peel and stick borders if you make a mistake, but it’s best to work methodically.
Smoothing and trimming
Use a smoothing tool (like a plastic spatula or a wallpaper brush) to firmly press the border onto the wall, working from the center towards the edges. This helps to remove air bubbles and ensure good adhesion. Once the border is in place, use a sharp craft knife and a straight edge (like a metal ruler or a T-square) to carefully trim any excess at the corners, ceiling line, or baseboard.
Dealing with corners and obstacles
Outside corners: Wrap the border around the corner by about 1/2 inch to 1 inch, then make a relief cut vertically from the edge to where the corner begins. Fold the two pieces neatly into the corner. Trim any overlap.
Inside corners: Cut the border so it slightly overlaps the corner. Make a vertical relief cut at the corner, then fold the overlapping piece into the corner. Apply the next piece of border butting up against the first piece, slightly overlapping the folded-in section. Trim the overlap for a seamless look.
Obstacles (windows, doors): For windows and doors, cut the border to fit up to the frame. For seams that fall in the middle of an opening, try to place them vertically near the side of the frame. When you reach an obstacle, cut the border to fit snugly around it, making relief cuts as needed.
Tips for a professional finish
Even the best vintage wallpaper border can look unprofessional if not applied correctly. Keep these tips in mind:
- Work in good lighting: Adequate light helps you see air bubbles and ensures accurate alignment.
- Pattern matching: If your border has a repeating pattern, ensure the patterns align seamlessly at the seams. This often requires overlapping pieces slightly and trimming.
- Use a level: For straight lines, especially at the ceiling or chair-rail height, use a spirit level to mark a guide line before applying the border.
- Don’t rush: Take your time. Rushing leads to mistakes, air bubbles, and crooked lines.
- Clean up as you go: Wipe away any excess paste immediately with a damp sponge or cloth. Dried paste can be difficult to remove and may stain the wallpaper.
- Consider the whole room: A border should complement, not compete with, your existing decor. Ensure the scale and style of the border work with your furniture, paint colors, and other wall treatments. For a cohesive look, explore high-quality peel and stick wallpaper options that might offer coordinating borders.
Common mistakes to avoid
Steer clear of these pitfalls for a flawless installation:
- Applying to unprepared walls: Dirt, grease, or uneven surfaces will cause the border to peel or adhere poorly.
- Using old or dry paste: Insufficient or expired paste won’t hold the border securely.
- Stretching the border: Pulling too hard on paper or vinyl borders can distort them, especially around curves or corners, leading to a wrinkled or uneven appearance.
- Ignoring pattern repeat: If your border has a pattern, failing to match it at the seams will be very noticeable and detract from the overall look.
- Overlapping incorrectly at corners: This is a common area where mistakes are made, leading to bulky or gappy corners. Precise cutting and folding are essential.
- Using the wrong type of border for the room: A delicate paper border in a high-moisture area like a bathroom is a recipe for peeling and damage.
Vintage wallpaper borders offer a fantastic way to add character and style to your home. By understanding the different types available, considering your design goals, and following careful installation steps, you can achieve a beautiful and lasting decorative effect.